Magento cron job is an important component for correct performance. It is widely used for running actions that are performed on schedule, such as indexing and caching, sitemap generation, currency rate updates, and many more as well. Magento default cron functionality includes AOE scheduler, but first things first.
However, today we would like to explain in detail how you can make cron setup with no issues. The configuration process can vary a bit depending on your site control panel (cPanel, Plesk, etc).
How often should you run cron executions for Magento?
Our recommendation is to run Magento cron job not manually every 5 minutes. We have seen various recommendations, from once in an hour to once a minute, but once in every 5 minutes from our experience is the right choice for a typical middle-sized Magento shop. If you set up a cron job for running every 5 minutes and use SSH, the part of the command which is responsible for the schedule will look like this:
*/5 * * * *
Commands to run cron in Magento
The commands used to run cron are different for various Magento versions.
Magento 1.X
Run cron on Magento 2.X
If Magento 2 cron is not running properly, you can check the cron.log to find errors.
Adding a new Magento cron task via SSH (Crontab Magento method)
Log in to the server via SSH. Run the Magento crontab -e command to add a cron task. At this point, you will see a text editor, where you can add or edit cron tasks. Starting from a new line, add the following record:
Save the changes and close the file. If you did everything correctly, the Magento 2 crontab -l command will show you the newly created task.
Adding a new Magento cron task via cPanel
To set up a new cron task in Magento via cPanel, log into your site’s configuration panel at
http://yourmagentosite.com:2082/ or https://yourmagentosite.com:2083/.
Then, enter cron into the search field, and you’ll see a Cron jobs option in the Advanced section.

To set up a cron job with this method, you may need to enter an email address in the Cron email section. This email will be used to send cron messages to, which is useful in case of any cron job execution issues.

Now let’s set the cron schedule and the command to be run.

Press Add New Cron Job to finish your configuration.
Check Cron Job Magento 2 status
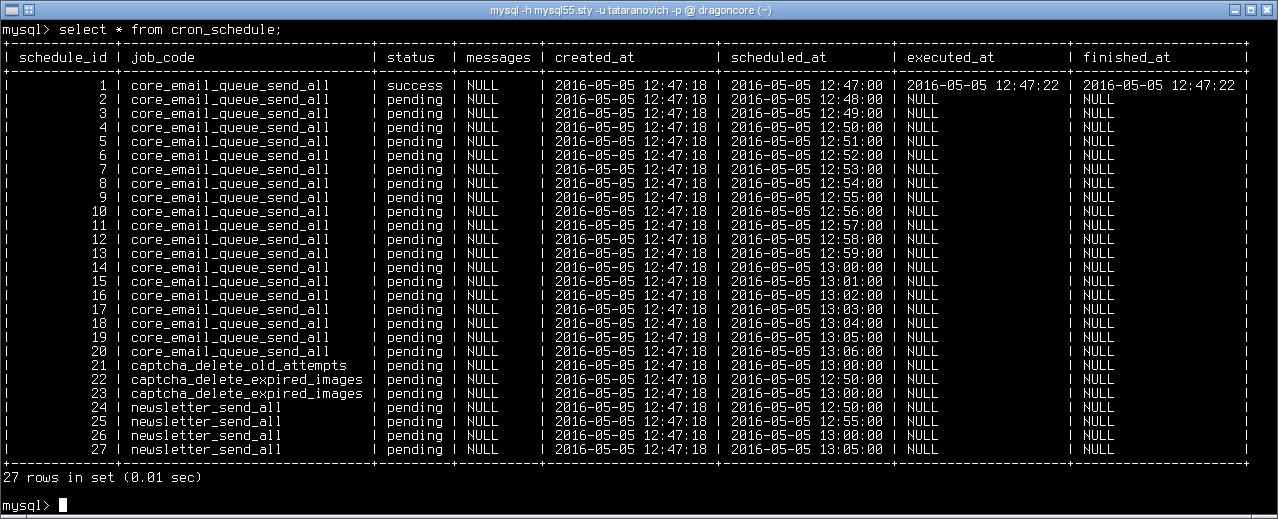
To make sure cron is installed correctly on Magento 2 and your cron task works as it should, you can go and see over the changes that appear in the cron_schedule table of the Magento database. If its contents are changing, then you configured Magento 2 crons the right way.
NB: Do not manually change anything in this database table! At this point, everything you should do is watch.
Here’s an example. We opened the table:

After waiting a bit, we see that the task was performed:

Common mistakes of Magento cron configuration
Making sure the instructions are valid
From our experience, the most common mistakes while setting cron on any website are caused by copying instructions from the Internet. Very often those instructions are correct but need adaptation for your server or were correct at the moment when the article was written but aren’t correct anymore.
To make sure you are using the correct instructions, refer to your hosting company support articles or ask your system administrator.
For example, a random article says that the cron job command looks like this:
This is correct, but you also should remember, that permissions for /var/www/magento/cron.sh file should allow its execution. Here’s a universal method where you let the command interpreter to execute the file:
Here’s another example of a command taken from a random article:
Using email address for cron
Make sure you use the correct email address in MAILTO. If there’s an issue with cron task execution, you will receive an email with the error description, which in case of troubles will help you to understand what went wrong.
Here’s how to set cron for Magento and add an email address for receiving messages:
Magento 1.X:
Magento 2.X
As always, don’t forget to replace the example address with your own email and insert the correct path to your Magento default folder.
Output redirection issues
Another common mistake you should know about is output redirection to /dev/null. It is used if some warnings are reported during the cron task executions, and the owner doesn’t want to correct the issues. Here’s how the command looks like:
In that case, any output from the cron task is suppressed to avoid receiving constant warning messages. The thing is, if somehow some fatal errors are caused during cron Magento execution, you won’t know about them, too, and it can slow down the investigation and get rid of the troubles.
The same effect can be seen if you set an empty MAILTO.
Magento 2 cron not running
Try flushing the cache and running cron again:
php bin/magento cache:flush
php bin/magento cron:run
Magento 2 runs specific cron jobs manually
Any manual manipulations can result in errors. To eliminate risks, you can acquire any of these free or paid extensions on the market.
For example, Amasty Cron Scheduler gathers all Magento cron jobs of third-party modules together with native Magento ones on a special Magento 2 Cron Jobs List grid. There you can see all the related information, like cron jobs, statuses, groups, and schedules.
To run a specific job manually, navigate to System > Cron Jobs List > then click the Run Job button to start cron run and create tasks for a particular cron job:

We hope that this article was helpful for you. If you still feel like you don’t fully understand what to do, don’t hesitate to turn to a specialist.


