
Sidebar
magento_2:cron-scheduler
Table of Contents
See the way the Cron Scheduler for Magento 2 extension works.
Guide for Cron Scheduler for Magento 2
Increase sales by significantly enhanced site performance. Improve cron jobs processing with a powerful tool for tracking and managing all cron tasks.
- View all existing cron tasks in chronological order in a timeline
- Monitor all running and scheduled cron tasks on a separate grid
- Get detailed info on each cron task: status, schedule, execution date, etc.
- Track and manage all cron jobs in bulk or individually on a handy grid
- Receive real-time error notifications on cron failures
- Set the interval between sending notifications to avoid spam
Cron Tasks List
To check if cron generates and processing tasks and detect all cron execution errors in one place, please go to System → Cron Tasks List.
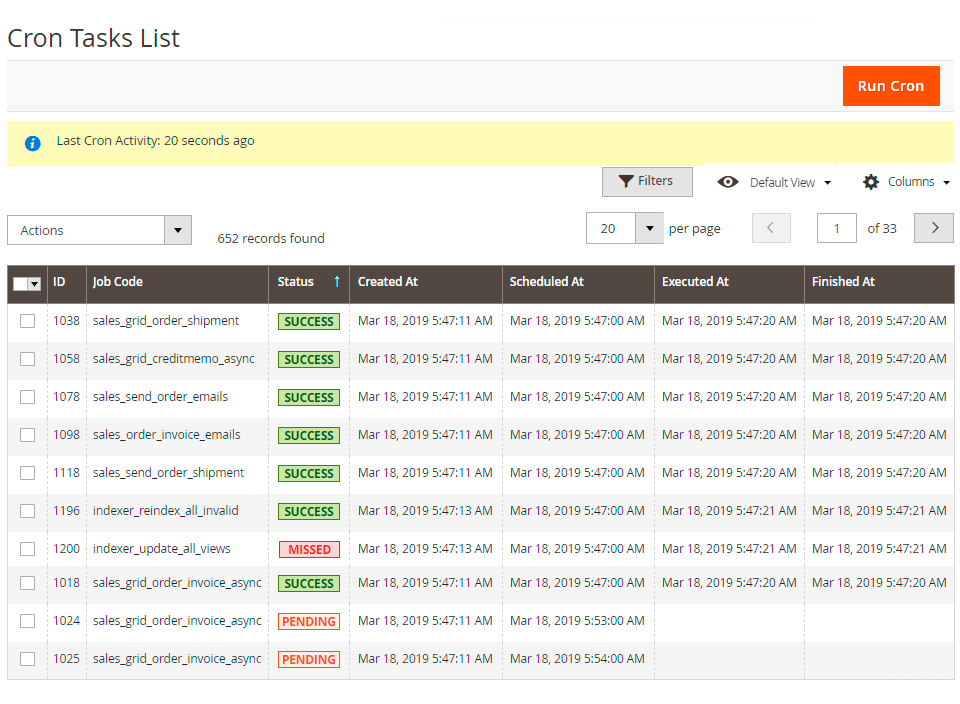
On a separate grid you can see a job code, its status, the date each job was created, scheduled, executed and finished.
Run all cron tasks and generate their schedule by clicking the Run Cron button. Also, Delete separate tasks in bulk via Actions dropdown menu. Apply filtering and sorting options if needed.
Cron Jobs List
To monitor and manage the overall store cron work process, go to System → Cron Jobs List.
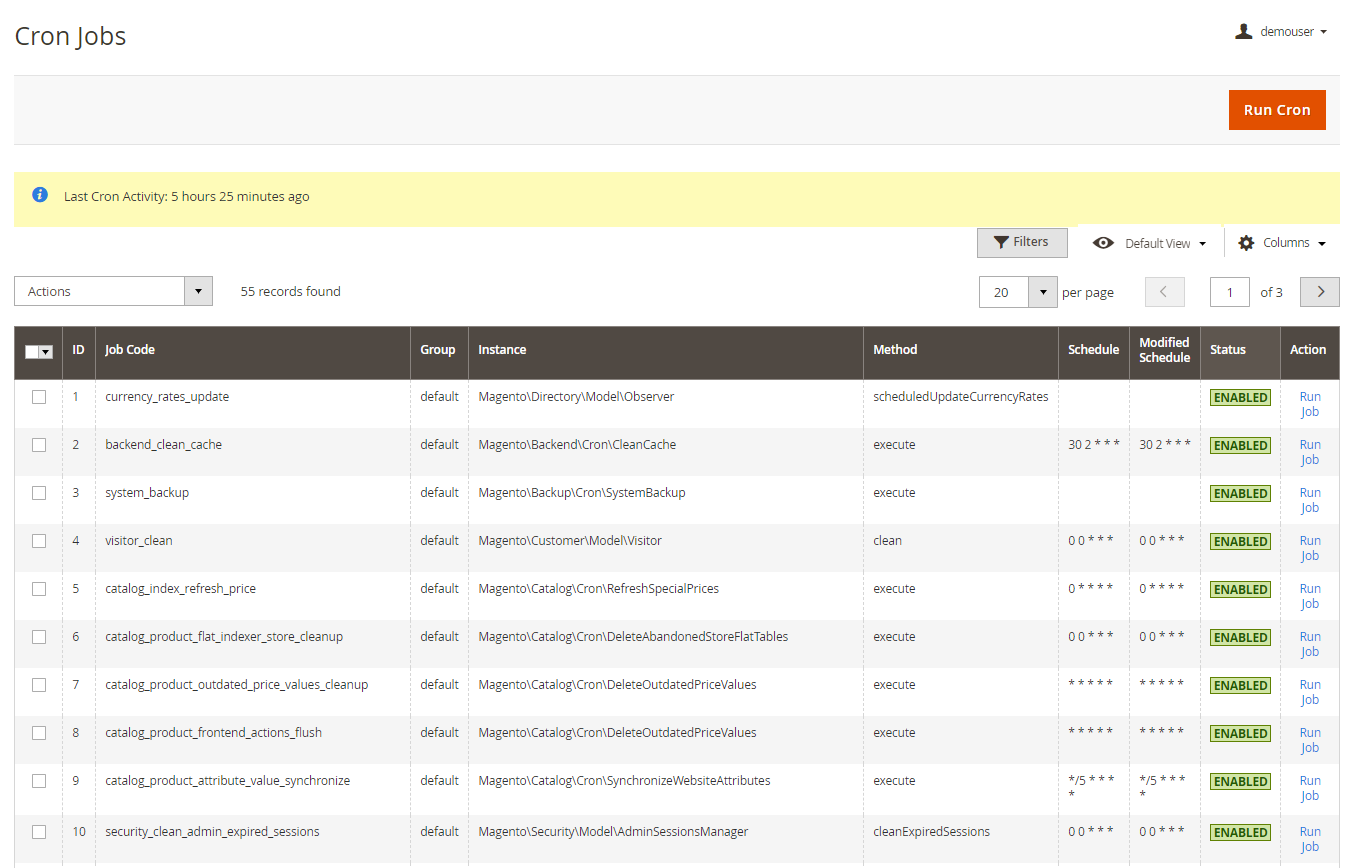
The extension gathers all cron jobs of third-party modules together with native Magento ones on a special Cron Jobs List grid. The grid provides you with sufficient info on cron jobs, including a cron task status, group, schedule, etc.
To Delete or Enable/Disable cron jobs in bulk, tick the necessary jobs and choose an action from the Actions dropdown menu.
Click the Run Job button to start cron run and create tasks for a particular cron job.
To modify a particular cron job schedule or enable/disable it right on the grid, simply click on its record line and make the necessary changes.
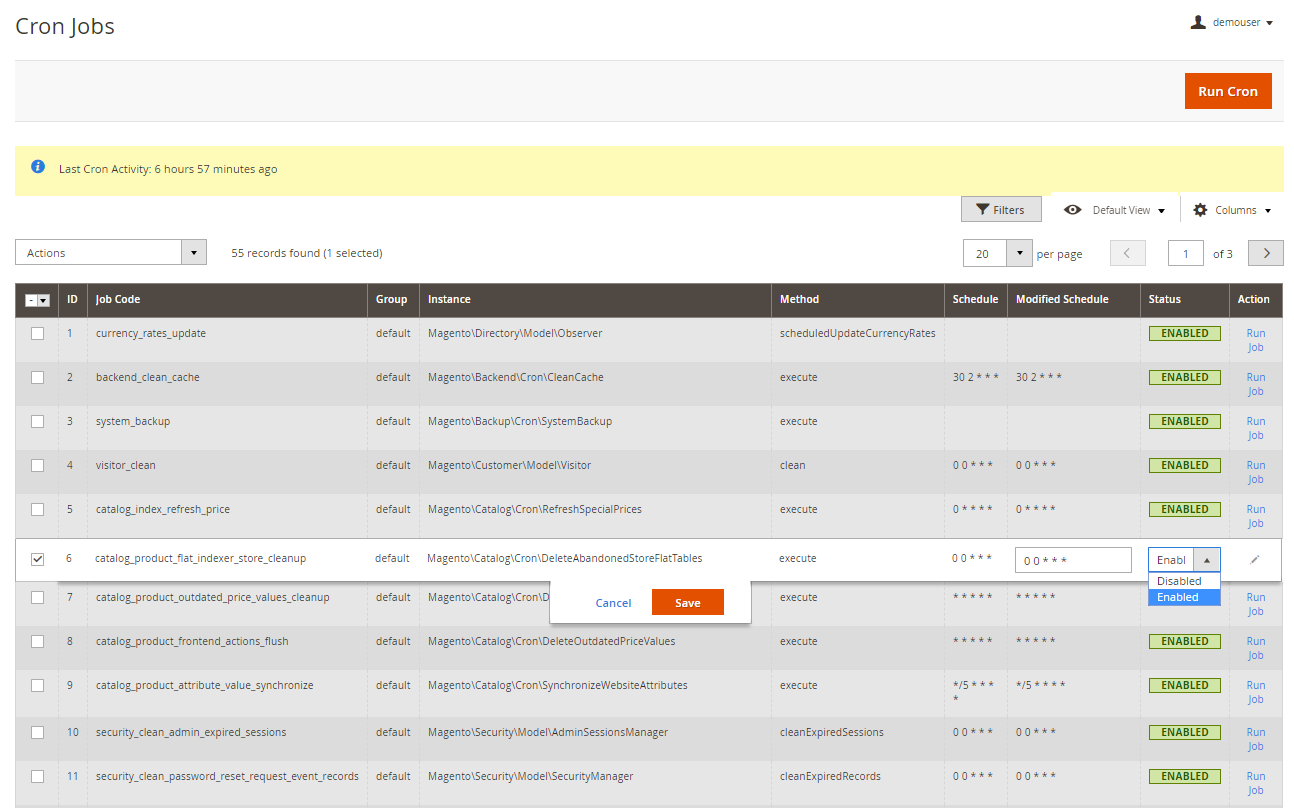
Hit the Save button.
Cron Jobs Timeline
To view all scheduled and running cron tasks in chronological order, go to System → Cron Jobs Timeline.
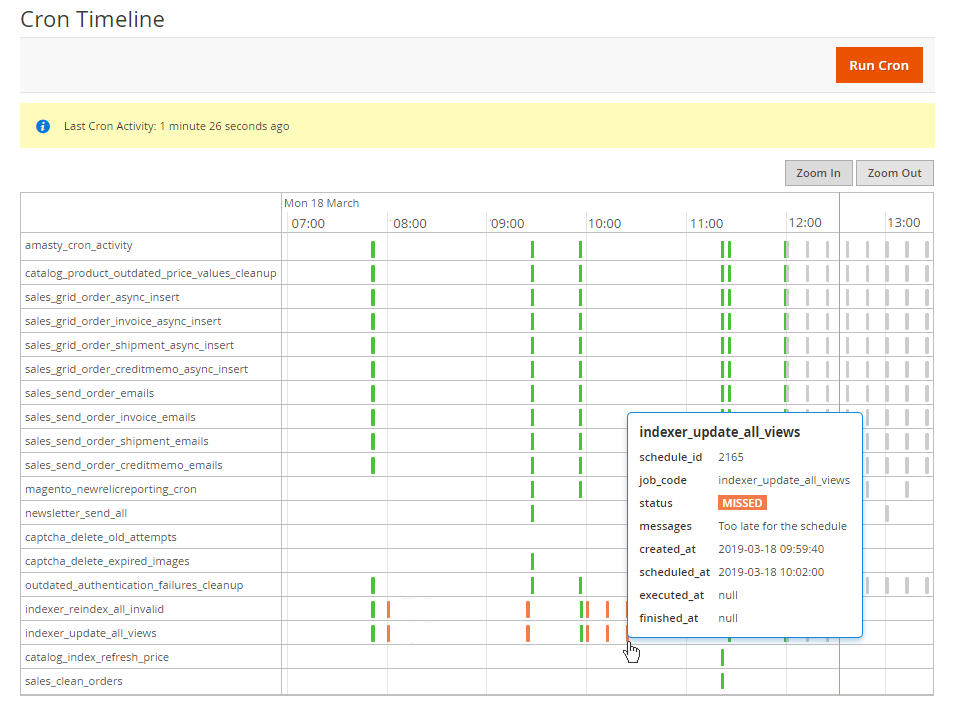
Each task is marked with a definite color, so that you can easily detect cron tasks execution errors alongside successful and pending tasks. Also, each mark width indicates a task processing time, so that you could define tasks which slow down other tasks work and timely modify the appropriate cron jobs schedule.
To see the details on a particular job, just hover over the mark you need.
You can also adjust Cron Timeline grid by using Zoom In and Zoom Out buttons. Use ‘Scroll’ to move to the top or bottom of the grid.
Start cron run manually any time it is needed by clicking the Run Cron button.
Configuration
The extension allows to receive real-time error notifications on cron failures. To configure email notifications, go to Stores → Configuration → Amasty Extensions → Cron Scheduler.
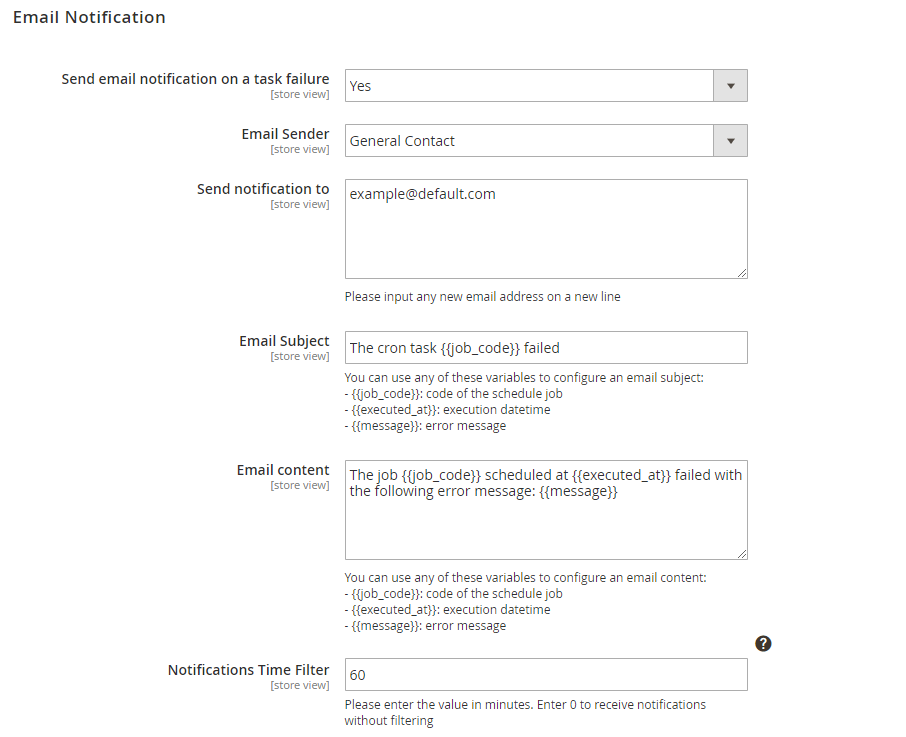
Send email notification on a task failure - set to Yes to enable email notifications.
Email Sender - choose an email contact that will be used as a sender.
Send notification to - specify email addresses to receive notifications. Please input any new email address on a new line.
Email Subject - set an email subject template.
Email content - specify an email content template to be used as an alert.
You can use variables to configure an email subject and content.
Notifications Time Filter - set the interval for notifications. Enter the value in minutes or enter 0 to receive notifications without filtering.
How does it work?
The setting is used to avoid 'spamming' from a frequently executed jobs. If there is a multifunctional job that runs every 5 minutes, then it would disturb you with emails every 5 minutes as well. Using the field you can specify the time period when a single job will not disturb you with the same failure email after the first message was sent. It does not affect notifications from other jobs. e.g. If the setting value is 60, then any multifunctional job will be able to send you notification not more than once per hour.
Troubleshooting
When you start generating a cron job, you may get the following error:
Exception (Magento\Framework\Exception\LocalizedException):exec function is disabled.
In this case you just need to enable exec function in your php.ini configuration file.
Find out how to install the Cron Scheduler for Magento 2 via Composer.
magento_2/cron-scheduler.txt · Last modified: 2020/11/06 12:04 by tihomirova