
Abandoned carts are, sadly, the norm for all stores and platforms, Magento included. According to Baymard Institute research, the average abandonment cart rate in e-commerce is around 70%.
Instead of covering general best practices for good e-commerce checkout performance, we’ll focus on the Magento checkout page specifically. Below, we’ll give hands-on, research-backed tips for Magento 2 checkout page customization and explain how one tool, One Step Checkout, can help.
1. Reduce the Number of Fields in Magento Checkout
A too-long and complicated checkout process is one of the four most common reasons for high cart abandonment. Around 18% of users mentioned it in Baymard’s study.
It’s important to highlight that users think about a long checkout process as the total number of fields they need to fill in after the order summary instead of the number of steps. The average number of fields in e-commerce is 11.8 fields.
However, most online stores only need 8 fields in total, according to the Baymard Institute survey. Here are the tips on how you can optimize the default Magento checkout fields:
- The First Name and Last Name fields can be joined to the Full Name field
- Shipping Address Line 2 can be hidden under the dropdown
- State, Region, and Country can be filled out automatically based on the Postal/ZIP code or IP address
- The Company field can be distracting, and it’s better to hide it under the dropdown
In Magento 2 customizing checkout pages can be easily done via One Step Checkout. To do this, please go to Amasty Magento Checkout Demo, then navigate to System > Manage Checkout Fields. Here you can rearrange existing fields, disable unnecessary ones, and add custom ones.

2. Enable Autocomplete in Magento Checkout
Filling in the fields incorrectly can also decrease conversions. Users often misspell city names and addresses, which can irritate users that need to correct typos manually or even lead to problems with the delivery service. Still, 30% of e-commerce websites don’t offer autocomplete options for addresses. Two tools will allow you to do it:
- ZIP/Postal Code Autodetection – A user types in the code, and State, Region, and Country fields are filled in automatically.
- Google Address Autocomplete – After choosing a shipping method, a user allows you to access their location and gets the address filled in based on their IP address.

The Google Address Autocomplete is available out of the box in the One Step Checkout Pro. To see how it works, switch to this Magento 2 Checkout demo, go to Stores > Configuration > Amasty Extensions > Google Address Autocomplete, set Google Address Suggestion to Yes, and enter your Google API Key.

Or watch this short video guide:
Read how to get an API Key in our user guide →
3. Optimize Mobile Checkout for Magento
The share of mobile traffic in e-commerce reached 68% in 2020. At the same time, the average mobile conversion rate is 30% lower than desktop — 1.98% vs. 2.92%. And one of the reasons for this is poor user experience.
For example, it’s much harder to type on mobile than on desktop, and the chances of misclick are higher as well. As a result, the more fields you have on the checkout page, the lower the conversion on mobile. What’s more, mobile page loading can be slower, forcing impatient users to bounce.
So, the main idea here is to make sure that your Magento checkout page is fast, responsive, and convenient for users of any device. Enable mobile-specific payment methods, like Apple Pay, Google Pay, and local mobile payment options. Also, consider an automatic switch to the numeric keypad when the user fills in numeric fields like phone or credit card number:

See how to set up responsive layouts in the One Step Checkout, making Magento 2 checkout customization for mobile extremely easy:
4. Let Users Check Out As Guests
Approximately 24% of users don’t want to create an account. Forcing them to create an account before checkout may lead to cart abandonment. So it’s important to let users check out as guests or provide them with one-click login.
Moreover, offering users to create an account during the checkout experience before confirmation is a better-performing strategy. Users have already filled in all the necessary details, and you can add only one field with the password.
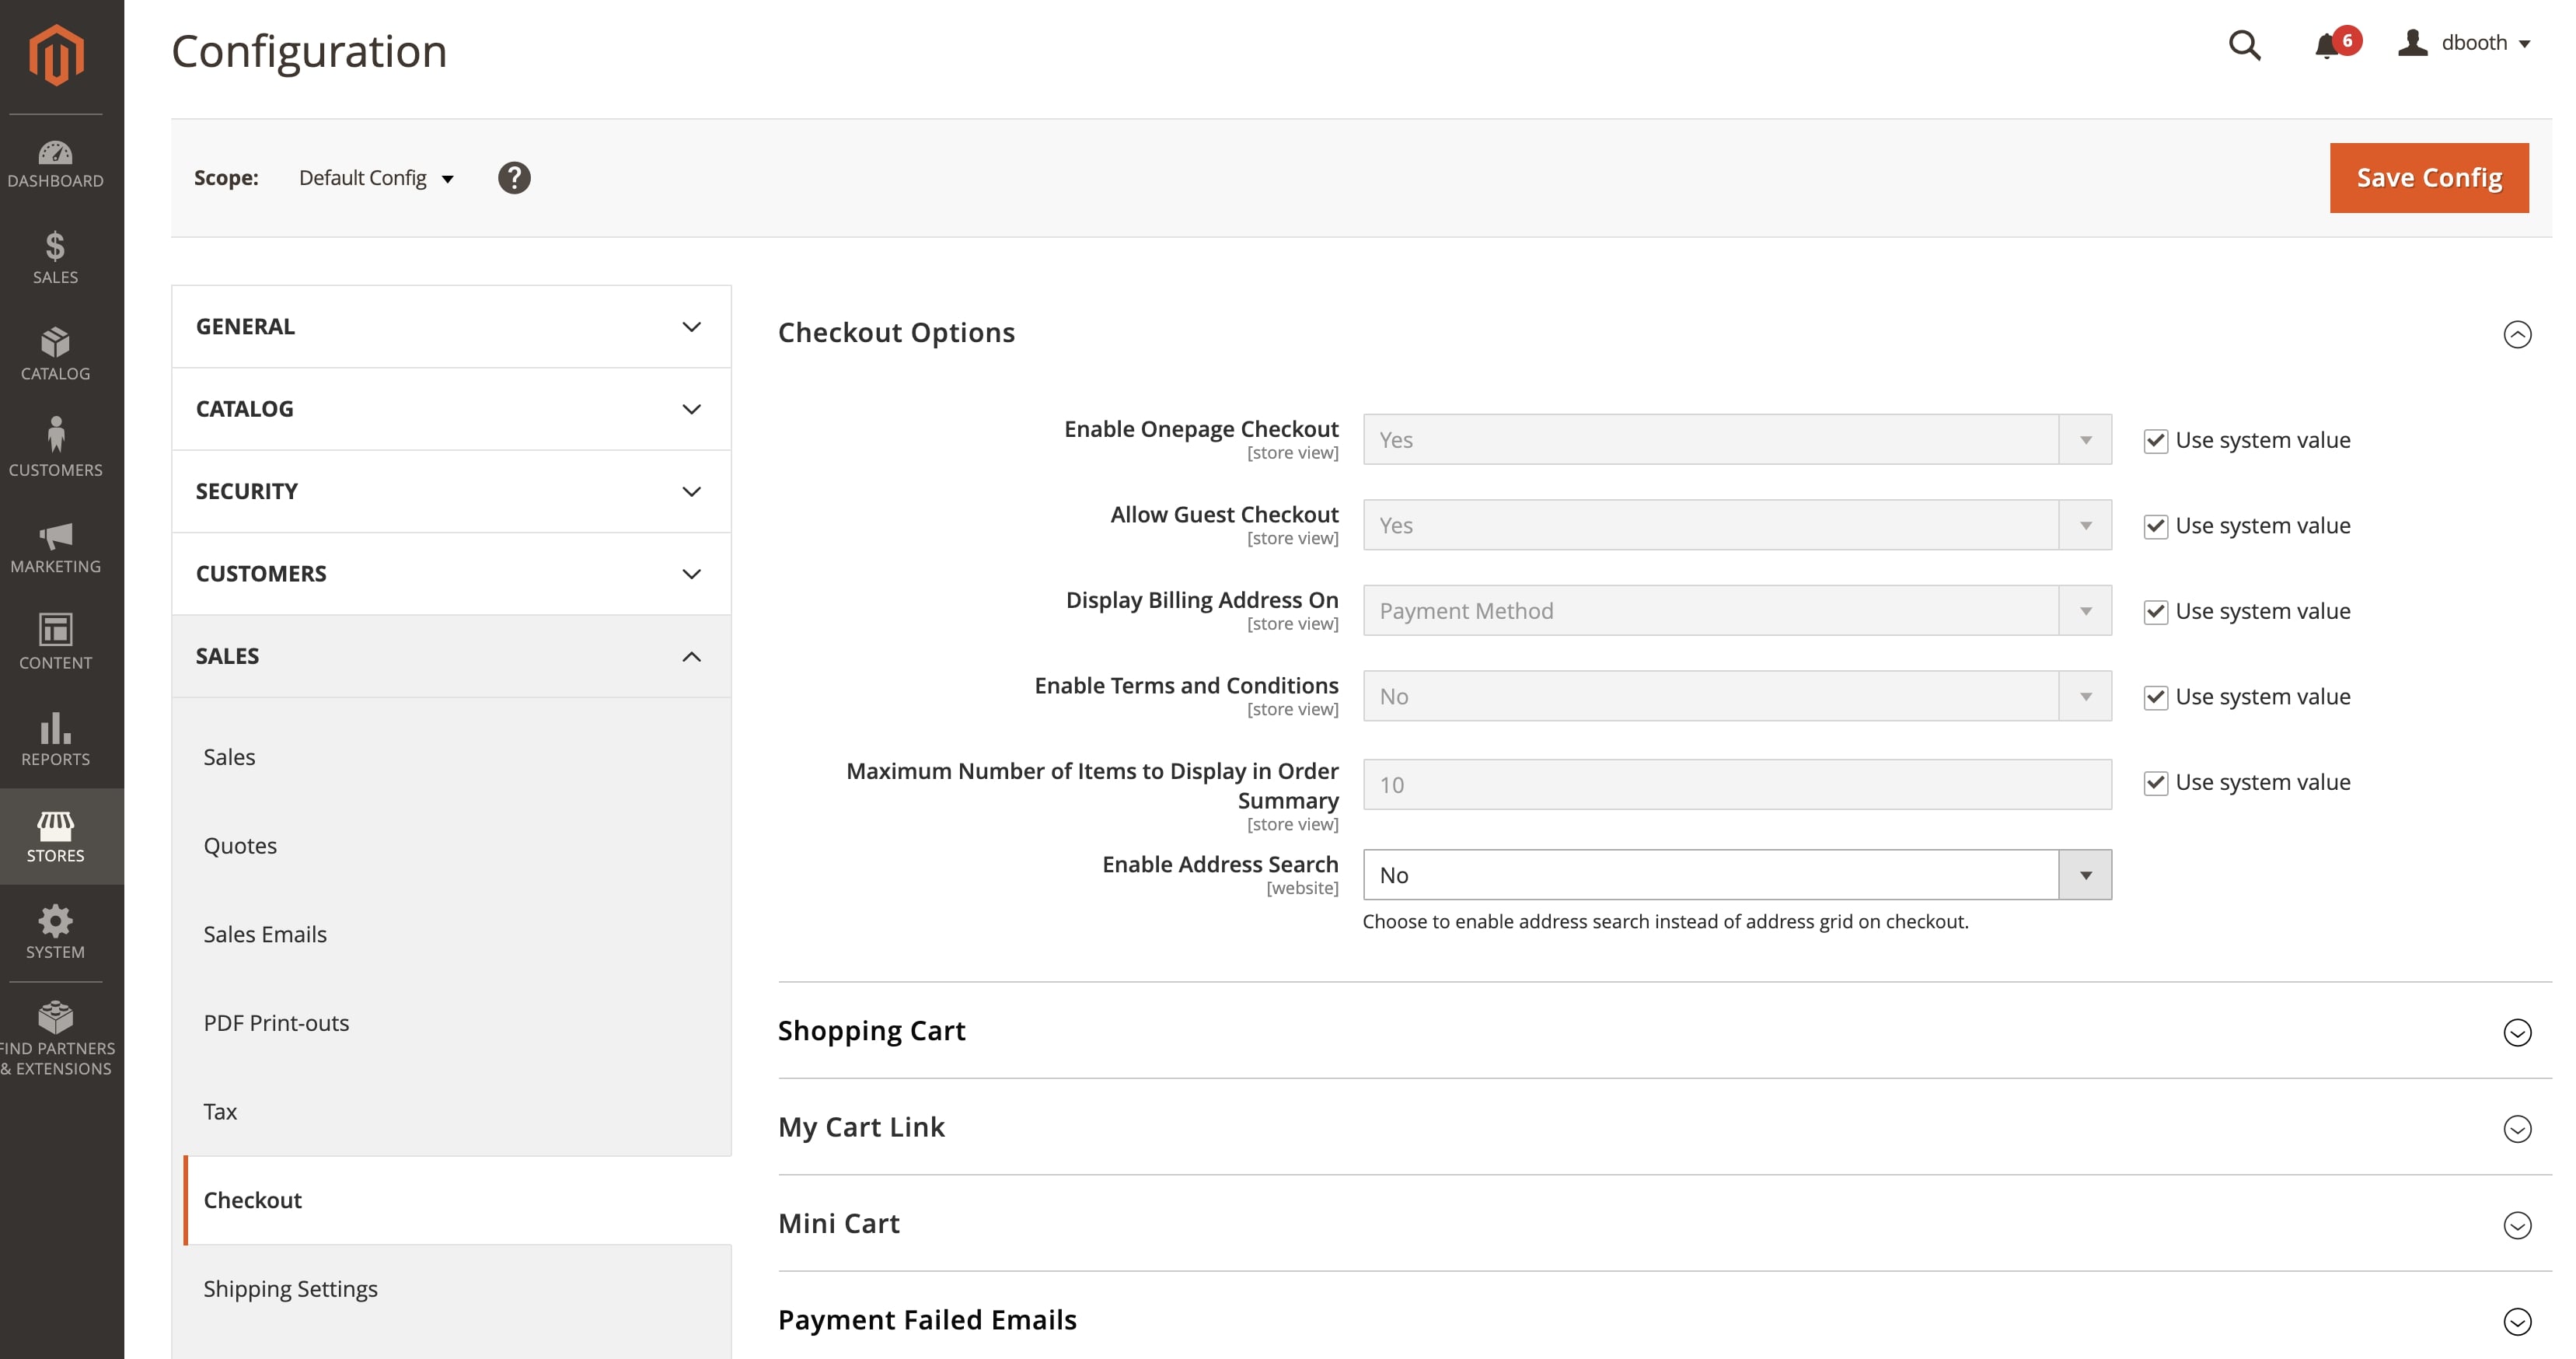
Now, let's see how to enable the guest checkout in Magento 2. Go to Stores > Settings > Configuration > Sales > Checkout and open the Checkout Options section. Set Allow Guest Checkout to Yes and save the settings.
Also, it’s a good idea to add login through social networks to your single page checkout. Let users log in to the store through their favorite Google account, Instagram, Facebook, and they will definitely not leave you because the registration process was too complicated. Let’s see how to enable it: please switch to this Magento Checkout optimization demo, navigate to Stores > Configuration > Amasty extensions > Social Login.


Get more settings details from the video:
5. Recover Cart Abandonment
No matter how easy and quick your Magento checkout is, some users will still abandon their carts. To reduce the abandonment rate, you can try to reach out to users who left your store with an email or retargeting ad, reminding them about products they left in the cart.
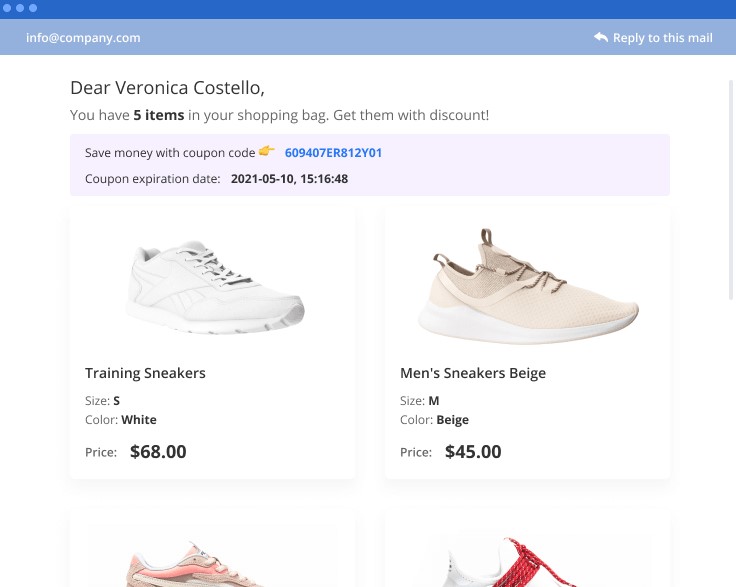
Statistics show that such actions can help you reduce cart abandonment by 6.5% and increase online sales by 20%.
This feature is included in One Step Checkout as well. Please, click on this Magento Checkout demo, navigate to Marketing > Abandoned Cart Email > Campaigns, and click Create new campaign. There you can set up to what customers you want to send an email with the reminder, choose an email template, edit content, add coupons if needed, and set a delivery schedule.

6. Analyze Data and Iterate
In the end, we want to remind you about the most important part — track your analytical data before and after implementing any changes to see how it influences your aim. To help you with this task and reduce the amount of time spent creating custom events in Google Tag Manager, we added built-in analytics to our checkout solution.
Click on this Magento 2 Checkout demo and go to the Reports > Checkout Analytics tab. Here you can see what checkout fields users complete most often and what are not that popular.

You can filter data by Store Views, Customer Groups, and time period (today, last 7 days, last 30 days, overall, custom). And Reports > Abandoned Cart Reports will show you the current Cart Abandonment Rate and Potential Revenue that you can recover.

Read More: 10 Best Practices for E-commerce Checkout Page Optimization
Wrapping Up
Following these steps and adjusting your strategy based on the statistics you see, you can customize the Magento 2 checkout page and increase your conversions by 35%.
And as you can see, you do not need to use many expensive tools or make titanic efforts to achieve these results. With Amasty’s One Step Checkout, Magento 2 checkout customization becomes simpler, more efficient, and more aligned with modern customer expectations.