
Earlier, we’ve already explained what GraphQL is and how it works. And today, we want to look closely at how you can use it in Magento 2. For this, we will take our Gift Card plugin as an example and dive deeper into queries and mutations.
GiftCardGraphQL
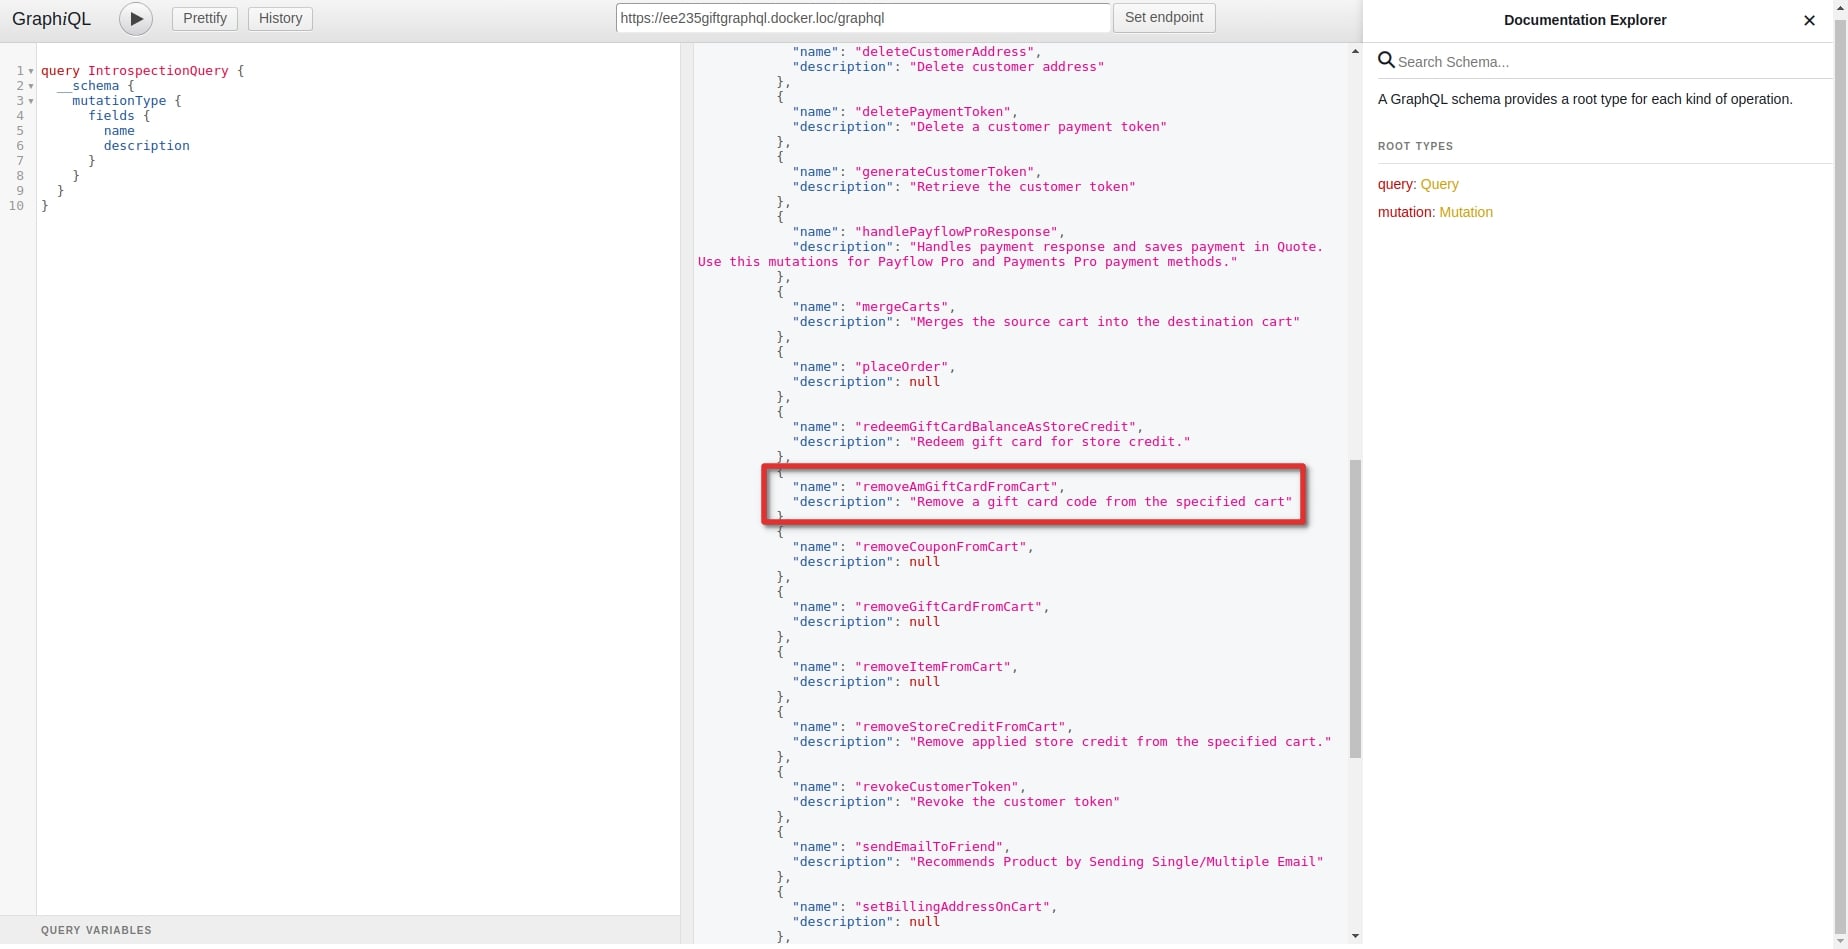
GiftCardGraphQL includes 1 query and 3 mutations.
The query has the name amGiftCardAccount and is responsible for the information about the gift-card product:

The addAmGiftCardProductsToCart mutation adds a gift-card product to the cart.
The applyAmGiftCardToCart mutation applies the code to the cart:

To remove the gift card code from the cart, use the removeAmGiftCardFromCart mutation:
Let’s consider them specifically.
The amGiftCardAccount query
As we mentioned above, the amGiftCardAccount query allows you to get information about the gift card by its unique code. To create a request, we need to know the gift card code. You can get it in the Magento backend. For this, go to Marketing > Gift Cards > Accounts and copy the needed Gift Card Code:

Now, you can make a request:

In the first column, you can see our request. We formed it from the options that are available for this query. Hereafter, the full list of the available fields is displayed in the 3rd column.
As a result, we got a response in the middle column. You can compare the received data with the information in the admin panel. They are the same.
Mutations
applyAmGiftCardToCart / removeAmGiftCardFromCart
To apply or remove the gift card in the cart, you can use mutations applyAmGiftCardToCart and removeAmGiftCardFromCart correspondingly.
Before making a request, you need to get a cart ID via the createEmptyCart mutation:

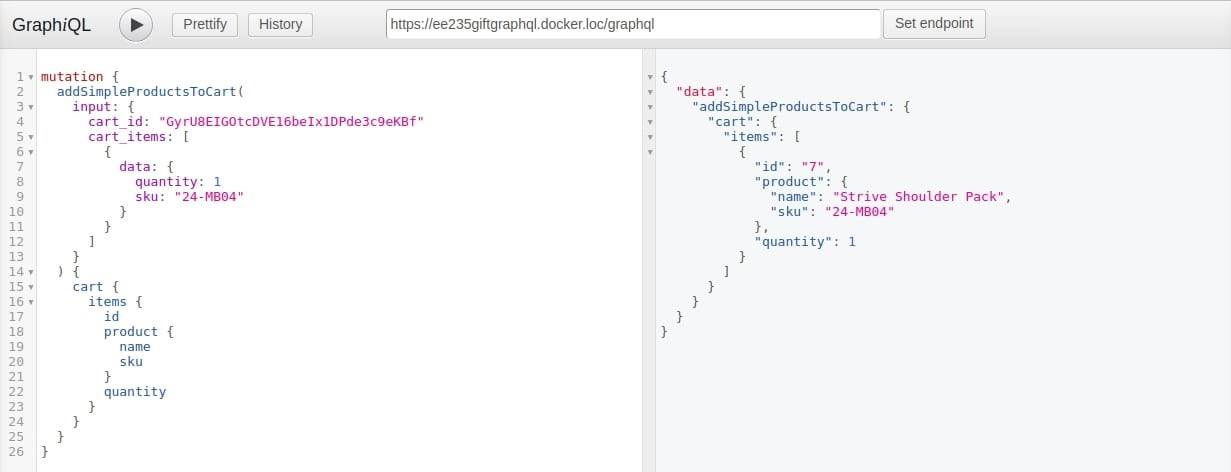
Then, add products to the cart, by using the received ID, product SKU, and quantity:

The product is added to the cart:
Now, you can use our applyAmGiftCardToCart mutation. For this, you need the cart ID received from the createEmptyCart mutation and the gift card code:
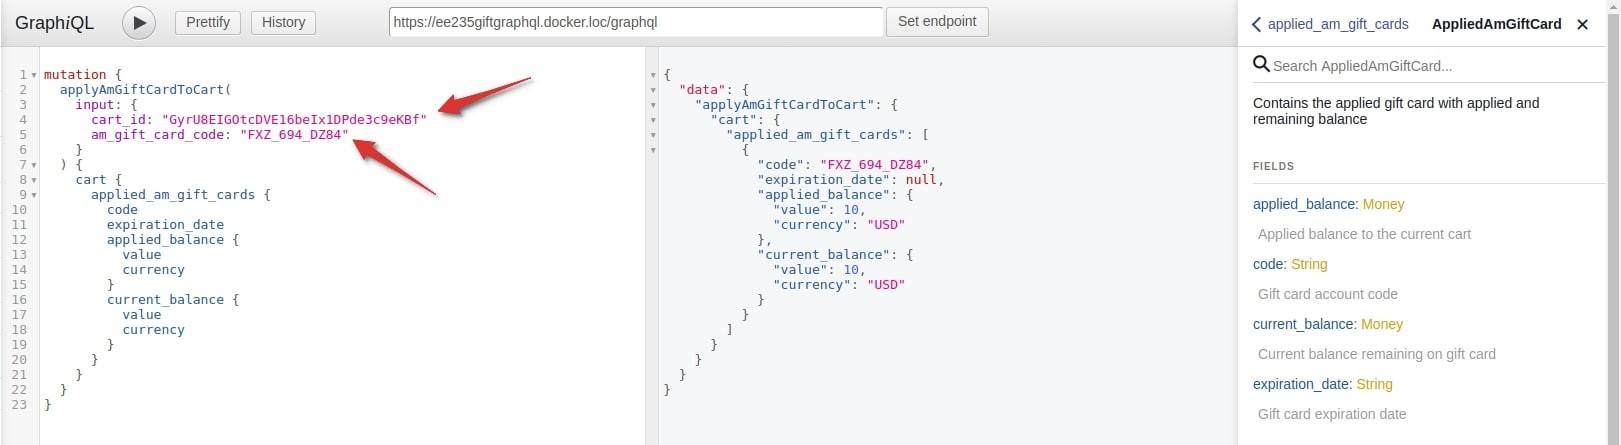
In this screenshot, you can see our request, respond, and the full list of the applyAmGiftCardToCart mutation options.
The applied_am_gift_cards option includes full information about applied gift codes to the cart. You can use it in any requests that are related to the cart.
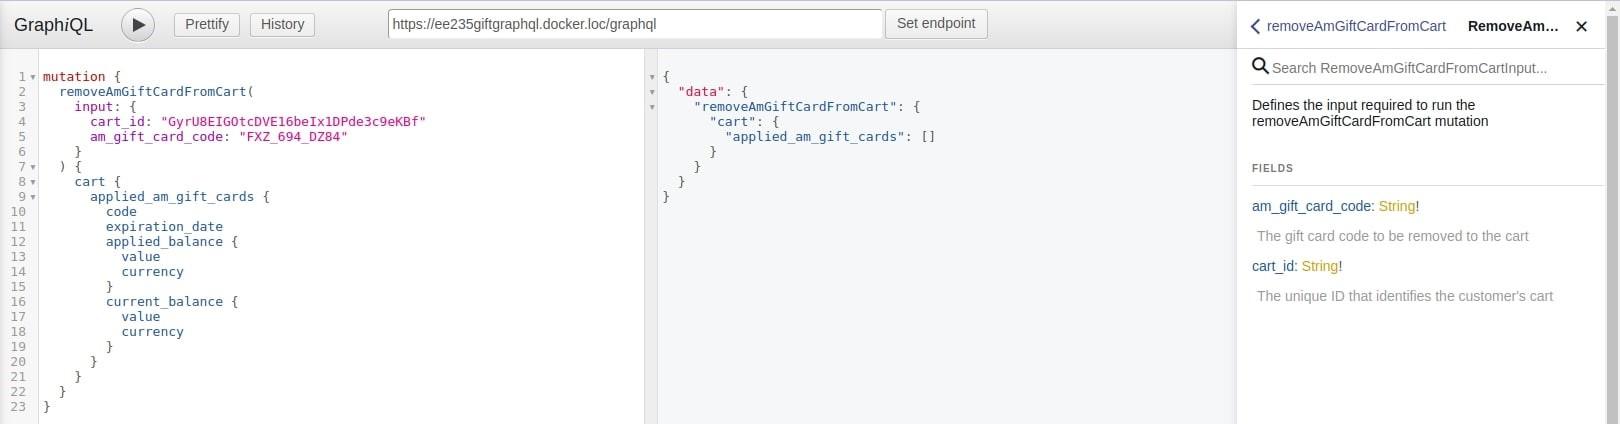
To reset the gift card, use a similar request with removeAmGiftCardFromCart:
addAmGiftCardProductsToCart
The addAmGiftCardProductsToCart is used to add a gift-card product to the cart.
Before making the request, you need to create a new gift card product in your Magento 2 backend. You can check out how to do this in our tutorial.
Go to Products > Catalog, click Add Product, and choose Gift Card Pro from the dropdown. Then, choose the Card Type, Gift Card Code Pool, and Gift Card Image:

Fill in product details:

Set prices:

And check the result on the frontend:

Next, get a cart ID via the createEmptyCart mutation, exactly how we did it earlier:

To add the gift-card product, you need not only the cart ID, product SKU, and quantity but also gift_card_options. This block is required and consists of gift card options that you can find in the 3rd column.
To get the list of chosen options, you need to use the … onAmGiftCardCartItem block. In the am_giftcard_options, you can specify for output code, label, and value of each option.

Other examples of the gift card use
The gift card product is available for all product requests. For example, let’s try to make a search request with our created gift card product. To display the gift-card product properties, you can use the … onAmGiftCardProduct block. Here is how it looks like:
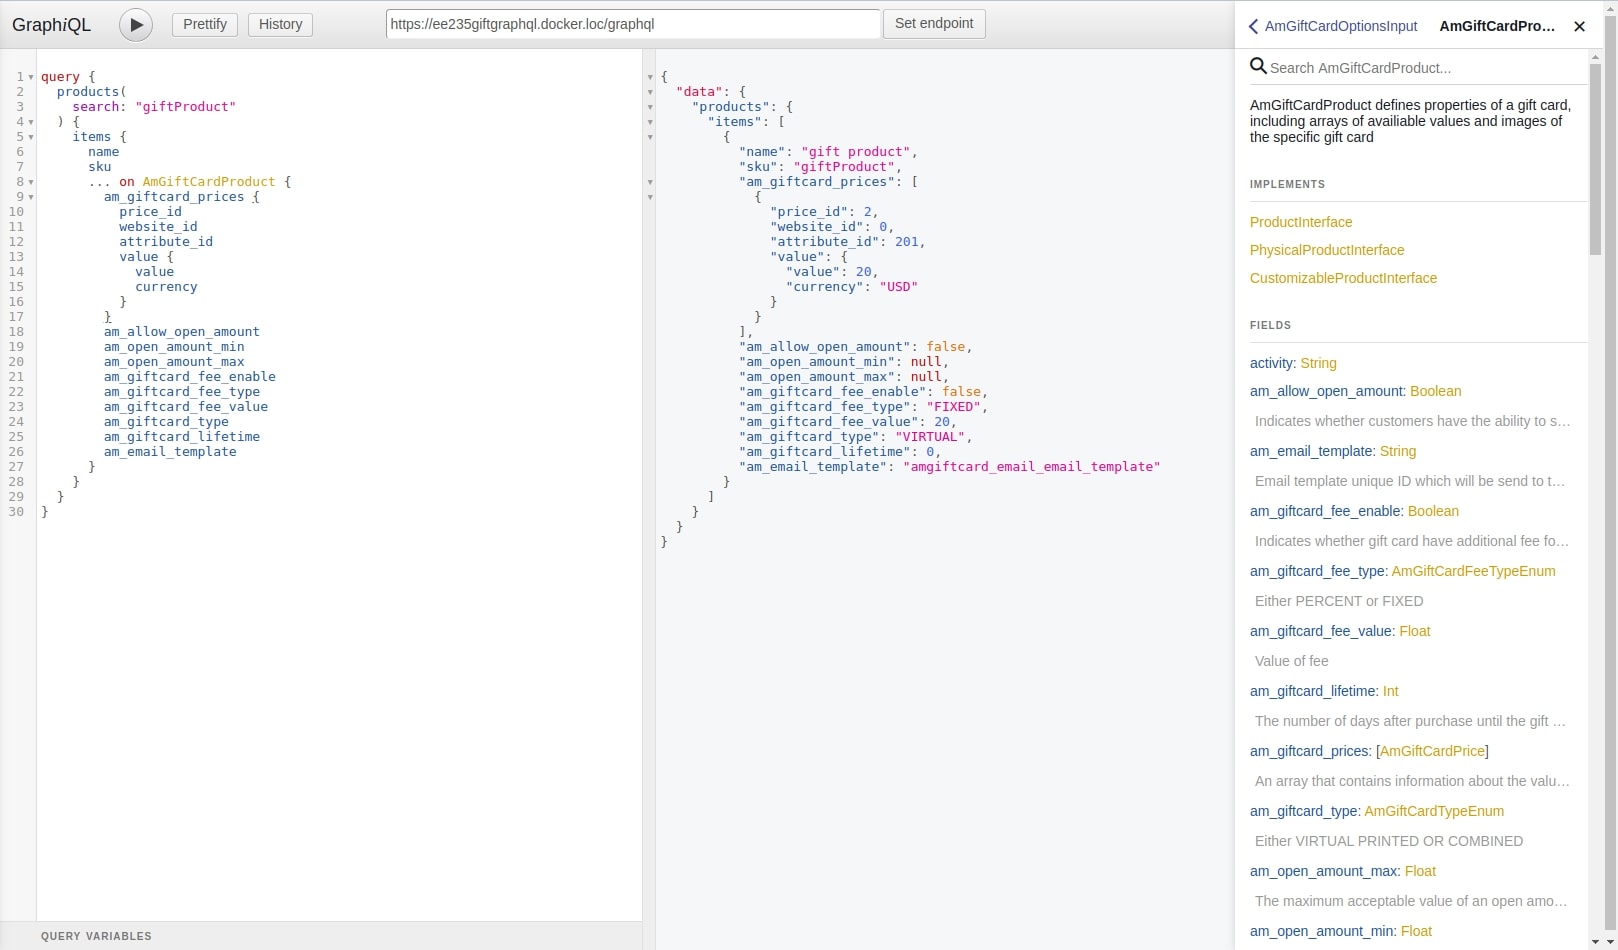
All the available options are listed in the 3rd column.
Hopefully, you now have a clearer idea of how to use GraphQL in Magento 2. But if you have any questions, feel free to comment below. We’ll do our best to help you out!