- Knowledge Base
- Most Asked Magento-Related Questions
- How to create new pages, blocks, widgets using Magento 2 CMS?
How to create new pages, blocks, widgets using Magento 2 CMS?
Magento 2 CMS is the Content Management System, which serves for creating new pages, blocks, and widgets.
With the use of the Magento 2 content management system, you can design custom static pages, add custom blocks and easily manage the position on a page(s), supply the blocks with relevant links and additional information.
Below we take a look at the creation of the 3 content elements.
How to create Magento 2 CMS pages?
To create CMS page in Magento 2, complete the next steps:
- Log in to the Admin Panel and switch to Content>Pages:
- Click the Add New Page button:
- Here you can give a new Name for the page, set a custom URL, choose on which store the page can be viewed, enable/disable it and decide on other settings:
- After all the required configs are made, click the Save Page button and clear the cache.
The page can be added to any other one using a link widget. E.g.: in case you want to add the page to the home one as a link, go into the Home page edit menu, choose Content and click the Insert Widget button. Then select the needed page and save the changes.
How to create a Magento 2 CMS block?
- If logged in, navigate to Content>Blocks and click the Add New Block button:
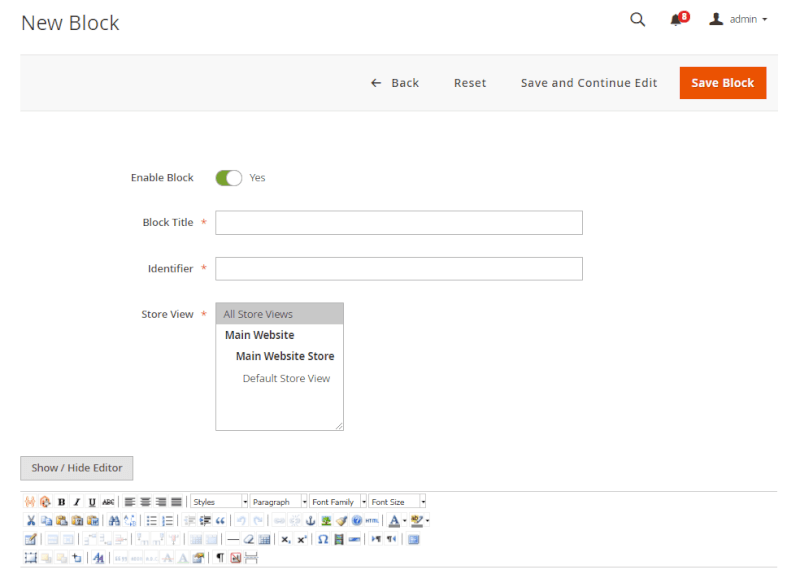
- In the New Block settings choose whether to enable the block, define the block Title and Identifier, specify the Store View;
- When choosing the Show / Hide Editor button, you’ll see a list of additional settings like Insert Widget, Insert Image, Insert Variable:
- When everything is set up, don’t forget to click the Save Block button and clear the cache.
How to create a Magento 2 CMS widget?
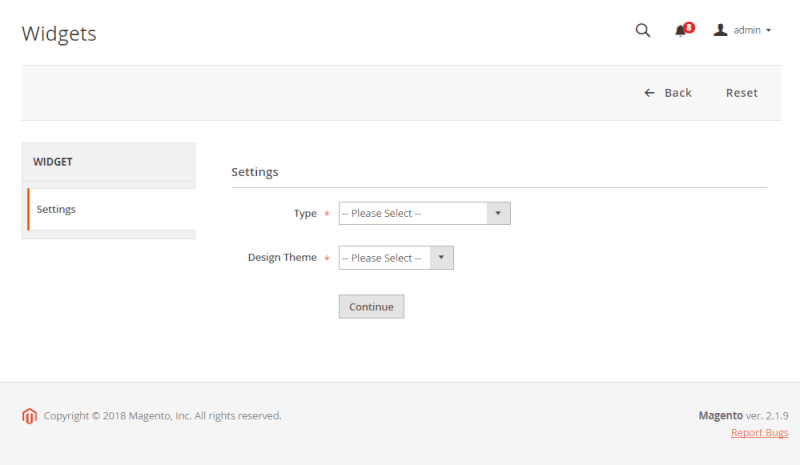
- When logged in, go to Content>Blocks and click the Add Widget button:
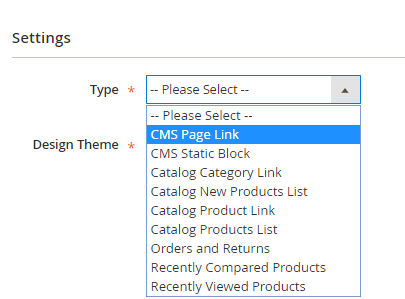
- In the Widgets menu you can choose one of the types:
and choose the desired Design Theme for it and click Continue.
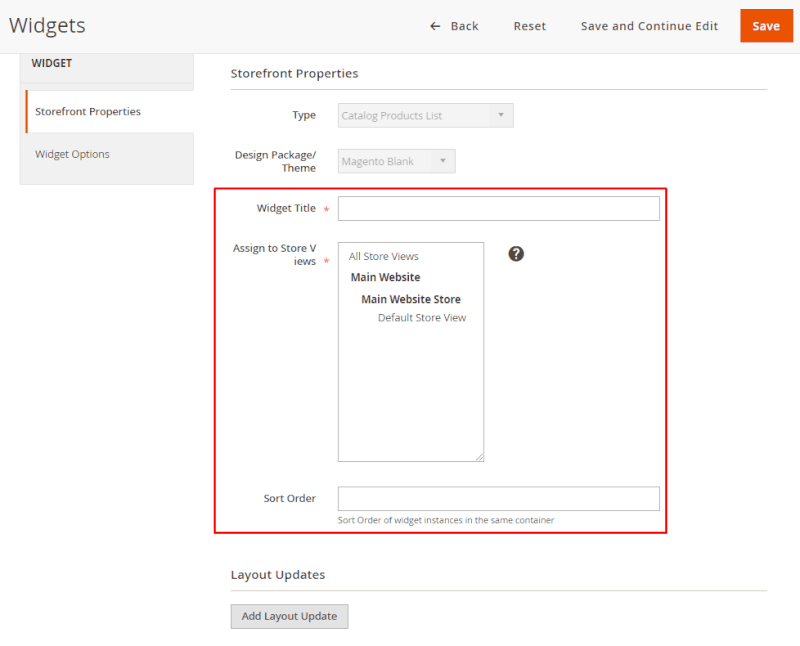
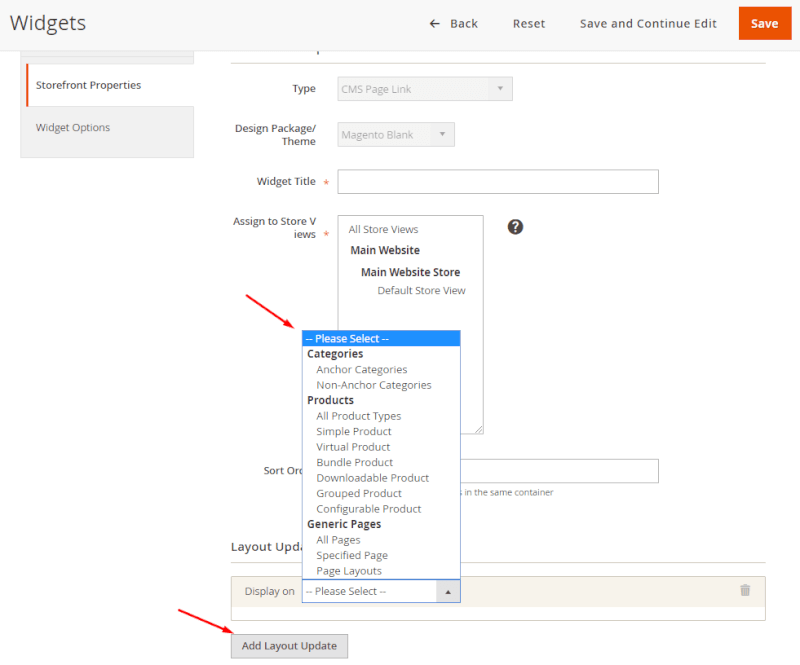
- Now you can set the Widget Title, assign it to Store Views and define the widget Sort Order:
- After the settings are completed, you need to add the Layout Update:
- Save the new widget and clear the cache.
Don't wait for big sales - save up to 20% on our special offers! Pick your deal →



Login and Registration Form