- Knowledge Base
- Most Asked Magento-Related Questions
- Magento 2 Logo: How to change the default logo?
Magento 2 Logo: How to change the default logo?
Building a brand awareness is one of the main tasks merchants face at a business launch. If you’ve chosen an e-commerce sphere and decided to base your website on Magento 2 platform, you will definitely need to learn how to change the default logo and its size to promote a custom one. Besides, you’ll need to update the copyright notice in the footer.
Magento 2 logo change & logo size
Your current store theme determines the size and location of the logo by default. The default Magento 2 logo is saved as an SVG file. A desired logo can be saved in any of the file types: GIF, PNG, JPG, or JPEG and uploaded from the admin panel of your website.
To find the default Magento logo and change it for a new one, navigate to:
- The Admin Panel> Content> Configuration> Select Your Current Theme> Header(Amasty advice);
!For Magento 2.x.x - Magento 2.1.x use this path: the Admin Panel> Stores> Settings> Configuration> General> Design> Header!:
- Choose a desired store view and click the ‘Edit’ button;
- Open the drop-down ‘Header’ menu and make the following changes:
- Logo Image - use the ‘Upload’ button to upload a new one;
- Logo Image Width/ Logo Image Height - enter desired parameters to the fields;
- Welcome Text - create a custom welcome text for your landing website page;
- Logo Image Alt - fill in the text that is to be displayed when hovering a mouse over the logo image;
- Having completed the settings, don’t forget to click the ‘Save Config’ button.
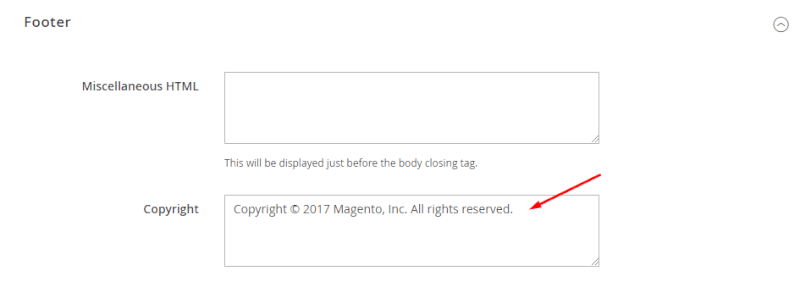
The footer copyright notice can be changed under the Footer drop-down menu:
Magento 2 logo won’t change/won’t show
In case a custom logo won’t change after the settings are fulfilled correctly, check the following:
- make sure you’ve clicked the ‘Save Config’ button;
- flush and refresh the Cache.
Having changed Magento 2 logo design, don't forget about implementing enhancements that influence user experience.


Login and Registration Form