- Knowledge Base
- Most Asked Magento-Related Questions
- How to change the default welcome email in Magento 2?
How to change the default welcome email in Magento 2?
When a new user registers a customer account on your website, they get a standardized email. Say you want to disable the default welcome email in Magento 2 and use a custom template instead. To do it, follow the next steps.
Step 1. First off, you need to create a custom template. For this, log in to the admin panel and go to Marketing > Communications > Email Templates. Then, click Add New Template.
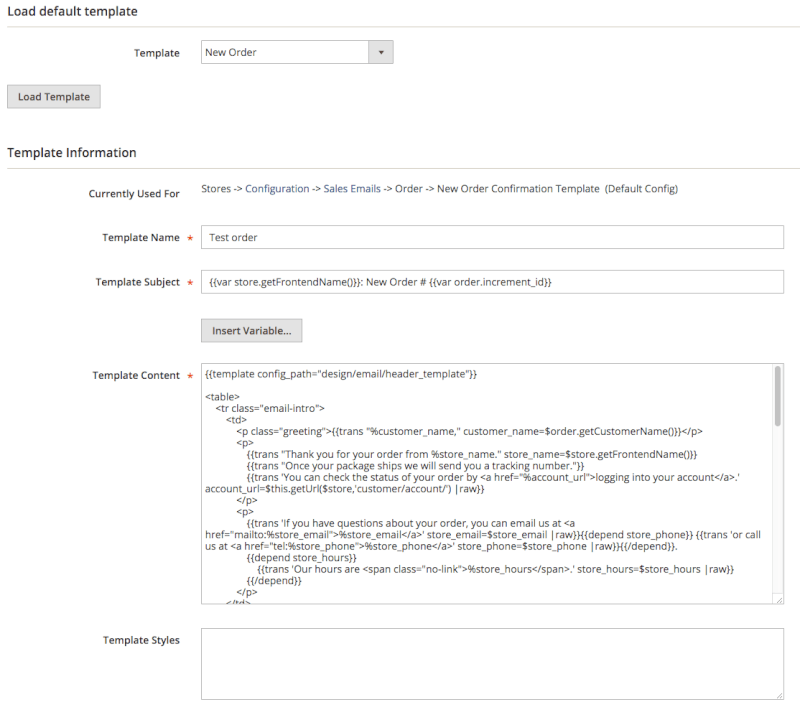
Step 2. In the Load default template section, choose the template that you want to edit and click the Load Template.
Step 3. Then, fill in the Template Information. Enter the Template Name and Subject.
Step 4. In the Template Content field, you can customize email content by using variables.
Step 5. Specify the Template Styles by adding custom CSS styles.
Step 6. When ready, save the changes.
→ Protect your email newsletters from getting into spam by using SMTP Email Settings
Step 7. Next, go to Stores > Settings > Configuration > Customers > Customer Configuration and open the Create New Account Options section. There you can set up the welcome email.
Step 8. In the Default Email Domain field, you need to enter the default email domain for the store.
Step 9. In the Default Welcome Email dropdown, choose your custom email template.
Step 10. Also, you can set up a custom template for welcome emails that are sent to users whose accounts were created by admins. For this, customize the Default Welcome Email Without Password field.
Step 11. If needed, you can change the Email Sender and enable Emails Confirmation. If you turn on email confirmation, you need to choose the confirmation link email template and set what email you want to send as a greeting after successful confirmation.
Step 12. When you are ready, don’t forget to save the settings and test how they work.
→ Recover lost sales by sending timely and personalized Abandoned Cart emails with Magento 2.Abandoned Cart Email for Magento 2


Login and Registration Form