How to configure customer groups in Magento 2?
Setting up and configuring magento 2 customer groups in Magento 2 is quite straightforward. Using this feature can help you ensure that you are achieving consistent customer segmentation to provide each of your customers with a unique, tailored experience. You can use this process to create one or multiple customer groups in Magento 2.
And the best part? No coding required!
Step 1: Create A Customer Group In Magento 2
Let’s start by logging into the Magento 2 Admin Panel of our site. Navigate to the “Customers” page using the vertical taskbar on the left-hand side of your screen. Then, navigate to “Customer Groups.”
Once here, you’ll see a large orange button to the right side of your screen that says, “Add New Customer Group.” Go ahead and click on that to get started.

Step 2: Set Up Your Customer Group
The first thing you’ll want to do is set your customer group name. The group name should be descriptive of the category you are setting up. Some of the defaults include general, wholesale, retailer, member, and Not Logged In.
After that, you should set a Tax Class for the group. This defines the tax rate for that specific customer group. Magento 2 has three different tax classes based on the tax rules for the main types of customers:
- Taxable goods
- Shipping
- Non-Taxable Goods
Using the correct tax class is critical to ensuring that your customers are charged tax correctly.

Step 3: Add Customers To Your Group
You have a group. Now you need to put some customers in it. There are a few ways to do this. First of all, you could navigate to a specific customer and select “Edit” to begin editing that customer’s information. Navigate to “Account Information” using the menu on the left of your screen. Finally, find the “Group” field, select the dropdown, and choose the group you want to assign the customer to.
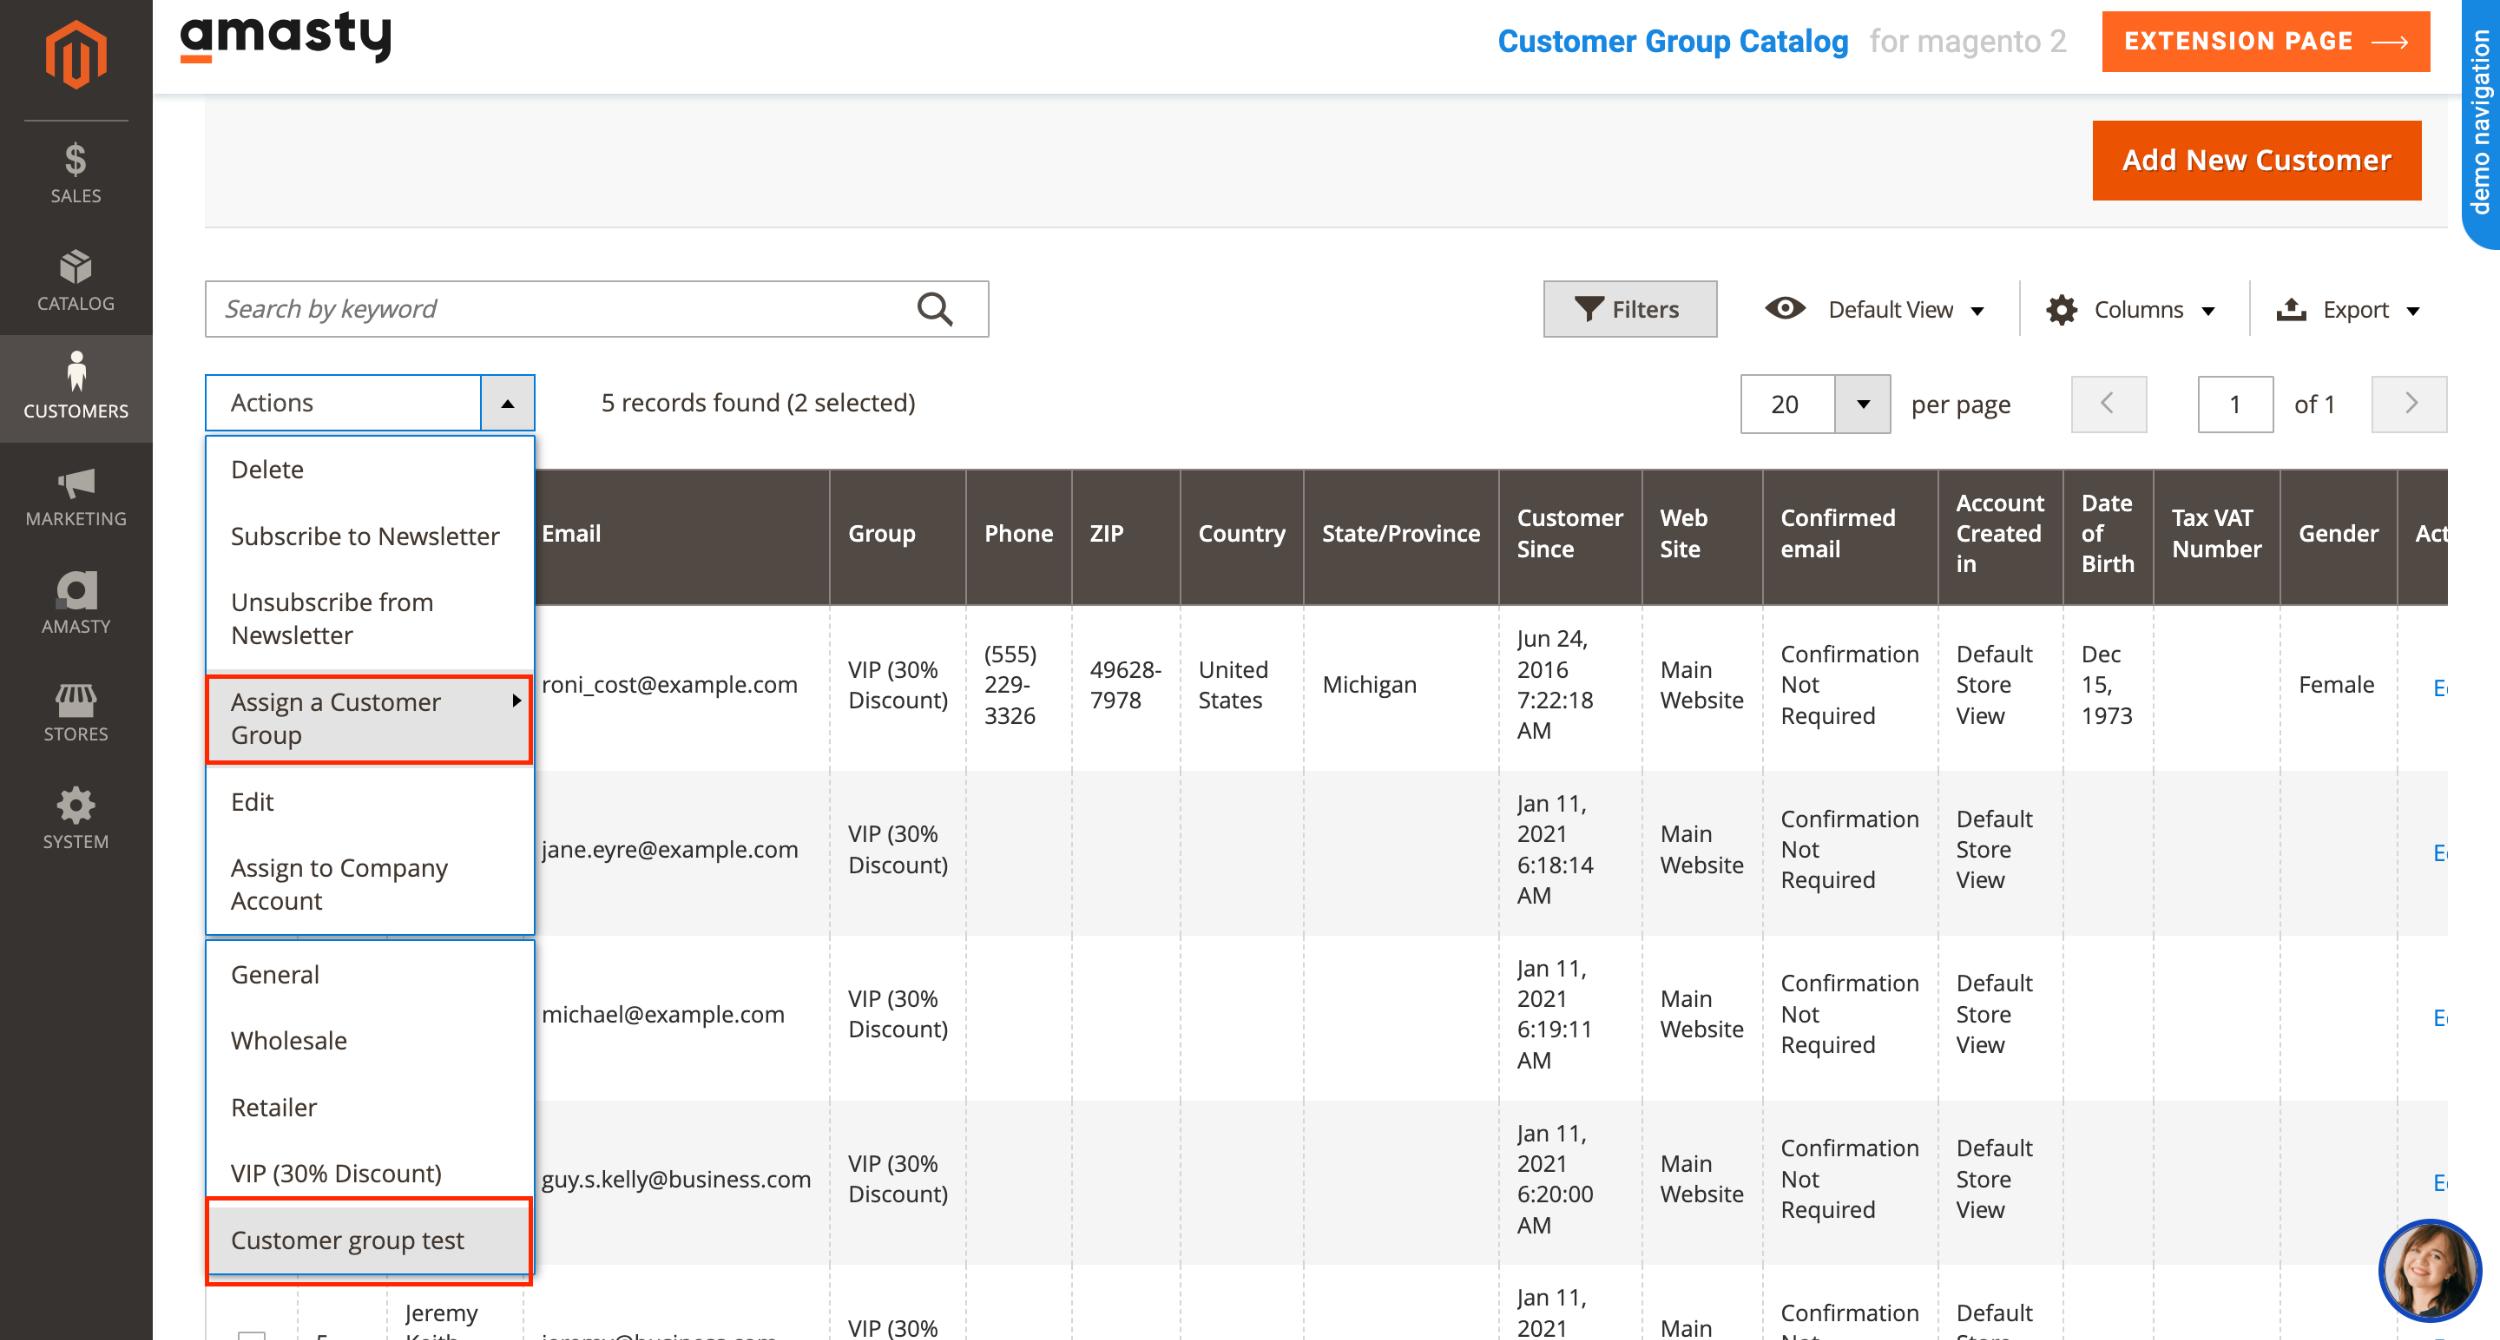
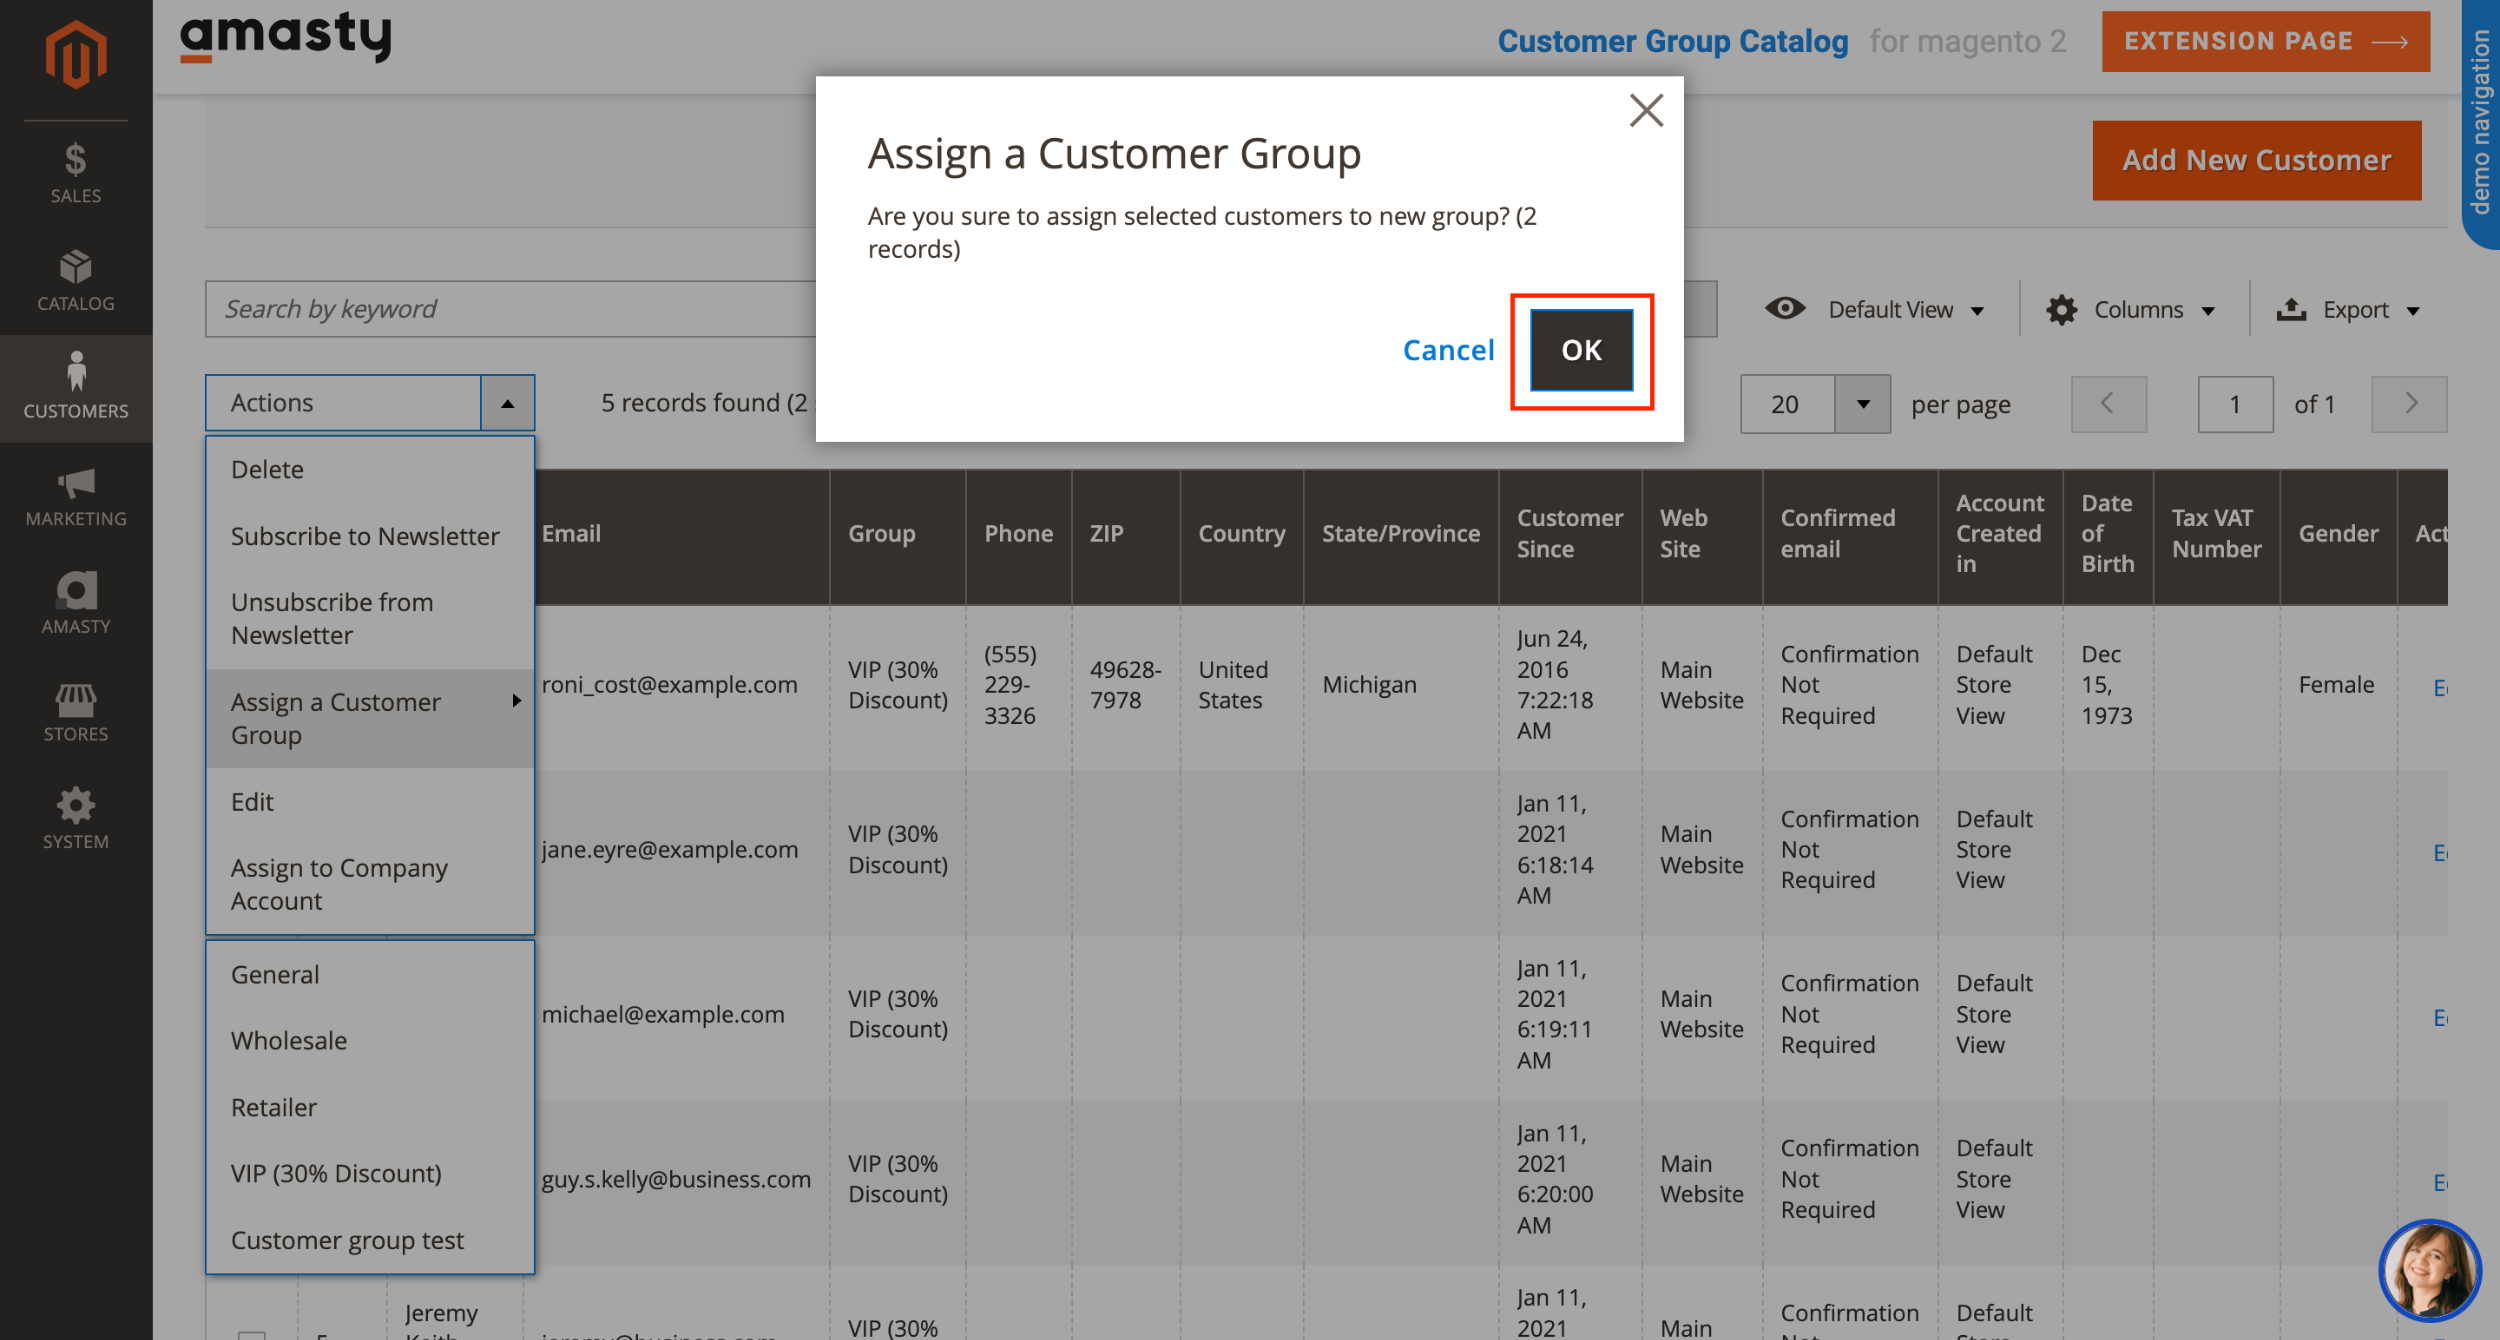
The other way to do this is to use the Grid view on the Customers screen. Navigate back to “Customers” and locate the table containing all your customers. Using the search bar or the filter options, select the customers you want to assign to a group. Then, click on “Actions” and “Assign a Customer Group.” You can then choose the group you’d like to assign the customers to.

Step 4: Magento 2 Customer Group Pricing
Now that you have set up your first customer group in Magento 2, you can manage your customer groups further. Many store managers use magento 2 customer groups to create a special magento 2 group price for each group. This enables offering special discounts as part of promotion efforts.
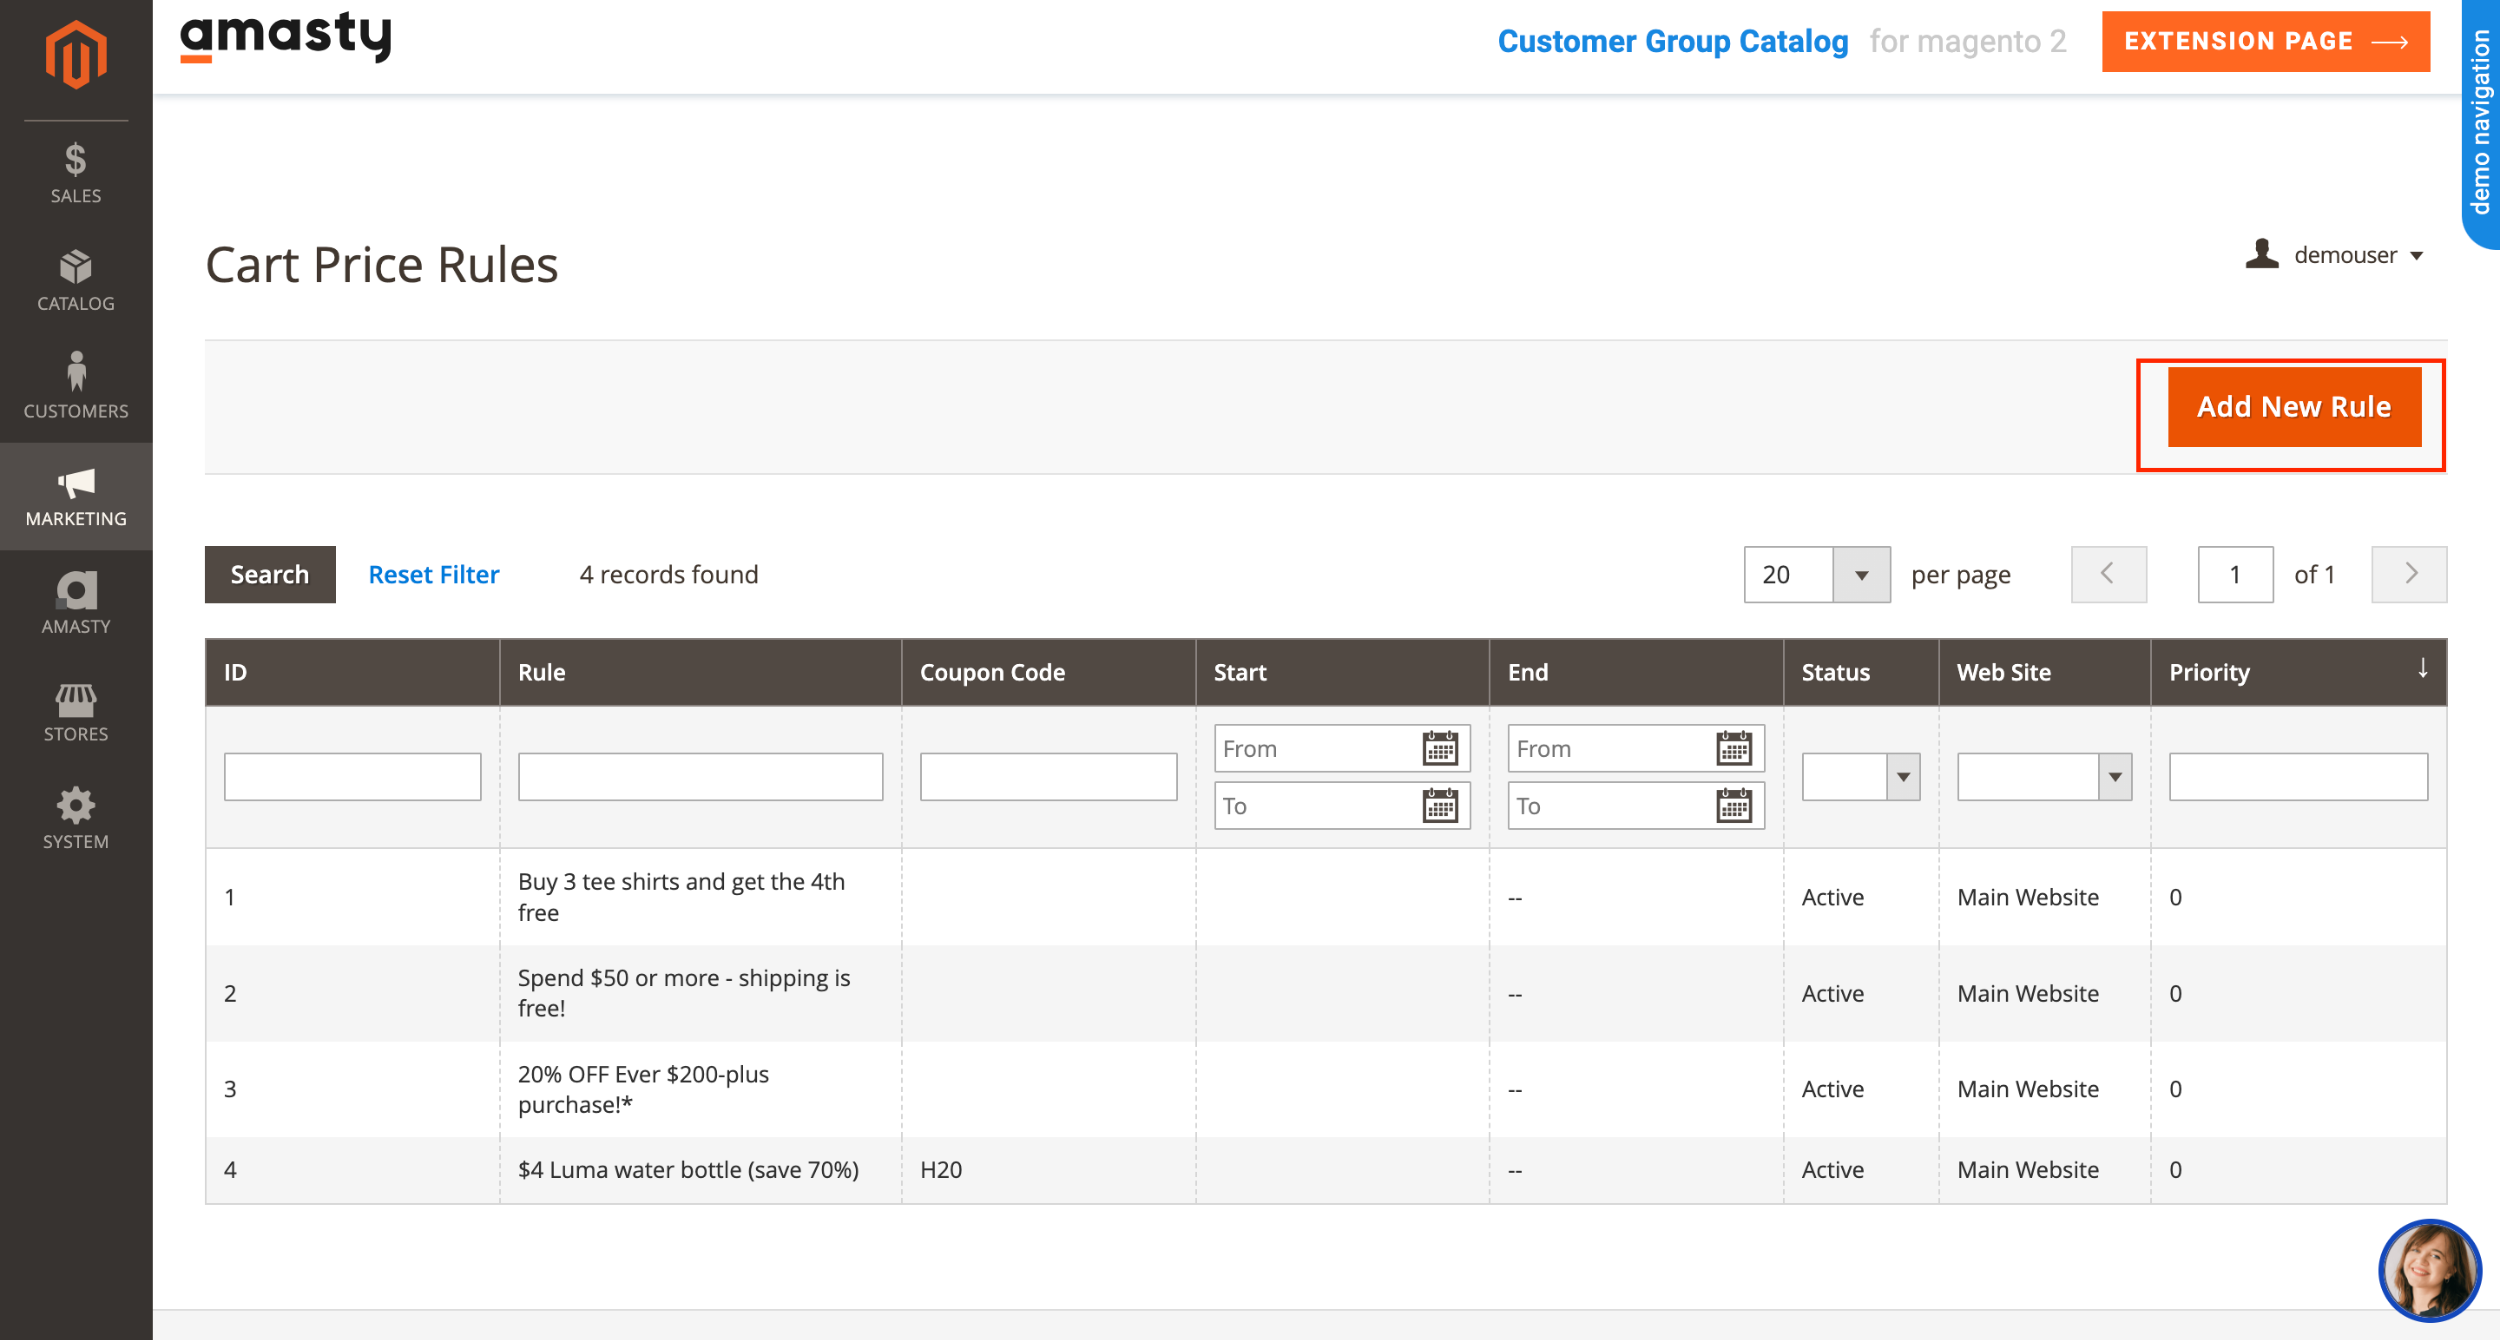
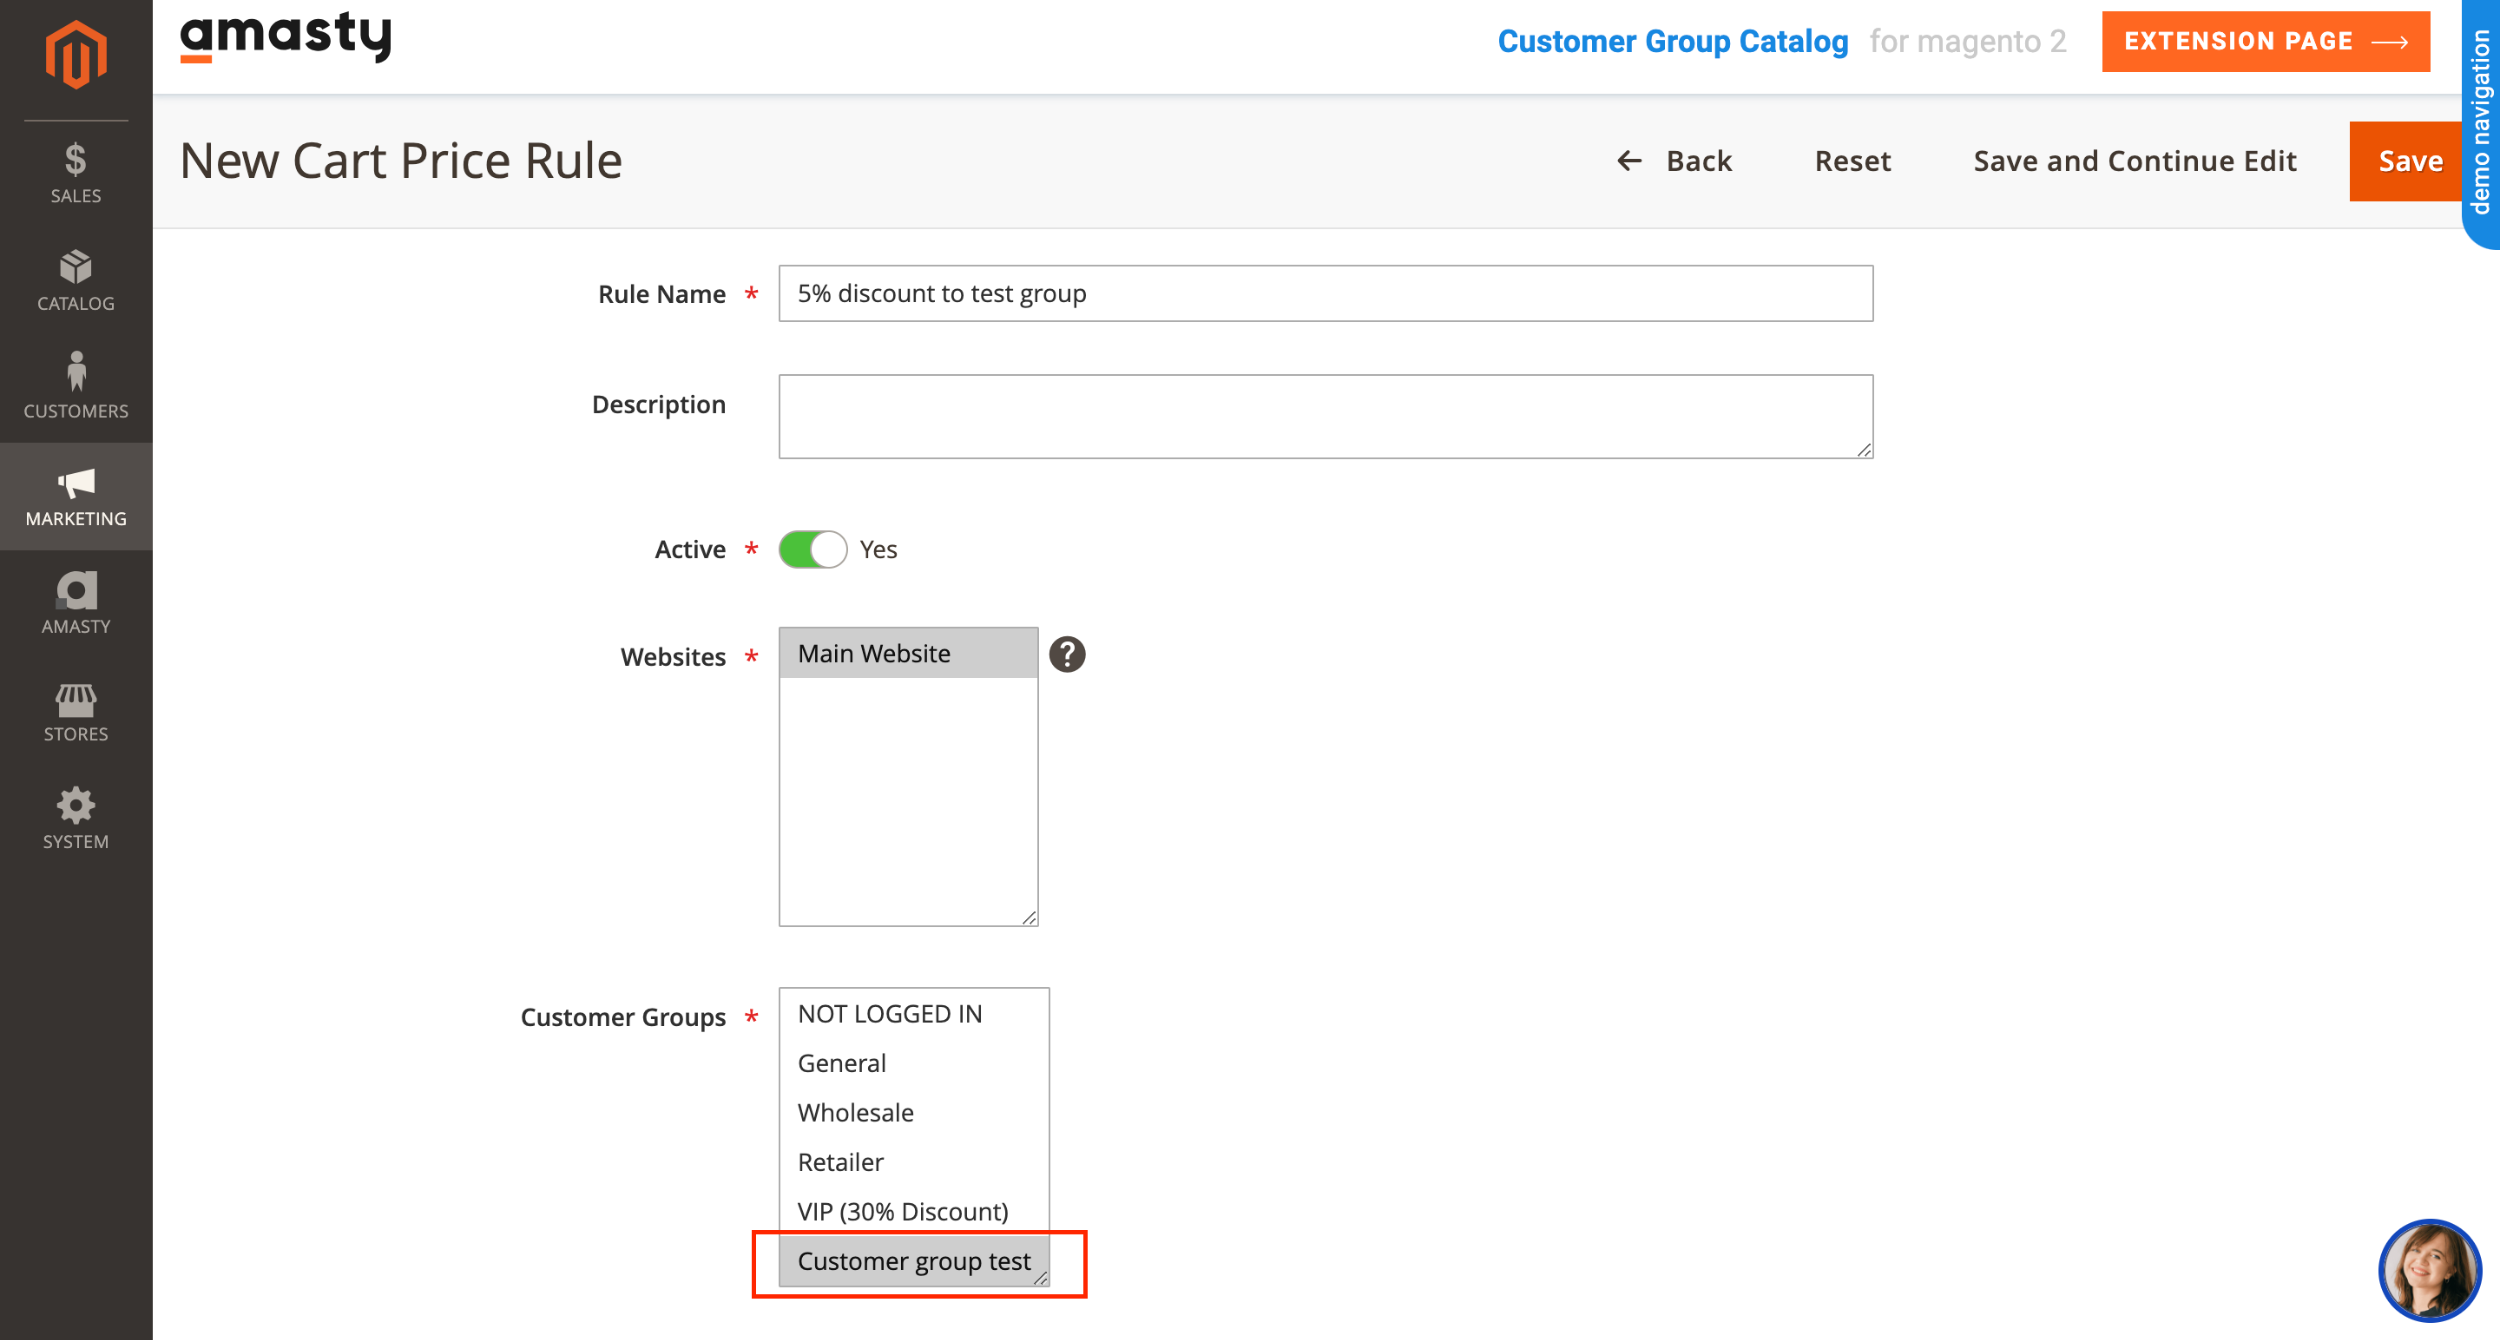
To do this, go ahead and create a new Cart Price Rule in Magento 2. From the admin panel, navigate to “Marketing,” “Promotions,” and then “Cart Price Rules.” From here, click on the “Add New Rule” button. Now, you will see a number of fields to fill in regarding the specific nature of this new rule. Make whatever changes you desire, and then navigate down to the “Customer Groups” field. Here, you can set this rule to apply only to certain customer groups.
Summary:
We have covered the basics of magento 2 customer groups. However, restricting products to be visible to certain customer groups can require significant coding. Fortunately, Amasty's Customer Group Catalog for Magento 2 makes it easy to provide selective access to your store catalog and offers many other useful features. Check it out here!
Loading
© 2009-2025 Amasty. All Rights Reserved.
Login and Registration Form