- Knowledge Base
- Most Asked Magento-Related Questions
- How to set up Magento 2 multi-language version?
How to set up Magento 2 multi-language version?
Growing your business globally don’t forget to translate the frontend content into the targeted countries’ languages with Magento 2 language switcher flags. To create a multi-language store you need to configure the website localized version.
Try out our Magento 2 GeoIP extension to switch your users to a right website version from the first visit.
The settings are pretty simple. First off, choose which of the three ways to apply:
- create a new website: the way allows for creating a separate website with a unique name. Besides, you’ll manage to create and assign multiple stores, store views to it;
- create a new store: the choice is justified if you want to make not only a localized version, but a store with sufficient differences. For this, you’ll need to create a website, add a store and store view;
- create a new store view: the way is the easiest one, as you can simply add a localized version to the current store.
Then continue with the backend settings.
Magento 2 multi-language store setup
Each of the described ways requires relevant setup in the Admin Panel.
Create a new website
- Log in to the Admin Panel, navigate to Stores>All Stores:
- Click the Create Website button:
- Fill in the website information, specify the Sort Order if needed and click Save Web Site:
- Once it’s saved, you can see the website on the Stores grid:
By clicking on the site name, you will switch to the menu. You can change the current Sort Order, Delete Web Site or Reset it.
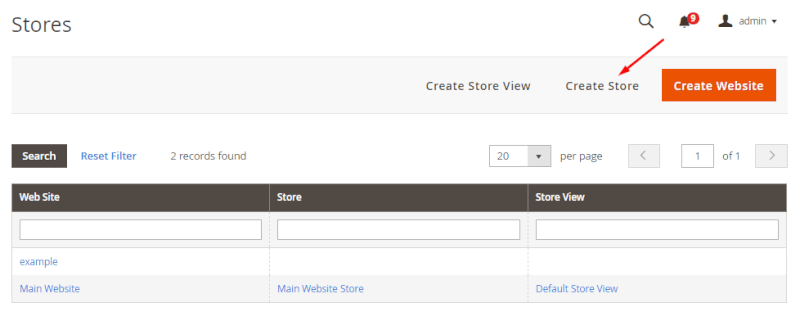
Create a new store
- If logged in, navigate to Stores>All Stores and click the Create Store button:
- Fill in the Store information and save the settings:
Web Site: choose the website to which you add the new store;
Name: decide on the name;
Root Category: select a needed category from the drop-down menu.
- If this handled right, the new store will be displayed on the Stores grid:
You can change all the previous store settings after saving, except Web Site.
Create a new store view
- Once logged in, go to Stores>All Stores and click the Create Store View button:
- Fill in the Store View information and save the settings:
Store: choose a store for which you create the view;
Name: fill in the name for the store view;
Code: insert the code;
Status: decide to enable or disable the store view;
Sort Order: indicate the order for store view display on the grid if needed.
The new store view will be displayed on the Stores grid:
All the configurations you set before can be changed, except Status.
- If you need to localize the new store view, go to Stores>Configuration>Locale Options:
- Choose the store view you need to localize, set all the Locale Options and save the configurations.
Now you have created a localized version of your main store. Thereafter, you need to install Magento 2 language pack. It performs full translations for Community and Enterprise editions (like files for standard phrases, email templates, etc.). Besides, you can use the GeoIP Redirect extension. It allows you to automatically redirect visitors to a localized store view based on their IP addresses. Alternatively, users will have to switch to a needed localized version manually.


Login and Registration Form