- Knowledge Base
- Most Asked Magento-Related Questions
- Magento 2 Clear Cache
Magento 2 Clear Cache
How to Clear Cache in Magento 2?
Option 1: Magento 2 Clear Cache via Admin Panel
Option 2: Magento 2 Clear Cache via Command Line
Magento 2 Cache Clean vs. Flush
Cache is a separate area of your hosting server, which is used to store web pages through browsers to speed up the load processes. To solve the issue with updates made on your website content the cache should be refreshed. Thus each time you make changes to your online store you need to refresh the cache to make them visible on the frontend.
How to Clear Cache in Magento 2?
Everyone looks for a solution that allows for fast and effortless cache deleting in Magento 2. Here are the simplest methods to clear cache.
Option 1: Magento 2 Clear Cache via Admin Panel
- Navigate to the Admin Panel> System> Cache Management:
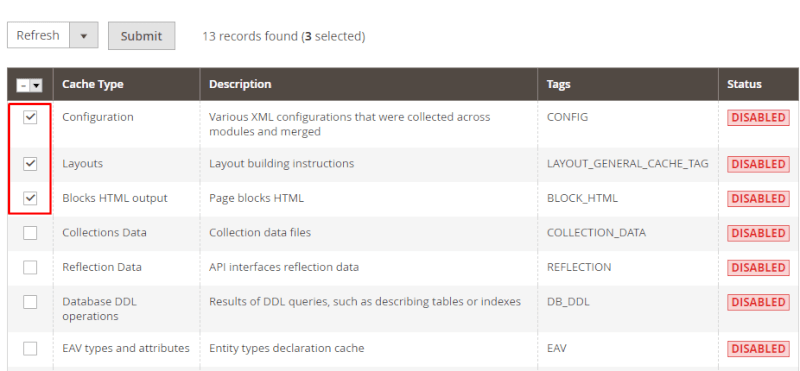
- Define the cache types that need to be refreshed;
- Tick the Cache Type blocks that are assigned Invalidated status or choose All if you don’t know what to refresh;
- Set Refresh action and click the Submit button:
- You can also use the ‘Flush Magento Cache’ and ‘Flush Cache Storage’ buttons directly.
What is the difference between flush Magento cache and Flush Cache Storage?
*‘Flush Magento Cache’: allows for refreshing cache you see in the backend and remove inner cache with Magento tag;
*‘Flush Cache Storage’: refreshes cache of all Magento stores sharing one cache storage (like Redis, magento Memcache), though based on different servers.
!If you run one of the cache storages together with Magento-based websites of other merchants, having refreshed it like that, you’ll clear their cache too!
Option 2: Magento Clear Cache via Command Line
Magento 2 allows you to clear cache manually via the command line. To clear Magento 2 cache manually you may need the next commands:
- To enable the cache:
php bin/magento cache:enable
- To disable the cache:
php bin/magento cache:disable
- To flush the Magento 2 cache via command line:
php bin/magento cache:flush
- To clean the cache in the website:
php bin/magento cache:clean
To clean particular cache types, you need to specify (comma-separated) the types, e.g.: config, layout, block_html, collections, reflection, db_ddl, eav, etc.
Full Page Cache
You can enable Full Page Cache option to enhance your website performance and speed up pages load:
- Navigate to Store> Configuration> Advanced> System> Full Page Cache and choose one of the options you need Built-In Cache or Varnish Cache:
Built-in Cache setting is stated to be from 4 to 9 times faster than Varnish Cache.
Helpful hint: when looking for a complex caching solution, pay attention to the Full Page Cache extension that offers:
- 5 algos to prioritize pages for cache warming,
- separate warming for mobile pages,
- Hole Punch for excluding particular blocks from caching,
- cache auto-update after any changes introduced to your prod catalog and
- all-inclusive cache warmer report with any emerging errors or lag reports.
Magento 2 Cache Clean vs. Flush
To remove played out items from your website you can run both the commands: clean and flush Magento 2 cache. However, you need to learn the difference:
| Clean cache | Flush cache |
|---|---|
| It deletes all enabled cache types from Magneto 2. Thus, disabled cache types are not cleaned. | It cleans all the cache types collected in a storage, which may affect other processing applications that run the same cache storage, e.g.: other websites (even of other owners). |
How to enable cache types?
If you need to clear particular cache types, which haven’t been automatically assigned Invalidated status, you need to return to the Cache Management menu to make the next settings:
- Tick the cache types you need to refresh:
- Set Enable on the upper left drop-down menu and click Submit:


Login and Registration Form