- Knowledge Base
- Most Asked Magento-Related Questions
- Magento 2 Stores and Timezones Configuration
Magento 2 Stores and Timezones Configuration
Having installed Magento 2, you should complete the general settings for your e-commerce website. To hunt down a question of the backend navigation and find a full list of settings you can make there, see Magento 2 Admin Panel Tutorial.
When configuring time zones for different nations, you may also need to redirect users to the needed language version of your website. For this, try out this Magento 2 GeoIP extension. Besides, look at our Order Number solution to create custom numeration and avoid mess.
Magento 2 Configuration Settings
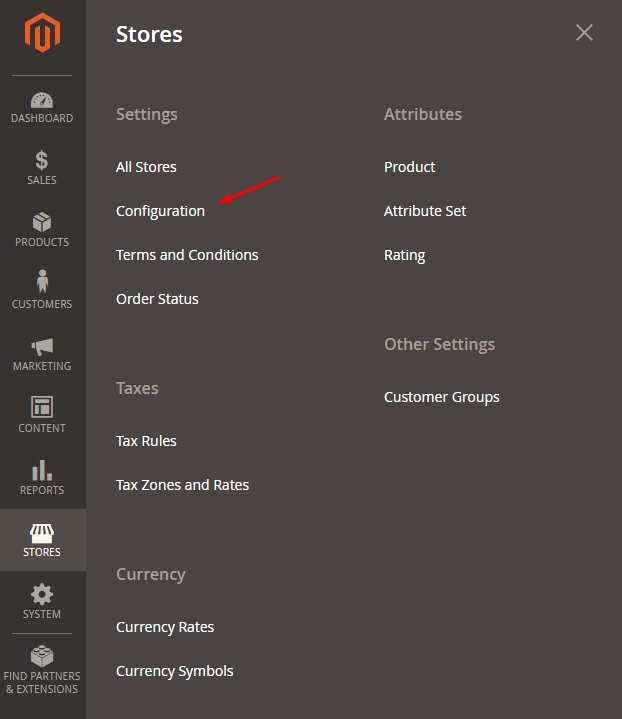
- Log in to the Admin Panel and then go to Stores>Configuration:
- Select General from the left-side navigation menu:
Locale Options
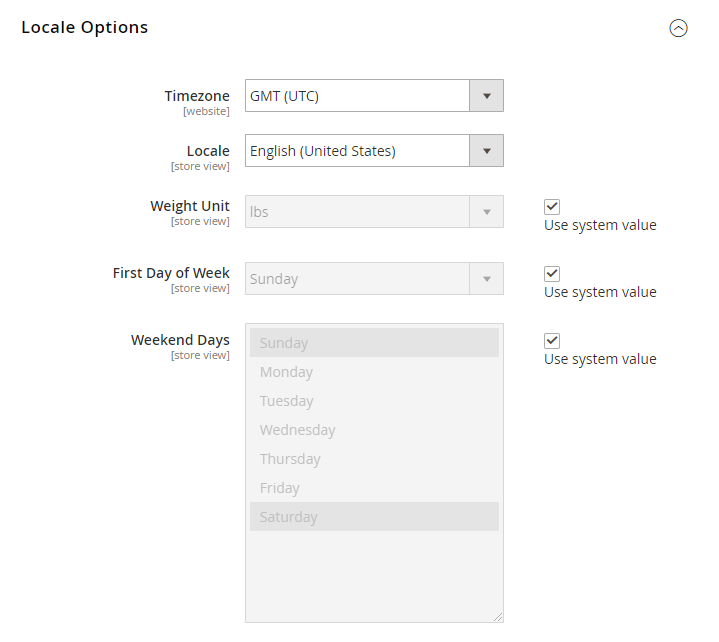
- Choose Locale Options from the drop-down menu to complete the next settings:
Timezone: choose the timezone of your Magento 2 store from the list;
Locale: choose a default language;
Weight Unit: choose the weight unit you need, either kilograms (kgs) or pounds (lbs). The unit will be applied to the products of your store and weight shipping;
First Day of Week: configure a work calendar for your store;
Weekend Days: choose the weekend days for your store.
- Save the changes right now or after all the settings are finished and clear the cache.
The settings are also required when adding a new Magento 2 Language Pack.
Store Information
- Expand the Store Information drop-down menu and proceed with the settings:
Store Name: fill in the name of your store;
Store Phone Number: fill in your store contact phone number;
Store Hours of Operation: define your store working hours here;
Country: choose a country where your store is situated;
Region/State: specify the region where the store is located;
ZIP/Postal Code: fill in a ZIP/Postal code of the area you have indicated above;
City: specify the city where your store is located;
Street Address: type in the street address of your store;
Street Address Line 2: fill up if required;
VAT Number: specify the VAT number of your store to make sure VATs are accurately calculated.
- Save the settings and don’t forget to clear the cache: System>Cache Management>Flush Magento Cache.
Right after Magento 2 installation, you may also need to learn how to set a custom admin URL and how to change the default logo. Besides, you can see how to configure Magento 2 contact form. Later on, when all the basic processes will be established you can find out how to set up Google Analytics, PayPal integration, and other settings.
See also: How to configure Fastly in Magento 2 →


Login and Registration Form