User Tools
Site Tools
Sidebar
magento_2:google_account_login
Table of Contents
For more details see how the Google Account Login extension works.
Ultimate Guide for Magento 2 Google Account Login
Reduce admin login time with Magento 2 Google Account Login. Instantly access your store backend without remembering and typing complex passwords.
- Quickly sign in to your store using Google Account
- Allow one-click login for your employees
- Avoid manual access administration
- Easily login from mobile devices
- Strengthen security with Google cross-account protection
Extension Configuration
Magento 2 Google Account Login will help you and your team be quickly authenticated in the Magento store backend using the G-Suite account.
Adjust Google Account Settings
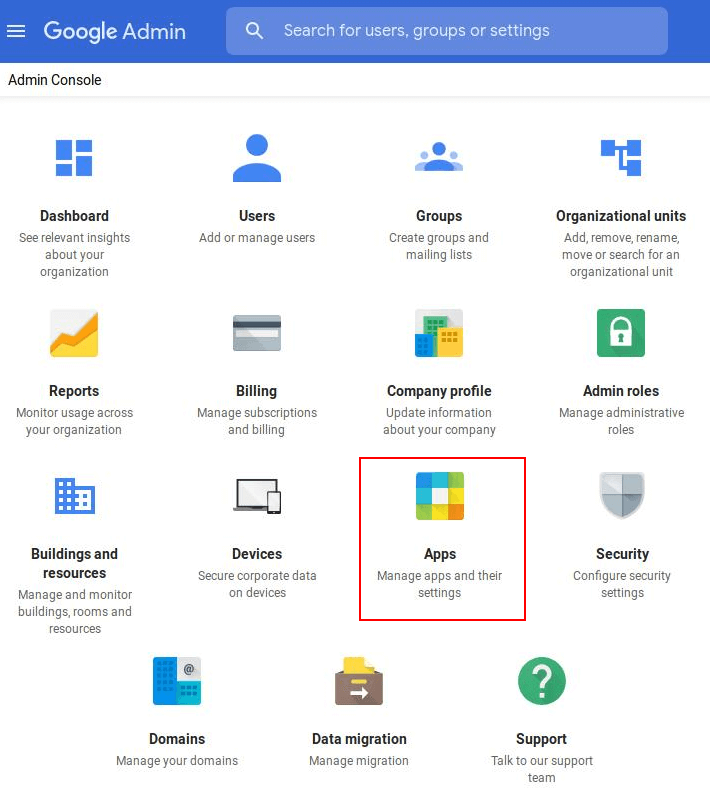
Let's start with Google account settings. Please go to your Google Admin Console Home Page → Apps. If you don't see the Apps on the Home page, please click More controls at the bottom.
Choose SAML Apps here.
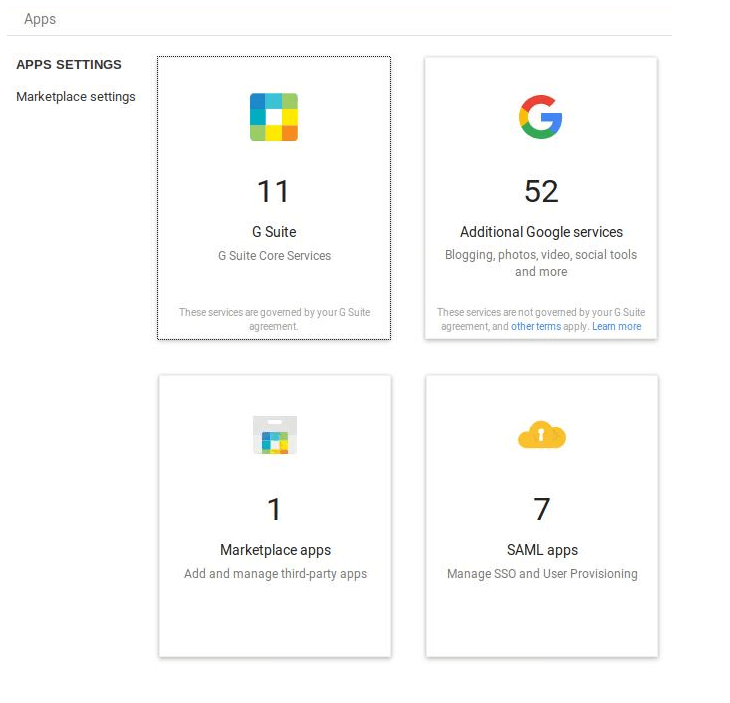
In the next window click '+' at the bottom right to enable SSO for SAML application.

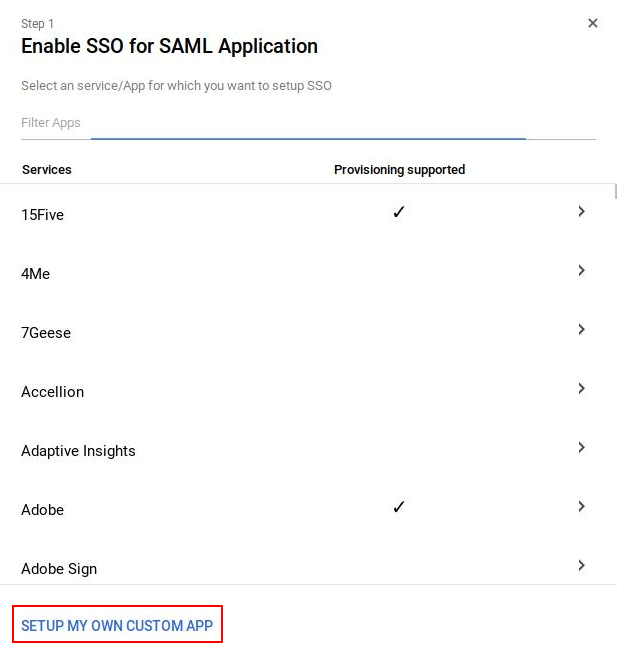
Next, please click Set up my own custom app at the bottom of the window.
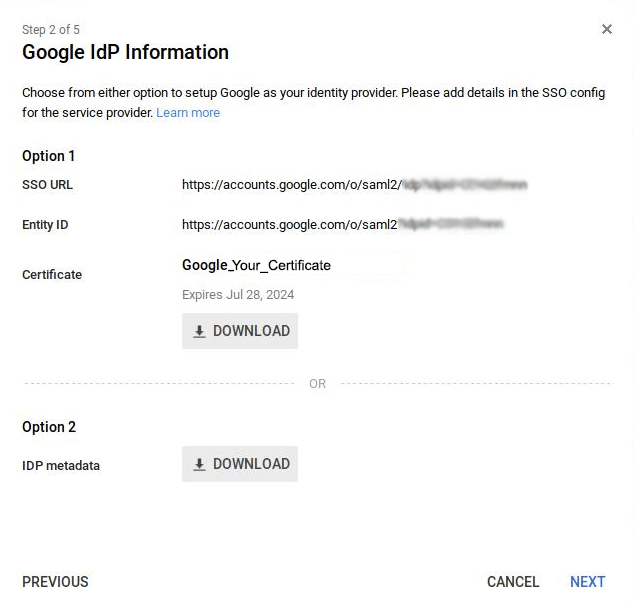
The Google IDP Information window opens and the SSO URL and Entity ID fields are automatically filled. Get the setup information needed by the service provider using one of these methods:
- Copy the SSO URL and Entity ID and download the Certificate.
- Download the IDP metadata.
Configure Extension General Settings
In a separate browser tab or window, sign in to your Magento admin panel, go to Google Account Login general settings: Stores → Configuration → Google Account Login.
The extension requires an additional Google Account Login package to be installed. Please, run the following command in the SSH: composer require onelogin/php-saml
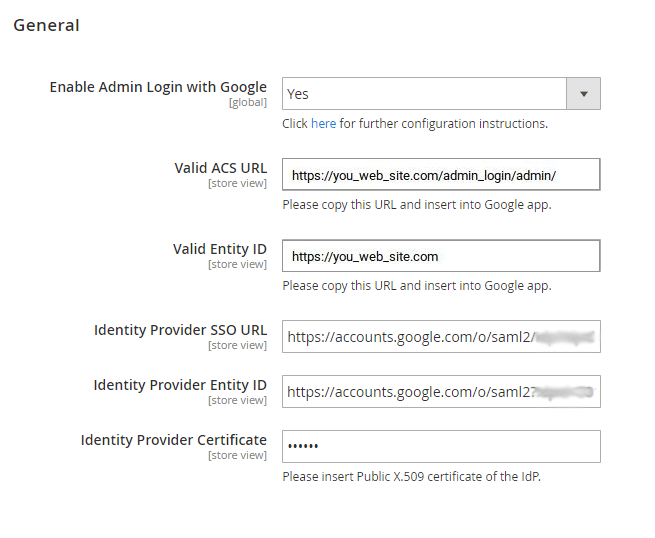
Enable Admin Login with Google - set to 'Yes' to enable the extension.
The fields Valid ACS URL and Valid Entity ID will be filled in automatically.
Fill in the fields Identity Provider SSO URL, Identity Provider Entity ID, Identity Provider Certificate with the info you've recently copied from the Google IDP Information window.
Then please, return to the Google Admin console.
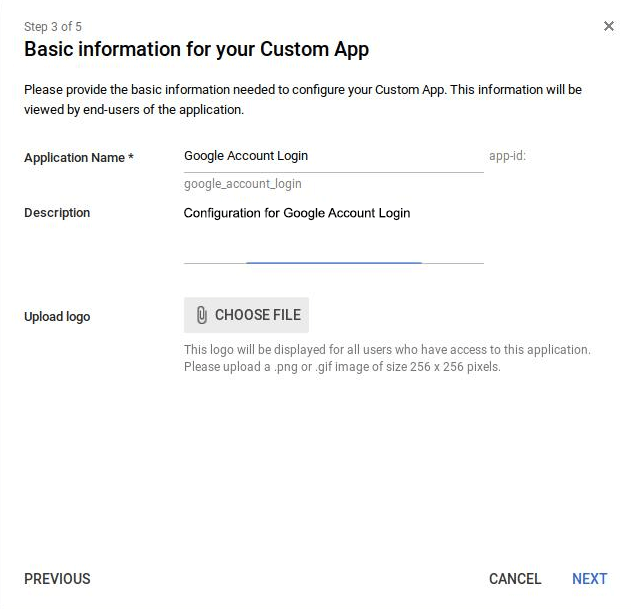
In the Basic Information window, add an application name and description. You may also upload a PNG or GIF file to use as an icon for your custom app. Note, that the icon image should be 256 pixels square.
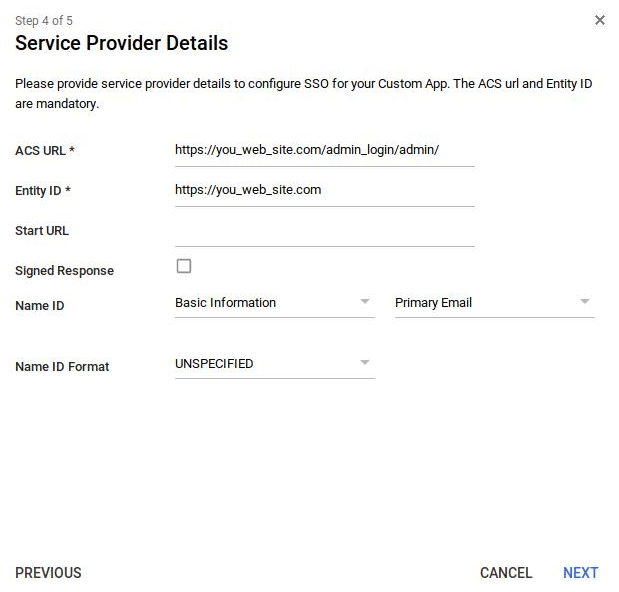
In the Service Provider Details window, enter an ACS URL, Entity ID, and Start URL (if needed) for your custom app. You may copy these values from the Magento 2 Google Account extension settings.
Add New Mapping
Please, click 'Add new mapping' on the Step 5 window and enter a new name for the attribute you want to map. Note, that you can define a maximum of 500 attributes over all apps. Because each app has one default attribute, the total amount includes the default attribute plus any custom attributes you add. In the drop-down list, select the Category and User attributes to map the attribute from the Google profile. Also note, that you cannot use Employee ID for attribute mapping. Then Click Finish.
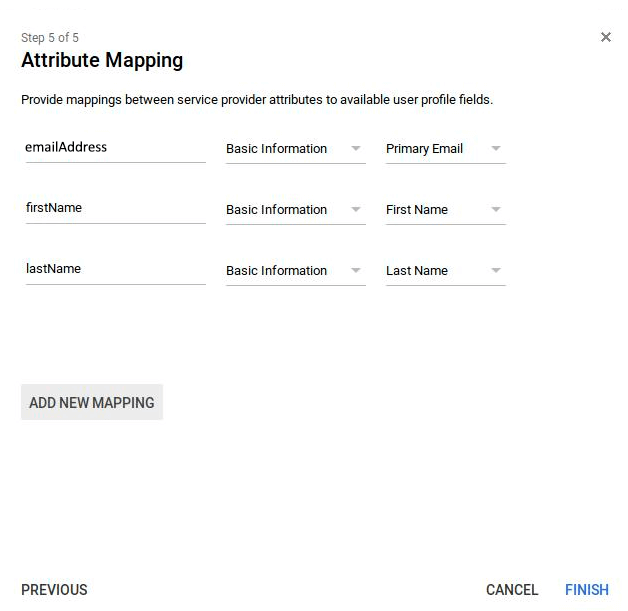
Note to add admin user email mapping (emailAddress field in our example). Using this mapping, Google Account Login extension will automatically login you and your employees to your Company Google account.
Now it's time to turn on SSO to your new SAML app. From the Admin console Home page, go to Apps → SAML Apps. Select your new SAML app. Then, at the top right of the gray box, click Edit Service.
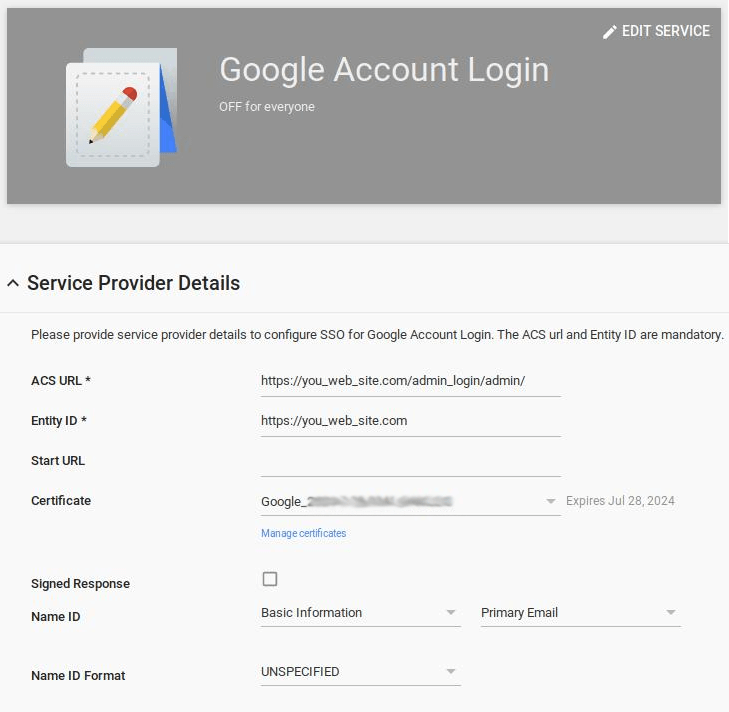
Turn On the Service in Google Admin Console
To turn on or off service for everyone in your organization, click On for everyone or Off for everyone, and then click Save.
To turn on or off service only for users in an organizational unit, at the left, select the organizational unit. Select On or Off.
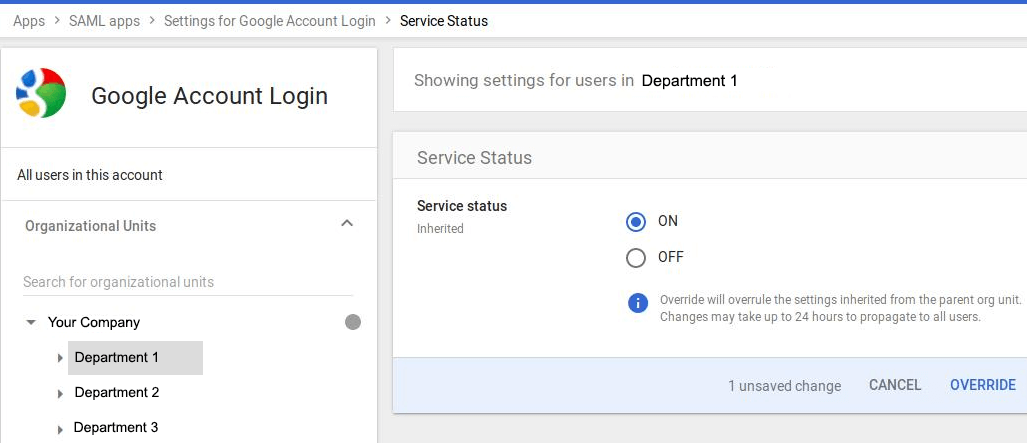
To keep the service turned on or off even when the service is turned on or off for the parent organizational unit, click Override. If the organization's status is already Overridden, choose an option Inherit-Reverts to the same setting as its parent. Don't forget to save your configuration.
Prevent your store from the common Internet threats like keyloggers, data sniffing and unsecured wi-fi connections using Magento 2 Two-Factor Authentication. Stay convinced that your Magento account is available only to your staff members.
Find out how to install the Google Account Login for Magento 2 via Composer.
magento_2/google_account_login.txt · Last modified: 2021/06/14 09:56 by asemenova
