
Sidebar
magento_2:custom_button
Table of Contents
For more details see how the Custom Button extension works.
Guide for Magento 2 Custom Button
Wrap links in customizable buttons to smoothly embed them into your website. Proactively interact with your site visitors by simple yet efficient UX enhancement.
- Create custom buttons of any color and size
- Locate buttons on any page of your store
- Specify custom text for your buttons according to your business needs
- Set up catchy animation on hover to motivate more clicks
- Redirect shoppers to any page by linking buttons with specific URLs
- WCAG compliant (for Hyva Theme)
- Hyva-ready storefront
- Hyva checkout compatible by default
The extension is compatible with the Hyvä Theme and meets WCAG requirements for the Hyvä Theme. To enable compatibility with the Hyvä Theme and WCAG compliance, install the 'amasty/module-custom-button-hyva' package from composer suggest. Please note that both compatibility features are available only with an active product subscription or support subscription.
Configure Default Color Scheme
With the Magento 2 Custom Button extension, you can configure default color schemes for two types of buttons: Primary and Secondary. Please navigate to Stores → Configuration → Amasty Extensions → Custom Button:
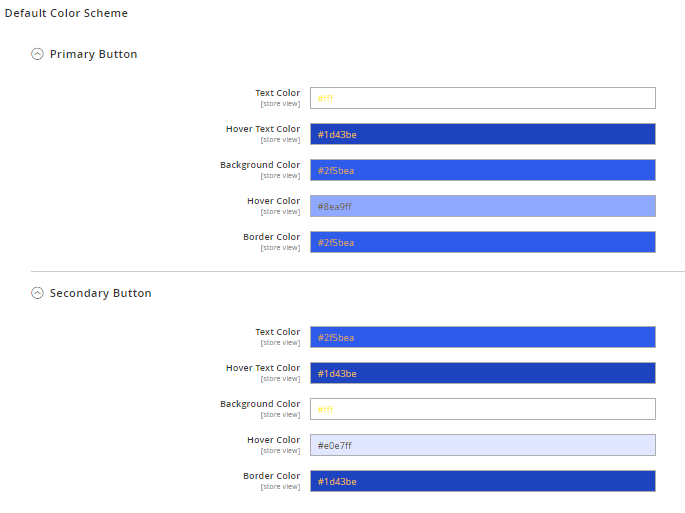
For both types of buttons, you can set:
- Text Color
- Hover Text Color
- Background Color
- Hover Color
- Border Color
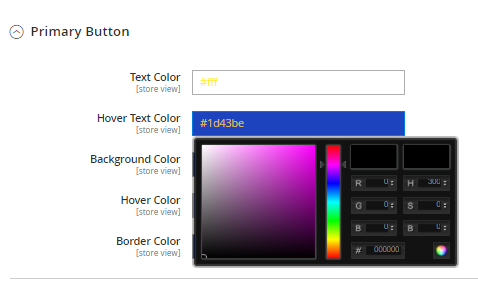
You can fill in the needed color manually or use a color picker for more convenience.
The default color schemes can be edited for particular Store Views.
Create Custom Button via Widget
You can add a custom button to your webstore pages and adjust its settings for particular purposes via Widget. Please, proceed to Content → Widgets:
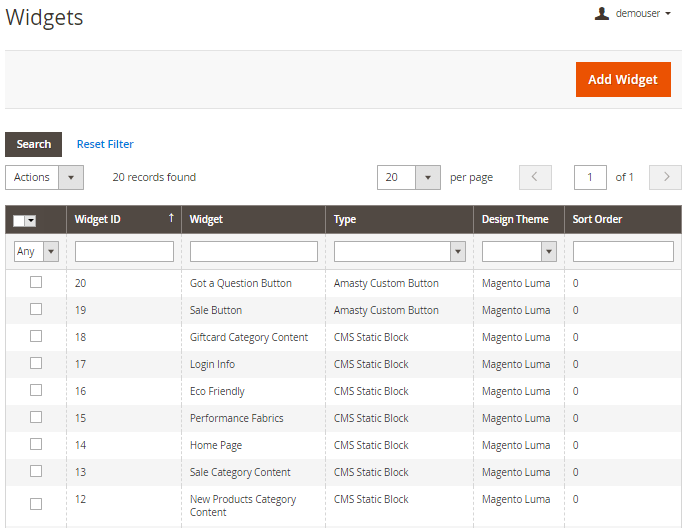
Hit the 'Add Widget' button.
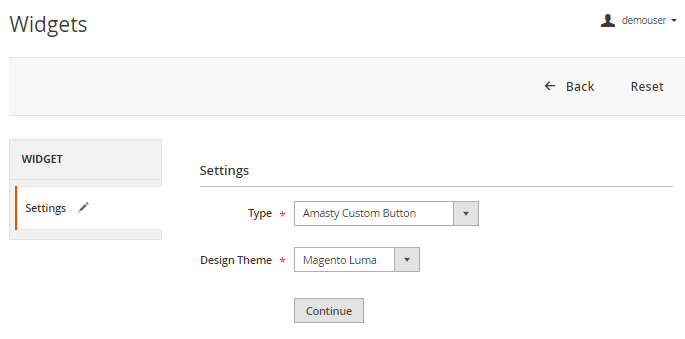
Type - in this field, please choose Amasty Custom Button.
Design Theme - specify the design theme.
Now, tap the 'Continue' button.
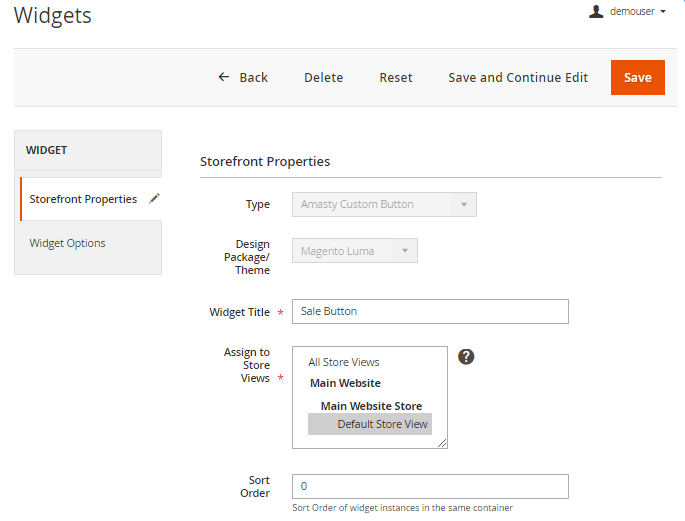
Let's start from the Storefront Properties tab.
Widget Title - specify the widget title (for your internal use).
Assign to Store Views - choose for which store views the widget should be enabled.
Sort Order - fill in the sort order for the widget if needed.
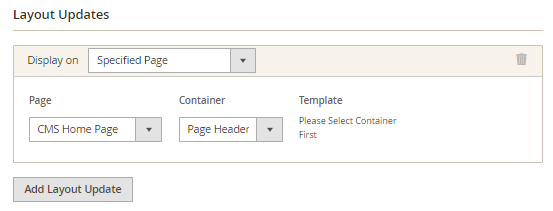
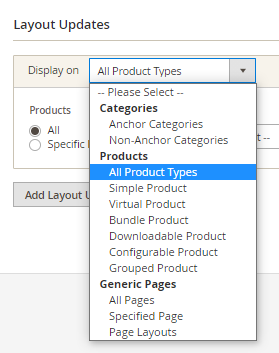
In the Layout Updates section, please set where to display your custom button. You can show the button on all the Product, Category, and Generic pages, or choose only specific pages.
In the Container field, you can specify the particular place on the page, where the button will be displayed.

Now, let's go to the Widget Options tab.
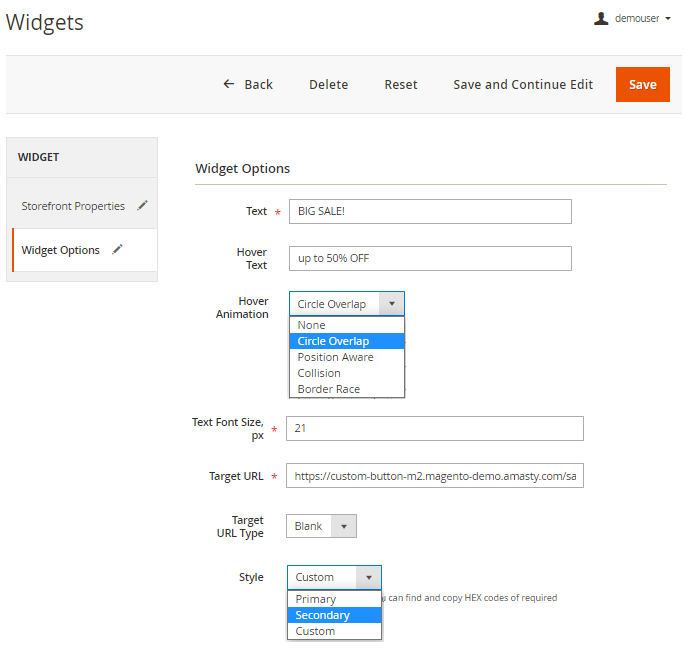
Text - add the text that will be visible on your custom button.
Hover Text - here you can add the text, that will appear on your button on hover. Leave it empty if you don't need to change the text on hover.
Hover Animation - choose one of the four available types of animation for your custom button: Circle Overlap, Position Aware, Collision, Border Race. Choose 'None' if you don't need animation on the button.
Text Font Size, px - fill in the font size for the button text.
Target URL - add the link to redirect customers to the particular page from the button.
Target URL Type - specify whether to open the target page in the same window or in the new one.
Style - here you can choose one of the two default button color schemes, configured previously (Primary or Secondary) or you can set a custom color scheme for your button. In such a case you should fill in the needed color values in the following fields. You may find and copy HEX codes of required colors from here.
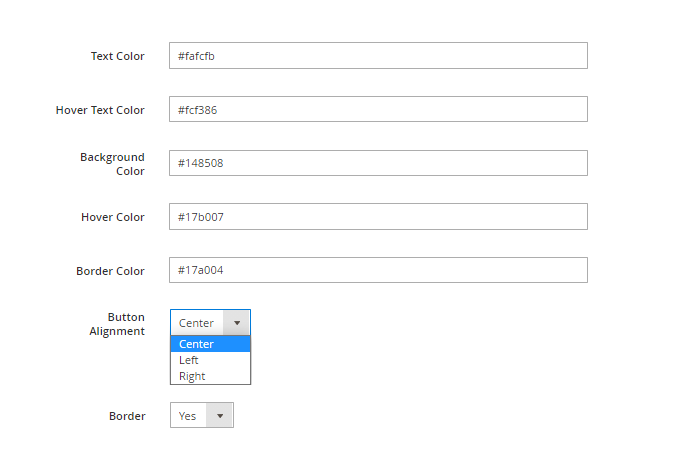
Button Alignment - specify the way of alignment of the button (left, right, center).
Border - set to 'Yes' to display the button with the border.
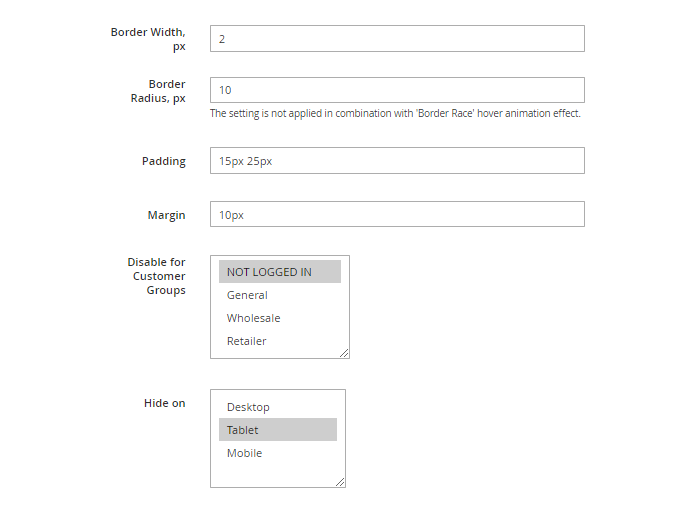
Border Width, px - here you can adjust the border width.
Border Radius, px - in this field you can adjust the button corners rounding. Note, that this setting is not applied in combination with 'Border Race' hover animation effect.
Padding - here you can set the height and the width of your custom button.
Margin - this setting allows for adjusting the indents around your button.
Disable for Customer Groups - with the extension you can also configure for which customer groups your custom button will be visible.
Hide on - also you can specify the types of devices (desktop, tablet, mobile) for which the button will be hidden.
You can also add a custom button via the 'Insert Widget' functionality when editing the content of any page or block.

Frontend Examples
Display custom button on generic and category pages:

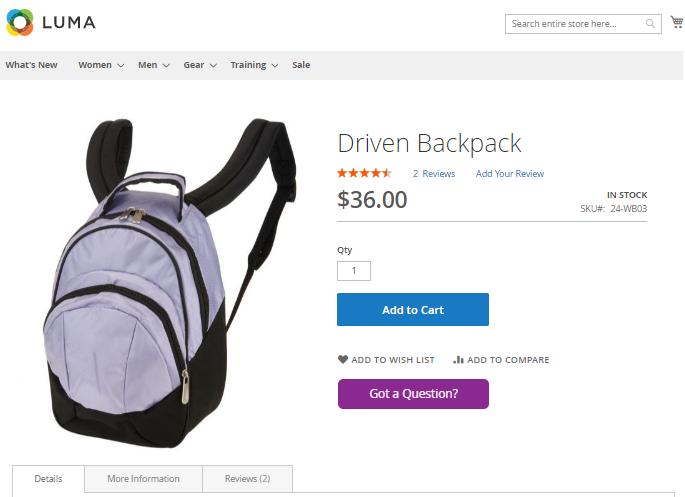
Place custom button on product pages:
Find out how to install the Custom Button extension for Magento 2 via Composer.
magento_2/custom_button.txt · Last modified: 2025/03/10 11:56 by asemenova