
Sidebar
magento_2:chat
Table of Contents
For more details see how the Live Chat for Magento 2 extension works.
Guide for Live Chat for Magento 2
Let customers be always in touch with you! Provide them with proper and convenient communication in channels that they are used to with Live Chat extension.
- Grow sales with orders made via chat
- Provide an easy way for your customers to reach you
- Reduce abandoned carts with timely provided consultancy
- Cut expenses on custom chat solutions
Configure General Settings
To access the settings of ‘Live Chat for Magento 2' please go to Stores → Configuration → Messenger Widget
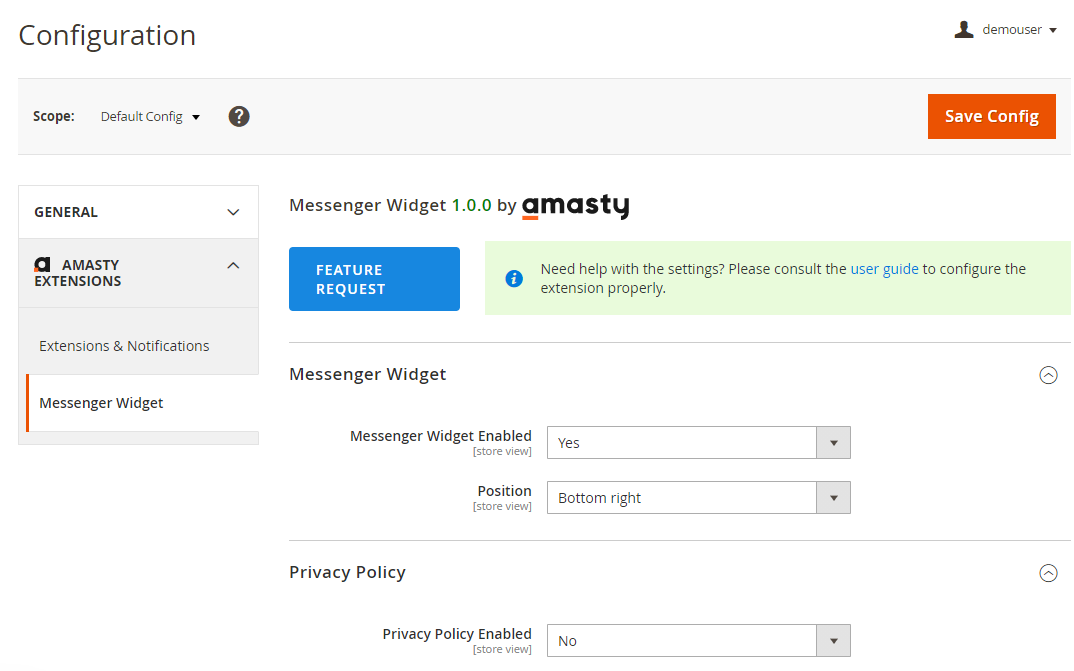
Messenger Widget
In this section, you can enable/disable the module and set a custom position of the messenger widget on your site.
Messenger Widget Enabled - The option turns on/off the module.
Position - This option allows you to choose the position of Messenger Widget on your website. Please, choose one of six available positions:
- Bottom right
- Bottom left
- Middle right
- Middle left
- Top right
- Top left
If you have more than five messengers, they will be displayed vertically in a row on your website. Please note, that in the mobile version the widget is visible only from the bottom left and bottom right positions.
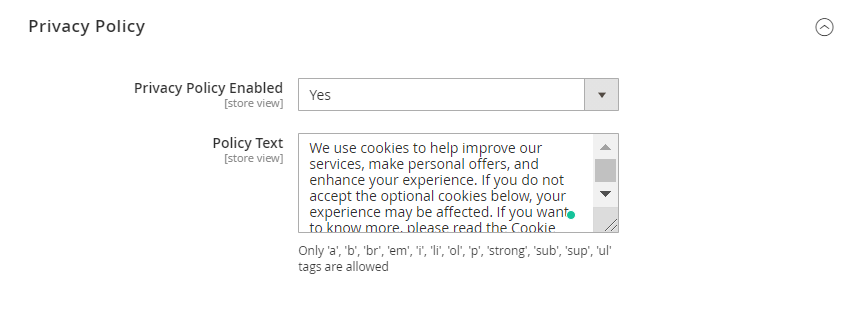
Privacy Policy Enabled - The option enable/disable the Privacy Policy pop-up. Set 'Yes' if you want to add a pop-up with any custom Privacy Policy text in your store which will be displayed until the customer accepts it.
Messengers
To view, edit and create messenger widgets, please go to Marketing → Messengers. A convenient grid displays all existing messengers. Discover mass actions to delete or change messenger status faster. To submit a new entry, please click the 'Add New Messenger' button in the upper right corner of the page.
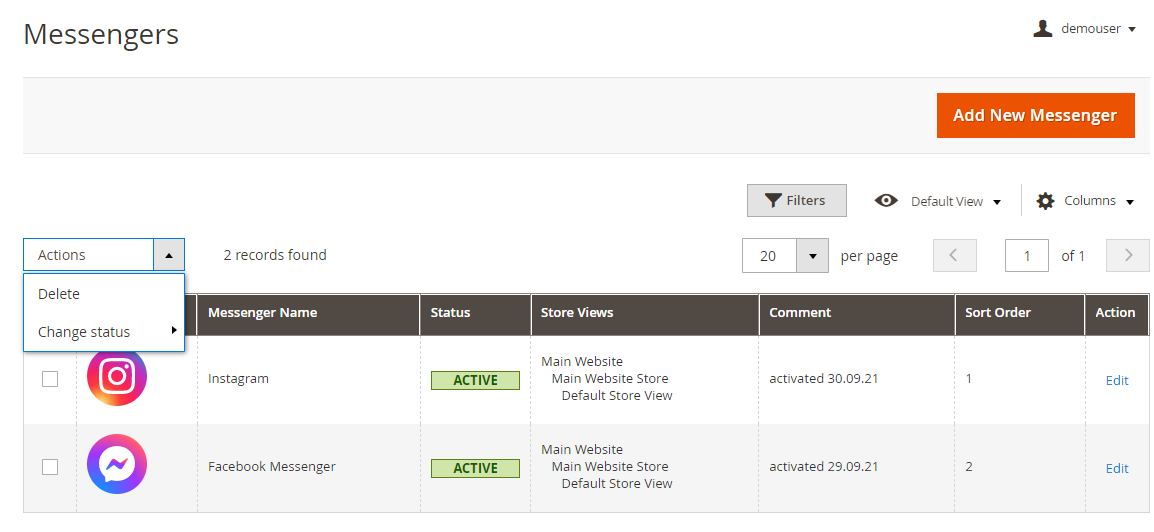 Every messenger on the grid has an ‘Edit’ option. If you want to make some changes in the messenger settings, select this option or just click the post line.
Messenger Properties
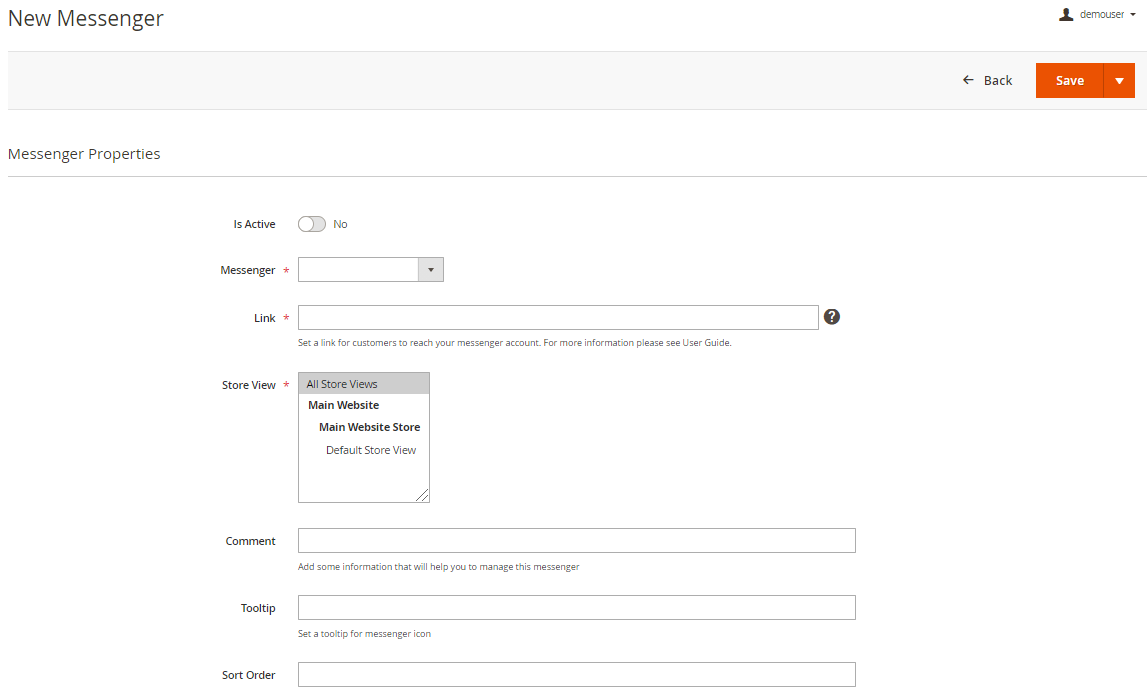 Is Active - The option activates/inactivates the messenger in the widget.
Messenger - Here you can select a required messenger from the list. The module supports the following messengers:
- WhatsApp
- Facebook Messenger
- Snapchat
- Skype
- Discord
- Viber
- Telegram
- Kik
- Line
- WeChat
- KakaoTalk
- Tango
- imo
- Instagram
- Twitter
- QQ
- Threema
- Signal
- Wire
You can always add any messenger not from the list by selecting the ‘Other’ option. You also need to add a custom title and upload an icon for the new messenger.
Link - In this field, you need to enter a link to your profile/account in the messenger to allow customers to contact you.
Store View - Specify the store view the messenger will be displayed on.
Comment - Here you can add any custom comment to the messenger that will help you while managing all messengers.
Tooltip - In this field, you can add a custom tooltip for the messenger icon.
Sort Order - Set the sort order of a messenger in the widget.
After creating the messenger, click the ‘Save’ button in the upper right corner of the page. You can also delete any messenger from the grid in this section by clicking the ‘Delete Messenger’ button.
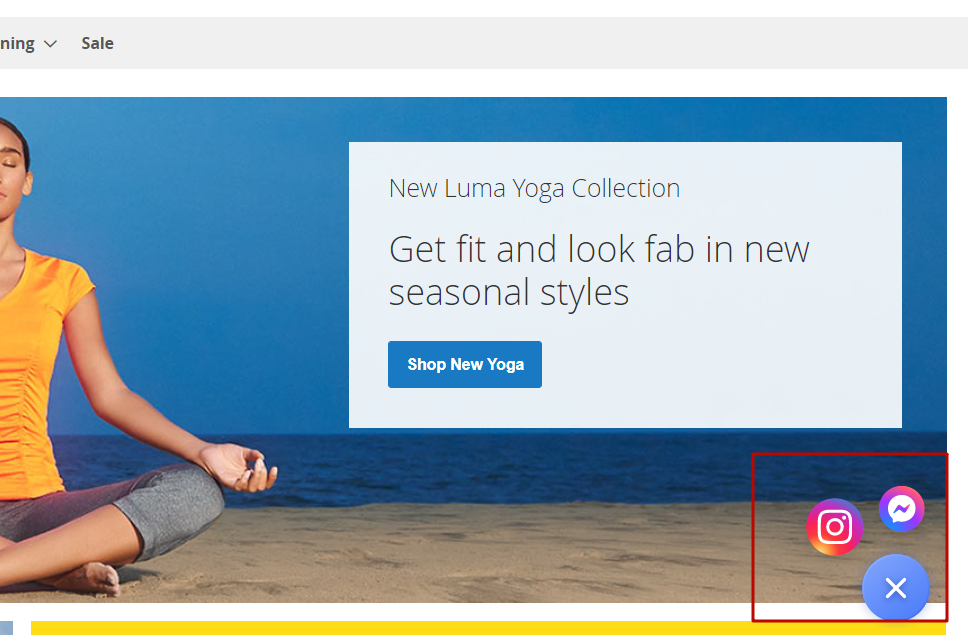
 Now you can see the created messenger in the widget on the website.
Find out how to install the Live Chat extension via Composer.
magento_2/chat.txt · Last modified: 2021/12/03 09:14 by azolotorevich