
Sidebar
magento_1:promo-banners-lite
Table of Contents
This extension is a part of promotion extensions like Special Promotions and Auto Add Promo Items.
Promo Banners Lite
Banner positions and settings
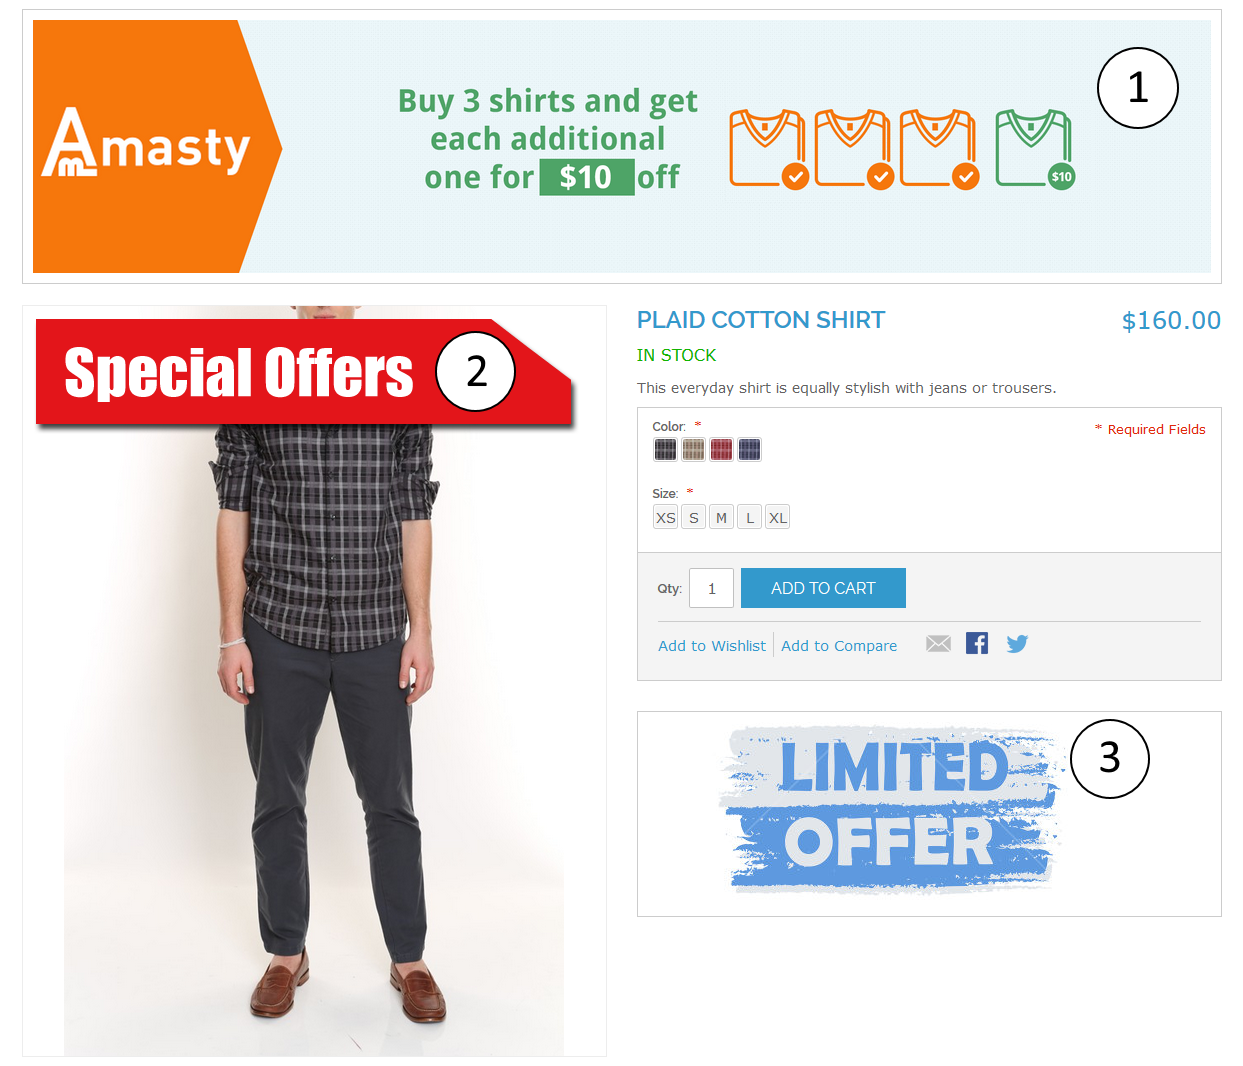 There are three positions on the product page where you can place a banner:
- Top Banner is placed on top of the product page, on the screenshot above this position is marked 1.
- Product label (ribbon) is added to a product image as a label, like it's pictured on the screenshot, position 2.
- After Product Description Banner is placed right after the product description or instead of it if description is absent. On the screenshot above this position is marked 3.
For banners in positions 1 and 3 you can set Alt text which is displayed when image loading is disabled, On Hover Text which will be displayed when mouse pointer is moved above the banner, Link which will open specified URL when banner is clicked and finally Description field where you set the text which will be displayed above banner.
With Show Banner for setting you can set to display banner on all product pages with All products option, or you can make the banner display on specific products or products from specific categories.
 In this example banners will show only on specified product pages.
 With these settings banner will show on all products in Mens Shirts category.
Promotion product images
Extension settings
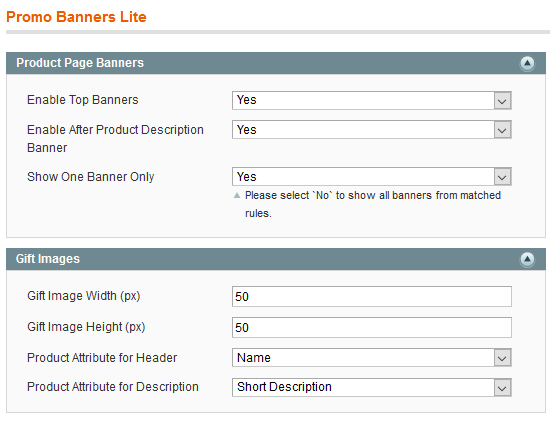
Enable Top Banners - controls Top Banner position, can be enabled or disabled store-wise.
Enable After Product Description Banner- controls After Product Description Banner position, can be enabled or disabled store-wise.
Show One Banner Only - when disabled, banners from different rules will stack up on the product page if there are multiple rules with banners applied. Enabled will show only the banner from the rule with highest priority.
Gift Image Width/Height (px) - set the necessary gift image parameters in pixels.
Product Attribute for Header - specify the value of a product to be displayed in the header.
Product Attribute for Description - select the attribute to be displayed in the description section.
GeoIP Database Installation
The module requires GeoIP database to be installed in order to detect users' location. Please go to System → Configuration → Amasty Extensions → Geo IP Data.
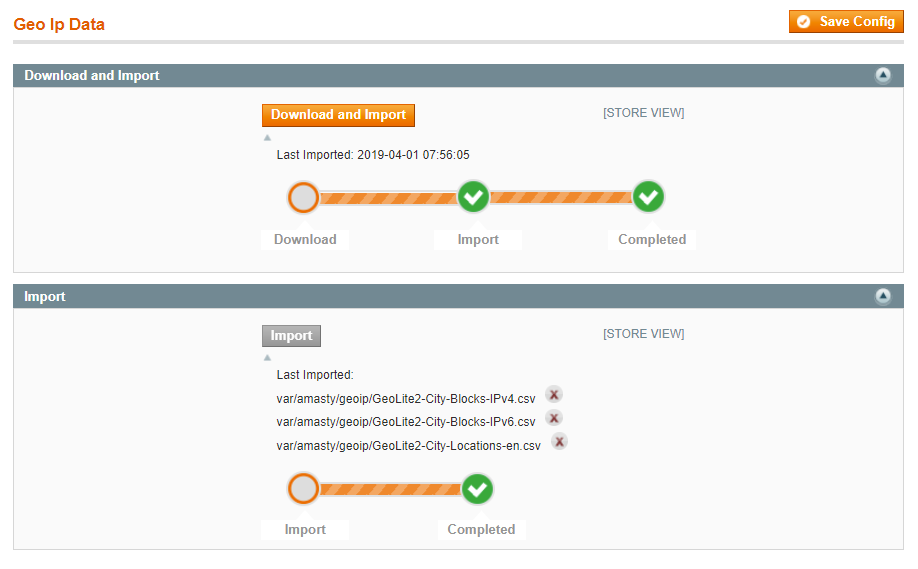
Databases are required for the correct work of the module. Also you need to install php bcmath or gmp extension on your server.
You can get the databases automatically or import your own data.
Hit the Download and Import button to make the extension download the updated CSV dump file and import it into your database automatically.
To import the files from your own source, use the Import option. Path to the files should look like this (the part 'var/amasty' should be replaced with your folders’ names):
var/amasty/geoip/GeoLite2-City-Blocks-IPv4.csv
var/amasty/geoip/GeoLite2-City-Blocks-IPv6.csv
var/amasty/geoip/GeoLite2-City-Locations-en.csv
In the Import section, the Import button is grayed out by default. It will be available right after you upload the CSV files. The red error notification will switch to green success notification when the import is completed.
magento_1/promo-banners-lite.txt · Last modified: 2019/04/11 12:13 by tihomirova