
Sidebar
magento_2:stripe-payment
Table of Contents
For more details see the way Stripe Payment extension works.
Guide for Stripe Payment for Magento 2
Improve your customers’ payment experience. Optimize the conversion rate by providing customers with a convenient and safe payment method.
- All payment needs in one solution
- Safe integration process with 3D Secure protection
- Fluent automatic invoicing function
- Convenient refund options and flexible management
- Fully compliant with the
- Compatibility with Stripe's Optimized Checkout Suite
- Hyva-ready storefront
- Hyvä Checkout ready
Magento 2 App for Payments with Stripe extension is compatible with Hyvä Theme and Hyvä Checkout. You can find the 'amasty/module-stripe-hyva' and 'amasty/module-stripe-hyva-checkout' packages for installing in composer suggest (Note: this compatibility is available as a part of an active product subscription or support subscription).
The Stripe Payment extension for Magento 2 is fully compliant to the Revised Directive on Payment Services (PSD2) that strives to create a secure payment process. It went into full effect on September 14, 2019. Please, re-install or update the extension to a version 3.0.0 to get all benefits of Strong Customer Authentication and 3D Secure v2.
Amasty is proud to be the first in the Magento market to have met security compliance requirements for activation keys and is now also pioneering the implementation of Stripe's Optimized Checkout Suite functionality. Read more about these features in our blog via this link.
This extension is now compatible with Stripe's Optimized Checkout Suite. This enables the configuration of Form Layout and Theme for the Stripe payment method (Note: this compatibility is available as a part of an active product subscription or support subscription).
We’ve developed compatibility with Stripe's Extended Authorization Hold feature, which allows holding customer funds for up to 30 days. This feature is available only with IC+ pricing on Stripe accounts and works with select bank cards. This feature does not work with the ‘Elements’ form type. Learn about this feature in Stripe documentation To try this feature and get more detailed information, please contact our support team [email protected] .
Set Configuration
To configure the extension, you’ll need your Stripe account.
To integrate the merchant's stripe account with a Magento store, please go to Stores → Configuration → Payment methods → Other Payment Methods → Stripe by Amasty.
If you have any troubles with installation, please visit our troubleshooting checklist.
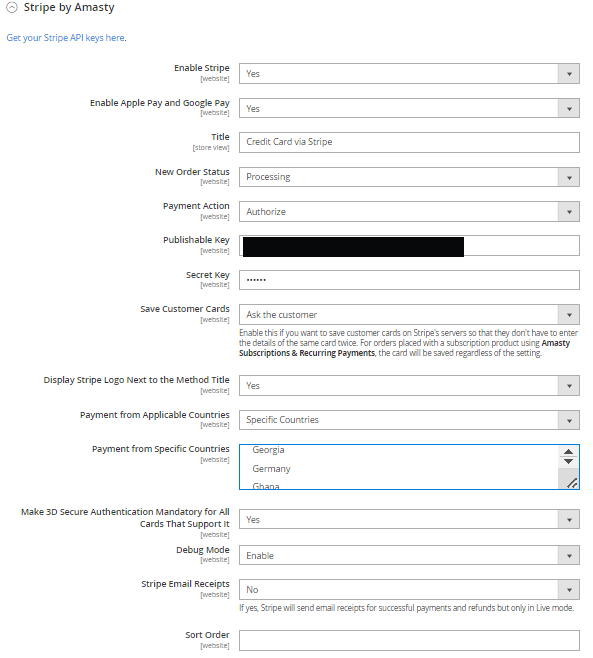
Enable - set to Yes to activate the payment method.
Enable Apple Pay and Google Pay – set to 'Yes' to enable payments via Apple Pay and Google Pay.
When making a payment via Google Pay and Apple Pay, the addresses provided during the order placement will serve as both the billing and shipping addresses for the order. In the payment system's popup, there won't be any option available to choose a shipping address.
Title - specify the custom name of the Stripe payment to display on the checkout page.
New order status – you can select an order status after the payment is captured. There are 2 available order statuses: 'Processing' and 'Pending'.
Form Type - in this dropdown, you can customize your perfect checkout with Elements:

After choosing Elements in the Form Type field the following settings will be displayed:

Please, note:payment methods must be activated in the Stripe account to appear in the Card Elements.
Form Layout - choose the layout that will be used for displaying of Stripe's payment methods:

Theme - choose the Theme that will be applied on Checkout for Stripe's payment methods:

See the variations of customized Checkout in this User Guide
Define the type of Payment Action:
- Authorize - to check a card validation without charging until the order is invoiced and approved.
- Authorize and Capture - to debit money immediately after order submission.
To get a Publishable Key and a Secret Key, please navigate to the Stripe App Marketplace, then click Install the Amasty Stripe for Magento 2 (or just open this direct link https://marketplace.stripe.com/apps/amasty-payments-for-magento-2).
Since January 2024, Stripe requires plugins to leverage Stripe Apps. All new and existing plugins must use a Stripe App to authenticate users for their service using OAuth 2.0 or a restricted API key.
- Click Install app to proceed with the new authentication method;
- Select the Stripe account where you want to install the app;
- Review and approve the app permissions, install the app (it is also available to install the app in the test mode);
- After you install the app, store the keys in a safe place where you won’t lose them. To help yourself remember where you stored it, you can leave a note on the key in the Dashboard.
- To get new security keys after installation, navigate to the application settings page in test mode or live mode and click View API keys.

- Copy Publishable key and Restricted (Secret) key;

- Paste it into the extension’s backend settings.

Save Customer Cards – set to 'Ask the customer' to save customers' cards details on Stripe's servers so that they don't have to enter them when purchasing again.
Display Stripe Logo Next to the Method Title – set to 'Yes' to display Stripe Badge. It helps to increase trust and make your customers feel more secure.
Payment from Applicable Countries - accept payments made via Stripe from All Allowed Countries or from Specific Countries.
Payment from Specific Countries - select the countries for which the Stripe payment method will be allowed.
Make 3D Secure Authentification Mandatory for All Cards That Support It – set to 'Yes' to surely prevent malicious actors from stealing any sensitive information.
Debug Mode - enable this option if you want to track payment processes.
Stripe Email Receipts - set to 'Yes' to let Stripe send email receipts for successful payments and refunds. It works only in Live mode.
Sort Order - specify the order according to which this payment method will be placed.
To test the module, see this information.
Partial Invoicing
If a customer drops an order and there are not enough goods to complete it, you can use partial invoicing. In such a case you invoice fewer goods than ordered and meet customer's demand despite the low stock. When the goods become available, you complete the order.
To divide an invoice go to Sales - Orders and pick the order you want to invoice partially.
Than pick Invoice in the top menu and go to the Items to Invoice tab.
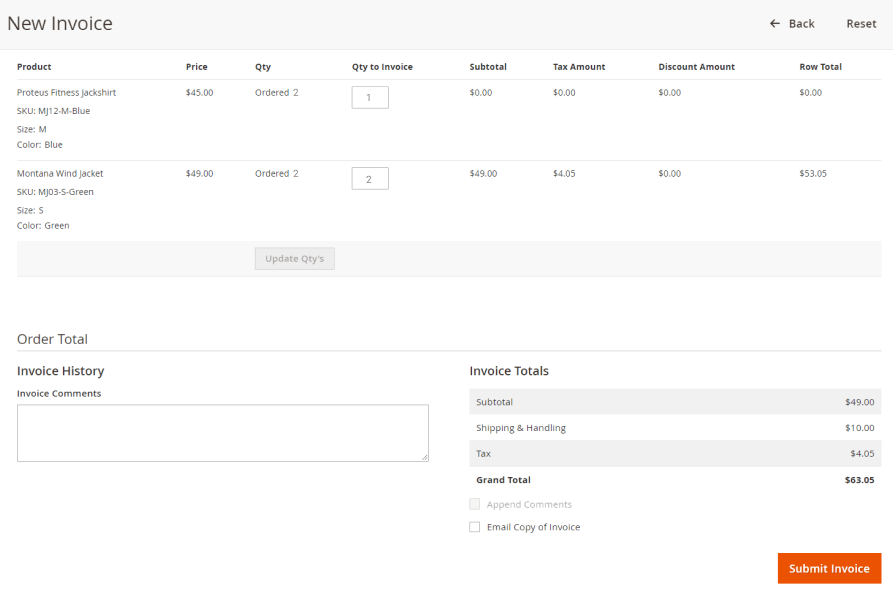
Set the number of items for the invoice and press Update Qty's button.
Submit the invoice by pressing Submit Invoice button at the bottom of the page.
Refunds and Partial refunds support
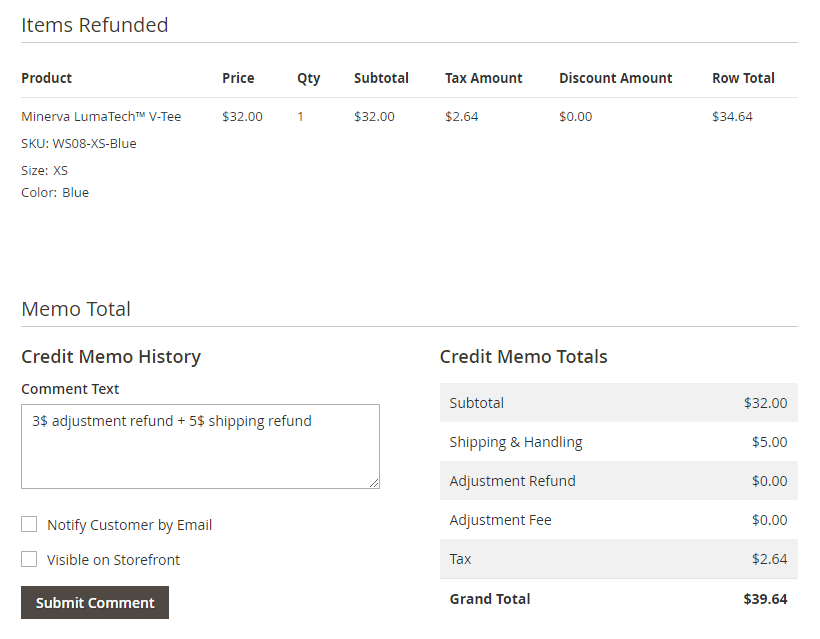
With the Stripe Payment extension, it is possible to make a full or partial refund of the order paid via Stripe payment. To see the detailed information about the refunds made, go to Sales → Credit Memos.
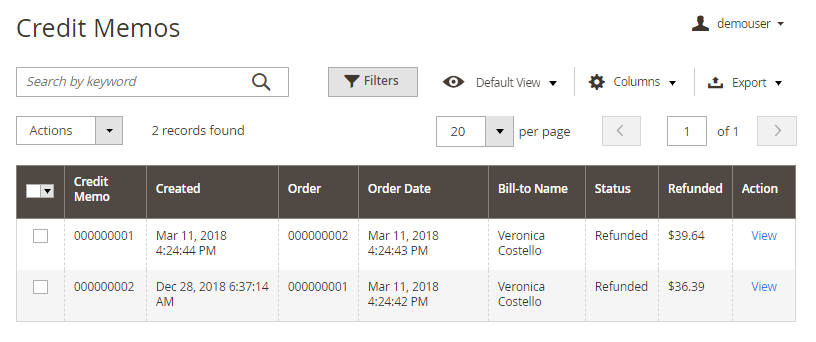
On a handy grid you can see the Credit Memo, dates the refund was Created, the Order and its Date, Bill-to Name, active Status and the Refunded sum.
You can easily find the necessary refund with the Search by keyword option or using Filters.
To see the details about each refund, click View in the Action column.
Admin can refund orders online from the grid.
Also it is possible to create orders and pay for them via Stripe from the admin panel. Go to Sales → Orders → Create New Order. After adding the products, choose the payment method.
Checking and Updating Access Rights (Permissions) for Amasty Stripe
If you encounter issues or errors related to permissions, follow these steps:
1. Verify the available permissions for the API key used with the Amasty Stripe app.
- Over time, required permissions may change, and older keys are not updated automatically. Therefore, it’s important to use the latest version of the key.
2. How to check current permissions:
- Go to the Amasty Stripe app page in Stripe Marketplace.
- Navigate to the Permissions tab and review the current list of permissions.
- Then, go to Stripe (Dashboard → Developers → API Keys).
- Find the key labeled “Key for Amasty Payments for Magento 2.”
- Hover over the tooltip icon next to the key to view the list of permissions.
3. If the permissions do not match the required ones:
- Reinstall the application to automatically generate a new key.
- Alternatively, you can use the Rotate Keys feature to update the keys, ensuring the current keys are displayed on the app page in your Stripe account.
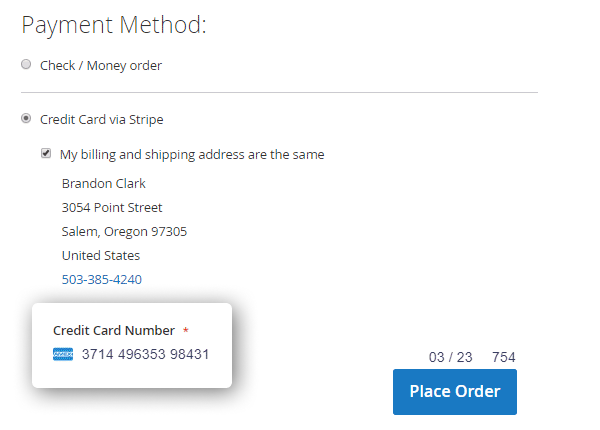
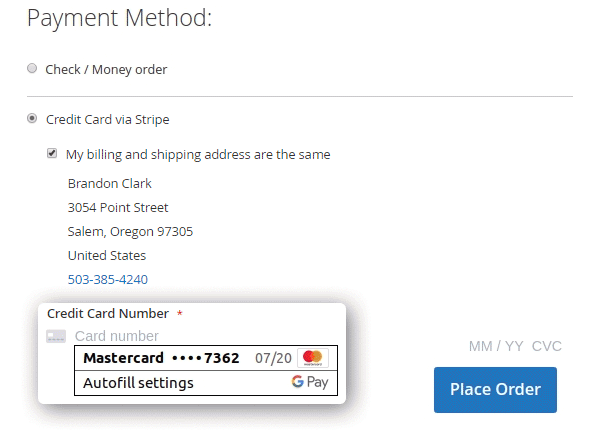
Show Stripe Payment on the Checkout Page
The customers will see the same formatting as they see on the card. The card type will be detected automatically.
Let customers choose the necessary card in one click instead of filling in a full checkout form.
Variations of customized Checkout:


To speed up the whole shopping process, see our One Step Checkout extension.
Find out how to install the Stripe Payment extension via Composer.
magento_2/stripe-payment.txt · Last modified: 2025/06/19 13:25 by avronskaya