
Sidebar
magento_2:california_consumer_privacy_act
Table of Contents
For more details see how the US Privacy Laws for Magento 2 extension works.
Guide for US Privacy Laws for Magento 2
Cover the key requirements of the latest US privacy laws with a single solution. Employ the Magento 2 US Privacy Laws extension to make your store compliant with the California (CCPA/CPRA), Colorado (CPA), Connecticut (CTDPA), Virginia (VCDPA), and Utah (UCPA) bills without any hassle. Ensure online privacy and strengthen customer trust.
- Let visitors know what data is being collected
- Let users reject personal data sales and sharing
- Provide buyers with the ability to download their data
- Allow customers to delete their info in one click
- Show privacy settings only to California residents in their customer accounts
General Settings
To configure the extension, please go to Stores → Configuration → Amasty Extensions → US Privacy Laws.
Expand the General tab.
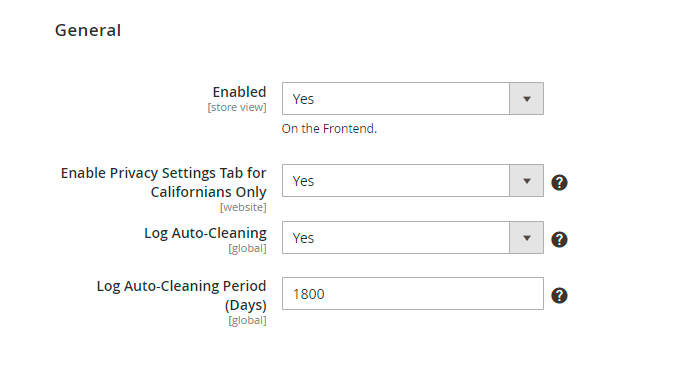
Enable - set to Yes to activate the extension.
Enable Privacy Settings Tab for Californians Only - if enadled, only Californian registered customers will see the Privacy Settings tab with the 'Don't Sell or Share My Personal Information' setting at their accounts. The customer Billing Address is used to detect the registration.
Log Auto-Cleaning - set to Yes to allow the extension automatically delete log records after a specified period.
Log Auto-Cleaning Period - set the number of days, after which log records will be cleaned. Be default, the number is 180.
Customer's Account Privacy Settings
In this tab, you can configure settings related to customer's account Privacy Settings block. Enable or disable certain features to match law requirements.
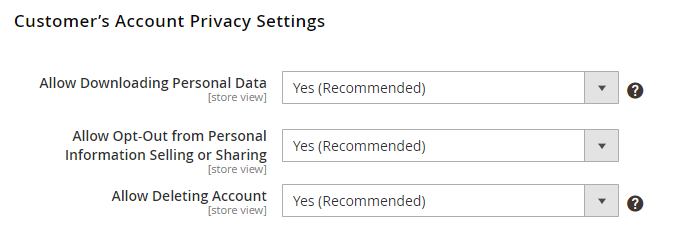
Allow Downloading Personal Data - set to Yes to let registered users download their personal data in a portable format.
Allow Opt-Out from Personal Information Selling or Sharing - set to Yes to allow displaying an opt-out checkbox in customers' accounts.
Allow Deleting Account - set to Yes to let users create requests to delete their accounts.
To see how these options look in Customer's account on the frontend, please navigate to the Frontend Examples section of this User Guide.
Personal Data Deletion
This tab has two dropdowns, in which you can meticulously adjust automatic data deletion and restrict data removal for specific cases. It is especially handy if you are required to store certain data for a set period of time to report taxes or other legal cases.
Automatic Personal Data Deletion
This setting helps you configure automatic personal data deletion.
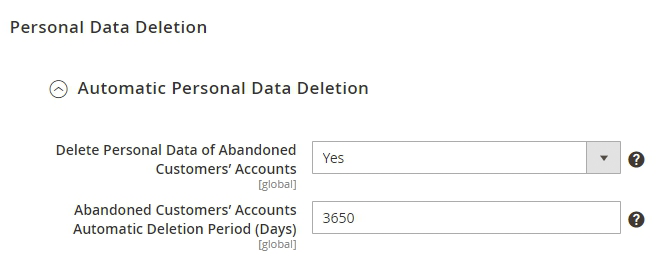
Delete Personal Data of Abandoned Customers’ Accounts - set to Yes to automatically create deletion requests for customer accounts that were last active long time ago.
Abandoned Customers’ Accounts Automatic Deletion Period (Days) - enter the number of days to mark the timeline for inactive accounts. If a customer last activity was more than X days specified in this setting, the deletion request will be created.
Prevent Data Deletion of Recent Orders
When the customer asks to delete personal data and the request is approved, the extension deletes their account, subscriptions, and their data in orders, invoices, shipments and credit memos. If this data is deleted, it could cause a problem for store owners, as these should be stored for a specific period of time. To adjust the deletion restriction in particular cases, please configure this tab.
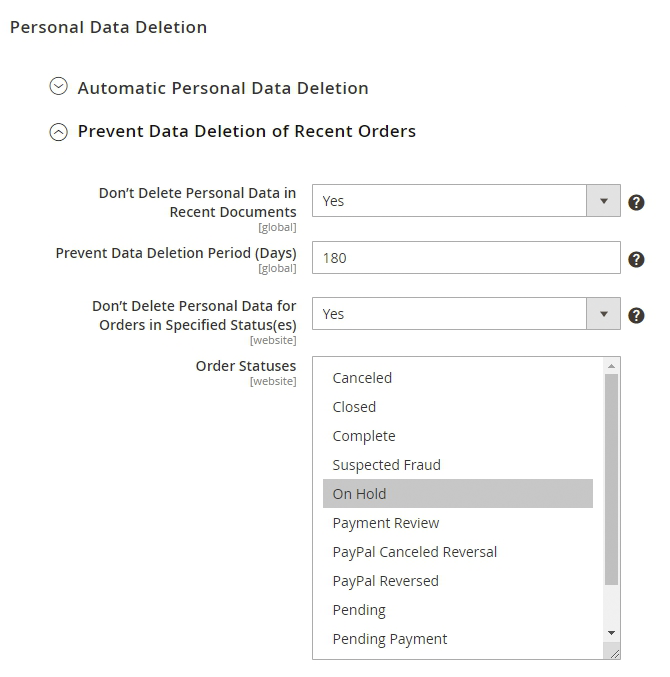
Don't Delete Personal Data in Recent Documents - set to Yes to enable saving data in recent documents.
Prevent Data Deletion Period (Days) - enter the number of days. After a customer deletes the account, personal data will stay untouched in orders, invoices, shipments and credit memos for the set period. When the time expires, the personal data will be automatically deleted.
Don't Delete Personal Data for Orders in Specified Status(es) - set to Yes if you want to preserve data for specific order statuses.
Order Statuses - choose the order statuses for which personal data will be preserved for a set amount of time.
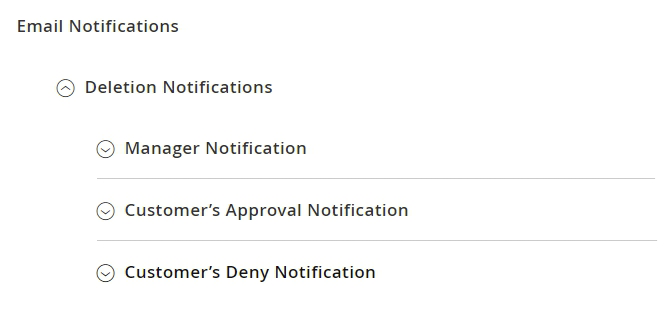
Email Notifications
In this tab, you can configure how email notifications on deletion requests will be handled. You can notify manager(s) and customers on deletion request approval or denial.
Manager Notifications
Your Magento store admin user will get an email when a customer submits a new request for deleting their account.
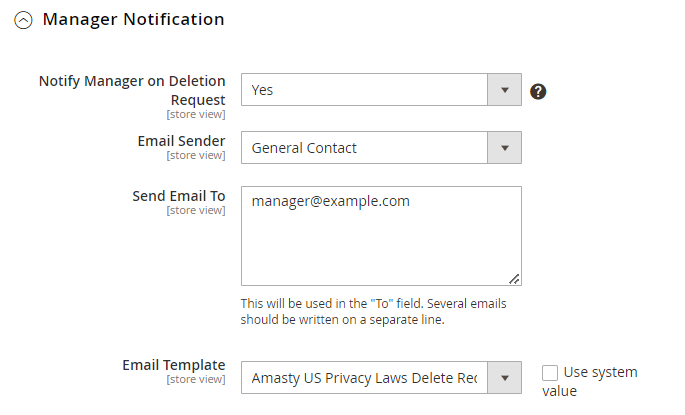
Notify Manager on Deletion Request - set to Yes if you want to generate auto-notifications for the admin user.
Email Sender - choose the contact for sending the email.
Send Email To - enter the email or several emails. In case of adding several emails, each one should be written on a separate line.
Email Template - choose the email template that will be used for automatic email notifications.
Customer's Approval Notification
Set the way email notifications for customers on their deletion requests approval will be handled.
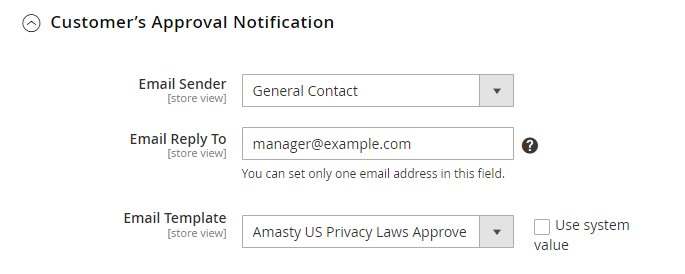
Email Sender - choose the contact for sending the email.
Send Reply To - enter the email that will be used for this purpose.
Email Template - choose the email template that will be used for automatic email notifications.
Customer Deny Notification
Set the way email notifications for customers on their deletion requests denial will be handled. The settings are similar to the Customer's Approval Notification.
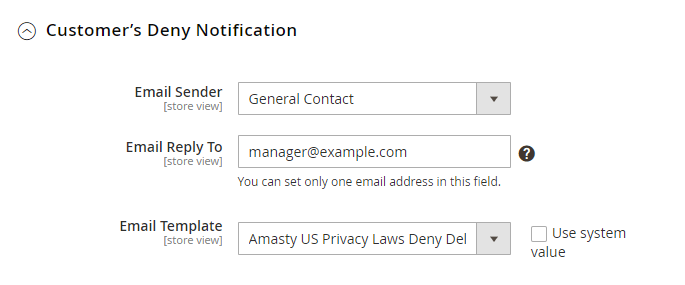
Email Sender - choose the contact for sending the email.
Send Reply To - enter the email that will be used for this purpose.
Email Template - choose the email template that will be used for automatic email notifications.
Privacy Policy Editor
The extension allows you to create and manage several Privacy Policies. To access the editor, please to Configuration → Customers → US Privacy Laws → Privacy Policy.
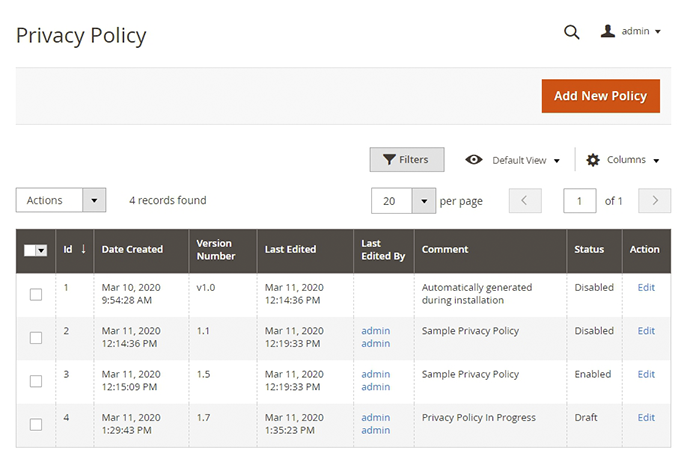
All Privacy Policies are displayed on a single grid. You can sort them or delete. To create new Privacy Policy, please click the orange Add New Policy button.
Comment - enter the working name of the policy that will be displayed on the grid. It is more convenient to use readable names, as you can quickly find the needed Privacy Policy. Note that Comment won't be displayed on the frontend to customers.
Version - enter the policy version in any convenient for you format.
Status - set the status for current policy. Choose from Enabled, Disabled, Draft.
Only one Privacy Policy version can be active at any given moment. After assigning the 'Enabled' status to other policy copy, the previous copy will be automatically switched to 'Disabled' status. To edit the previous version, please use a Clone button to create a new copy in the 'Draft' status that is available for edits.
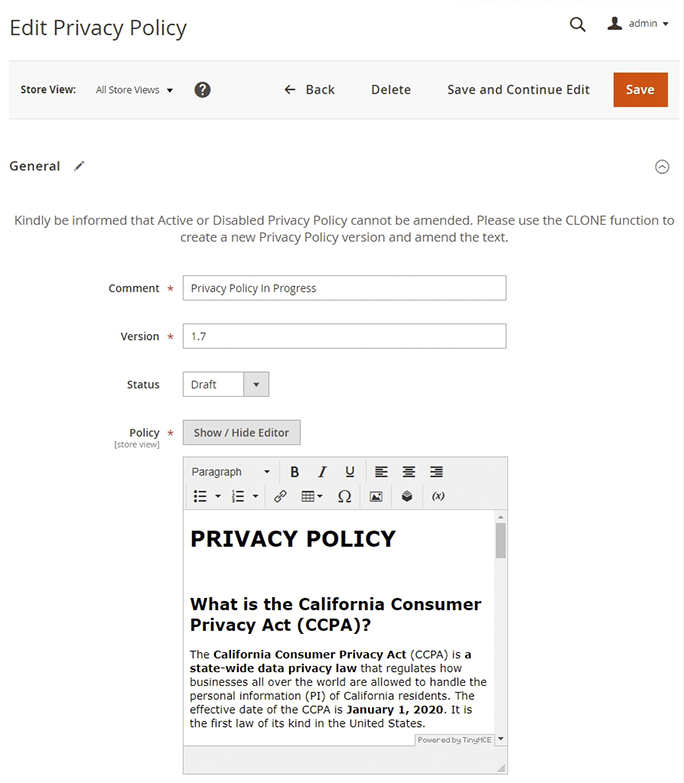
Policy - insert the text of your Privacy Policy. We strongly advise consulting a legal specialist to create policy based on your local laws.
For Magento Community, use WYSIWYG editor (as in the screenshot above).
For Magento Enterprise version, manage the policy text using Page Builder as in the screenshot below:
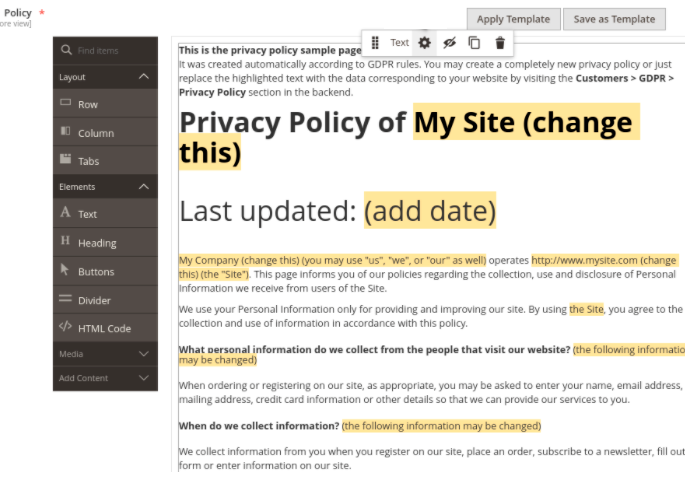
Check Page Builder User Guide to learn more about the elements and see the variants of Page Builder usage.
After finishing adjusting the Privacy Policy, press the Save button. The policy now will be always accessible on the Privacy Policy grid.
Consent Checkboxes
The US Privacy Laws extension for Magento 2 allows you to create custom checkboxes for asking users' consents. To do that, navigate to Configuration → Customers → US Privacy Laws → Consent Checkboxes.
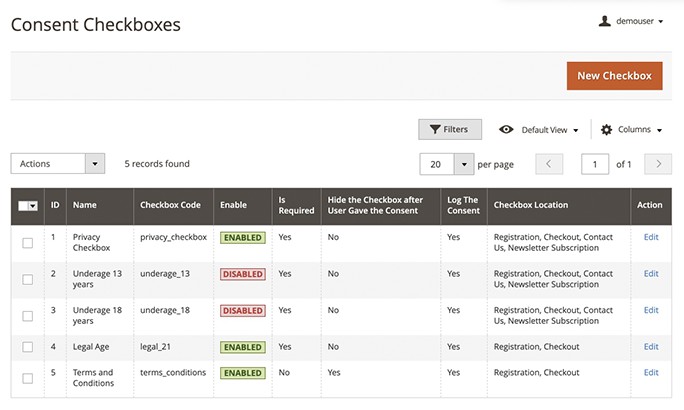
On the grid, you can oversee all checkboxes you've already created, and manage them. To add a new checkbox, press the New Checkbox orange button.
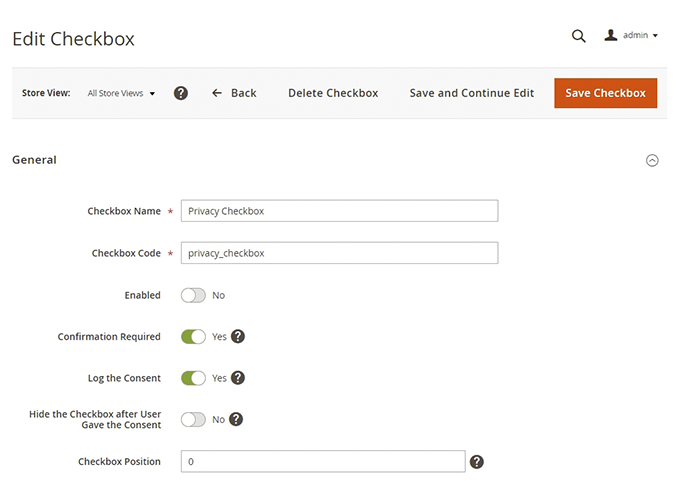
Checkbox Name - enter the checkbox name that will be visible on the frontend.
Checkbox Code - enter the unique code name for checkbox element. E.g. 'privacy_policy' or 'underage_18', etc.
Enabled - set to Yes to enable the checkbox to display on the frontend.
Confirmation Required - set to Yes if this checkbox should be treated as mandatory and marked with an asterisk '*'
Log the Consent - set to Yes if the checkbox consent should be logged in.
Hide the Checkbox After User Gave the Consent - set to Yes if you want to receive this consent only once. Note that, after Privacy Policy updates, checkbox still will be triggered to receive the most recent to Privacy Policy version consent.
Checkbox Position - set the position for checkbox, where the 0 is the highest.
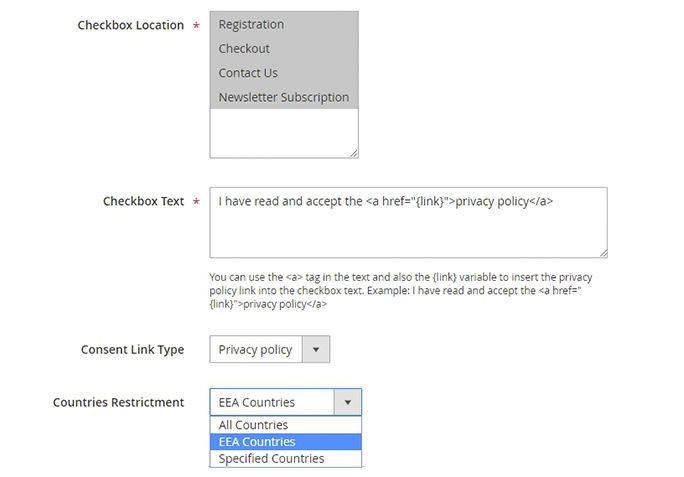
Checkbox Location - choose where the checkbox will be displayed.
Checkbox Text - enter what will be displayed on the frontend for user. You can also add links to Privacy Pilicy or CMS pages.
Consent Link Type - if in the Checkbox Text you've added link, please specify its type for a correct processing.
Countries Restrictment - choose visitors from which regions will be able to see the checkbox. For example, you can show certain checkbox only for residents of particular countries.
After configuring the checkbox, press the Save button.
This is an example of how custom checkboxes look on the frontend. In the image below, checkboxes are shown on the Registration Form.

Consent Log
The module allows tracking all customer's privacy-related actions, e.g. giving consent via checkboxes and accepting Privacy Policy. To access the Consent Log, navigate to Configuration → Customers → US Privacy Laws → Consent Log.

Customers Grid
Store admin can view and filter customers by their consents on selling personal information. Go to Customers grid and view add 'Don't Sell or Share My Personal Information' column to the grid to motitor whose info you may process. Change consents right from the grid using inline editor.
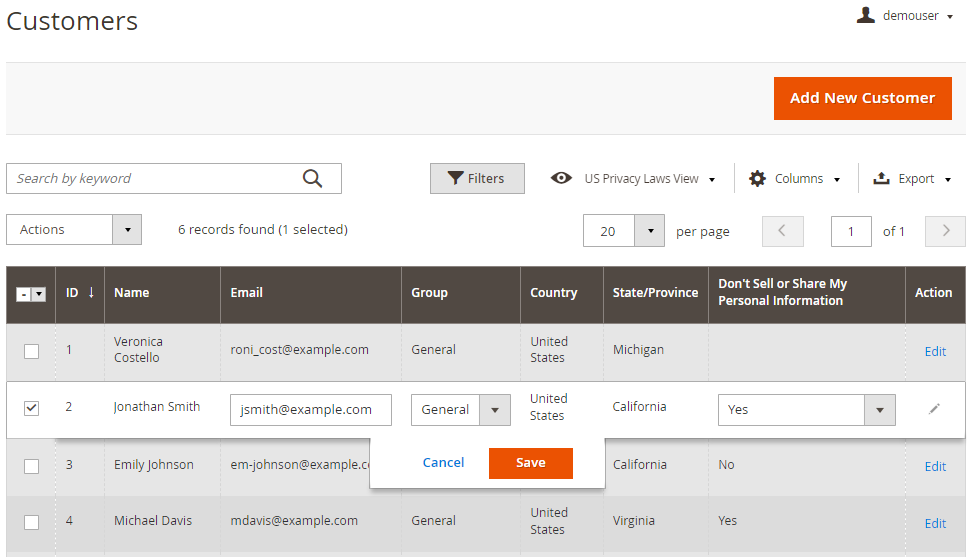
Keep in mind that you can update consents only for Califonia residents, if the Enable Privacy Settings Tab for Californians Only option is enabled. It will help you to view and manage Californians and customers from other states sepafrately.
Delete Requests
According to the requirements of the latest US Privacy Laws, every person has the right to delete their personal data. After submitting the deletion request via customers' account Privacy Settings block, the request will be displayed in the Delete Requests grid. Here, the manager can oversee all requests and approve or deny them in bulk.
To use the Delete Requests grid, navigate to Configuration → Customers → US Privacy Laws → Delete Requests.
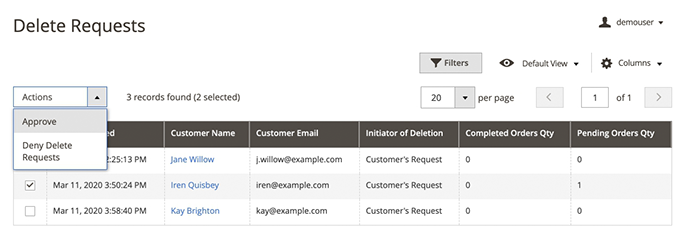
Keep in mind that a deleted customer will still be visible in the “All Customers” list, but without any personal data. It is necessary for the correct work of the database as some customers' data still may be necessary for order processing or other documentation.
Action Log
When a user submits an action in the account (e.g. account deletion request, changing of privacy settings, etc.), it is automatically registered in the Actions Log grid. To access the grid, please go to Configuration → Customers → US Privacy Laws → Action Log.
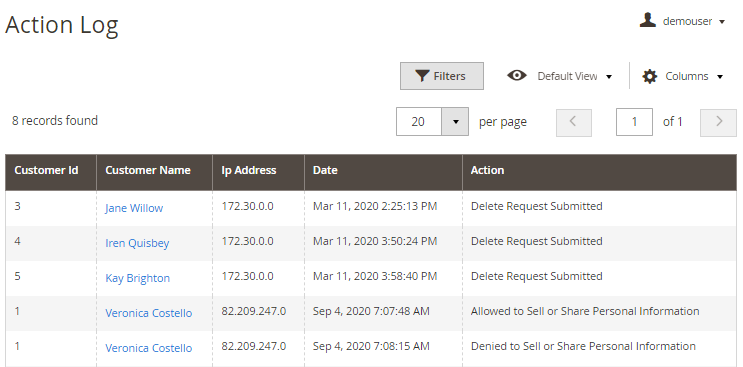
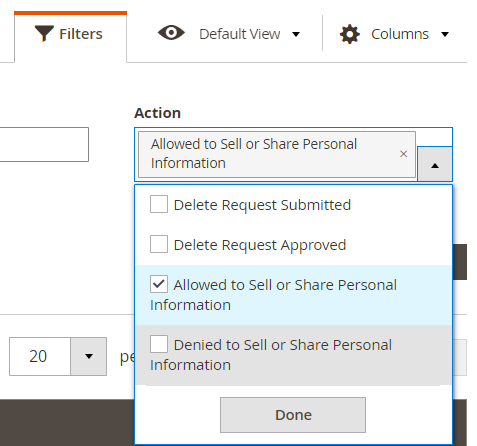
You can use filters to sort out customers who allowed you to sell or share their personal information or vice versa.
Frontend Examples
After the module installation, this is the way customer's account US Privacy Settings block looks like.
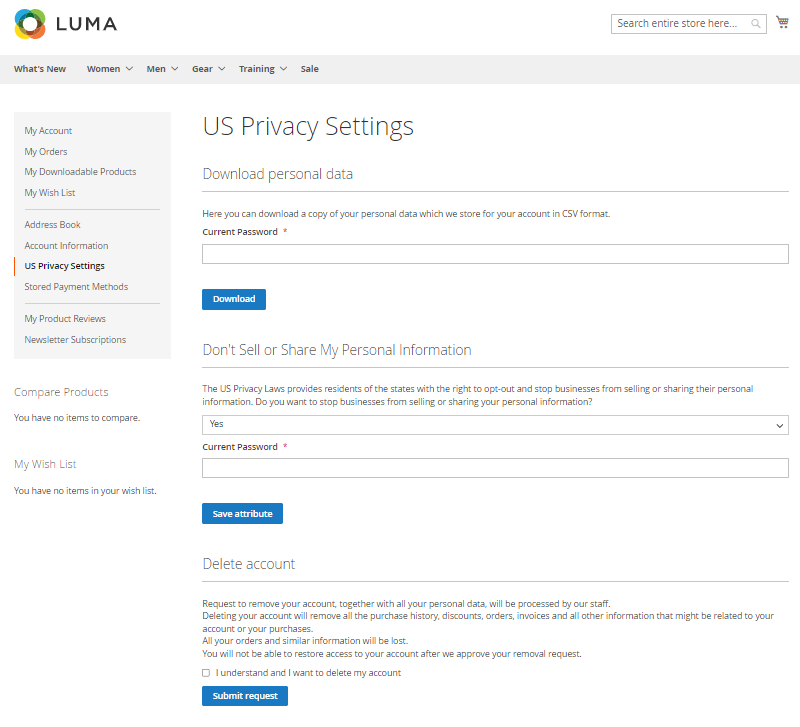
Download Personal Data - a customer can download their personal data in a portable format. After confirming their identity, the data will be packed in a file and automatically downloaded.
Don't Sell or Share My Personal Information - here, user can opt-out from selling or sharing their personal information to 3-rd parties.
Delete My Account - in this section, a user can create a request to delete their account. After checking the checkbox, the user will have to confirm their identity by entering the account password. After that, a deletion request will be created on the Delete Requests grid in Admin's backend.
GeoIP Database Installation
This product includes GeoLite2 Data created by MaxMind, available from 24.10.2023 (last update date).
To install the GeoIP database, go to Stores → Configuration → Amasty Extensions → GeoIP Data.
Databases are required for the correct work of the GeoIP Redirect module. Also, you need to install php bcmath or gmp extension on your server.
You can get the databases automatically or import your own data.
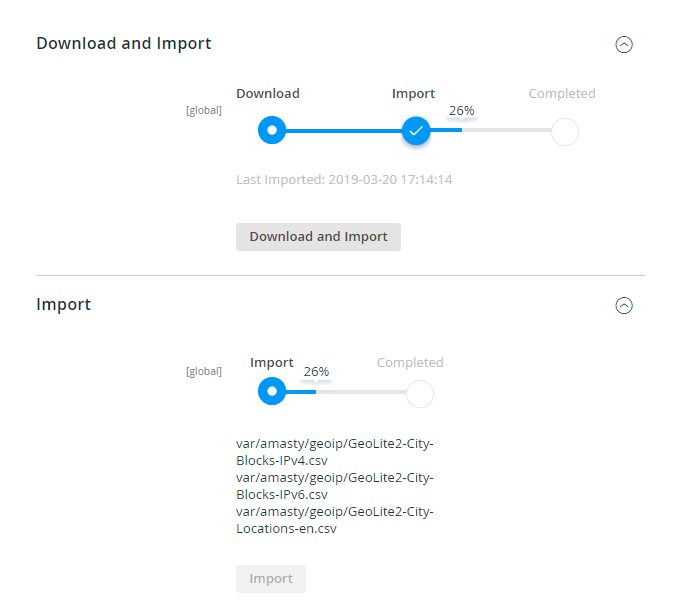
Hit the Download and Import button to make the extension download the updated CSV dump file and import it into your database automatically.
To import the files from your own source, use the Import option. Path to the files should look like this (the part 'var/amasty' should be replaced with your folders’ names):
var/amasty/geoip/GeoLite2-City-Blocks-IPv4.csv
var/amasty/geoip/GeoLite2-City-Blocks-IPv6.csv
var/amasty/geoip/GeoLite2-City-Locations-en.csv
In the Import section, the Import button is greyed out by default. It will be available right after you upload the CSV files. The red error notification will switch to green success notification when the import is completed.
If you face any difficulties with importing the location database, please see the following solution.
IP Database Update Settings
The database included in the extension was last updated on October 24, 2023. To keep the IP database current, you can update it using one of two methods.
Please note that regardless of the updating method chosen, you need to import the IP database first.

Refresh IP Database - select the appropriate method for refreshing the IP database:
- Manually - to manually upload the updated database files;
- Update via Amasty Service - to update the database automatically and regularly via Amasty Service, which is complimentary for you until August 2024.
Debug Mode
You can enable IP forcing, which makes it possible to set a specific IP address that will be used instead of the visitor's real IP address when determining geolocation. The feature is useful while configuring or testing the extension.
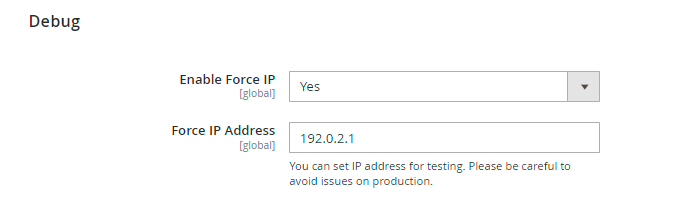
Enable Force IP - set to Yes to replace the real IP address.
Force IP Address - specify the address to use instead of a real one.
Find out how to install the US Privacy Laws extension via Composer.
magento_2/california_consumer_privacy_act.txt · Last modified: 2024/06/28 13:02 by kkondrateva