Sidebar
magento_2:shop-by-brand
Table of Contents
For more details see how Shop by Brand extension works.
Guide for Shop by brand for Magento 2
Let your customers easily reach their favorite brands. Use featured brand slider and all-brands listing to provide better shopping-by-brand experience.
- A slider with featured labels
- All-brands listing page with the search box
- Possibility to filter and sort by brand
- Unique CMS page content for each brand
- Possibility to display logos on product pages
- Hyva-ready storefront
- ADA & WCAG compliant both for Luma and Hyva themes
- Compliant with EU Product Safety Regulation.
Magento 2 Shop By Brand extension is compatible with Hyvä themes. You can find the amasty/module-shop-by-brand-hyva-compatibility package for installing in composer suggest.
Please note, that for the correct work of Hyvä compatibility, the GraphQL module also should be installed. You can find it in composer suggest amasty/module-shop-by-brand-graphql.
General Settings
The extension creates SEO-friendly pages. Every page contains all your products sorted by particular brand attribute. Pages also contain unique content that you can assign for each option of brand attribute.
To configure the extension, go to Admin Panel → Stores → Configuration → Amasty Extensions → Improved Layered Navigation: Brands

Brand Attribute - Here you can set an attribute that will be used as a brand. You can use different attributes as a brand for different store views. It is also possible to setup nice short URLs for pages of a brand attribute (or any other one you prefer), e.g.:
- example.com/canon.html
- example.com/nike.html
To generate such URLs for an attribute, please specify the code of the attribute in the Brand Attribute field. This feature works only for one attribute at a time.
URL Key - Specify the key that will be added to the URL before the brand name. E.g. your-site/brand/brand-name.html
Choose CMS page - Select a CMS page where the All Brands List will be shown. Please make sure the CMS page is enabled (Content → Elements → Pages).
Search Engine Bucket Size - Indicate how many brands will be handled by the search engine for the display on the All Brands page on the frontend. Please note, that increasing the bucket size might influence the website’s performance. The Search Engine Bucket Size setting takes priority over the default settings of the search engine used on the instance.
Brands Item Label - Specify a name, which will be displayed in a menu bar and account top links.
Brand Label specified as Teams

Display Tooltip - Multi-select the directories, where you would like to display a tooltip with a brand info. Possible variants to display:
- all-brands page
- product pages
- catalog pages (listing)
A tooltip
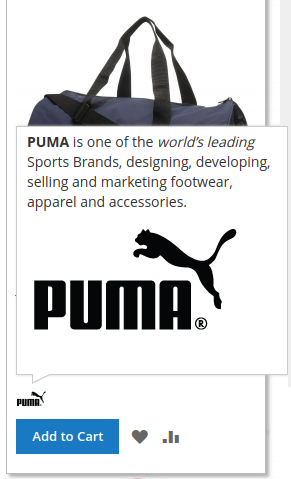

Tooltip Content - automate the tooltip creation and update. Enter the variables that should be used for a tooltip. Possible variables: {title}, {small_image}, {image}, {description}, {short_description}.
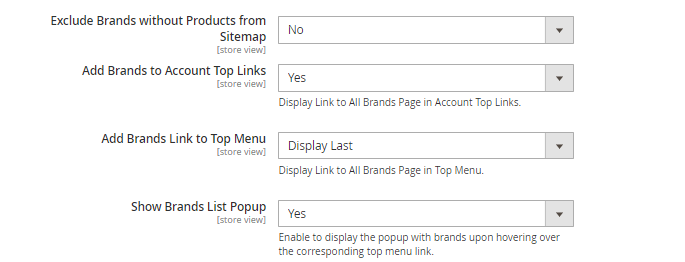
Exclude Brands without Products from Sitemap - set to ‘Yes’ to exclude brand pages without products from the sitemap.
Add Brands to Account Top Links - Display a Brands link in a customer account.
Add Brands Link to Top Menu- choose whether to display a Brands link leading to the All Brand Page on the top menu bar. To configure the link position, select one of three modes:
- No
- Display First
- Display Last
Show Brands List Popup - display brands list and filter them by a character right in the top menu Brands dropdown.
Brands List Popup Configuration

Show Brand Logo - Enable to display brand logos in the Brands List Popup.
Image Max Width (Height) - Specify the size of logos in the listing popup.
Enable Search - Enable a search box on the all-brands listing page.
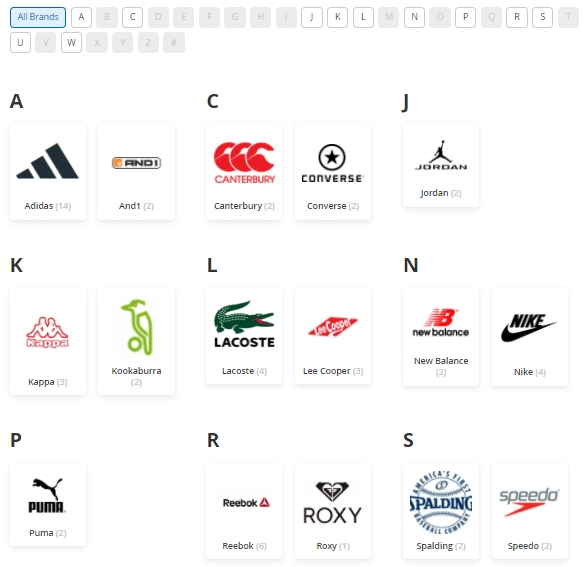
Enable Filter by Character - Enable to display all the alphabet characters and possibility to click them.
Show Characters without Brands - Enable to display only characters.
Show Products Quantity - Enable to display a marker with a number of items assigned to a particular brand.
Show Brands Without Products - Set to 'No' to display only the brands that have products assigned to them. Please note that this setting may affect the performance.
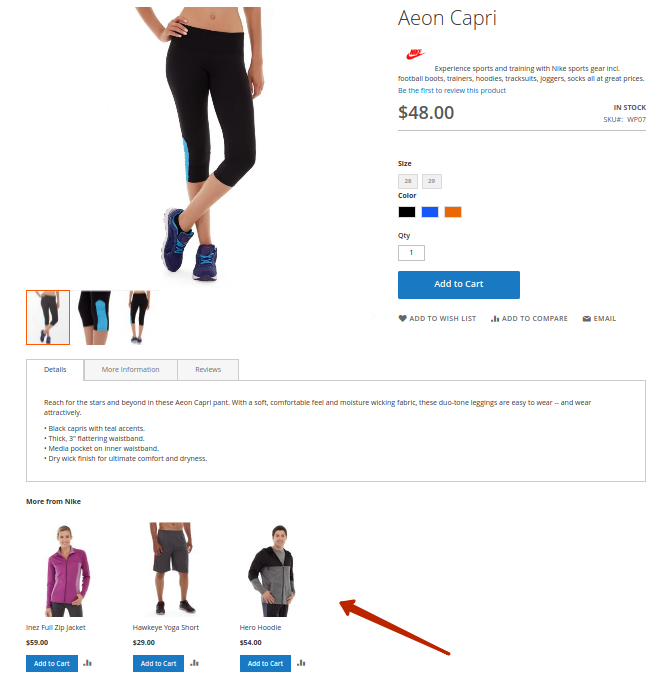
More from this brand

Enable - Display a block of products of a current product's brand. A block will be displayed at the bottom of a current product page.
Title - Specify a title of a block, using a Brand variable.
Max Product Count - Specify the number of random products to display in a block.
Product Page Brand Settings

Display Brand Logo on Product Page - Enable a brand logo display on the products pages.
Display Short Description on Product Page - Enable a label short description on the products pages.
Brand Logo Width & Height, px - Specify the size of a brand in pixels.
To prevent errors when accessing a brand page with a configured Shared Catalog (applicable to Magento EE), ensure that permissions are properly set for the Root Category, as the brand category inherits from the Default Category.
Product Listing Brand Settings

Display Brand Logo on Product Listing - set to Yes to show brand logos on category pages.
Please enable “Used in Product Listing” setting for brand attribute.
Brand Logo Width and Height - adjust logo resolutions. Specify the value in pixels (e.g. 10) or percent (e.g. 10%). Leave empty to use default image size.
NOTE: Brands block on a category page is based on the current category. It means that the block contains only brands from the opened category. 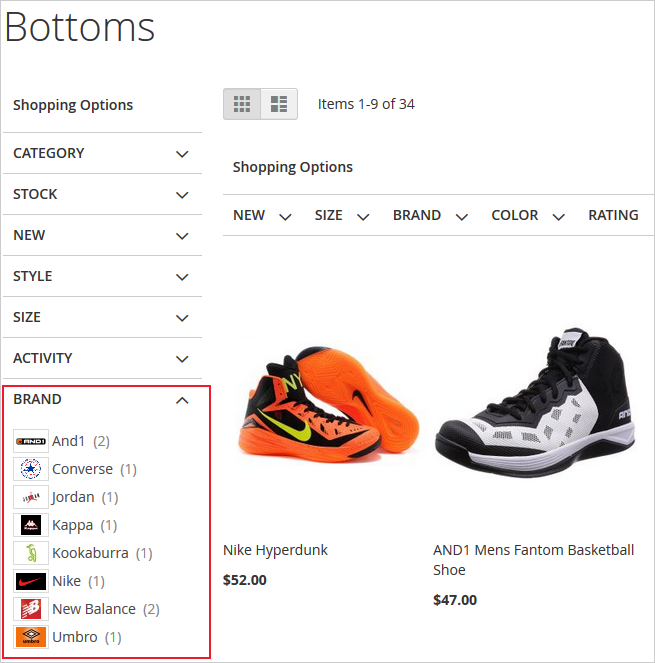

Brand Attribute Settings
To add new brands and to manage brand attribute settings please go to Stores → Products → Attributes → Product → Brand.
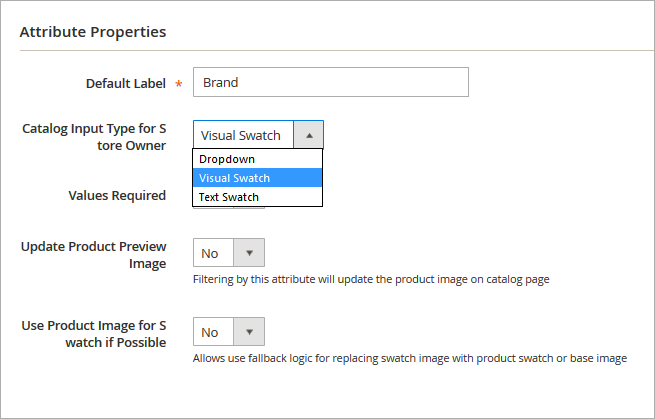
Catalog Input type for store owner - select an input type for the catalog. Choose on of 3 available variants:
- Dropdown;
- Visual Swatch;
- Text Swatch.
Add brand names and adjust settings for different store views, upload brand logos and specify a brand that will be preselected by default.
![]()
Click on the Settings icon beside a brand name to detailed brand information, and make all needed changes.
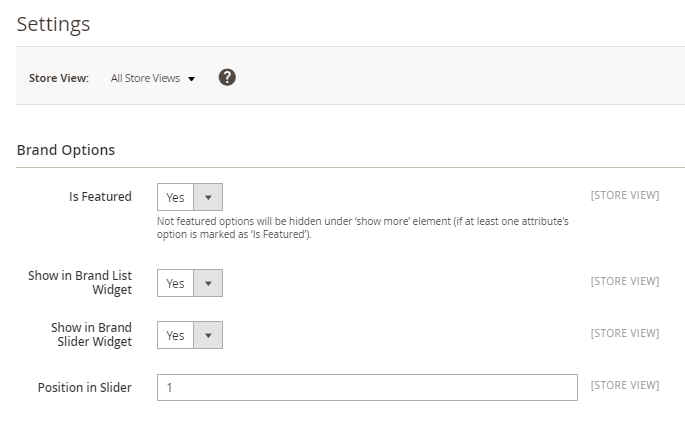
Brand Options - Here you can enable the display in a Brand List Widget, in Brand Slider Widget, and specify the brand Position in a slider. Also, you can make the option Featured if necessary.
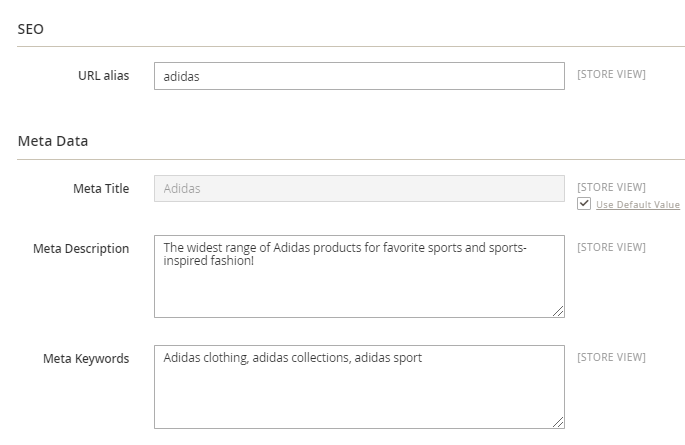
URL alias - Specify a custom URL alias if necessary that will be used in the URL of the filter results page.
Meta Data - In this tab, you can specify meta title, description and keywords for each particular brand.
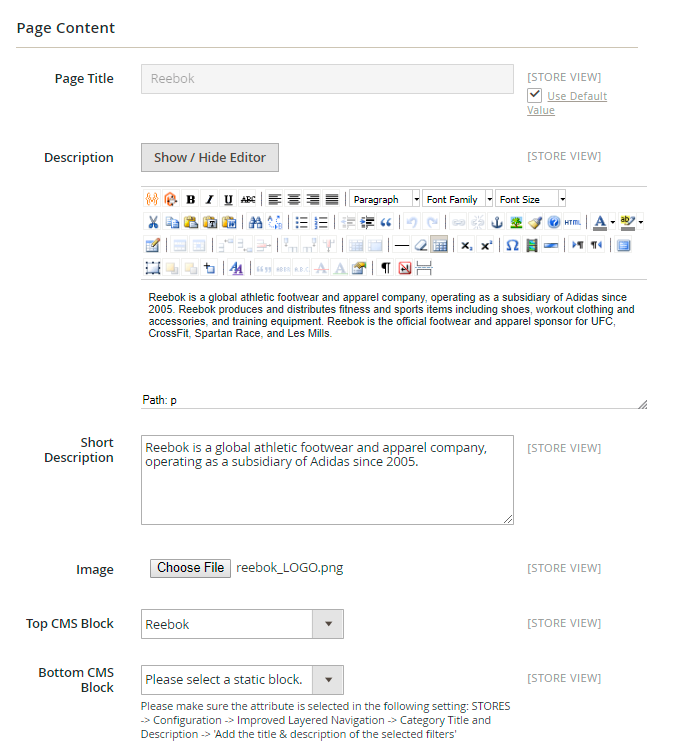
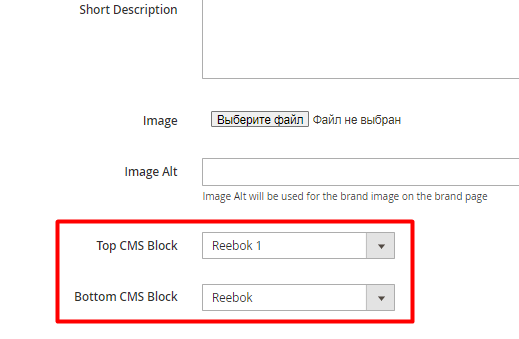
Specify content for the brand page. Add a title, description, image, and CMS blocks.
Additional Brand Information
In the Page Content section you can also specify the Additional Brand Information. We added the ability to display information about the manufacturer, importer and responsible person of the Brand in accordance with the requirements of the EU Product Safety Regulation (Note: the functionality is available as a part of an active product subscription or support subscription).

You can specify the Brand Info Block Position: After Brand Title, After Brand Description, Above Page Footer, or in the Product Page More Information Tab. You can select either a single position for the Brand Information Block or multiple positions.
If you select Product Page More Information Tab as the placement for the Brand Info Block, the additional brand information will also be displayed on the product pages of items assigned to this brand.
Manufacturer or Importer Postal Address - Specify the manufacturer or importer postal address to be displayed in the Brand Info block.
Manufacturer or Importer Electronic Address - Specify the manufacturer or importer e-mail address to be displayed in the Brand Info block.
Responsible Person’s Contact Information - Add the manufacturer or importer responsible person’s contact info to be displayed in the Brand Info block.
The input settings support the following tags: <u>, <b>, <a>, <i>, <br>.
Here is an example of how the Brand Info Block may look on the frontend:

How to customize particular Brand Pages using Page Builder?
Go to Content → Elements → Blocks and create a new CMS Block. Scroll to content section and use Page Builder to add such elements as text, headings, images, videos, banners, etc. to your CMS block.
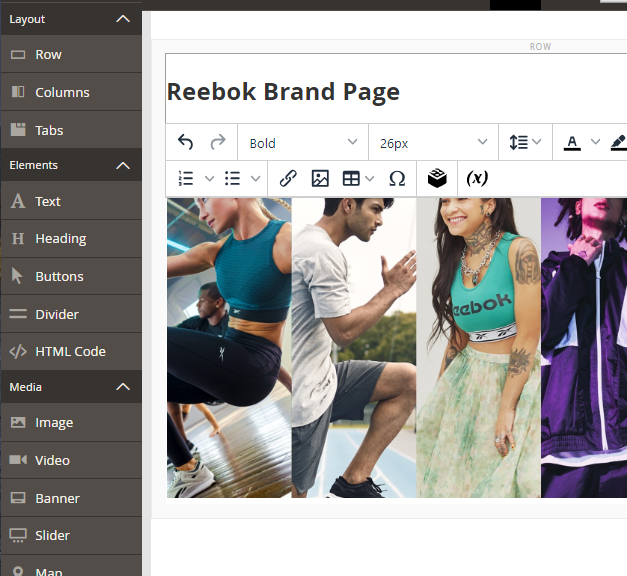
Then Enable it, fill in the Block Title, Identifier and specify the Store Views.
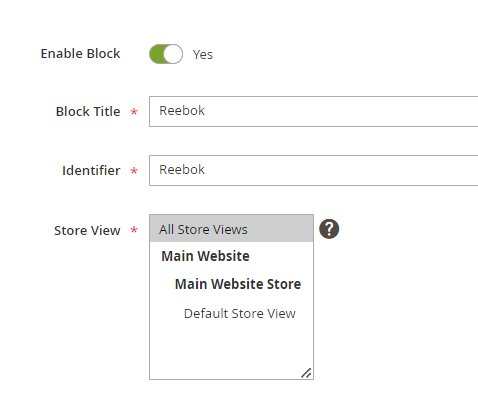
Save the block. Then open the settings of the particular brand page, scroll to the Page Content section and choose your new CMS block to be used as a Top CMS Block or a Bottom CMS Block.
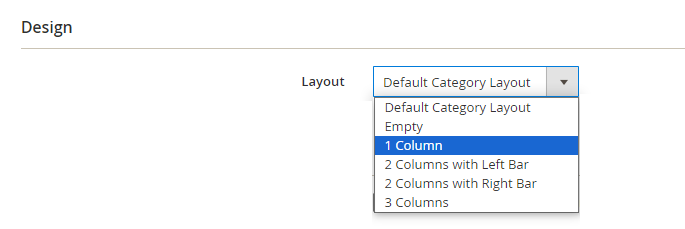
In the Design section, you can adjust сustom Brand Pages layout, by specifying the page display type:
- Default Category Layout
- Empty
- 1 Column
- 2 Columns with Left Bar
- 2 Columns with Right Bar
- 3 Columns
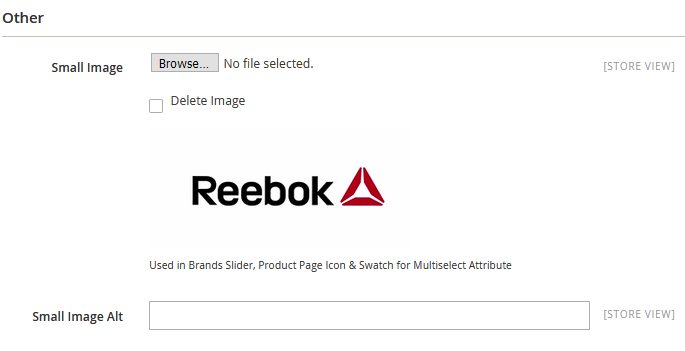
Add a brand image and specify a small image Alt.
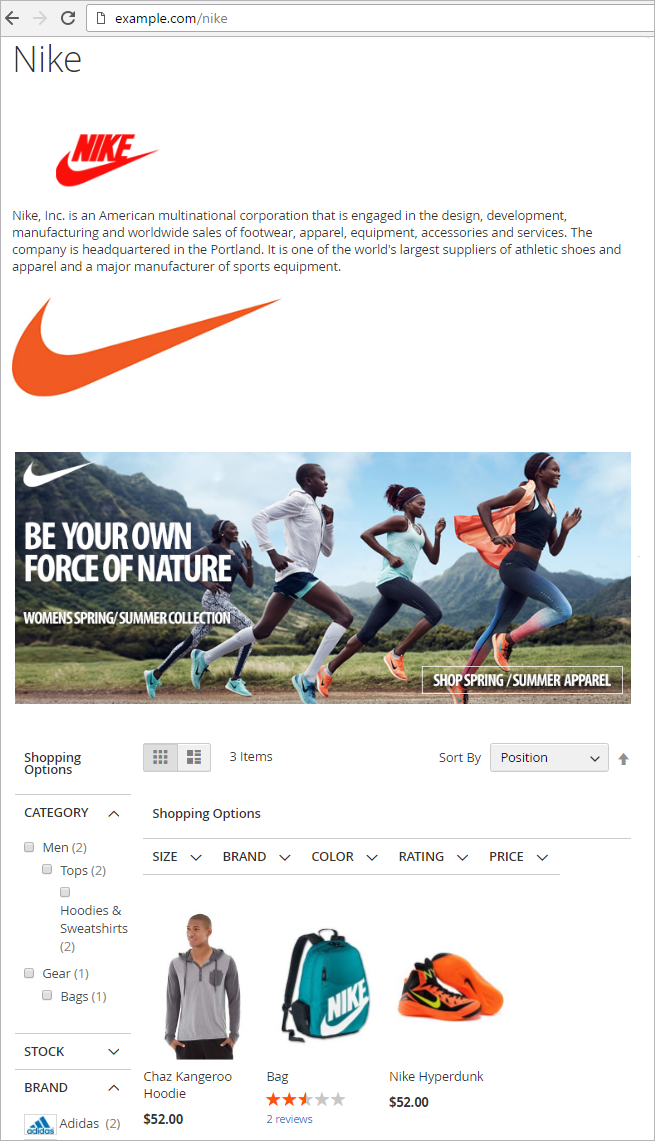
Below you'll see a brand page with a short SEO-friendly URL and custom content.
All Brands CMS Page Settings
To add an All Brands page Content → Elements → Pages. Here you can Add a page with a list of all brands in alphabetical order.
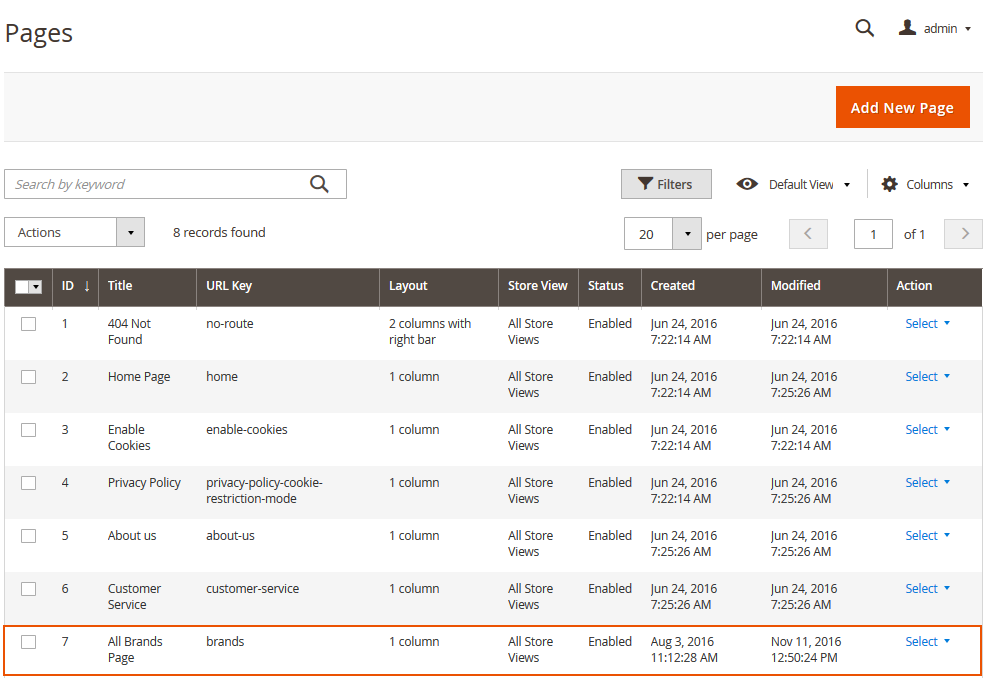
Please click on the Add New Page button to create a page with all brands.
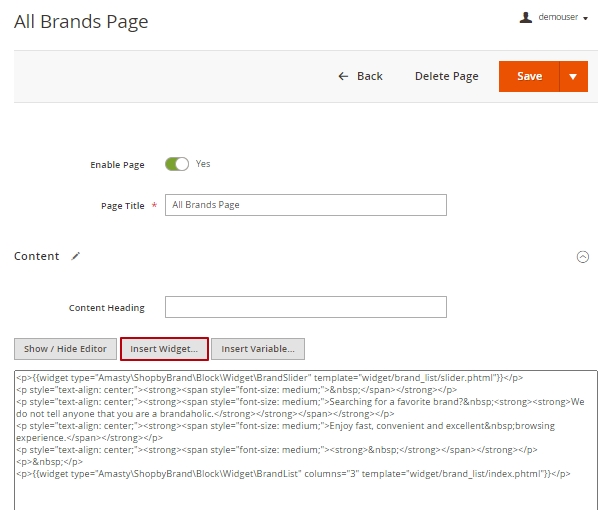
When creating an All Brands page, you can add various text elements and images to the page and also you can:
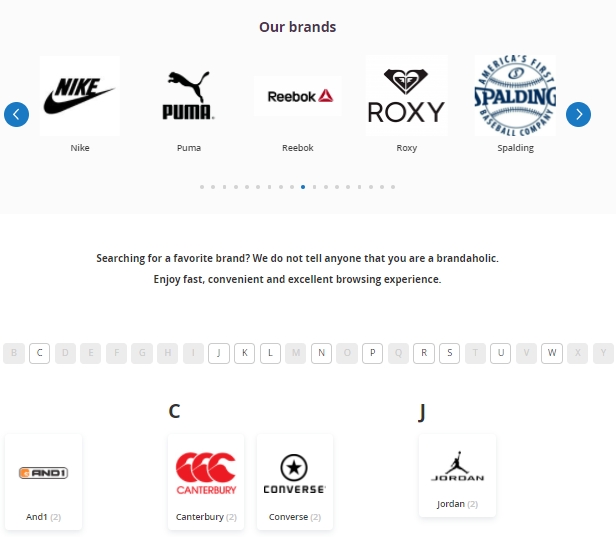
- Insert Brand Slider widget;
- Insert Brand List widget.
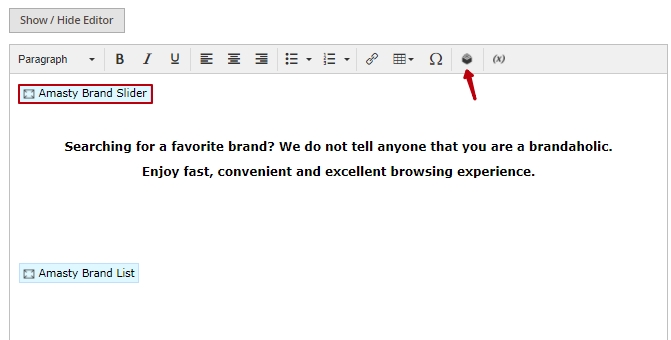
You can create and insert Brand Widgets either while editing any CMS page using the WYSIWYG editor, or by navigating to Content → Elements → Widgets. From there, you can create a widget, set the display on specific pages, and adjust its position.
Brand List Widget Settings
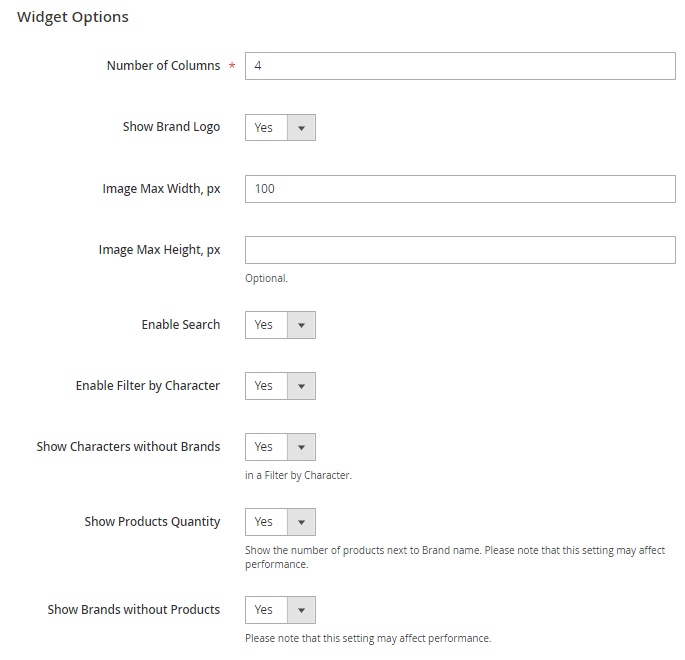
Number of Columns - Set the number of columns for your brand list widget.
Show Brand Logo - Enable to display brand logos in the all-brands listing.
Image Max Width (Height) - Specify the size of logos in the listing.
Enable Search - Enable a search box on the all-brands listing page.
Enable Filter by Character - Enable to display all the alphabet characters and the possibility to click them.
Show Characters without Brands - Enable to display only characters.
Show Products Quantity - Enable to display a marker with a number of items assigned to a particular brand.
Show Brands Without Products - Set to 'No' to display only the brands that have products assigned to them.
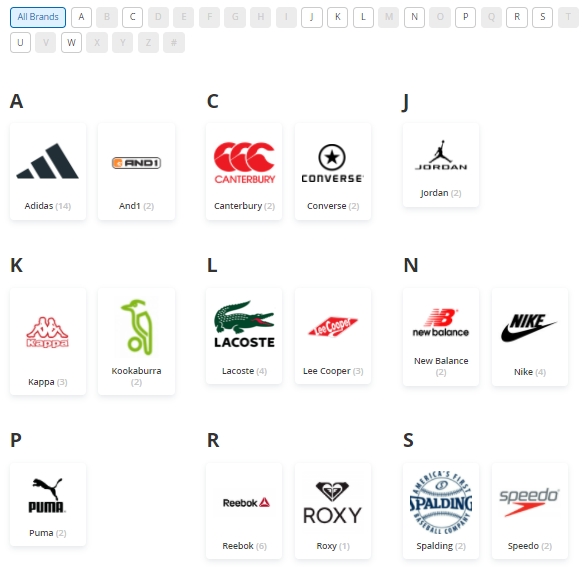
This is a frontend example of a page with an alphabetical list of all brands. Each name leads to the appropriate brand page.

Brand Slider Widget Settings

Hide Brands - Here are all the existing brands displayed for which the “Brand Slider Widget” option is set to Yes (in the brand attribute settings). If you select any brands here, they will not be displayed in the brand slider widget on the frontend. The functionality is available as a part of an active product subscription or support subscription.
Brands Display - Adjust brands display in the Brand Slider Widget (Note: this functionality is available as part of an active product subscription or support subscription):
- Show Brands without Products - Disable to display only the brands that have products assigned to them.
- Show Brands Related to Category - This option regulates display only on category pages, showing only the brands that have products in this category.
Visible Items Quantity - Specify how many brands will be displayed in a slider at a time.
Sort By - Select a sorting type for slider items – either by name or by position.
Slider Max Width, px - Set the slider maximum with in px.
Header Title - Specify a header title for the slider.
Specify the Header Background Color and Header Text Color.
Adjust Image Max Width and Image Max Height.
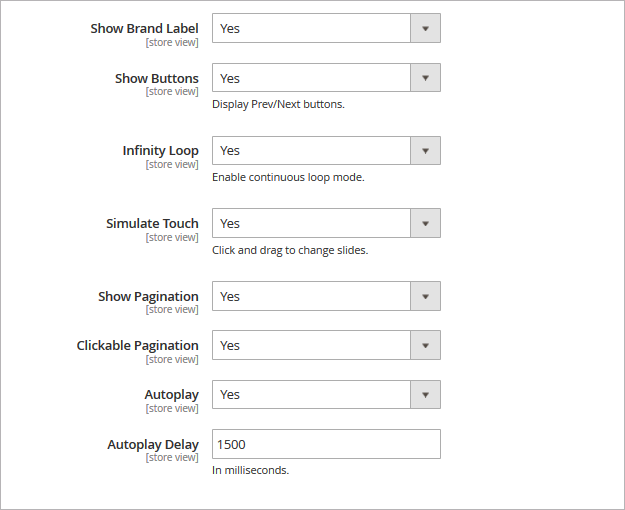
Show Brand Label - Choose whether to display text labels together with brand logos.
Show Buttons - Enable previous/next buttons display.
Infinity Loop - Enable continuous loop mode for slider images.
Simulate Touch - Let customers click and drag slider images.
Show Pagination - Enable pagination display below the slider.
Clickable Pagination - Set to 'Yes' to enable pagination per click.
Autoplay - Switch on/off the autoplay option.
Autoplay Delay - Specify the time interval (ms) for autoplay delay.
Brand Info Widget Settings

The Storefront Properties of the Brand Info Widget are configured in the standard way. However, there are some nuances in the Layout Updates section. Currently, only the following containers are available for widget placement:
- Main Content Area
- Main Content Aside
- Main Content Bottom
- Main Content Container
- Main Content Top
- Product Extra Info
- After Page Header
- After Page Header Top
- Before Main Content
- Before Page Footer
- Before Page Footer Container
- Page Header Container
In the Widget Options tab you can selected brand fields will be displayed in the widget:
- Short Description
- Additional Brand Information
Select both options or leave empty to display all fields.

Note: this functionality is available as a part of an active product subscription or support subscription.
Brand Management
To manage brands, please navigate to Content → Amasty Layered Navigation → Brand Management.
In this section, you can conveniently manage all the brands from the grid. For each brand, you can add custom descriptions and logos, adjust position in a slider, insert various CMS blocks and banners, add metadata, and etc. Also, here you can view what attribute is used for brand for a particular store view. You can set different attributes as a brand for different stores in the Brands General Settings Section (Stores → Configuration → Improved Layered Navigation: Brands → General).
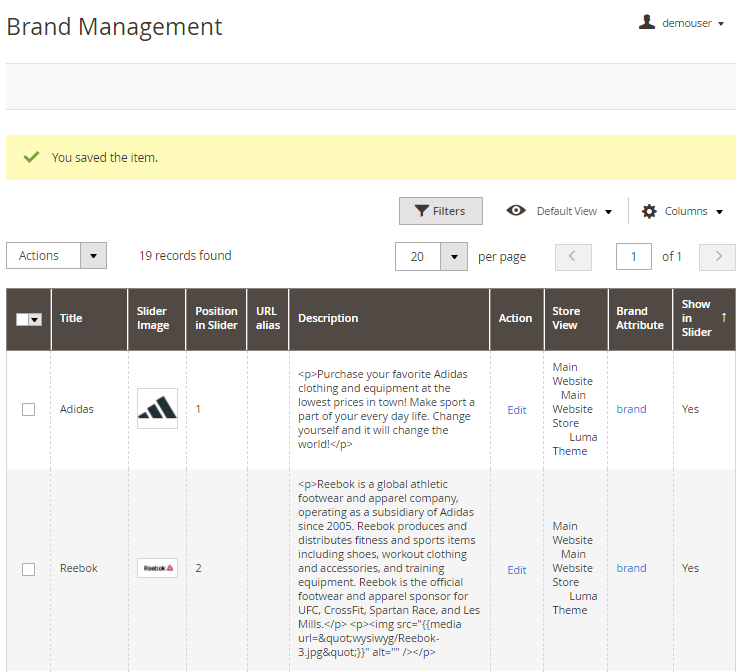
Access any brand to make changes. The way of configuration for each brand is the same as it was described in the brand attribute settings section.
This extension is also available as a part of the Elastic Search Premium module. See on demo →
Compatibility with ChatGPT AI Content Generator Pro
The extension is compatible with the Pro version of Amasty ChatGPT AI Content Generator (the compatibility is available as a part of an active product subscription or support subscription). This means that if you have both extensions installed, you can automatically generate Brand Pages content using AI Content Generator.
This functionality is available if you have both extensions installed: Shop by Brand for Magento 2 and ChatGPT AI Content Generator Pro for Magento 2.
With the ChatGPT AI Content Generator Pro for Magento 2 you can automatically generate the following types of content for Brand pages:
Seo tab:
- URL Alias: Generated based on the Page Title or its existing value, if present.

Meta Data tab:
- Meta Title: Based on the Page Title or its existing value, if present.
- Meta Description: Generated from the Page Title, Description, or its existing value, if present.
- Meta Keywords: Created using the Page Title, Description, Meta Description, or its existing value, if present.

Page Content tab:
- Page Title: Suggested based on the previous title or its existing value, if present.
- Description: Based on the Page Title, Short Description, or its existing text, if any.
- Short Description: Derived from the Page Title, Description, or its existing text, if any.
- Image Alt: Based on its existing value, if present.

Other tab:
- Small Image Alt: Generated based on its existing value, if present.

You can also generate the same types of content via editing Brand Attribute Options.
To do this, navigate to Stores → Attributes → Product → the attribute you use as a Brand Attribute:

Scroll down to brand options and click the gear icon on the option you want to edit:

Use the help of AI to generate the content you need:

Check the demo and this user guide to learn more.
Custom Product Sorting on Brand Pages (Add-On)
The additional functionality allows admins to customize product sorting on brand pages.
The feature can be enabled only after purchasing a Custom Product Sorting for Shop by Brand Add-On.
To manage products order on a brand page, go to Content → Layered Navigation → Brand Management.

Open the necessary brand page and scroll to the Products tab.
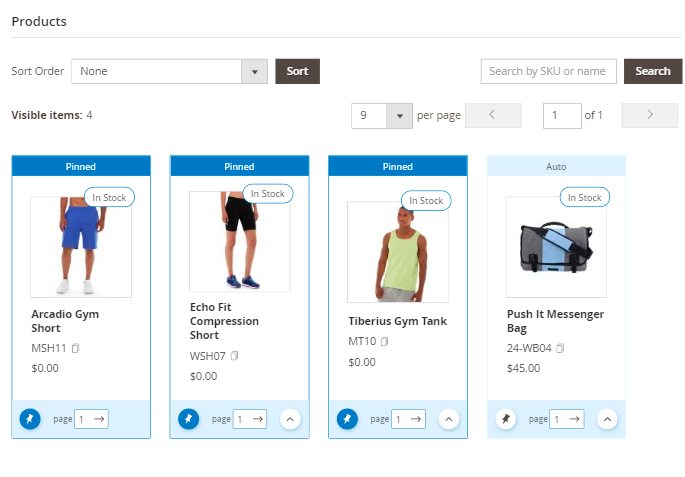
Here you can:
- Reorder items using drag-and-drop
- Place particular products at the top of the listing
- Adjust sorting options
- Move products through the pages
- Pin particular ones
With the add-on, you can manage product sorting for particular store views separately.
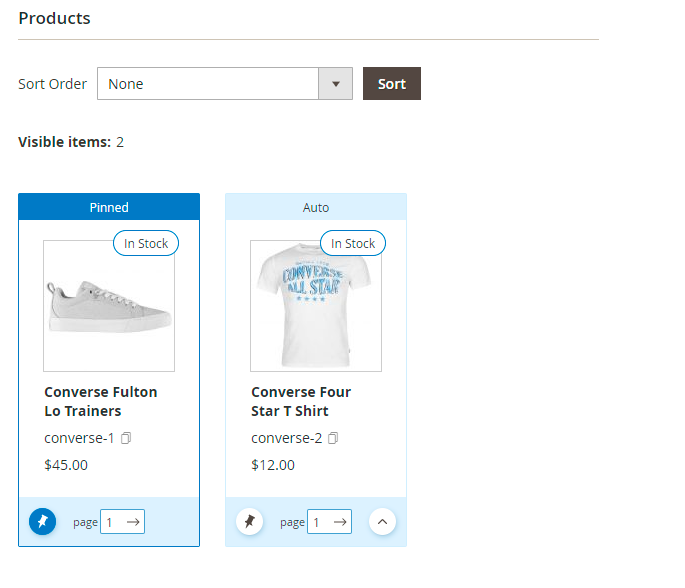
First, set the necessary sort order, according to which all products will be displayed.
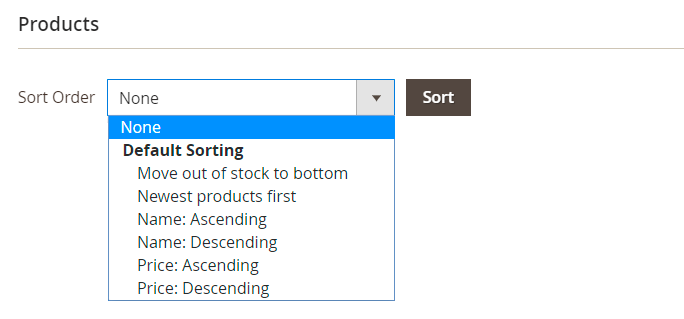
Sort Order - select from the dropdown the preferable way of the automatic ordering of the product listing.
Available options:
- Move out of stock to the bottom
- Newest products first
- Name: Ascending
- Name: Descending
- Price: Ascending
- Price: Descending
Search Products - find products within one current brand product listing by SKU or name.

In the Visible Items field the number of all the products that fall under the specified conditions is displayed.
Keep in mind that only Enabled products with the Visible Individually option can be displayed.
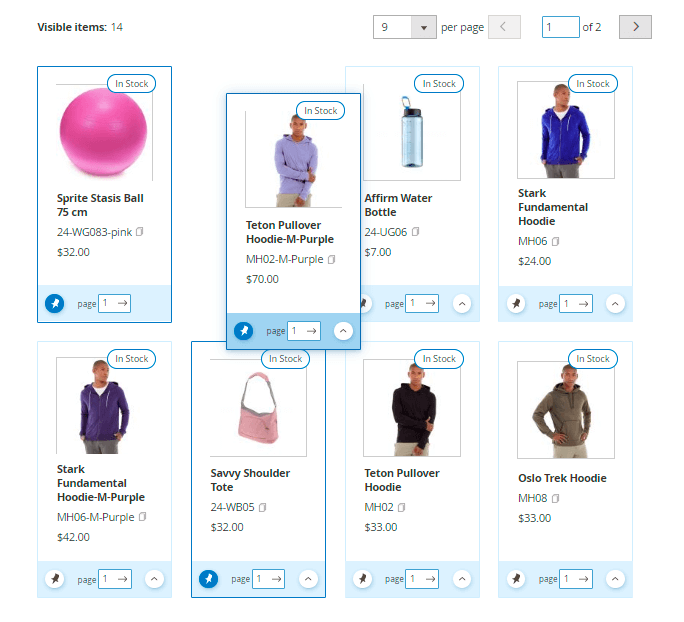
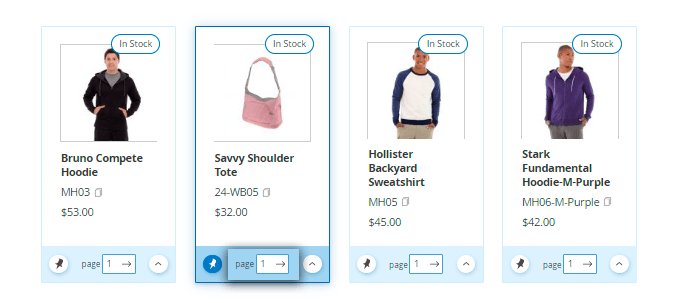
Drag-and-drop brand products according to your current marketing needs.
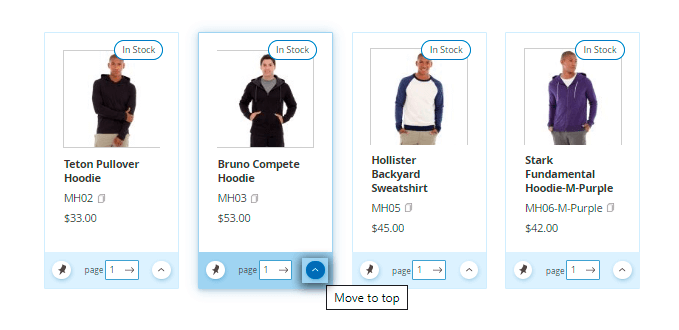
Move to Top - hit this button to send a particular item to the first position in the list.
Once you drag a particular product, the Manual mode is set automatically and it is “pinned” to a particular location. The feature helps to fixate a product in the same position even after the automatic sorting is activated too.
Moreover, the number of products per page in the admin panel equals the number of products customers see on the frontend. Thus, you will see how the products will be displayed to customers on each page.
With the move products through the pages feature it is possible to adjust the of products per each page by moving particular products to another page. As the page number is changed, the product becomes last on this page.
As the result, we set the follwing products order:
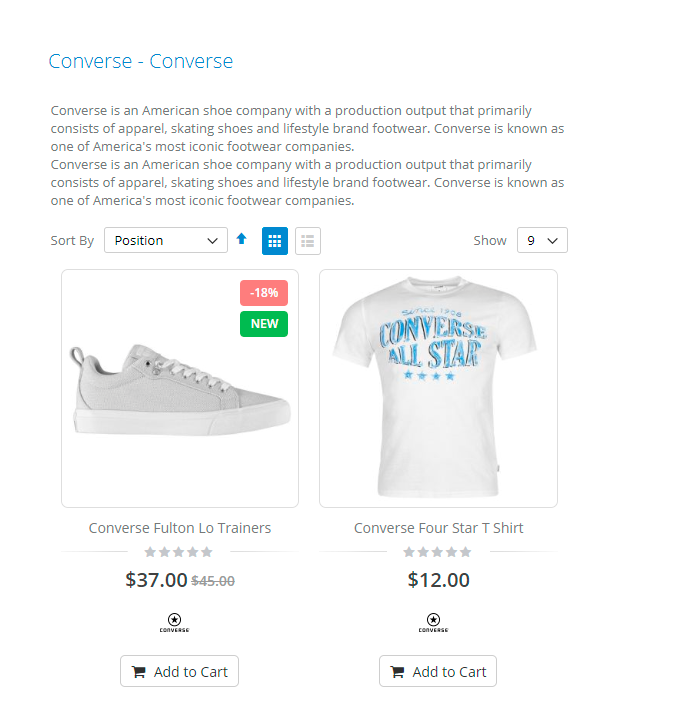
And on the frontend it will be displayed in the following way:
PWA for Shop by Brand (Add-On)
With a ready-made PWA solution, you can provide shoppers with an outstanding mobile experience. Customers can smoothly search for their favorite brand products from any device.
The feature can be enabled only after purchasing the PWA for Shop by Brand Add-On. Also, you need to install PWA Studio first.
In order to correctly install a PWA add-on, please install the corresponding GraphQL system package first. For the correct name of it, please check the composer.json file of the main module. For example, the GraphQL system package name of the PWA add-on for the Blog Pro extension would be the following: amasty/blog-graphql
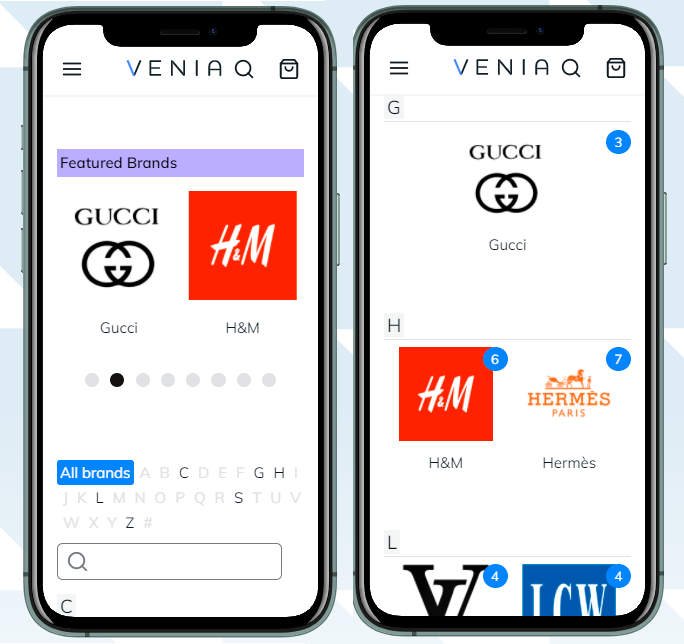
If the add-on is installed, Venia theme will display all-brands page in the following way:
Unique brand pages will be displayed like this:
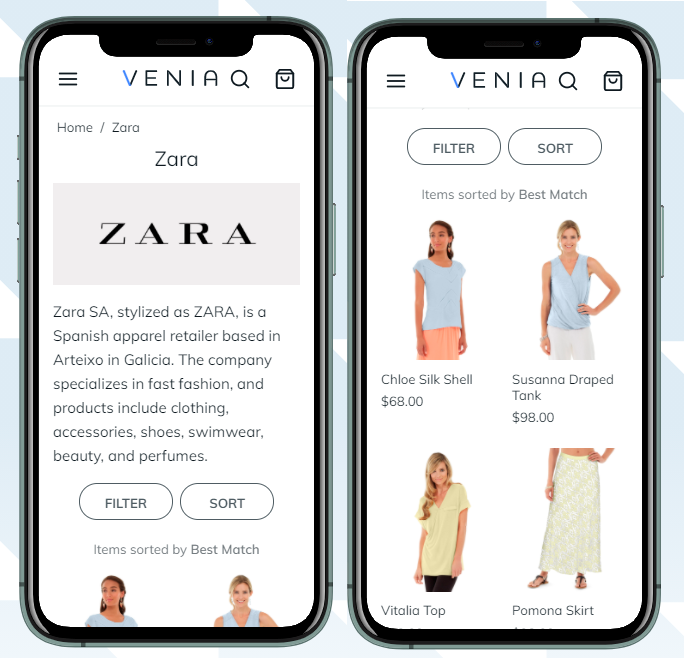
You can still add brand slider to category and CMS pages. The sample of a category slider on a tablet:
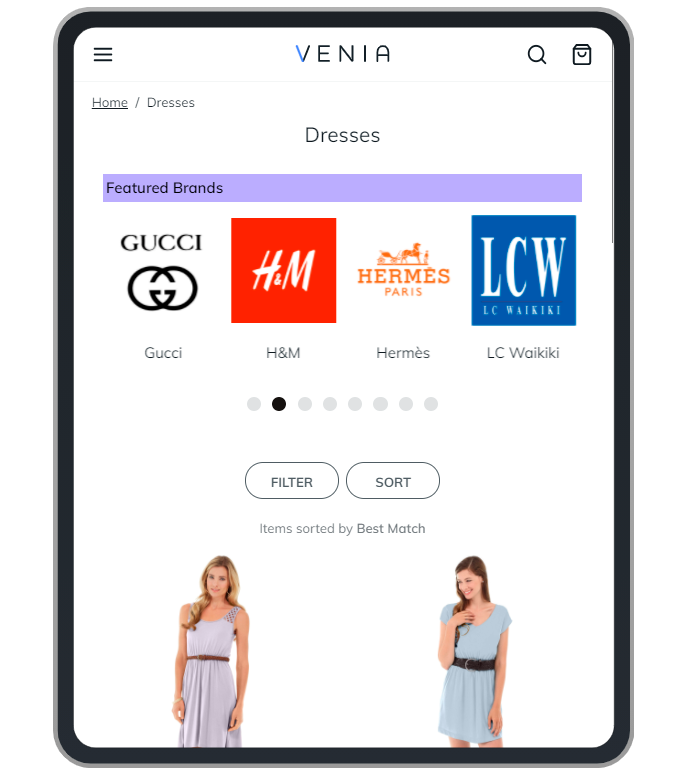
PWA-ready solution does not support the following extension features:
- brand logos on product and category pages;
- customizable position of the All-Brands page tab (it is always displayed at the bottom of the menu);
- links in the accounts.
Find out more about Magento PWA integration here.
Additional packages (provided in composer suggestions)
To make additional functionality available, please install the suggested packages you may need.
Available with no additional fees:
amasty/module-shop-by-brand-graphql- Install this module to activate GraphQl and Shop By Brand integration.
amasty/module-shop-by-brand-cloudandamasty/module-shopby-livesearch-root-category- Install these modules to activate LiveSearch and Shop By Brand integration.
Available as a part of an active product subscription or support subscription:
amasty/module-shop-by-brand-hyva-compatibility- Install this package to ensure the Shop by Brand extension works with the Hyvä Theme.
amasty/shop-by-brand-widget- Install this package in order to manage Brand Slider Widget .
amasty/module-shop-by-brand-subscription-functionality- Install this package in order to use custom Brand Pages Layout functionality and to display information about the manufacturer, importer and responsible person of the Brand in accordance with the requirements of the EU Product Safety Regulation. For Luma Theme.
amasty/module-shop-by-brand-subscription-functionality-hyva- Install this package in order to display information about the manufacturer, importer and responsible person of the Brand in accordance with the requirements of the EU Product Safety Regulation. For Hyvä Theme.
amasty/module-ai-shop-by-brand-content-generator- Install this module to ensure compatibility with Amasty ChatGPT AI Content Generator Pro.
Find out how to install the Shop By Brand extension for Magento 2 via Composer.
magento_2/shop-by-brand.txt · Last modified: 2025/06/25 08:43 by asemenova


