
Sidebar
magento_2:multi_warehouse_inventory
Table of Contents
For more details see the Multi Warehouse Inventory extension page.
Guide for Multi Warehouse Inventory for Magento 2
Easily create multiple warehouses with Multi Warehouse Inventory for Magento 2. Conveniently manage stock right from the product grid. Utilize a smart algorithm to automatically choose a proper warehouse for delivery.
- Create as many warehouses as you need
- Manage and update Magento inventory right from a grid
- Minimize shipping costs with a smart algorithm
- Create shipments in one click
- Configure custom shipping methods and rates
Configure General Settings
To configure extension settings, please go to Stores → Configuration → Amasty Extensions → Advanced MSI.
General Settings

Enable Module - choose Yes to enable the extension.
Notice, that the extension works on Magento 2.3 version and higher. Contact us, if your Magento version is 2.2 or lower.
Minimal Delivery Cost Algorithm Settings
With the extension, you can customize the algorithm of a source (warehouse) selection. In this tab, you can define the automatic warehouse selection algorithm that will be used when one product is assigned to multiple sources.
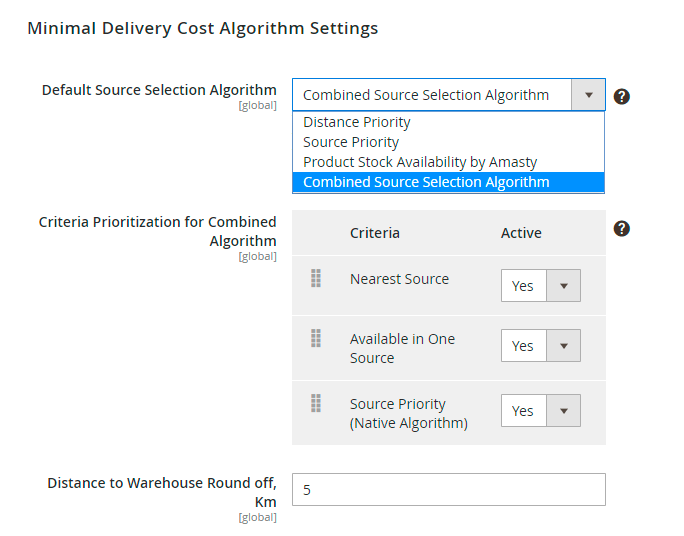
Default Source Selection Algorithm - the module provides 4 Source Selection Algorithms:
- ‘Source priority’ – selects an optimal warehouse according to its priority in the stock assignment settings block.
- ‘Product Stock Availability by Amasty’ – chooses the source that has all order items in stock. It is useful if you want to avoid breaking the order into several shipments from different sources.
- ‘Product Stock Distance by Amasty’ – automatically selects the warehouse nearest to a customer.
- ‘Combined Source Selection Algorithm’ – it is a custom completely new algorithm, that uses 3 criteria above one by one until the ‘perfect match’ is found.
After you select one of the algorithms it will be immediately applied to the ordered items on the shipment creation page.
Criteria Prioritization for Combined Algorithm - use drag and drop to set the priority of each criterion.
How it works:
The algorithm will apply the upper criteria first. If the result consists of several sources that fit the condition of the first criteria, the list of these several warehouses will be transferred to the next lower criteria for processing. The sources that don't fit the first criteria will not be processed by the second one. But they will be available on the shipment creation page with lower priority.
Distance to warehouse round off, km - add the distance value that will be used in the Amasty ‘Combined Source Selection Algorithm’. If the distance between the closest and other warehouses is less than the value, the warehouses are considered to be equally distant from the customer.
Automatic Source Selection & Shipping Cost Calculating

Enable Automatic Source Selection - choose Yes to enable the chosen algorithm as soon as a buyer places an order. The warehouse for shipment will be selected automatically and displayed to a customer with a shipping cost information. This option allows using shipping services (like UPS, USPS, FedEx, DHL). The origin sources will be chosen during order creation, and a customer will be charged for the shipping costs immediately on the checkout page. Shipping costs will be calculated for each source (warehouse) depending on its address and then summarized.
Please keep in mind, that Shipping(s) for an order will be created immediately after a click on 'Ship' button on the order details page in the admin area.
If this option is enabled, you won’t be able to change items’ quantity in the admin panel. But you will see all the information about the order and its shipment in the Order View section.
Manage All Sources in a Grid
Note that sources are your warehouses. To let the extension work you need to create at least 2 sources.
Sources are the physical locations where product inventory is managed. They can include warehouses, offline stores, distribution centers, drop shippers, etc.
To manage sources, please go to Manage Sources menu from the admin panel. Easily track your sources by code, name, and status. The module allows you to Edit existing sources and Add a new one via the button Add New Source.

Note, that sources can’t be removed to avoid order data loss. Also, the code of the source can’t be changed. But you can disable sources and edit the related info, including location and contacts.
Easily Create a New Source
To create a warehouse, click the Add New Source button and fill in all the needed info about a warehouse.
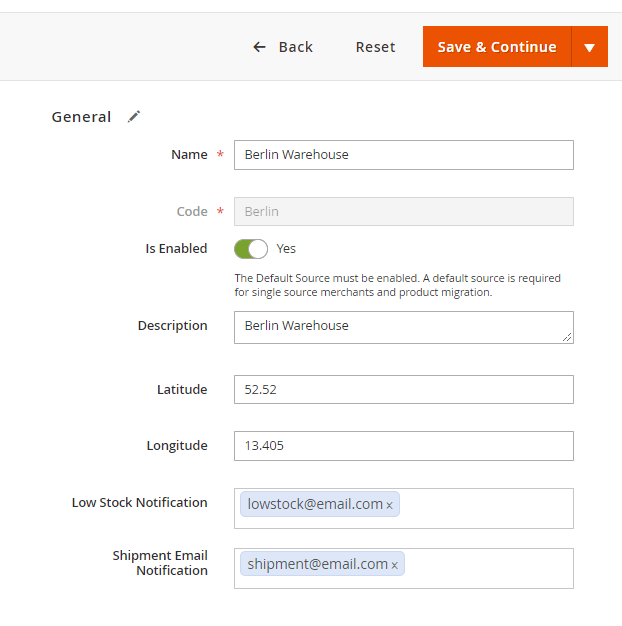
Specify an appropriate email in the fields Low Stock Notification and Shipment Email Notification. Thus you'll get notifications when an item should be shipped from a particular warehouse and on an item low stock situation.
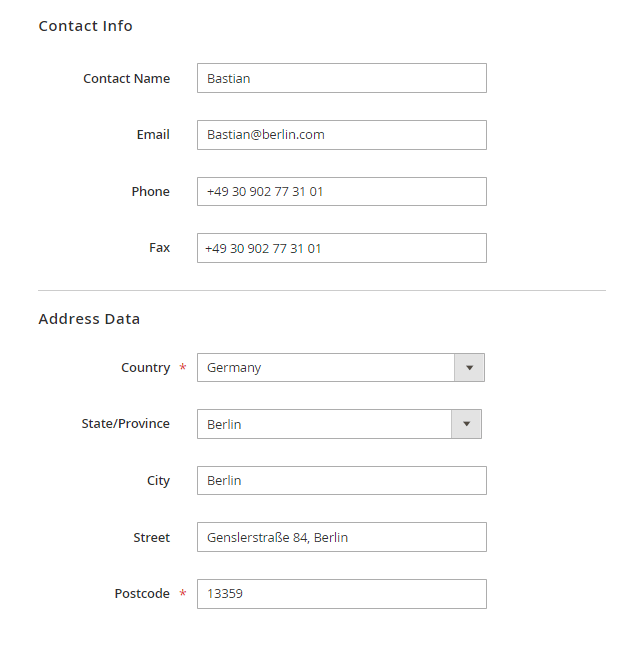
Add the source contact information and address data.
For admin convenience, Source name and Source Address will be displayed in the header of Low Stock Email notification.
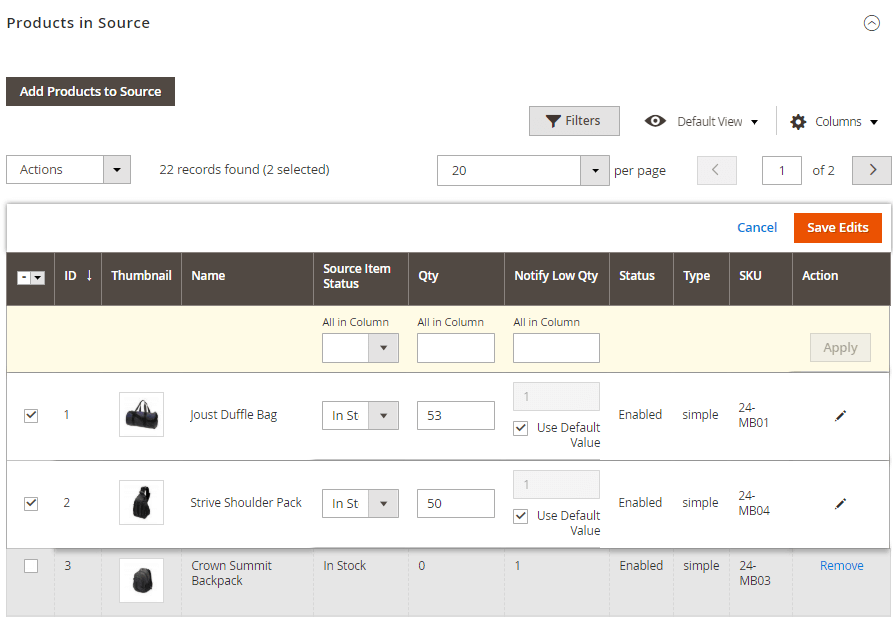
Now you can assign products to a source and adjust quantity. Click Add Products to Source button to add new items. Edit product quantity right from the grid. Save your time choosing multiple products and change their status via mass action. Quickly pick the needed items via filters. Here you may also specify the low stock quantity: you'll automatically get a notification when the product quantity riches this number.
The extension provides you with the capability to adjust shipping methods settings for each source. You may fill in a custom amount, or use Shipping Provider Rate.
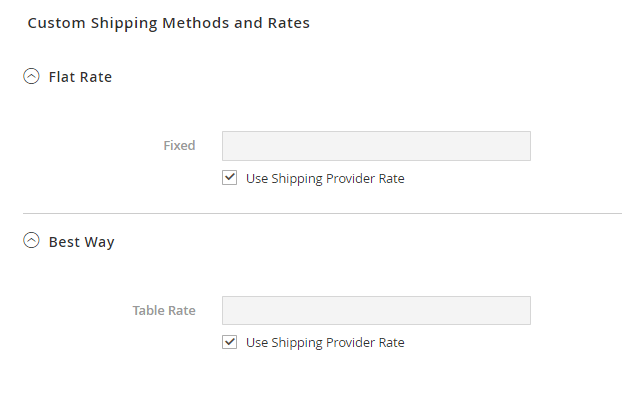
Note, that if you use the fixed cost for the shipping method, all predefined shipping calculations for this source will be overridden with this fixed amount.
Save the source.
Link Sources to Sales Channels
Stocks enable you to unite several sources and then link them to sales channels and salable quantities. Technically, stocks represent a virtual, aggregated inventory of products available for sale to your sales channels (currently these are websites). Each stock maps your sales channels with sources for available inventories and salable quantities. Depending on your site configuration, the stock may be assigned to one or more sales channels and sources. Through the stock, you can modify the prioritization of sources used when shipping orders and by the Source Selection Algorithm.
You start with a Default Stock assigned with the Default Source and your website, best used by Single Source merchants. Only the Default Source can be assigned to this stock. Multi-Source merchants create custom stocks for custom sources and websites as needed. You can easily do it with the help of our Magento 2 Multi Warehouse Inventory extension.
To assign sources to stocks, please go to Manage Stocks tab.
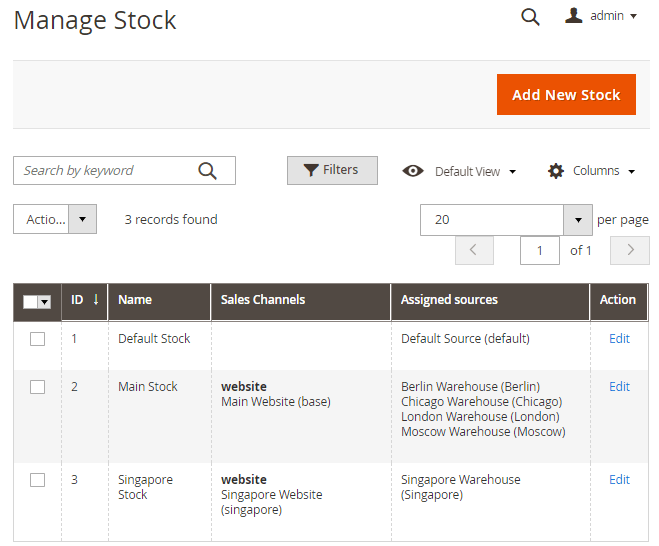
Choose a necessary stock and press the Edit button.
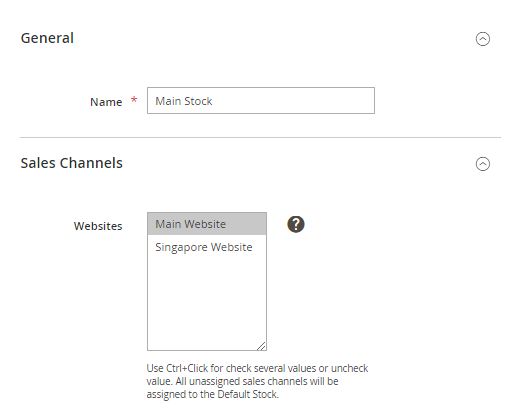
Name - specify the name for your stock.
Sales Channels - specify the sales channel. Sales channels represent entities selling your inventory, including websites and store views. Each sales channel can be assigned only to a single stock, and a single stock can be assigned to multiple websites. After you specify the Sales Channel, any previous assignation would be removed for each selected Sales Channel. Use Ctrl+Click to check several values or uncheck value. All unassigned sales channels will be assigned to the Default Stock.
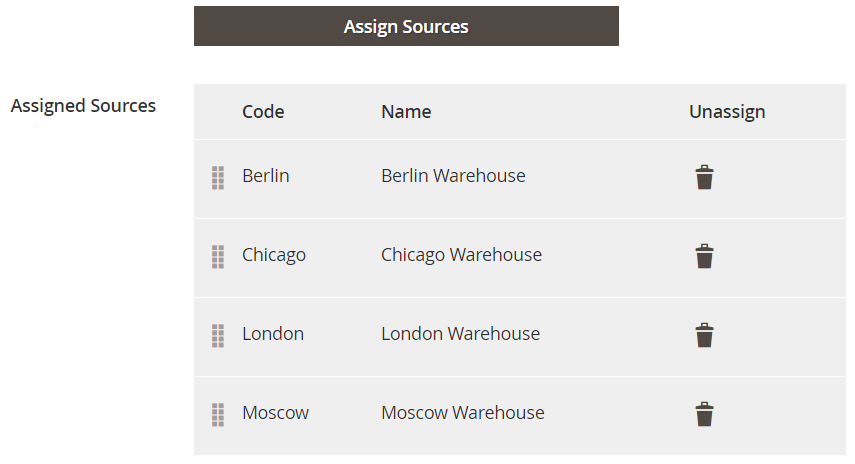
Now, please scroll to the Sources tab and assign sources to the stock. Easily change sources priority via drag and drop. The priority is used by the ‘Source priority’ algorithm.
Manage Inventory From Product Grid
With the Multi Warehouse Inventory for Magento 2, you can assign items to a warehouse and manage the stock from the product grid. To do this, please go to Catalog → Products.
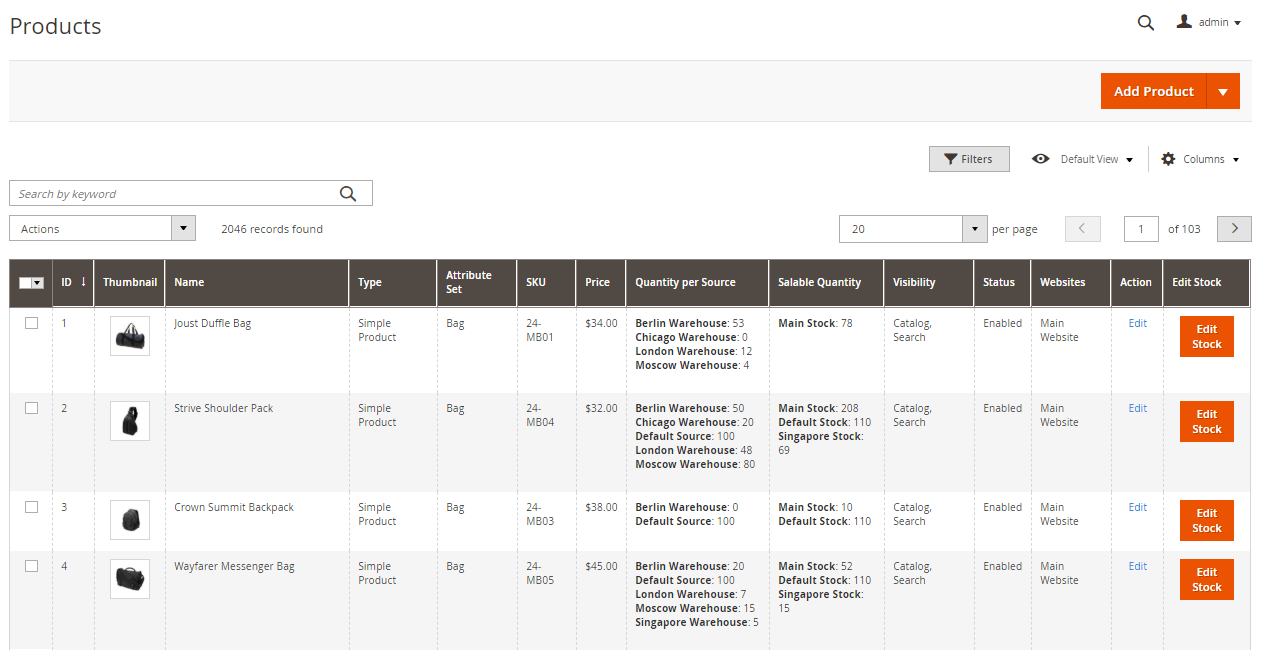
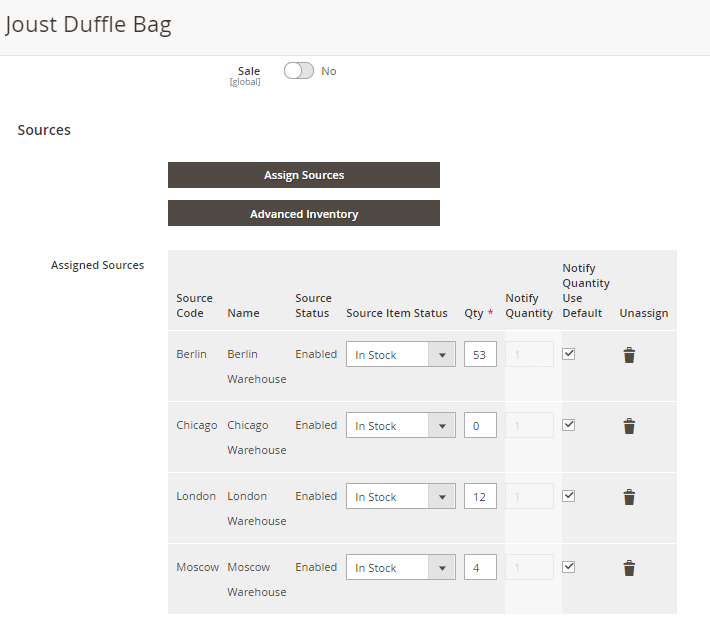
Click Edit to edit the stock quantity for each source in the product settings.
Hit the button Edit Stock on the grid to quickly adjust the product stock for each warehouse in a convenient pop-up window.

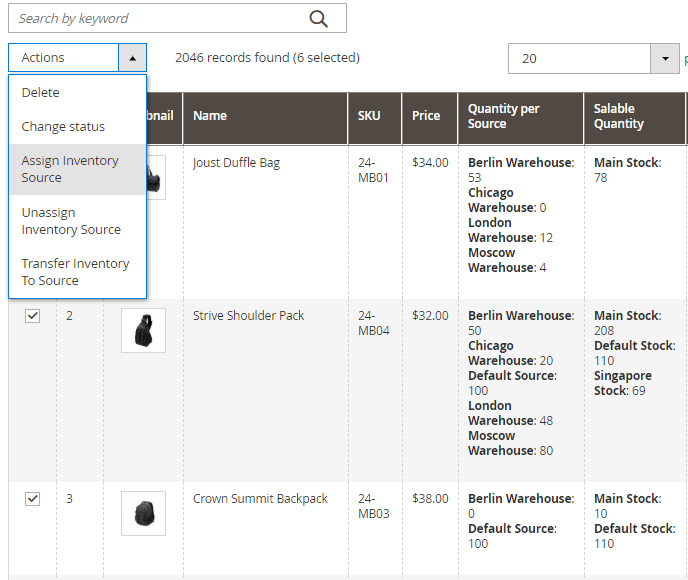
You can also easily edit products in bulk right from the grid. Just select the products you need via filters and specify the Action you need: Delete, Change Status, Assign Inventory Source, Unassign Inventory Source, Transfer Inventory To Source.
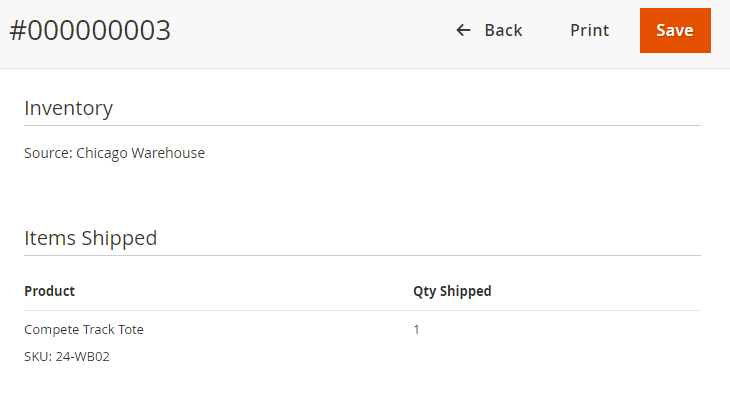
Create Shipments Quickly
To create a shipment, please go to Sales → Orders. Then choose a necessary order and hit the View button.

Please click the Ship button to open a shipment creation page.
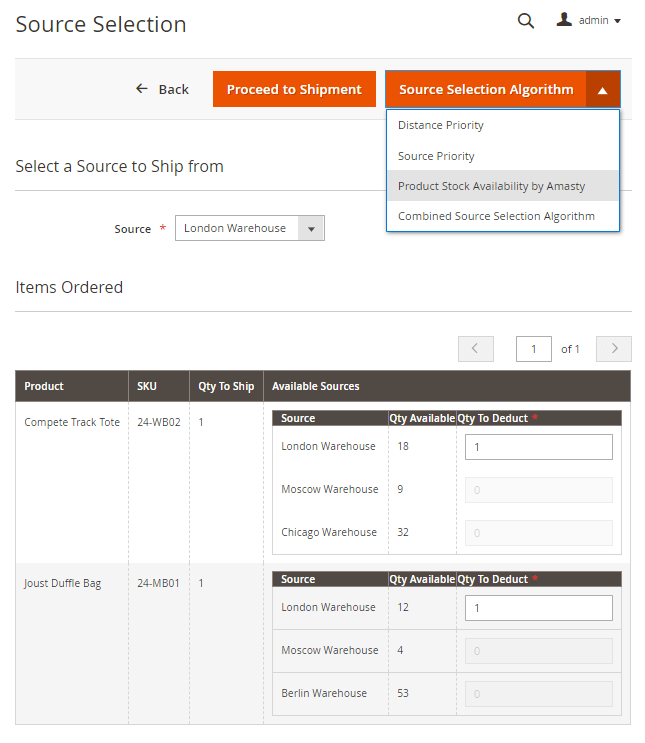
The module automatically chooses the default source selection algorithm, determines the optimal warehouse and the number of products to be shipped.
If the automatic shipping cost calculation is enabled, the module will choose the necessary source while a customer creates an order. If this functionality is disabled, you can change the source selection algorithm right from this page and change the quantity to deduct from each source.
Press ‘Proceed to Shipment’ button and ship the order.
Import Data
Fill product quantities in a sample file and quickly import stocks for each source.
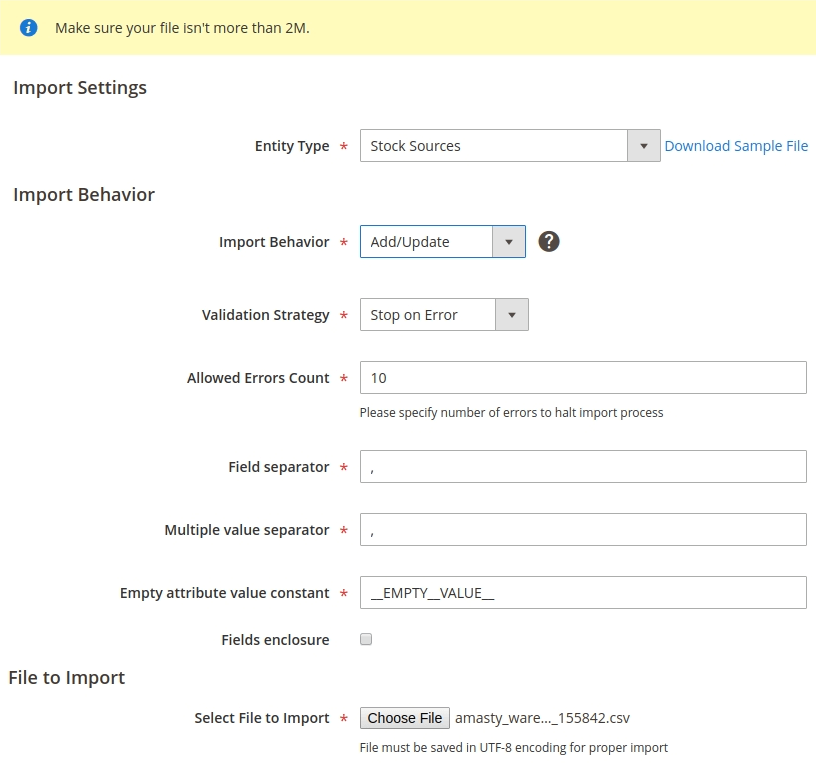
To do this go to System → Import. In the Entity Type choose ‘Stock Sources’, then download and fill in a sample file.
Decide whether you want to update, replace or delete data by configuring ‘Import Behavior’.
Set import configuration to stop import on any number of errors to prevent loading broken data or skip error entries.
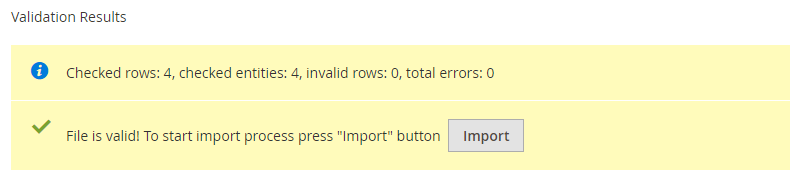
Then choose a file to import (already filled in sample file) and press the ‘Check Data’ button.
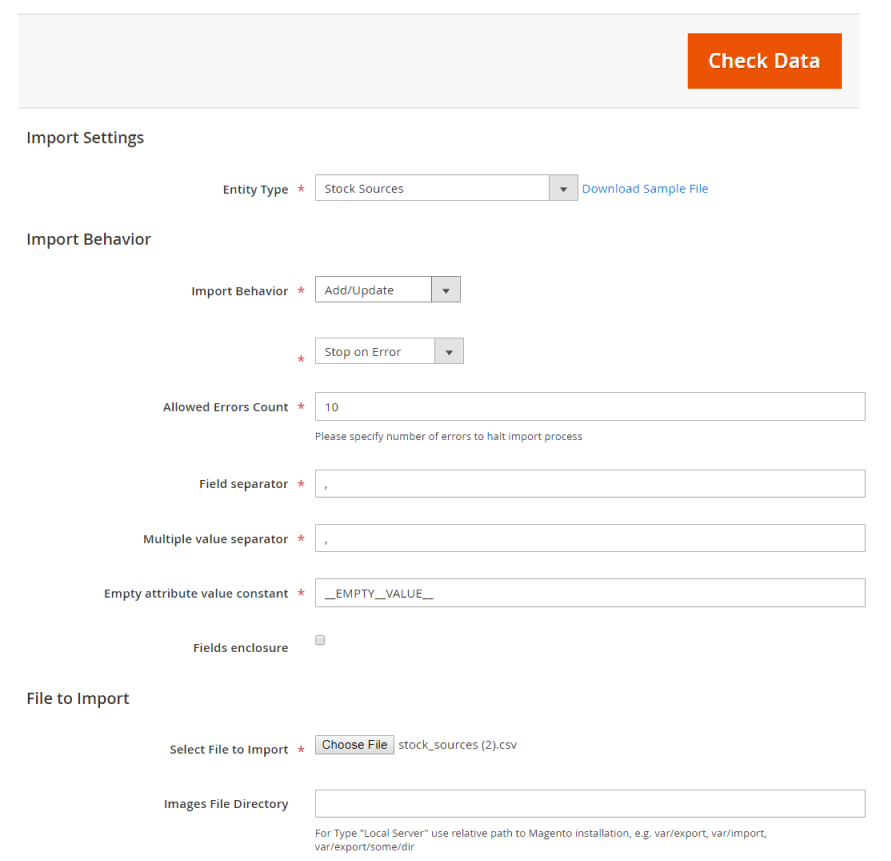
Correct the mistakes and press the ‘Import’ button to import stock data.
Make sure that you don’t change a sample file structure and that a file isn’t more than 2M.
Export Data
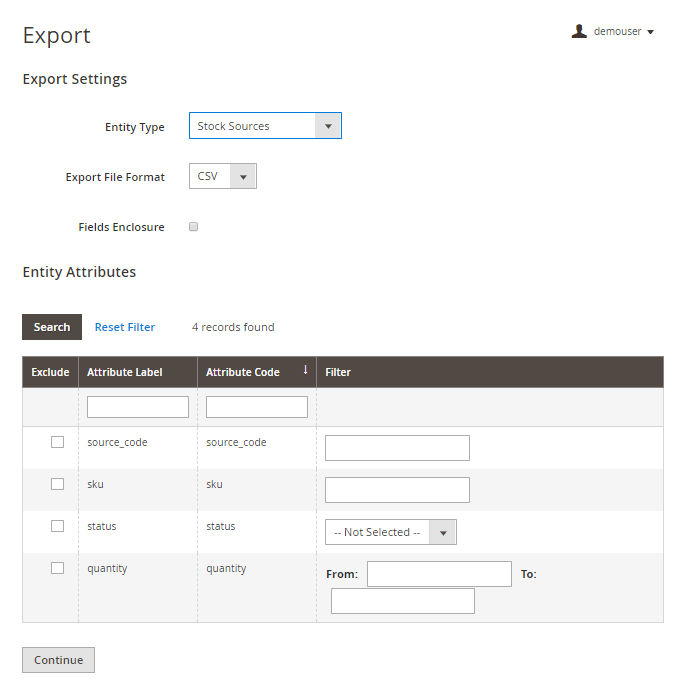
To export needed stock data, please navigate to the System → Export tab.
Entity Type - choose Stock Sources.
Export File Format - CSV format is needed.
You may also exclude particular attribute values from the exporting if needed. In the Entity Attributes table tick the attribute columns you want to exclude and hit the Continue button.
On Nov 18, 2019, we've significantly updated the Multi Warehouse Inventory extension. You can easily migrate your data from the old version of MWI to the Advanced MSI extension or Updated MWI. Please follow the instructions below.
Export From Old MWI and Import to Magento Inventory Management / Updated MWI
Before to start the data migration, please make sure, that all-important fields in the MWI (warehouse info) are filled in correctly: Warehouse Name, Warehouse Code, Country, Postcode. The data export from the Multi Warehouse Inventory can be performed only via conventional export System → Export.
If you exported or imported only a part of warehouses and need to Export/Import the rest, please note, that source_codes may not match. In this case, the CSV file will not update your database but will add data to it.
To migrate all the data correctly, you'll need to take two steps:
- Transfer the sources (warehouses)
- Transfer the filling of the sources with products
Step 1: Transfer the sources
Please go to System → Export. Choose the entity type Amasty Warehouses (Sources) Export to export the sources.
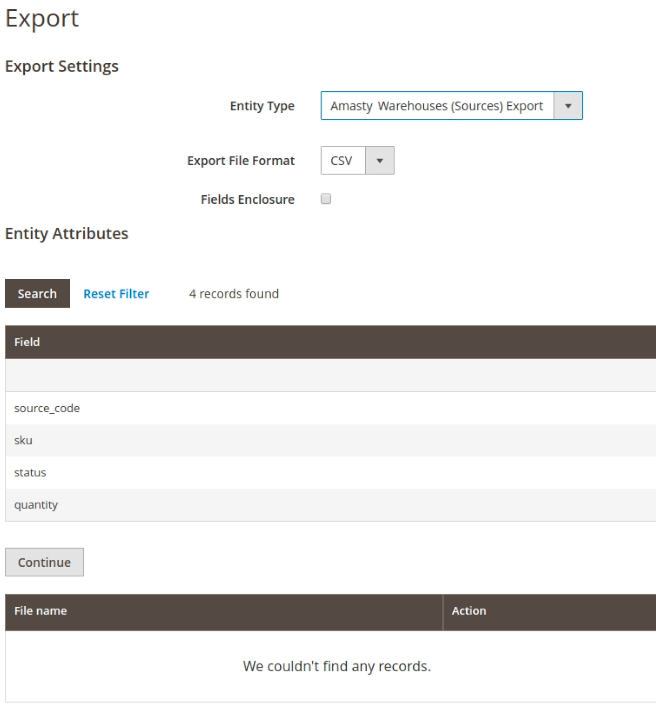
- Click the button Continue and get the CSV file with the data.
- Go to System → Import and choose Amasty Warehouses (Sources) Import.
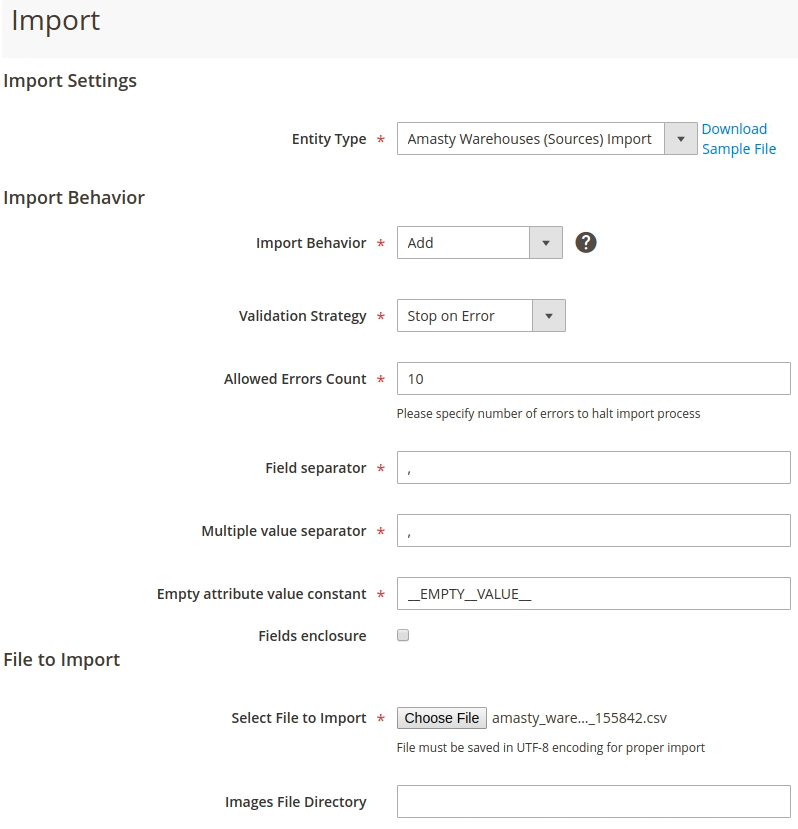
- Add the downloaded file.
- Click Check Data
- Click Import
You may go to Stores → Sources and see the migrated sources, yet not linked to products.
Step 2: Transfer the filling of the sources with products
Please go to System → Export. Choose the entity type Amasty Items per Warehouses (Sources) Export to export the products and sources link data.
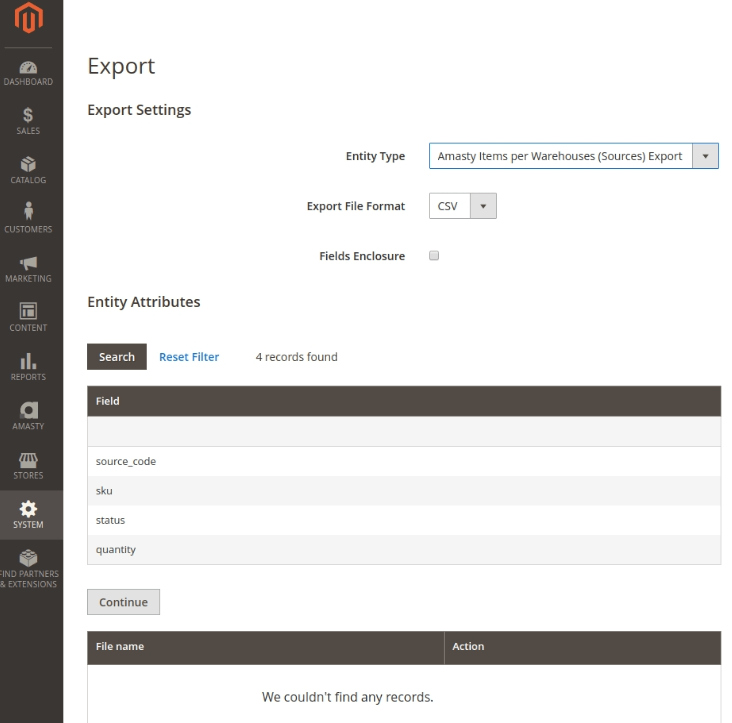
- Click the button Continue and get the CSV file with the data.
- Add the downloaded file.
- Go to System → Import
- Click Check Data
- Click Import
If you go to the page of one of the products that were previously linked to the MWI warehouse, you'll see, that now it is linked to the MSI source, the name of which completely coincides with the name of the former one.
After the data migration is complete, please turn off your MWI to avoid the fatal error on the product grid. Also, please perform php bin/magento index:reindex.
Find out how to install the Multi Warehouse Inventory extension via Composer.
magento_2/multi_warehouse_inventory.txt · Last modified: 2021/04/29 08:03 by tihomirova