
Sidebar
magento_1:custom_form
Table of Contents
For more details see the Custom Form extension page.
Custom Form
Create web forms to analyze your target audience. Easily collect additional info and create an e-mail database.
General Settings
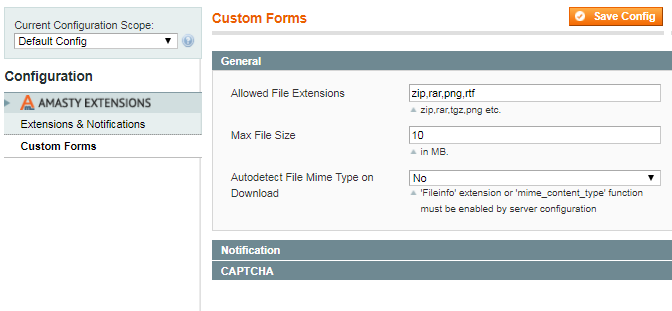
General
To configure the extension, go to Admin Panel → CMS → Custom Forms
Allowed File Extension - Specify available formats for files that should be uploaded.
Specify Max File Size for upload in megabytes(mb).
Autodetect File Mime Type on Download - Automatically detect file types.
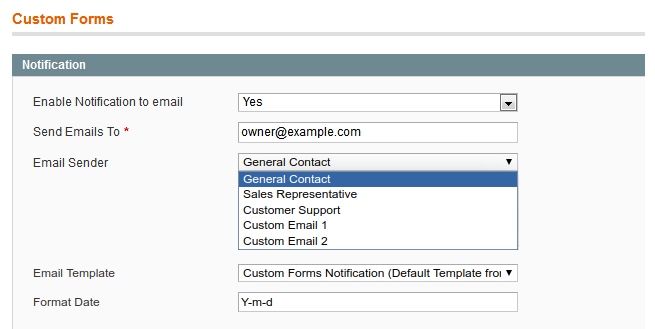
Notification
Enable Notification to email - Allow the extension to send notifications.
Send Emails To - Specify an e-mail to receive the submitted data.
CAPTCHA
Enable CAPTCHA - Set to Yes to enable CAPTCHA.
If you plan to use CAPTCHA in your forms, remember to specify the parameters of symbols. The following fields are mandatory.
CAPTCHA Timeout (minutes) - Specify a timeout in minutes.
Number of Symbols - Specify the number of symbols, eight symbols maximum.
Symbols Used in CAPTCHA - Specify symbols.
Use either letters or numbers, no spaces, lookalike symbols (e.g. i,l,1) decrease chance of correct recognition.
Case Sensitive - Set to Yes, to make CAPTCHA Case sensitive.

How to create new fields
To configure and create custom Forms, Fields or Submitted Data, go to Admin Panel → CMS →Custom Forms →Fields
Here all your custom fields are listed. You can edit each of them whenever you need.
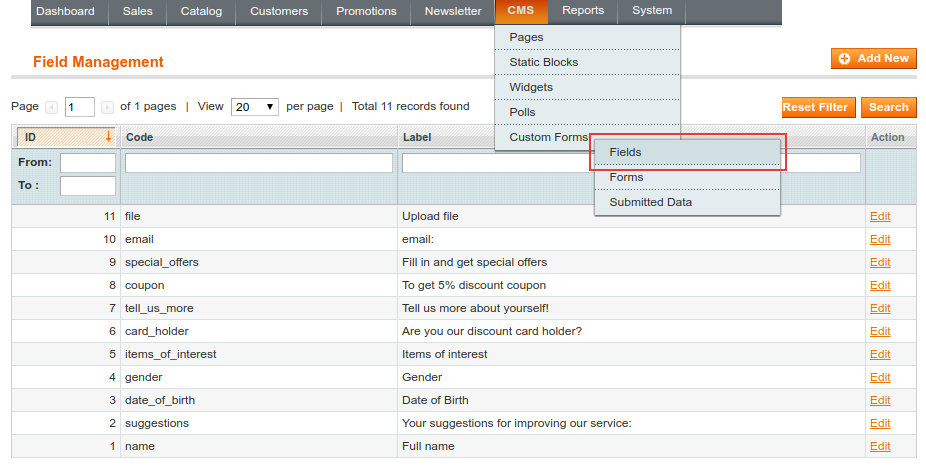
Add New - To create a new field click Add new button
Types of fields
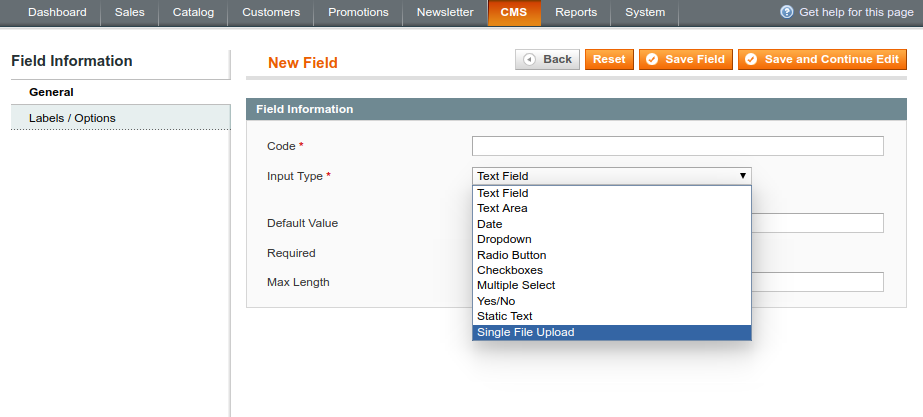
Code - Specify an identifier for your field, for internal use.
Input Type - Select a type of input for your form. Notice that it cannot be changed, after the field is saved.
Static Text type of input can not be changed.
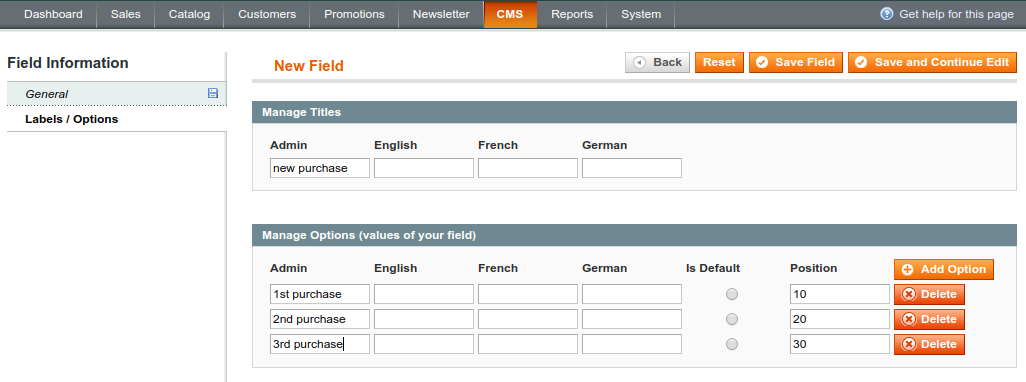
Options for Dropdown, Checkboxes, Multiple Select and Radio Buttons types of input are identical.
Single file upload - Offer a field to upload files.
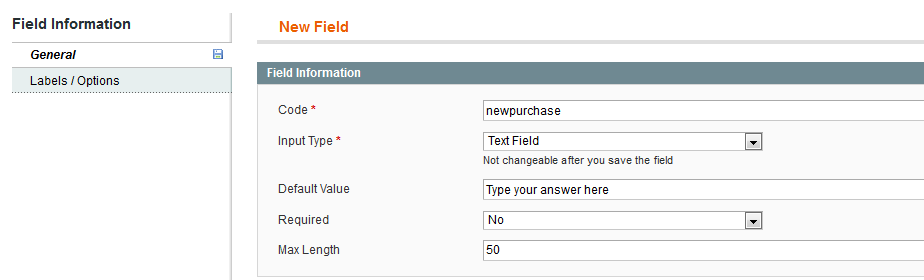
Default Value - Specify the text by default in this field.
Max Length - Specify the max length of the field (in symbols).
Notice that Text Area type of input allows to use more symbols than Text Field.


Admin - Values can be specified here.
Position - New positions can be added without editing the existing ones.
Create new forms
To create new forms or edit already existing ones, go to Admin Panel → CMS → Custom Fields → Forms

Add New - Click Add New to create new form.
On a grid, you will see already existing forms
Edit - Editing already existing fields is also possible.
Code - Specify the identifier for you form for internal use.
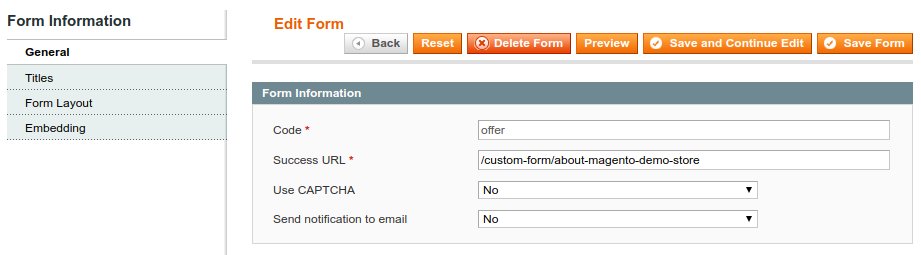
Send notification to email - Choose whether to receive email notifications after the form is submitted.
Success URL - Specify the URL to which your customer would be redirected after the form is successfully submitted
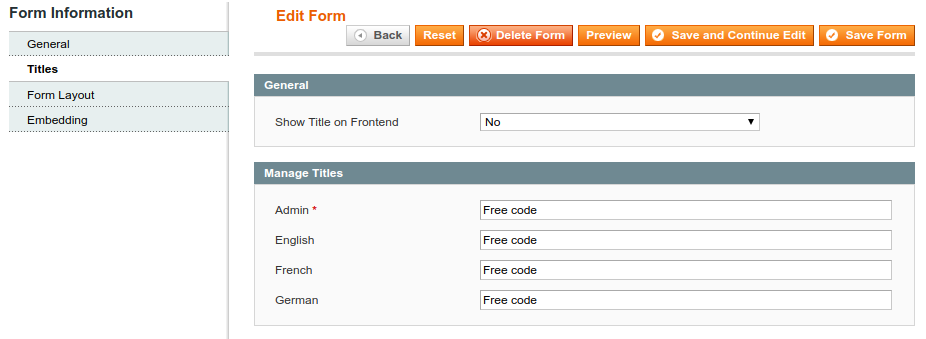
Manage Titles - Specify title of the form for different store views.
CSS id - Assign CSS IDs for forms’ lines to have an ability to configure them simply.
Add New Field - Choose fields to add to the line.
Order - New lines can be added and ordered without editing the existing ones.

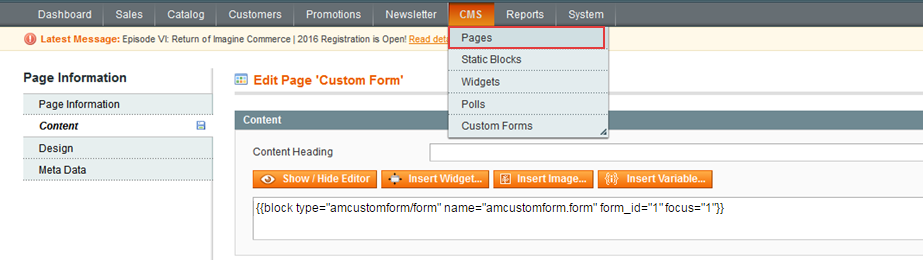
Insert forms into any CMS Page

CMS Embedding Code - Use the code to add your newly created form to CMS.
Use focus=“1” to activate the form right after the customers load the page.
Use focus=“0” not to activate the form right away. (e.g. the form is at the bottom of the product page – and the customers have to check the product info first and then go to the form).
To add your newly created form to your site, go to Admin Panel → CMS → Pages. Paste the code of a custom form in Content field .
Submitted Forms' Data
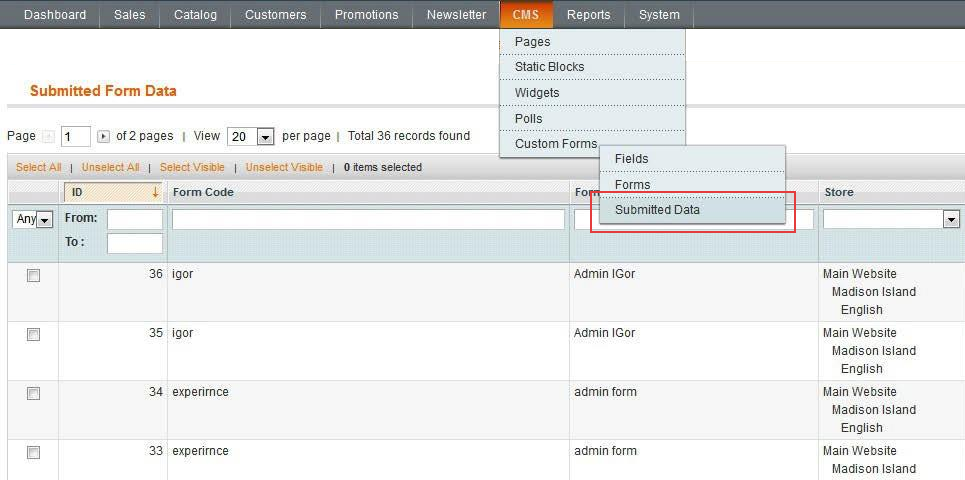
To view saved data of custom forms go to Admin Panel → CMS → Custom Forms → Submitted Data
View detailed info from each custom form right from the admin panel.

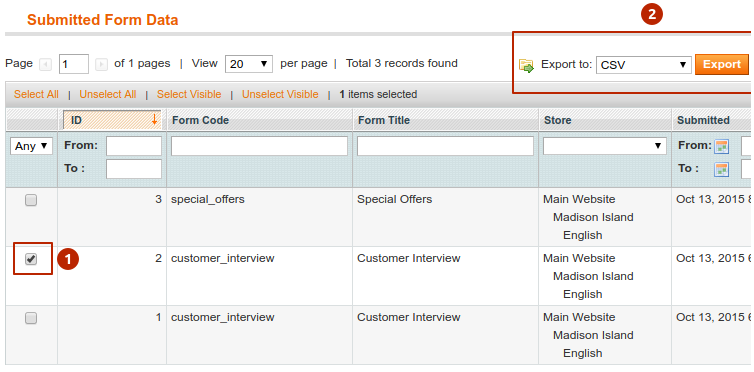
Export forms' data via CSV file
To export custom forms, check the desired form on the grid, and click Export.
Frontend
This is how a custom form may look on the frontend.

magento_1/custom_form.txt · Last modified: 2019/07/25 14:48 by skudrov