
Sidebar
magento_2:dropshipping
Table of Contents
For more details see how the Dropshipping extension works.
Guide for Dropshipping for Magento 2
Set up your business with minimal costs using Magento 2 Dropshipping extension. Create and manage dropshippers base right from the Magento admin panel.
- Add an unlimited number of dropshippers
- Limit suppliers' access to orders
- Allocate products between warehouses
- Assign orders to particular vendors
- Calculate and display shipping costs
- Hyva-compatible by default
Constructing Dropshippers Base
Creating Dropshipper Roles
To construct the base of dropshippers, you need to create custom dropshipper roles.
Go to Admin Panel → System → User Roles.
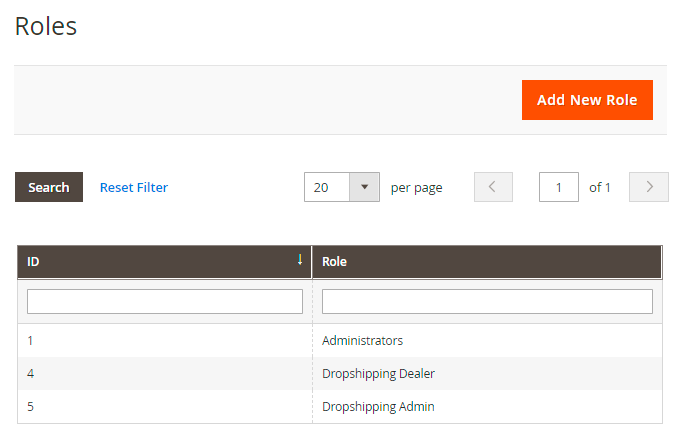
Here you can view and edit the roles or create a new one.
Hit the Add New Role button.
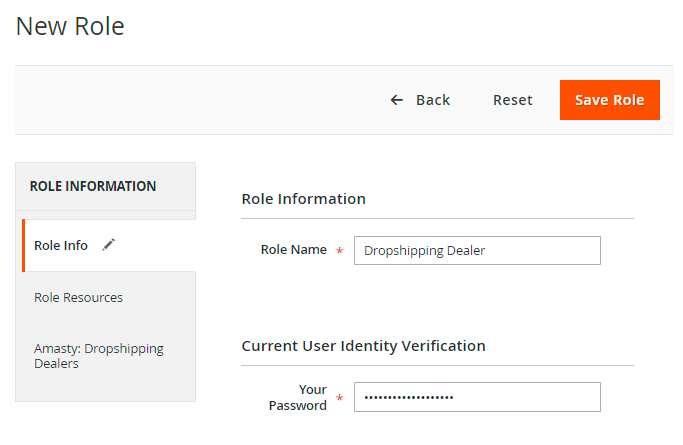
In the Role Info tab specify the Role Name and set the Password.
To limit dropshippers' access, switch to the Role Resources tab.
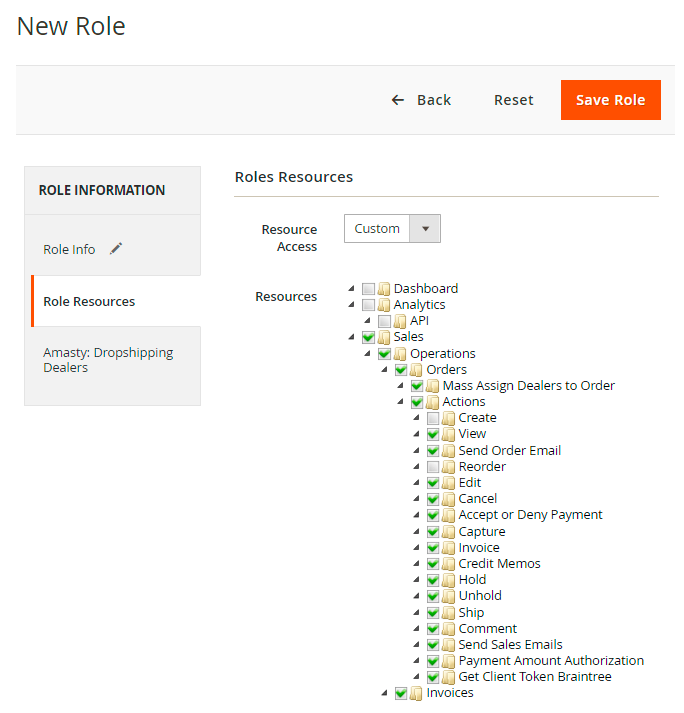
Select the sources to which your dropshippers will have access.
Go to the Amasty: Dropshipping Dealers tab.
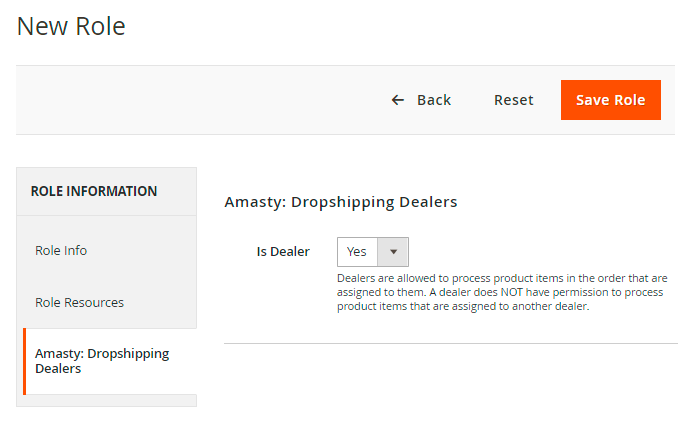
Is Dealer - set to Yes to allow dealers to process product items in the order that are assigned to them. A dealer does NOT have permission to process product items that are assigned to another dealer.
Save the role.
Adding Dropshipper Users
After the dealer's role has been created, navigate to Admin Panel → System → User Roles.
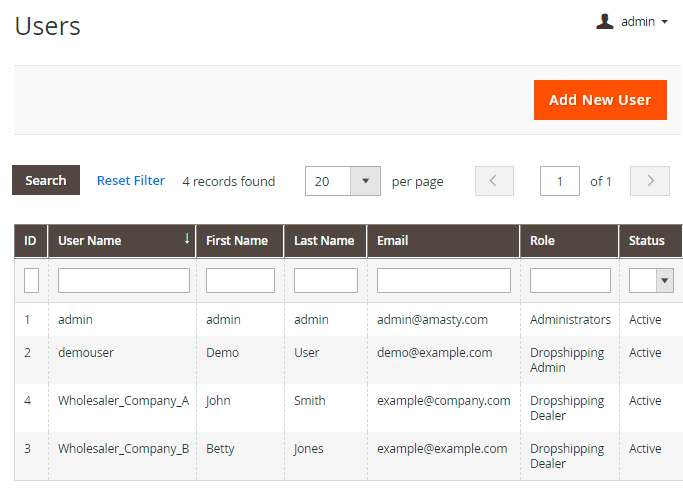
On the grid you can see all the existing users.
To create a new one, click Add New User.
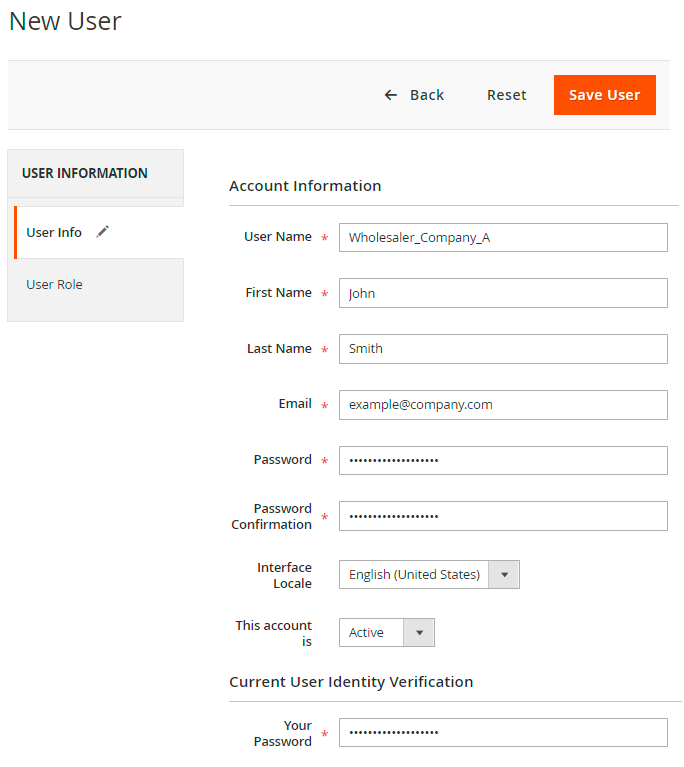
Specify the necessary account info. Activate on Inactivate the user in the This account is option.
Save the role and configure its settings.
Switch to the User Role tab.
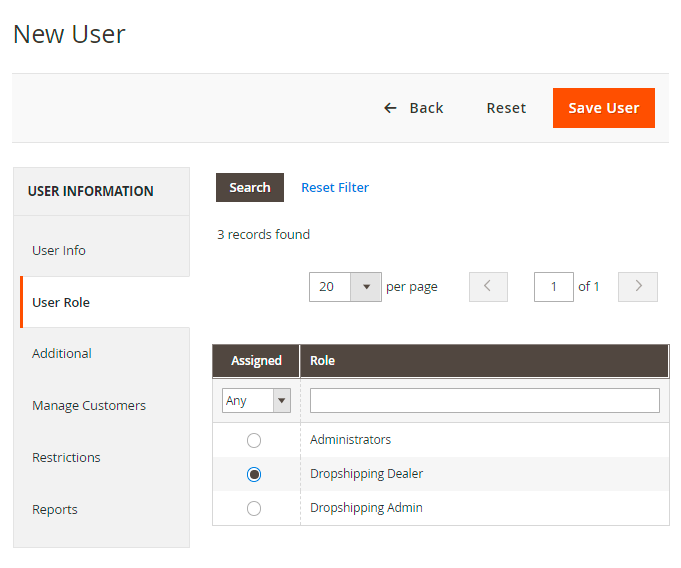
Assign the dropshipper's role that you've previously created.
In the Additional tab you can specify extra information about the dropshipper's account. This data will be displayed to assigned customers on the checkout page as well as on the customer account page.
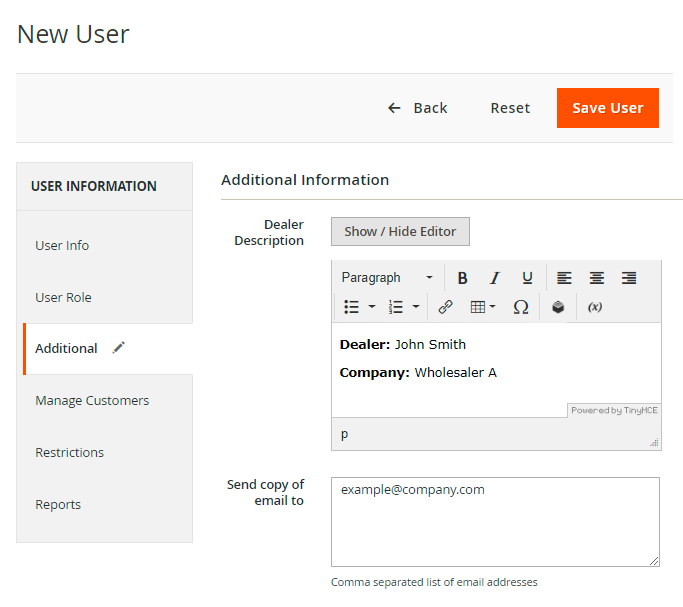
This info can be added and edited only by the store admin user.
Go to the Manage Customers tab to assign particular customers to the dealer.
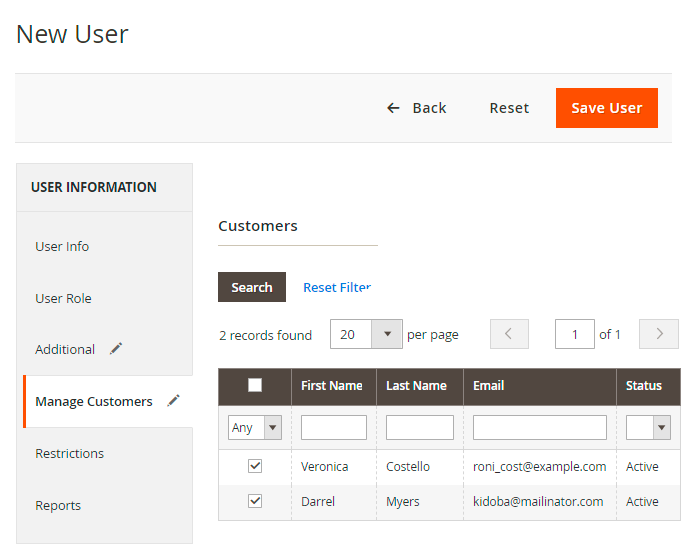
The user will be able to see only these customers on the Manage Customers grid, only orders placed by these customers on the order grid, and documents (invoices, shipments, and credit memos) related to orders of these customers.
At the Restrictions tab you can assign the user to a particular customer group.
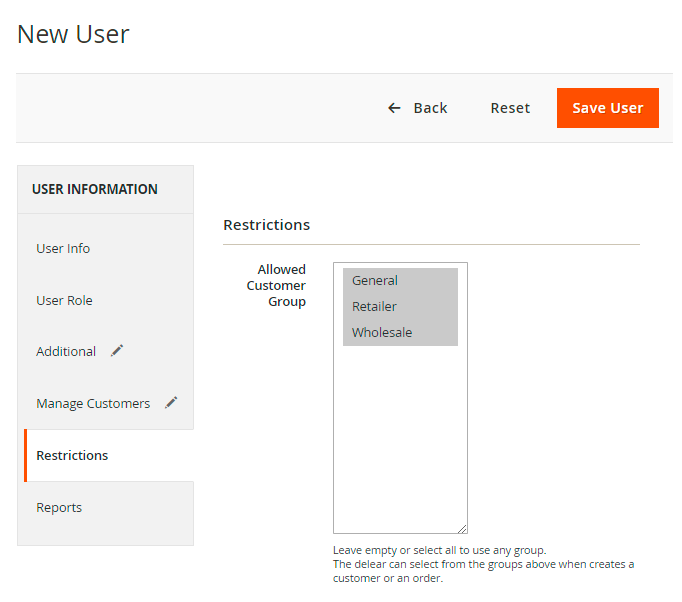
By default users are assigned to all customer groups. If you assign users to certain groups, they will be able to add customers only to this group.
At the Reports tab you can view all orders assigned to this dealer.
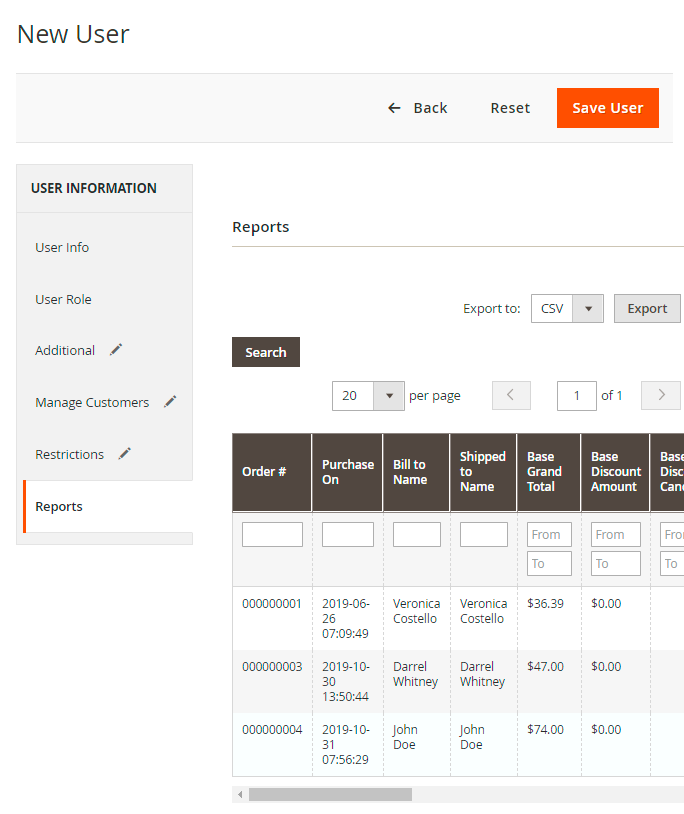
It is possible to filter and sort orders on this grid. So, for example, if you pay commissions to dropshippers based on complete orders, you can filter the list to show only completed orders.
Email Notifications for Dropshippers and Admins
With the extension, you can configure automatic notifications for both users.
Navigate to Stores → Configuration → Amasty Extensions → Dropshipping Dealers.

Notify Dealer on Item Assign - set to Yes if you want the dealer to receive an email notification when admin assigns items in the order to this dealer.
Admin Name - specify admin's name that will be displayed to Dealers in email notifications and Magento back office.
Admin Email - provide the comma-separated list of admin email addresses.
CC for Product Assign Email - provide the comma-separated list of emails to send there a copy of the original email about the products assigned to a particular dealer.
Email Sender - select the contact from which the notifications will be sent.
Product Assign Notification Template - choose the email template.
MSI General Settings
After the users and roles have been created, you need to configure the shipping process.
First of all, go to Stores → Configuration → Amasty Extensions → MSI.
General Settings
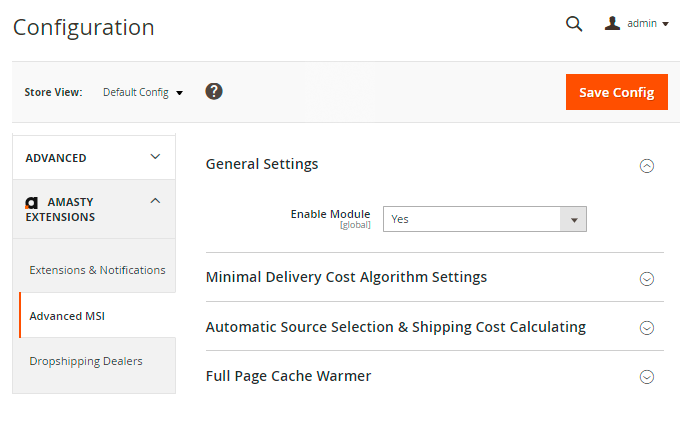
Enable Module - set to Yes to enable the extension.
Minimal Delivery Cost Algorithm Settings
Expand this tab to choose the automatic source selection algorithm.
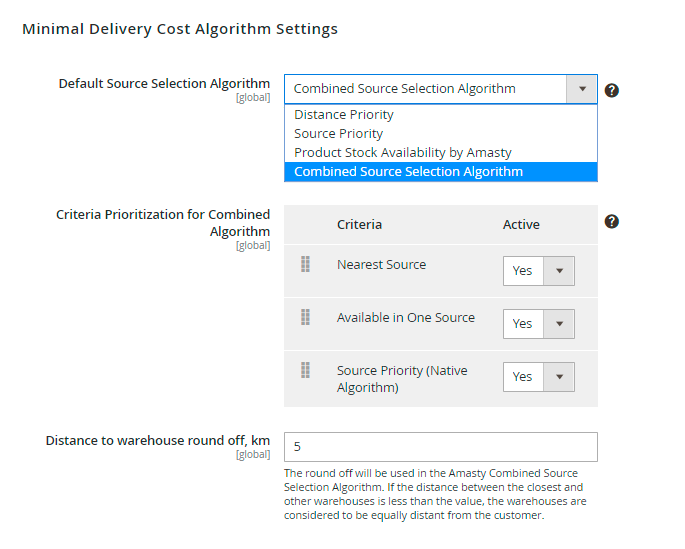
The extension offers you 4 Default Source Selection Algorithms:
- Distance Priority - picks the nearest warehouse from a customer to reduce transport costs;
- Source Priority - chooses an optimal warehouse according to its priority in the stock assignment settings block;
- Product Stock Availability by Amasty - selects an optimal warehouse according to availability of goods;
- Combined Source Selection Algorithm - applies 3 picking criteria one by one until the matching warehouse is found.
The selected algorithm will be immediately applied to the ordered items on the shipment creation page.
Criteria Prioritization for Combined Algorithm - set the priority of each criterion for the Combined Source Selection Algorithm via drag and drop.
How it works:
The algorithm will apply the upper criteria first. If the result consists of several sources that fit the condition of the first criteria, the list of these several warehouses will be transferred to the next lower criteria for processing. The sources that don't fit the first criteria will not be processed by the second one. But they will be available on the shipment creation page with lower priority.
Distance to warehouse round off, km - set the distance value that will be used in the Amasty ‘Combined Source Selection Algorithm’. If the distance between the closest and other warehouses is less than the value, the warehouses are considered to be equally distant from the customer.
Automatic Source Selection & Shipping Cost Calculating

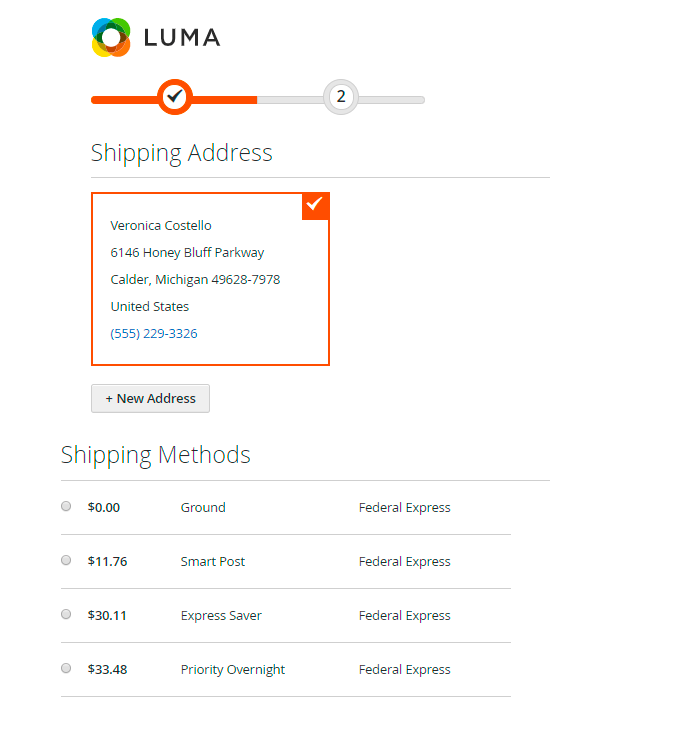
Enable Automatic Source Selection - set to Yes to activate the chosen algorithm as soon as a customer places an order. The necessary source for shipment will be selected automatically and displayed to a customer with shipping cost information.
This option allows using shipping services (like UPS, USPS, FedEx, DHL) with Multi-Source Inventory. The origin sources will be chosen during order creation, and a customer will be charged for the shipping costs immediately on the checkout page.Please note, that Shipment(s) for an order will be created immediately after a click on 'Ship' button on the order details page in the admin area.
This is how the feature is displayed on checkout:
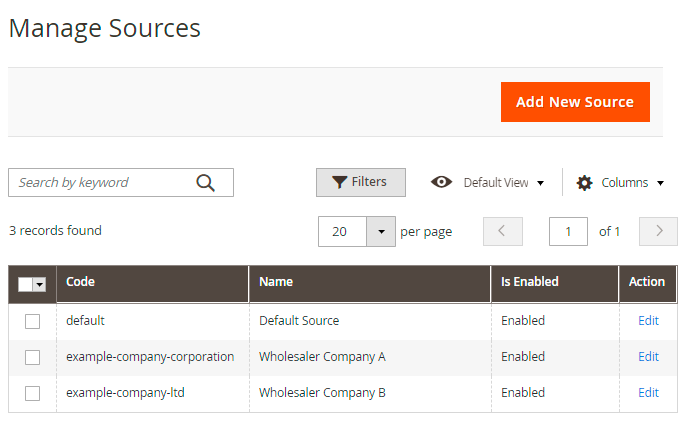
Manage Sources
Note that sources are your warehouses. To let the extension work you need to create at least 2 sources.
To find the list of all sources, go to Stores→ Sources. You can easily track your sources by code, name and status. The extension allows you to edit already existing sources and add a new source right from the admin panel.
To create a source, press the Add New Source button and fill in general information about a warehouse.
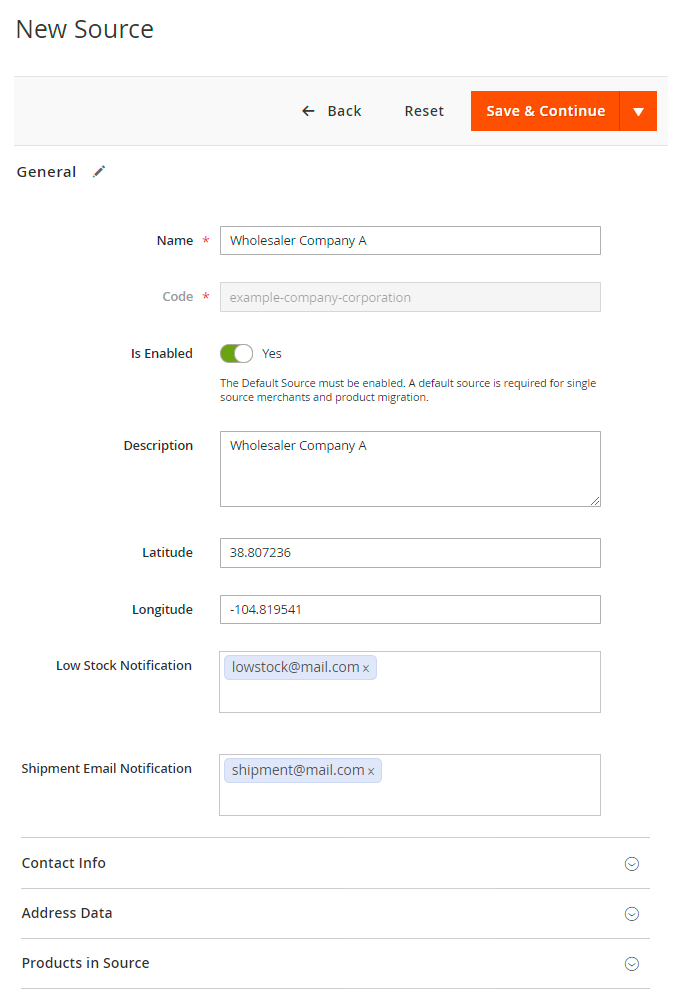
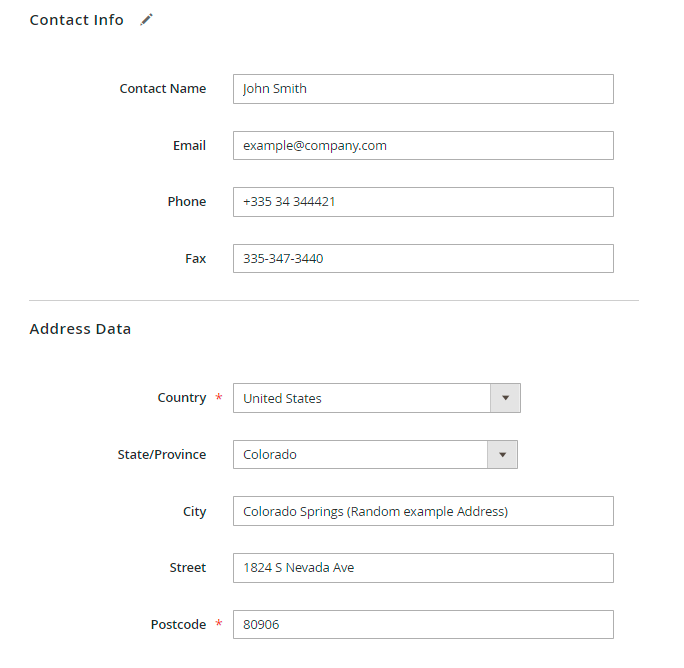
Then fill in warehouse contact information and address data.
In the Low Stock Notification and Shipment Email Notification specify the emails to which the notifications upon low stock and submitted shipments will be sent.
Then fill in warehouse contact information and address data.
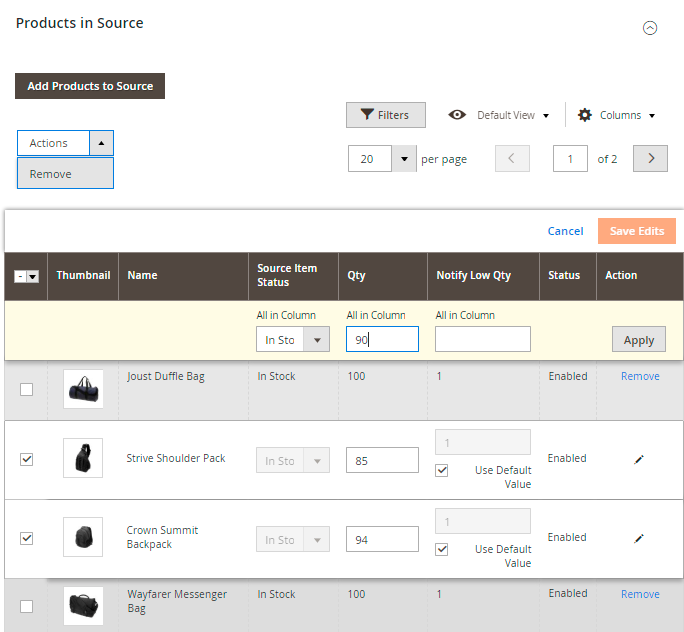
In the Products in Source tab you can assign products to a source (warehouse) and adjust quantity. Click Add Products to Source button to add new products. Edit product quantity right from the grid. You may choose multiple products and change their status in bulk. Use filters to quickly pick out the needed items. Here you can also specify the low stock quantity: you'll automatically get a notification when the product quantity riches this number.
Adjust shipping methods settings for the source. You may fill in a fixed amount, or set to use Shipping Provider Rate.
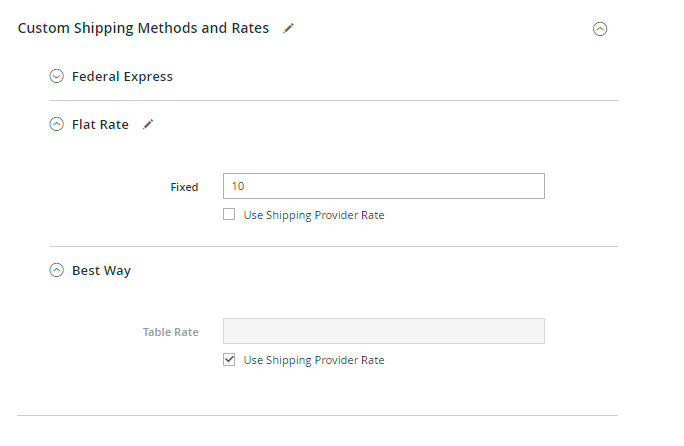
Note, that if you use the fixed cost for the shipping method, all predefined shipping calculations for this source will be overridden with this fixed amount.
Save the source.
Assign Sources to Stocks
Sources must be assigned to a particular stock. To assign sources go to Stores→ Stocks.
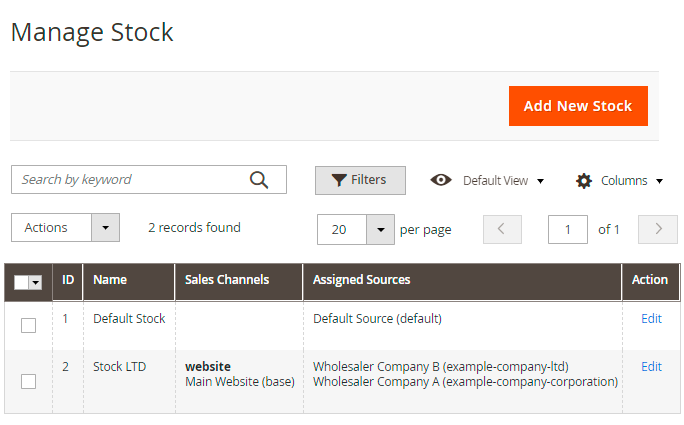
Then choose a necessary stock and press the Edit button.
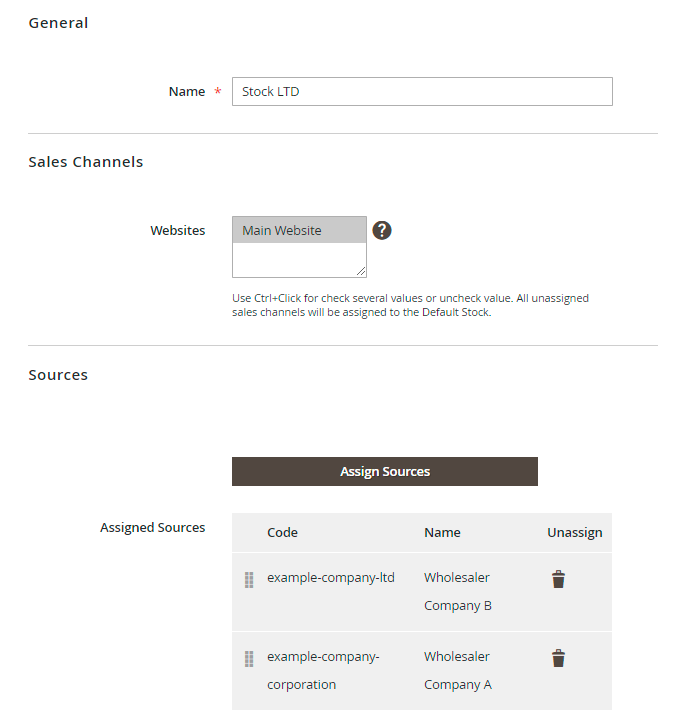
In the settings block find Sources tab and assign sources to the stock. You can change sources priority via drag and drop. The priority is used by ‘Source priority’ algorithm.
Assign Sources to Products
Now you need to fill in the quantity of products in each source. To do this, go to Catalog→ Products.
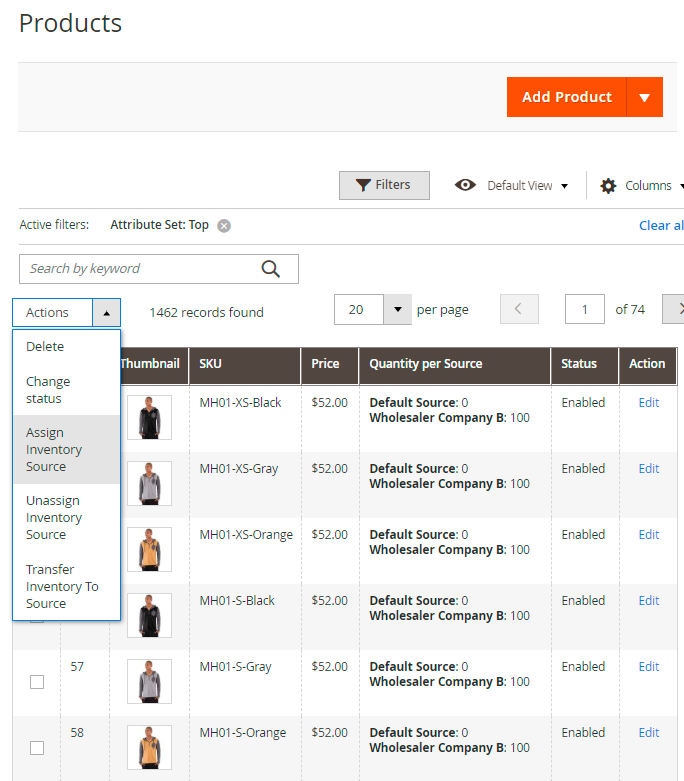
On the grid you can view to which stock a product is assigned, its quantity and easily change the stock if needed.
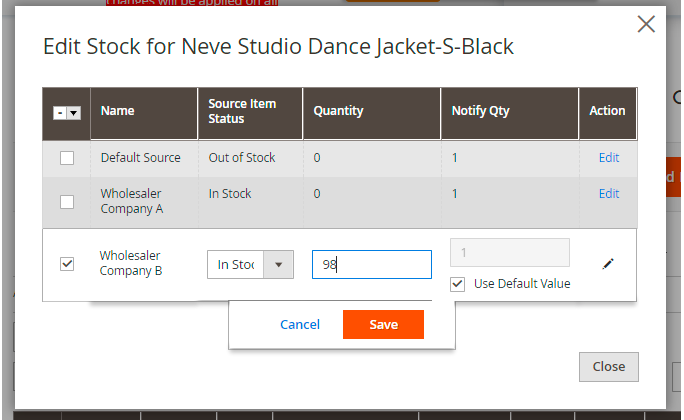
Hit the button Edit Stock on the grid to quickly adjust the product stock for each warehouse in a convenient pop-up window.
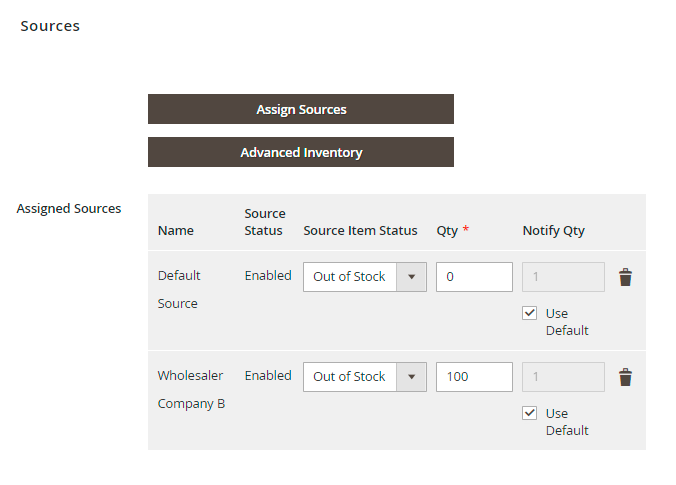
You can also edit product stock info by ticking Edit for a particular product. In the settings block find Sources tab and fill the stock for each source.
Order Management
Now you can avoid manual tasks and configure an automatic order export. These profiles let you limit the data to export, configure an automatic export by event or by cron, and filter orders by suppliers.
To configure profiles, go to Amasty → Export Orders → Profiles.
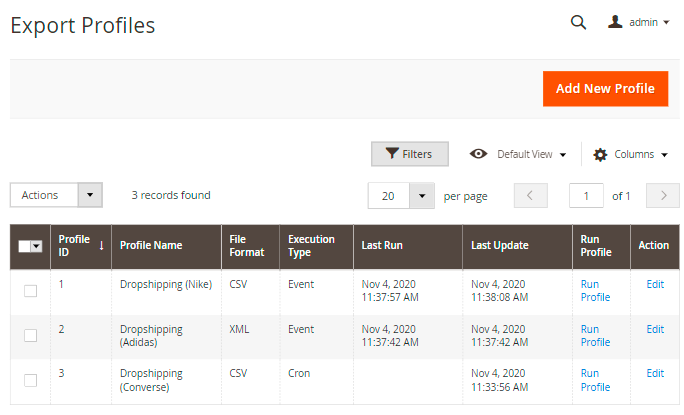
Click Add New Profile and proceed to this guide to configure it properly.
With the Magento 2 Dropship, you can also assign orders to particular dealers manually.
Go to Sales → Orders.

On the grid you can see the dealer by which an order is being processed and assign new orders to a particular one using mass action. Just tick the orders and select Assign Orders to Dealer option in the Action dropdown menu.
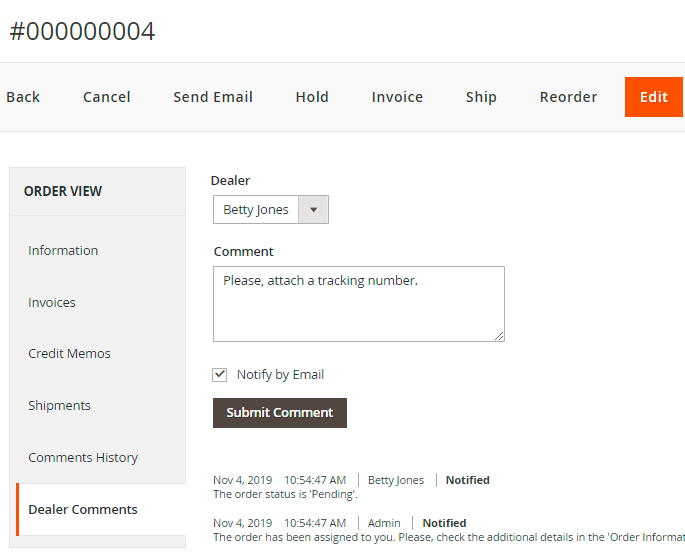
When an order has been assigned, a dropshipper will get a notification. You may provide a dealer with additional info and get details using Dealer Comments order tab.
Splitting Products in Order
There can be a situation when one order contains products from different vendors. In this case, you may split the order and let dropshippers process only their products.
Click on the necessary order, go to the Information tab and scroll to the Items Ordered section.

Besides, on the same grid, you could see whether the Dealer was notified by email on the column 'Notified'.

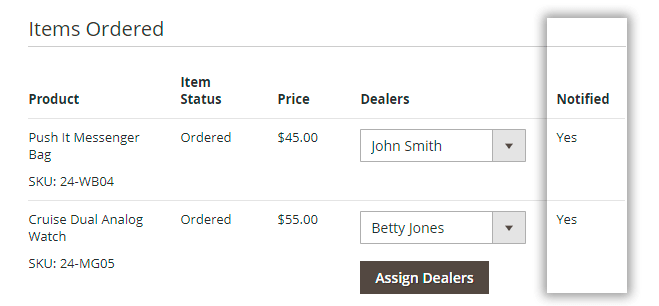
Dealers will have access only to products assigned particularly to them.
Save the changes.
Find out how to install the Dropshipping extension via Composer.
magento_2/dropshipping.txt · Last modified: 2024/12/18 10:50 by avronskaya