
Sidebar
magento_2:tiktok_pixel
Table of Contents
See the way the TikTok Pixel for Magento 2 extension works.
Guide for TikTok Pixel for Magento 2
Connect to TikTok Ads Manager either via Pixel or Events API to effectively measure TikTok ad performance. Gain a better understanding of website visitor actions to optimize advertising campaigns, find or re-engage new customers, and maximize conversions.
- Track crucial events
- Set up events as conversions
- Create custom audience segments
- Model lookalikes
- Unlock more comprehensive analytics
General Settings
Before adding new pixels, please attentively configure the general extension settings.
Go to Stores → Configuration → Amasty Extensions → TikTok Pixel → General.
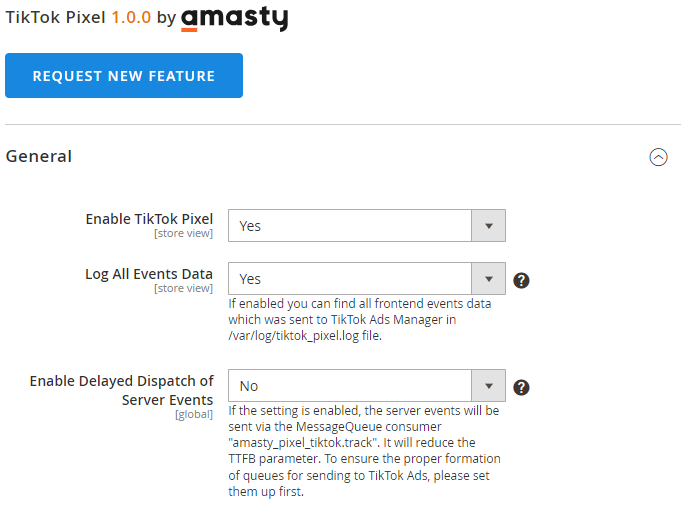
Enable TikTok Pixel - Set to Yes to enable the extension and make the Log All Events Data and Enable Delayed Dispatch of Server Events settings visible.
Log All Events Data - If enabled, you can access a record of all frontend events sent to TikTok Ads Manager, stored in the var/log/tiktok_pixel.log file.
Please activate this feature only when you're checking event data, and don't forget to turn it off when you're done debugging to avoid slowing down the site. It's a good practice not to leave the Log All Events Data feature enabled continuously to save disk space.
It is crucial to note that only information about active Pixels is included in the logger. However, if the page is being cached, the logging process in the debugger might not occur. Make sure to consider the caching settings while testing the logging events data for accurate event tracking and troubleshooting.
Enable Delayed Dispatch of Server Events - Select Yes to allow the delayed dispatch of server events. The server events will be sent via the MessageQueue consumer amasty_pixel_tiktok.track, reducing the TTFB parameter.
To ensure the proper formation of queues for sending to TikTok Ads, please set them up first.
Manage Pixel IDs (grid)
Create and oversee TikTok Pixel IDs in one place.
Navigate to Marketing → TikTok Pixel → Manage Pixel IDs to access the grid with Pixel ID recordings. Click the Add New Pixel button to add a new connection with your TikTok Ads Manager account or select Edit in the Action column to make adjustments to existing Pixel IDs.
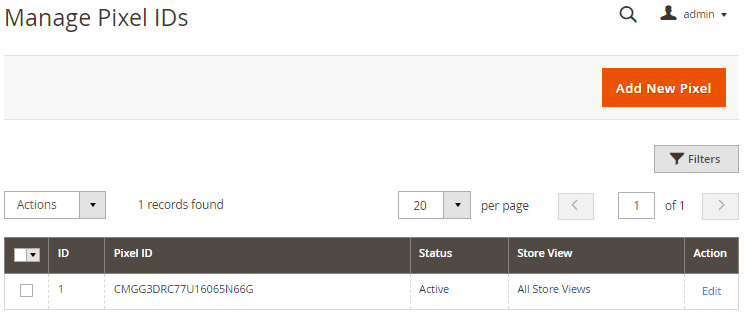
When needed, you can set up multiple TikTok Pixel IDs to gather event data independently for various store views.
Create or Edit Pixels
General
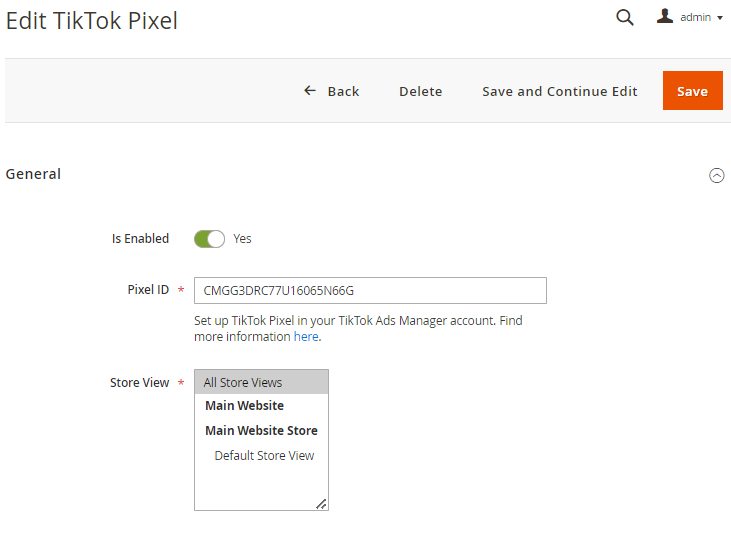
Is Enabled - Toggle to Yes if you want to activate this Pixel ID.
Pixel ID - Provide here the TikTok Pixel ID taken from your TikTok Ads Manager account.
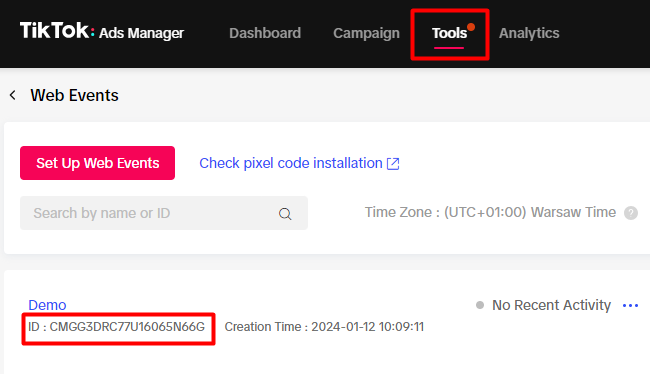
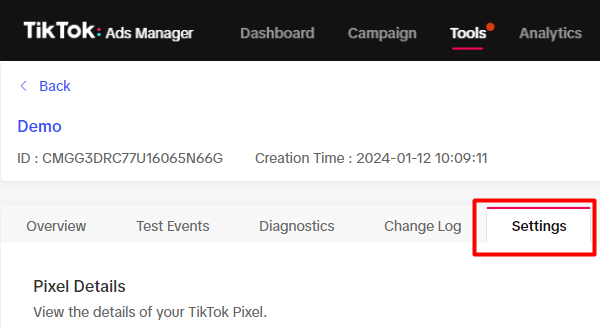
To copy the needed Pixel ID, navigate to Events Manager in your TikTok Ads Manager account. For this, go to Tools → Events → Events Manager → Web Events and click the Manage button to open all earlier created pixels.
If you've just created a new pixel, it may take some time for the collected data to become visible.
Store View - Select the store view(s) for which this Pixel will collect the data.
TikTok Pixel (events)
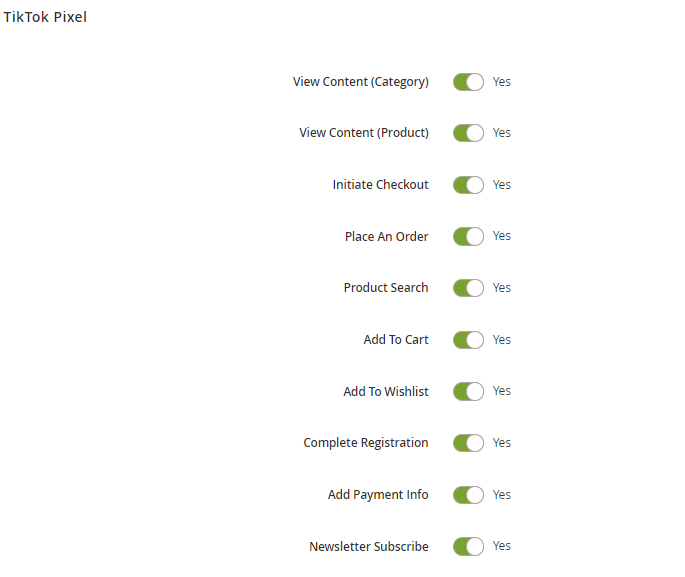
Decide which user actions on your website will be tracked using the Pixel method and enable them in a few clicks.
It is the list of available events:
- View Content (Category)
- View Content (Product)
- Initiate Checkout
- Place An Order
- Product Search
- Add To Cart
- Add To Wishlist
- Complete Registration
- Add Payment Info
- Newsletter Subscribe
Please be informed that the extension monitors prices in your store's base currency.
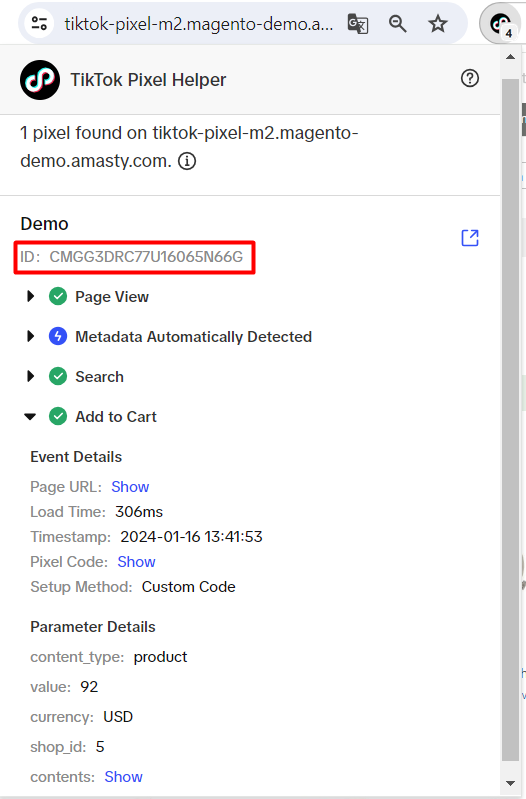
TIP: To verify pixel and events setup, download TikTok Pixel Helper in the Chrome Store. Leverage this browser extension to check for errors and get installation recommendations.
Events API
Please note that you need to log in to your TikTok Ads Manager account and have at least one created pixel there to configure the Events API functionality.
In its official documentation, TikTok recommends advertisers set up both Tiktok Pixel and Events API to mitigate data loss and maximize performance benefits.

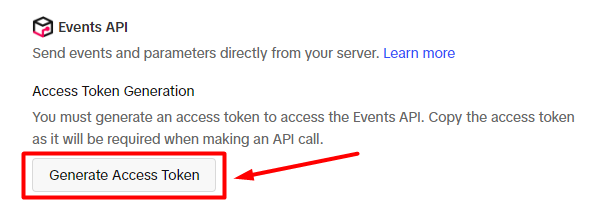
Access Token - place here the Access Token generated on your TikTok Ads Manager account side.
For this, in the top menu, go to Tools → Events → Events Manager → Web Events → click Manage button → open the needed pixel → Settings tab → Events API → Generate Access Token.
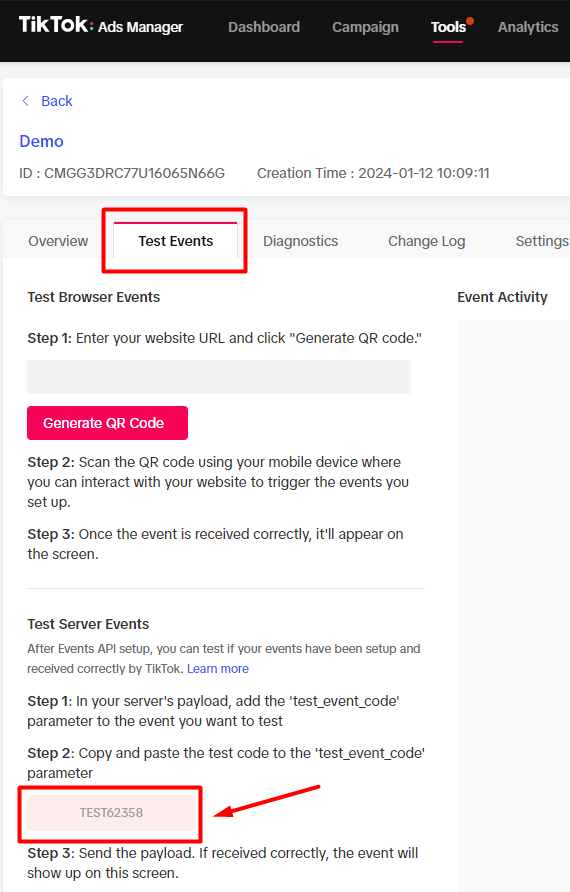
Test Event Code - specify the test code copied from the Test Events tab of the Pixel in your TikTok Ads Manager account. Leave empty, if you don’t want to send the Test Events.
This feature helps to make sure that your events are received correctly by TikTok.
Please save the changes and flush the Magento Cache after the Pixel ID adding or editing is complete.
Thanks to the TikTok event deduplication functionality, it is possible to track the same events via Pixel and Events API simultaneously with no risk of data overlapping.
Find out how to install TikTok Pixel for Magento 2 via Composer.
magento_2/tiktok_pixel.txt · Last modified: 2024/01/17 15:24 by kkondrateva