
Sidebar
magento_2:custom_form
Table of Contents
For more details see how the Custom Form for Magento 2 extension works.
Guide for Custom Form for Magento 2
The Custom Form Extension for Magento 2 lets you create web forms of various types to collect customer info. Use a special drag-and-drop constructor to generate multiple forms in seconds and customize them according to your requirements.
- Multiple input types
- Drag-and-drop constructor
- Possibility to add forms to any CMS page
- Redirect customers to any page after form submission
- Collect customer data
- Hyva-ready storefront
- Hyva Checkout compatible by default
- WCAG compliance (for the extension with Luma and Hyvä Theme)
- Compatibility with AWS S3 storage
Magento 2 Custom Form extension is compatible with Hyvä themes. You can find the amasty/module-custom-form-hyva package for installing in composer suggest (Note: the compatibility is available as part of an active product subscription or Support Subscription).
The extension is compatible with Amasty Google Analytics 4 with GTM Support (you can find the compatibility package for installing in composer suggest). This means, if you have both modules installed, you will be able to easily track your website visitors' interactions with custom forms in your GA4 account. Find more information on how to configure this functionality here.
Magento 2 Custom Form extension is compatible with GraphQL Application Server. You can find the amasty/module-graphql-application-server-compatibility package for installing in composer suggest.
Configuration
To configure email notification settings, please go to Stores → Configuration → Amasty Extensions → Custom Forms.
Admin Notification
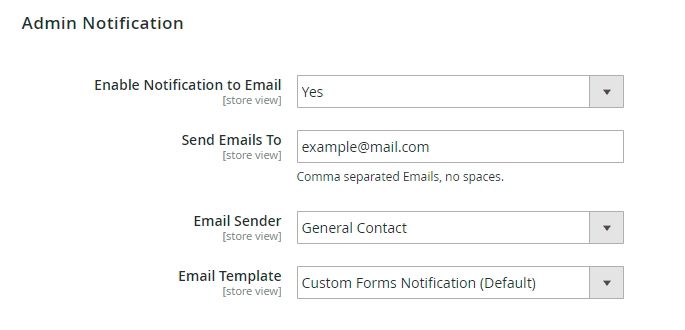
Enable Notification to Email - set to Yes to enable automatic notifications.
Send Emails To - specify email address that will receive notifications.
Email Sender - select the contact that will be used as a sender.
Email Template - choose a template according to which email content will be created.
Reply Form Configuration
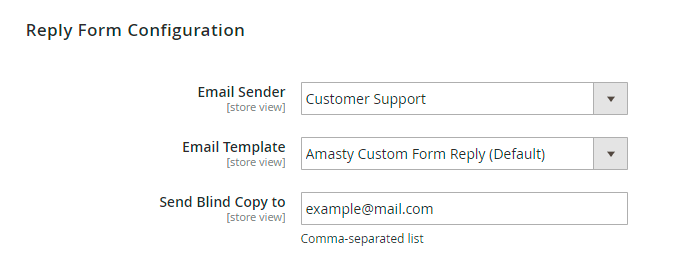
In the Reply Form Configuration tab select Email Sender, Email Template and where to Send Blind Copy.
Autoresponder
With the extension, you can also configure auto response.
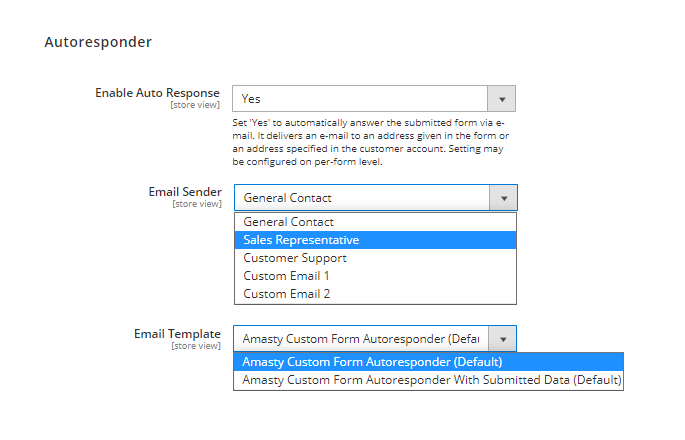
Enable Auto Response - set 'Yes' to automatically answer the submitted form via e-mail. It delivers an e-mail to an address given in the form or an address specified in the customer account. The setting may be configured on a per-form level.
Specify email sender and choose an email template (Amasty Custom Form Autoresponder is set by default).
Customer Account General Settings (Custom Form Pro)
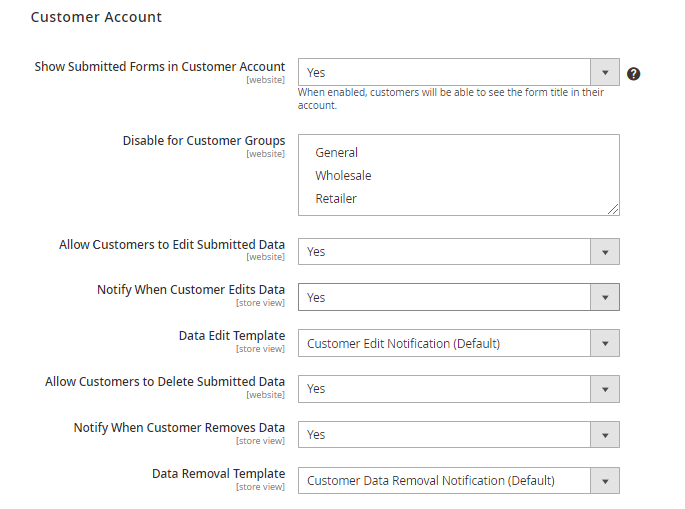
Show Submitted Forms in Customer Account - set to ‘Yes’ to enable your customers to view the submitted form title in their accounts.
Disable for Customer Groups - specify the customer groups for which the ability to view the submitted forms from the account will be disabled.
Allow Сustomers to Edit Submitted Data - set to ‘Yes’ to let customers edit data from submitted forms.
Notify When Customer Edits Data - set to ‘Yes’ to receive notifications every time when customers edit their submitted data.
Data Edit Template - choose the template for the email notifications related to submitted data edits.
Allow Customers to Delete Submitted Data - here you can allow or disallow customers to delete their submitted data.
Notify When Customer Removes Data - set to ‘Yes’ to receive notifications every time when customers remove their submitted data.
Data Removal Template - here you can choose a data removal template.
GDPR Consent
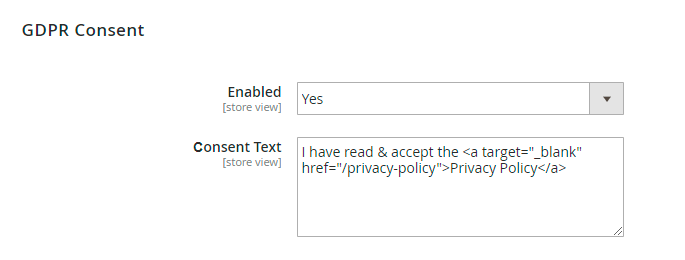
Enabled - set to Yes to display privacy policy consent message.
Consent Text - adjust the message. Use HTML to customize the information.
Explore our Magento 2 GDPR extension to strengthen the data security and privacy.
Mailchimp (Custom Form Pro)
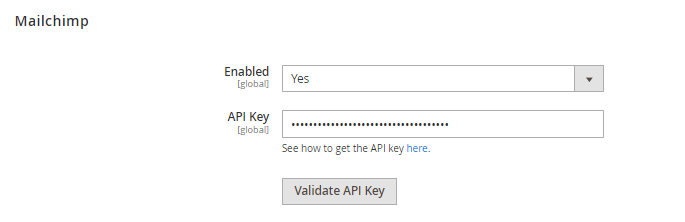
Enable - set to automatically add the emails from submitted forms to particular Mailchimp lists.
API Key - add the API Key from your Mailchimp account. See how to get key here.
Validate API Key - click this button to validate your API Key.
Advanced

Google Api Key - fill in the key that will be used for Google Map Field. Click here to get API key.
Add Google Map Address and Image to PDF files - set to 'Yes' to allow for adding Google Map Address and Image to PDF files. Also, please check the Google API information related to PDF downloads.
Date Format - select the format according to which a date will be filled in and then displayed.
File Upload Links Lifetime (days) - after a set amount of days, file links will no longer be valid. Use “0” to disable this functionality. This feature is designed to protect the links to files and to reduce the risk of unauthorized access to them.
To provide an additional level of security for files uploaded via forms you can also restrict access to the extension folder pub/media/amasty/amcustomform. (Please, consult with your system administrator to do it correctly).
Custom Form Grid
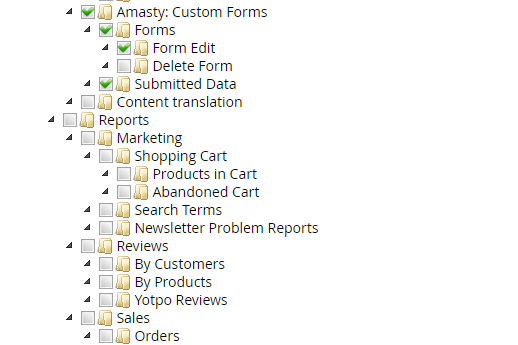
To see and manage all created forms in one place, go to Content → Custom Forms → Forms.
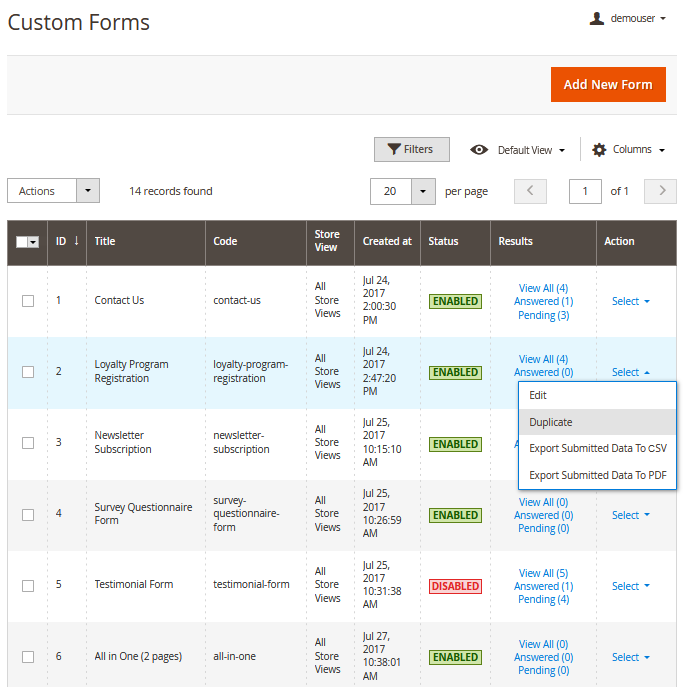
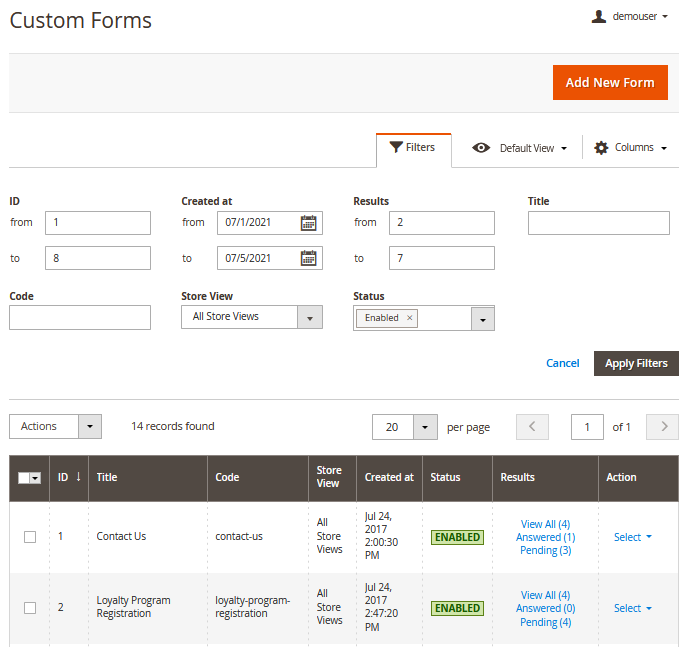
On a handy grid you can easily track forms Results, Edit, Duplicate them in the action column. Also, you can Export Submitted Data to CSV or PDF files. Perform mass actions via Actions dropdown menu (Delete/Disable/Enable) if needed.
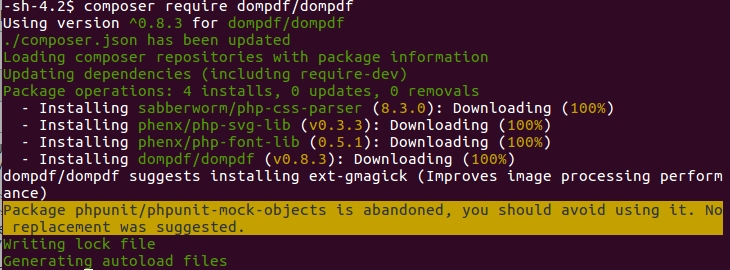
To use PDF functionality, please install the library dompdf/dompdf. To do this, run the command “composer require dompdf/dompdf” in the main site folder.
Also, please check the Google API information related to PDF downloads.
To see an example of responses' CSV file export, please check the Contact Us Form Export file. The download will start automatically on click.
You can Delete, Disable, and Enable forms on the grid via mass action:

Note, that now from the admin panel you can restrict or allow the custom forms deletion for particular user roles. To do this, navigate to System → Permissions → User Roles → (choose needed role) → Role Resources:
Use Filters to quickly find the needed forms:
To create a new form, click the Add New Form button.
Custom Form Creation
Form Information
To generate a new Custom form you need to configure a number of general settings.
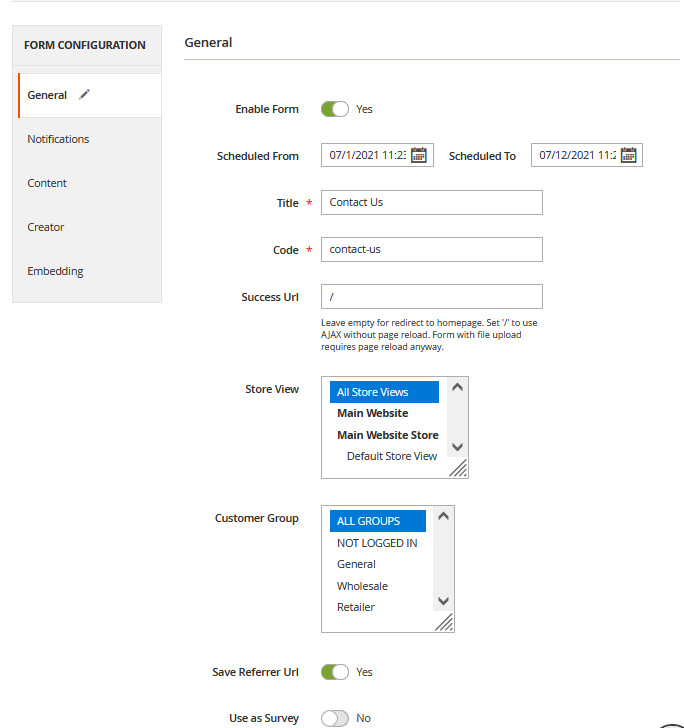
Enable Form - enable/disable each particular form.
Scheduled From/Scheduled To - here you can schedule a form display (e.g. to match the time of your marketing campaigns, etc.)
Title - specify the form title that will be displayed on the custom forms grid.
Code - use a form code for your admin purposes.
Success URL - set “/” to use AJAX without page reload. Form with file upload requires a page reload anyway. Leave empty for redirect to the homepage.
Store View - determine the store views on which the form will be displayed.
Customer Groups - select customer groups for which the custom form will be available.
Save Referer Url - set to Yes if you want to track the origin source of the form submission.
Use as Survey - set to Yes to restrict form submission, so that the user can submit the form only once. If set to No, a form can be completed by the same user unlimited times.
In the Custom Form Pro extension version, you can also adjust Mailchimp settings for each form.
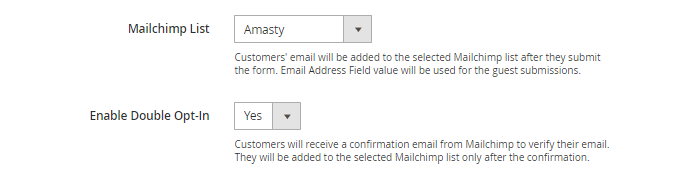
Mailchimp List - choose the Mailchimp list to automatically add the customers’ emails from a form submitted data. Email Address Field value will be used for the guest submissions.
Enable Double Opt-In - if set to ‘Yes’, customers will receive a confirmation email from Mailchimp to verify their email. They will be added to the selected Mailchimp list only after confirmation.
Email Notifications
You can configure admin notification on the level of a particular form. This will override the settings that are specified in General Settings.
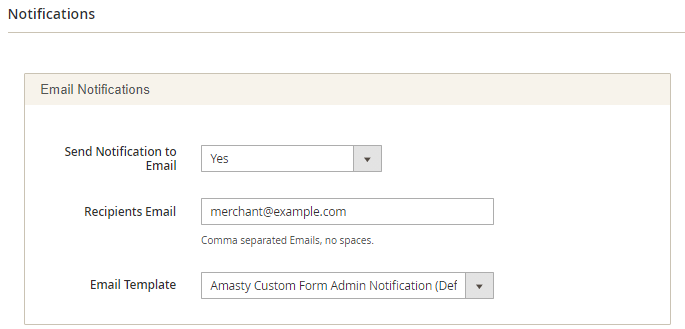
Send Notification to Email - activate this option to notify store admins about new form submissions.
Recipients email - input recipient email for the customers' form data.
Email Template - select email template variant.
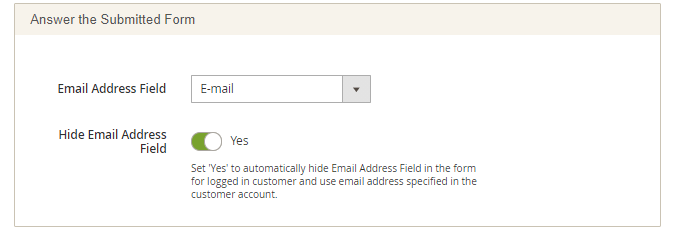
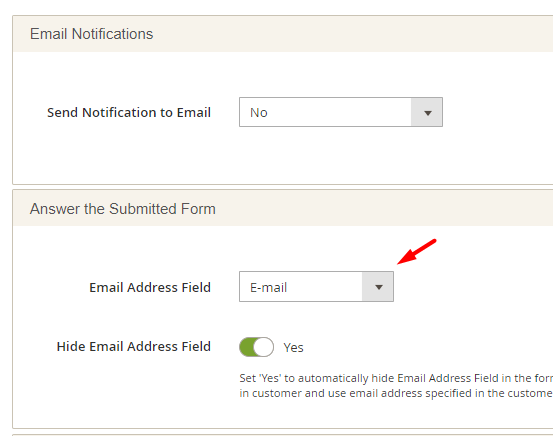
Email Address Field - choose a field to be used as email address for manual and auto response reply to the customer.
Place 'Text Input' field in the form and 'Save' the form to be able to select the field here. If empty, email address specified in the customer account will be used and reply to guests will not be sent.
Hide Email Address Field - set 'Yes' to automatically hide Email Address Field in the form for logged in customer and use email address specified in the customer account.

Please note that this setting will have higher priority than the general autoresponder settings since it is a narrow case of the autoresponder config.
Enable Auto Response - enable/disable autoresponder or use the system config value.
Email Template - pick up one of the default templates, use system config value, or create your own custom one so it can be chosen from this dropdown as well.
Use Departments to Receive Notifications (Custom Form Pro)
Within Custom Form Pro extension you can create and use departments to receive notifications about form submissions by customers (Note: this functionality is available as part of an active product subscription or support subscription).
To do this, follow these steps:
- Navigate to the custom form creation/editing page (Amasty > Custom Form > Forms)
- In the “Creator” tab, add a dropdown field and click on “Edit.”
- In the “Options” section, enter the department name in the first column and the department email in the second column. Add as many options (departments) as you need using this method.

- Fill in all other required fields and be sure to save your custom form.
- Next, go to the “Notifications” section. In the “Use Departments” tab, select the newly created dropdown with departments in the “Departments Email Address Field”.

As a result, this dropdown will appear on the form frontend. You can choose whether to make it a required field or not, based on your needs. This way, customers can select which department their request (submitted form) will be sent to.

Form Content

Form Design - select one of three available designs from the dropdown: Default (will be automatically chosen if no changes applied manually), Linear Theme or Circle Theme.
See how the Linear Theme looks on the frontend:

See how the Circle Theme looks on the frontend:

Submit Button - specify any custom text for the form submission button.
Success Message - fill in the text that will be shown to store visitors after the successful form submission.
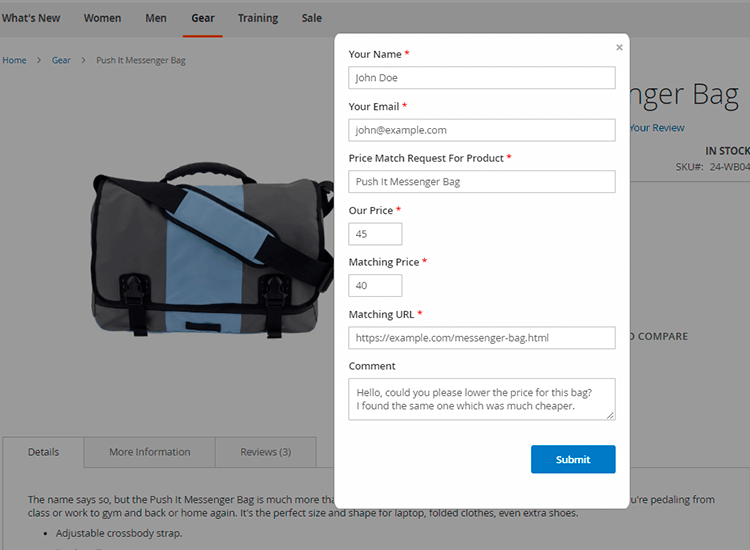
Show on Button Click - enable this option to display a custom form in a popup window that appears on the button click.
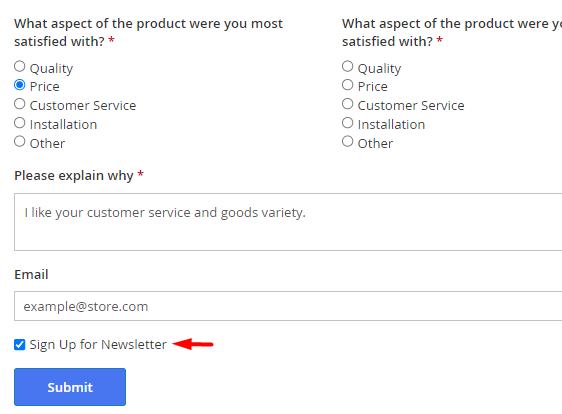
Add Subscription Checkbox - set to 'Yes' to enable subscription checkbox for the form. The compatibility is available as a part of an active product subscription or support subscription.
Please note that the 'Add Subscription Checkbox' field is disabled by default. To enable it, you should first create an email field in the Creator tab of the form settings:
and then specify it in the 'Email Address Field' within the Notifications tab of the form settings.
Here is the frontend example of Subscription Checkbox:
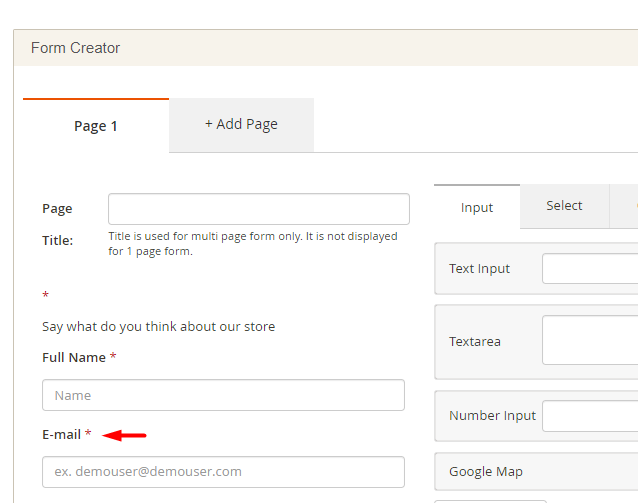
Form Constructor
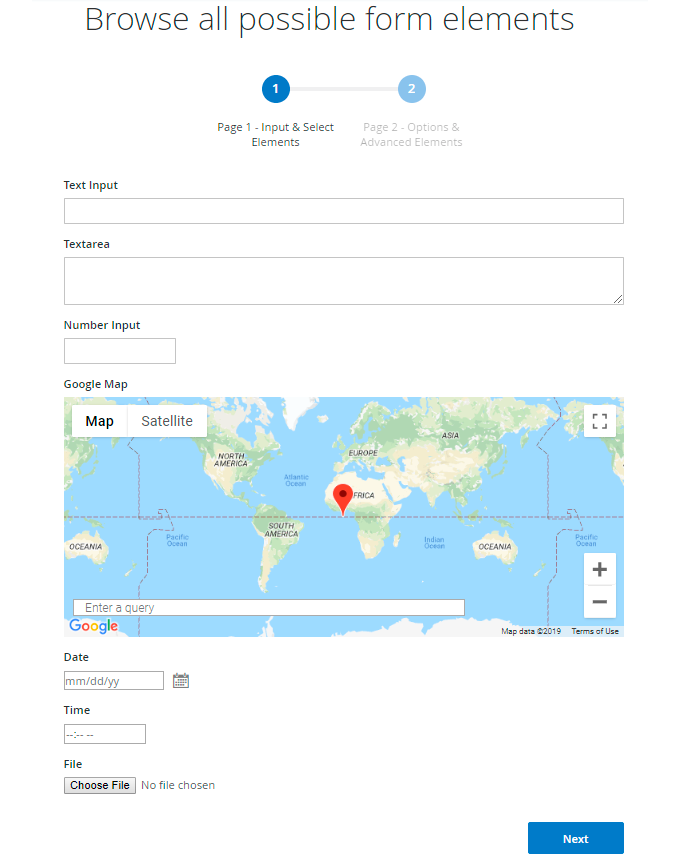
In the Form Creator tab you'll find a rich set of input types and form elements that can be used for each custom form you create. Just select the necessary field type and drag it to the form creation area. You can also create additional pages via +Add Page tab if needed.
1. Input type
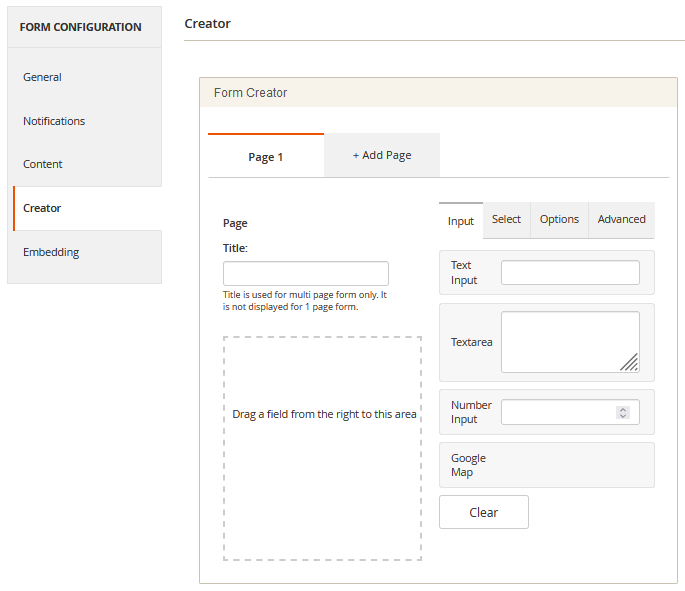
The Input tab contains the following input types:
- Text Input (for short texts. e.g. Name);
- Text Area (will be useful for customer messages or reviews);
- Number Input;
- Google Map.
2. Select type
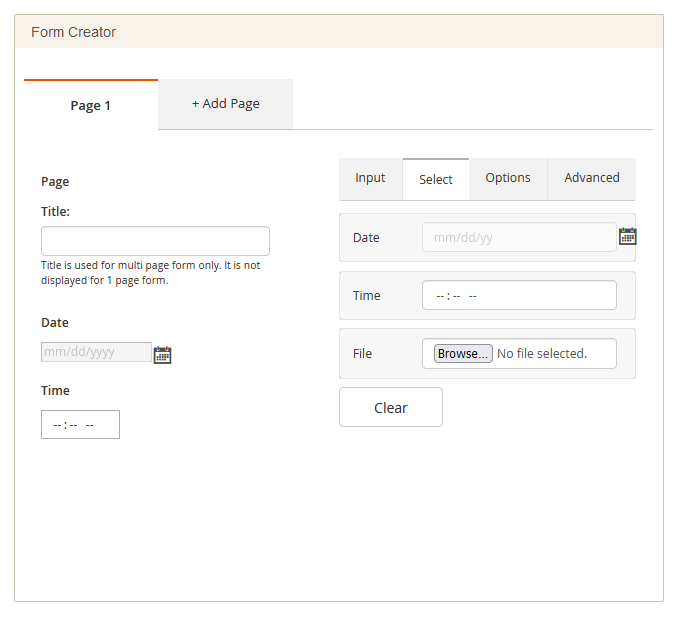
In the Select tab you can choose:
- Date field
- Time field
- File attachment field
The File Attachment field supports the following file formats by default: doc, docx, xls, xlsx, ppt, pptx, gif, bmp ,png, jpg, jpeg ,pdf, txt. If you need to add some specific extension, click Edit button and proceed to Allowed Extension field.
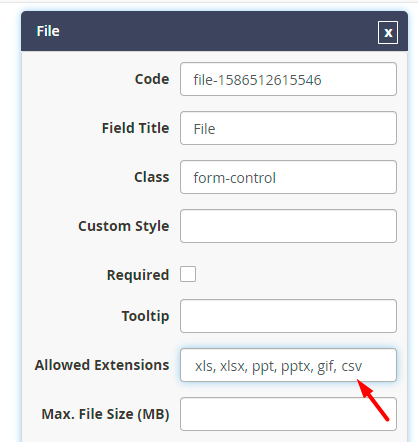
Here specify comma-separated extensions you'd like to allow. Don't forget to provide the default ones as well.
3. Options type
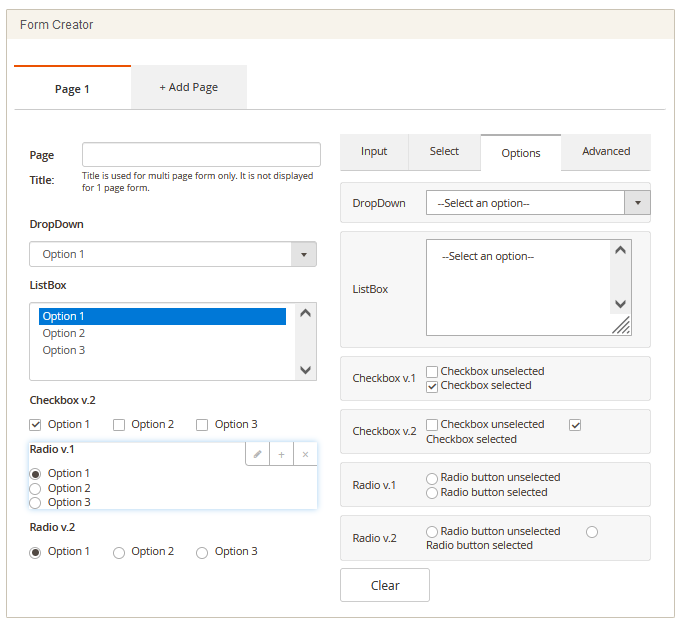
The Options tab offers a range of fields with predefined answers.
- Dropdown
- List Box
- 2 Check Box types
- 2 Radio Buttons input types
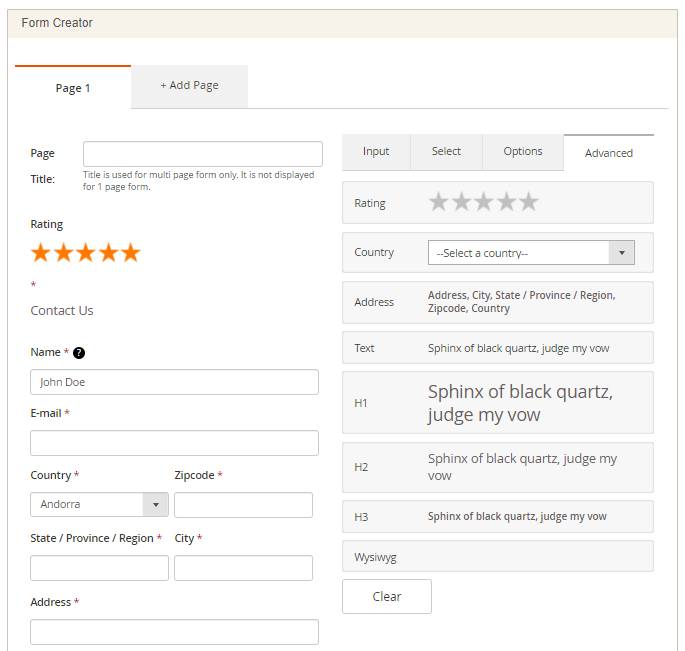
4. Advanced Elements
It's possible to add even more elements to your custom forms. In the Advanced tab you will find different title types to structure your web forms effectively.
Edit Input fields
Once all necessary fields are chosen and added to the form creation area, it's time to customize them by specifying field titles and other necessary info. Actually, you can edit each specific field right after dragging it to the form creation area.
To start editing the field, please hover the mouse over the corresponding field and click on the Edit icon.
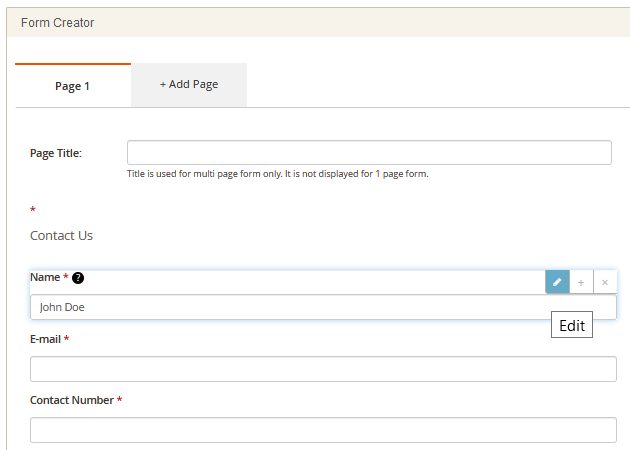
After hitting the “Edit” icon, the field editing form will appear.
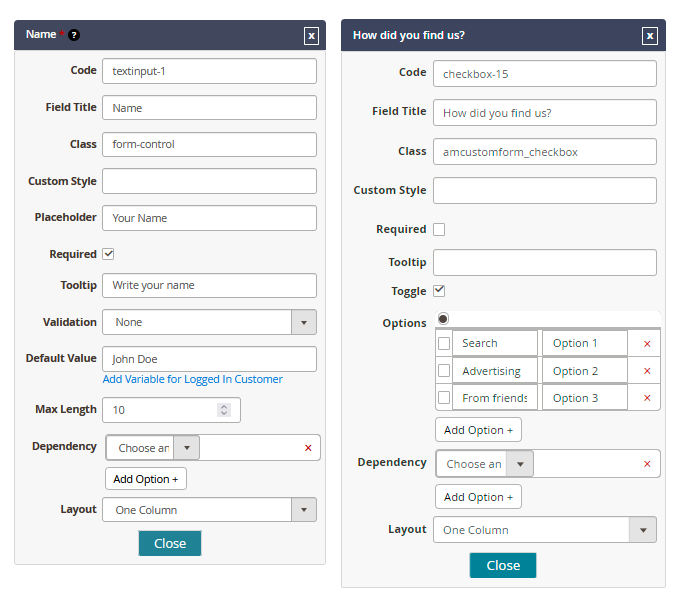
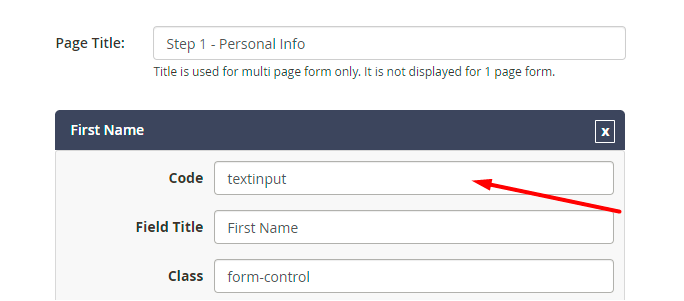
Code - fill in a custom form code that will be used in the backend for your admin purposes.
Field Title - specify a custom form name. Use it while filtering submitted data.
Class - here the type of the form is specified.
Custom Style - due to this option, you can customize the display of each particular field (font, color etc).
Custom styles can be incorporated via CSS.
For instance, if you configure the following styles for a text field:
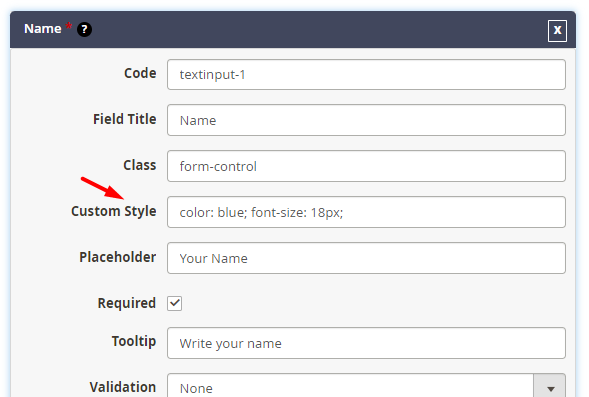
You'll see it displayed like this on the storefront:
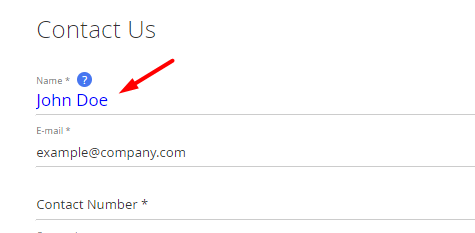
You can apply multiple styles to a single field. In such cases, remember to separate them with semicolons.
Required - enable this option if you want to make this particular field required. It means that visitors won't be able to submit the form with this field blank.
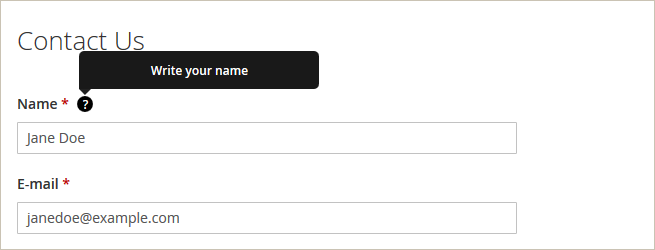
Tooltip - here you can specify an additional text that will be displayed in the tooltip on the frontend.
Below you'll see the way tooltip looks like.
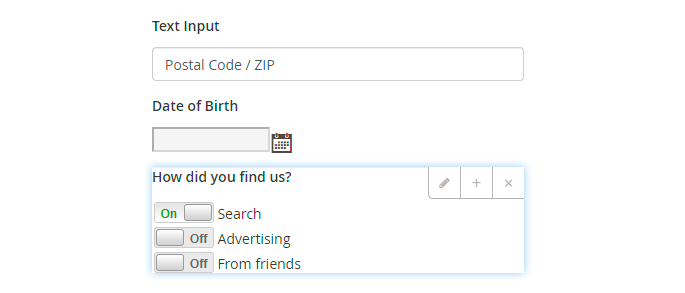
Options - add as many new options for checkboxes, radio buttons, and dropdowns as you need.
Toggle - if the Toggle option is activated, the checkbox will look like this:
For particular forms, you may also set Validation, Default Value, and Max Length.
Please note, that in the constructor fields such as Text Input, Textarea, Number Input it is possible to use Magento Commerce Customer and Customer Address attributes as variables for the logged-in users. Also, for these fields, it is possible to add Product Page Form Variables (applicable for custom forms placed on product pages).

In Dependency, specify any existing field and its particular option, which will trigger the occurrence of a dependent field you create.
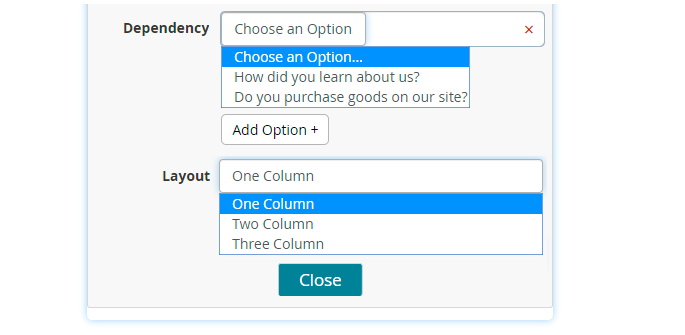
You can only make a field dependent from already existing field. This means that firstly you have to Save a form with all the needed fields and options but without dependencies. Afterwards you can edit and add dependency.
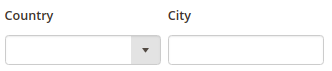
Layout - set the layout with 1 up to 3 columns. If you choose 2 or 3 columns, the additional fields will be added to the row, in which the editable field is placed.
2 columns' layout sample: two fields are placed one after another in one line.
You may also use Regular Expressions in Validation field.
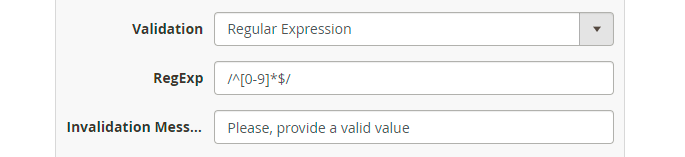
Find out more about regular expressions here.
Custom Variables in Notifications
Also, you may include particular form values into notification emails. To do this, apply a unique code in the corresponding field.
The usage of numbers in a Code field is not recommended.
Proceed to email template management. Navigate to Marketing → Email Templates and edit any Amasty Custom Form template.
Please note that templates are not created automatically. To use templates, you need to add them manually.
To include a custom value, fill in the followng variable:
var response.getCode
Instead of the Code specify the provided earlier value.
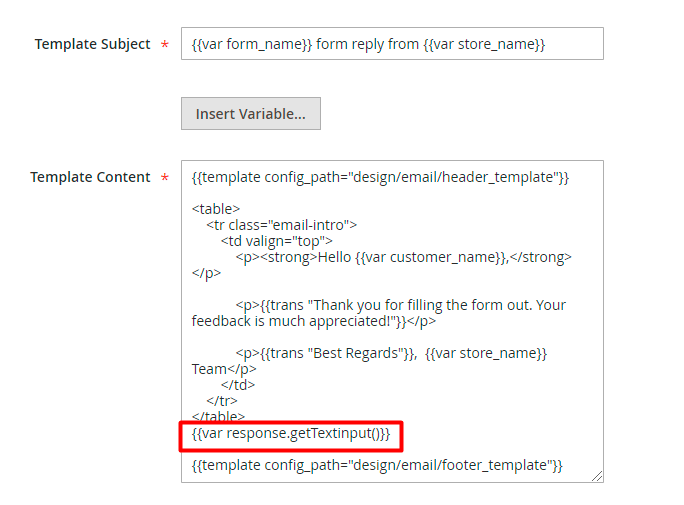
Save the changes. Thus, the value that a customer will specify in this field of a custom form will be included in the notification as well.
Embedding
Each custom form you create can be added to any CMS page. Simply copy the code and paste it into the CMS page you need.
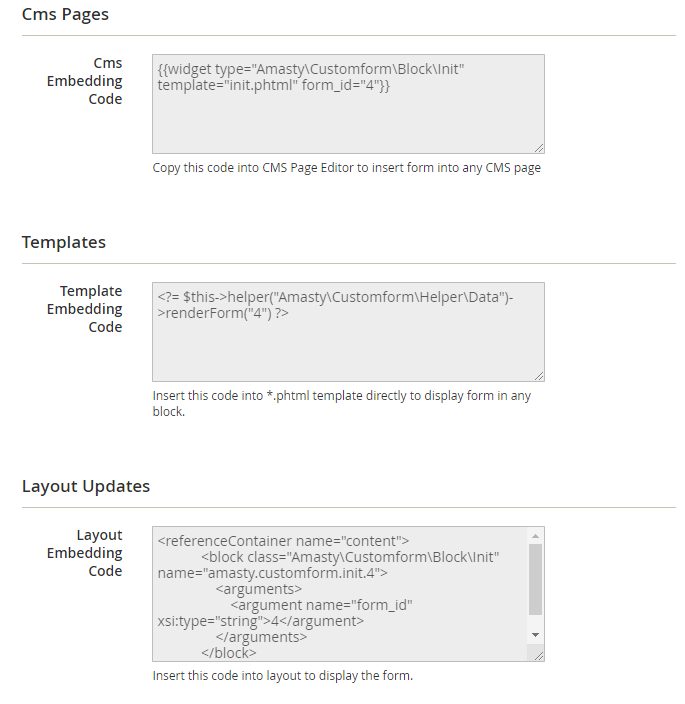
To select the page to which the form should be added, please go to Content → Elements →
Pages. Here you can select the necessary page and paste the copied code into the Content field.
Layout Embedding Code - to add a custom form to any place of your web store, insert this code into layout.
In Magento 2.3.4, there is no more the Layout Update XML field in the admin panel. Instead of it, you will find the Custom Layout Update dropdown on the CMS Page Edit, Category Edit, and Product Edit pages. It was done to increase the security level of the system.
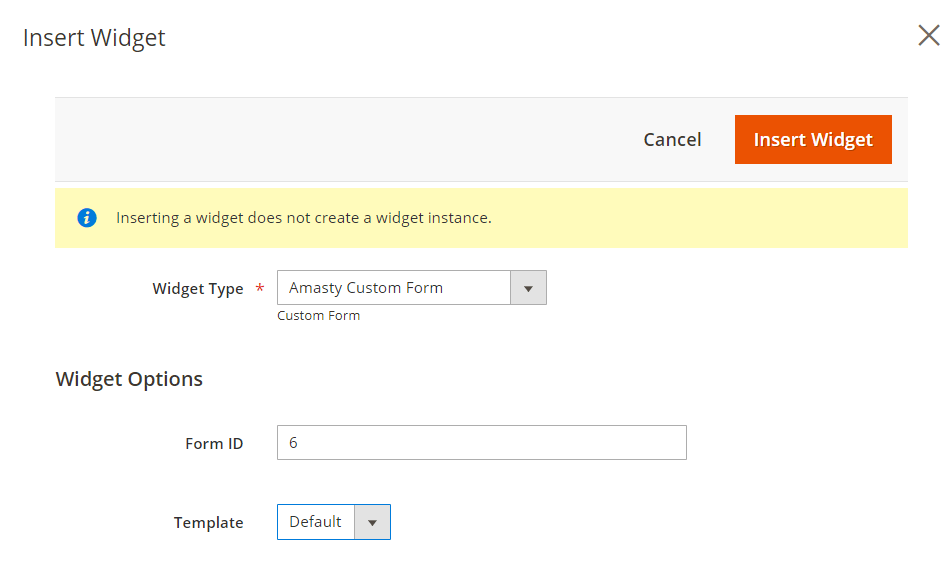
Custom forms could be also integrated into any place of the CMS pages via widgets (Content → Widgets → Add Widget), you just have to specify the form ID while creating a widget.
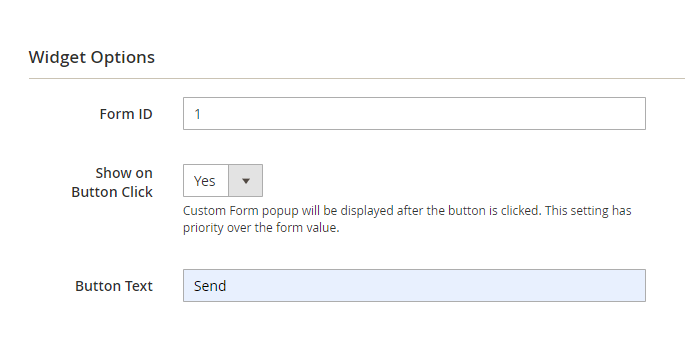
In the widget settings, you can also adjust the way how the form will be displayed (normal view ar a popup). Thus you can display the same form in different ways on different site pages according to your needs.
Customer Account (Custom Form Pro)
With the Custom Form Pro extension version, you can also adjust Customer Account settings for each particular form individually. If you will not change anything in the Customer Account tab of a form, general configuration settings will be applied to it.
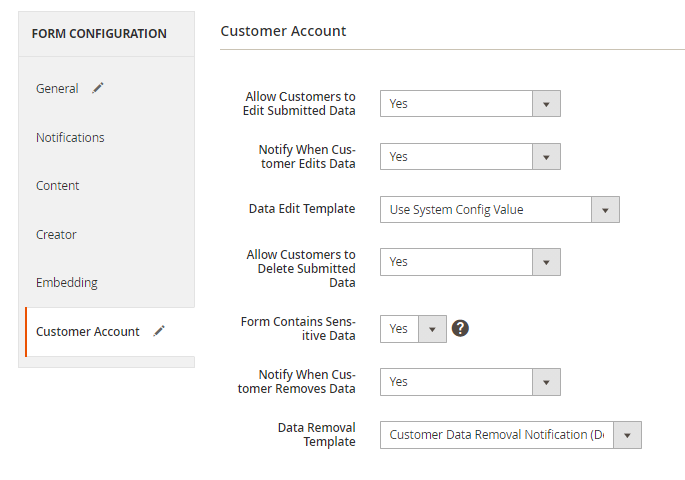
Allow Сustomers to Edit Submitted Data - set to ‘Yes’ to let customers edit data from submitted forms.
Notify When Customer Edits Data - set to ‘Yes’ to receive notifications every time when customers edit their submitted data.
Data Edit Template - choose the template for the email notifications related to submitted data edits.
Allow Customers to Delete Submitted Data - here you can allow or disallow customers to delete their submitted data.
Form Contains Sensitive Data - set to 'Yes', if the form contains sensitive information. In such a case, if customer deletes their submitted data from the form, it will be removed in the backend as well.
Notify When Customer Removes Data - set to ‘Yes’ to receive notifications every time when customers remove their submitted data.
Data Removal Template - here you can choose a data removal template.
Track Submitted Data
To keep track of the submitted customer data, please go to Content → Custom Forms → Submitted Data.
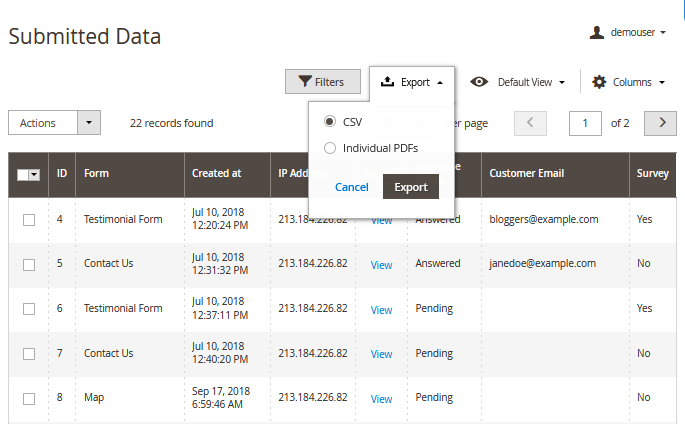
Export - to export a particular submitted entry, check its box on the grid, navigate to Export tab, and press Export button. Choose the needed export format: CSV or PDF.
To use PDF functionality, please install the library dompdf/dompdf. To do this, run the command “composer require dompdf/dompdf” in the main site folder.
Also, please check the Google API information related to PDF downloads.
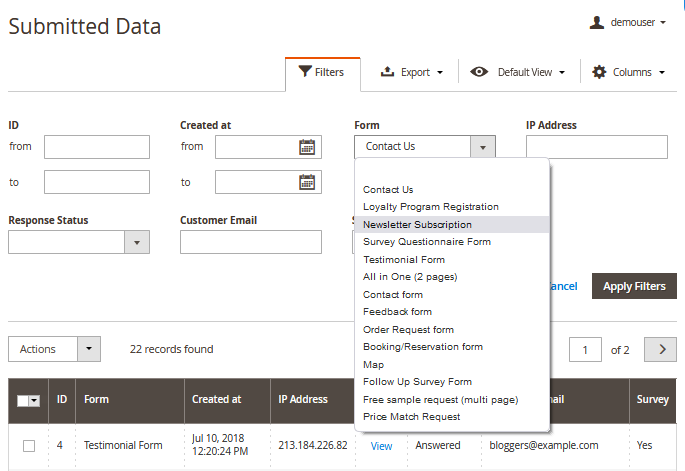
You can instantly find all submitted data for each specific form by using the corresponding filter. All custom forms you create are automatically included in the filter.
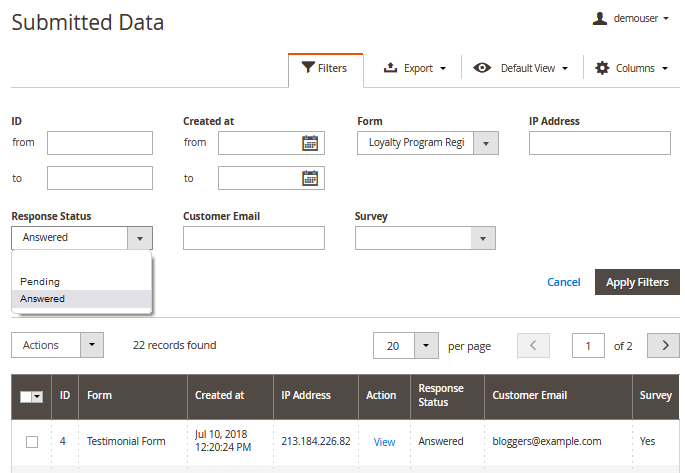
You can also filter by Response status, Customer Email, and Survey type (if the form was a survey).
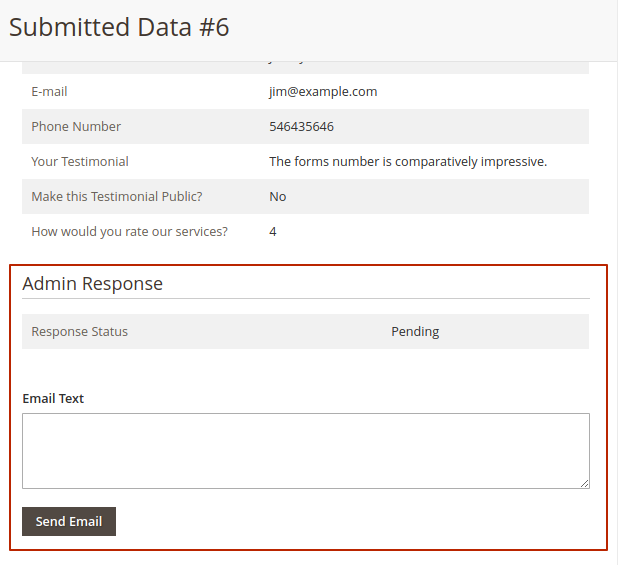
Click on the necessary submission to view the details.
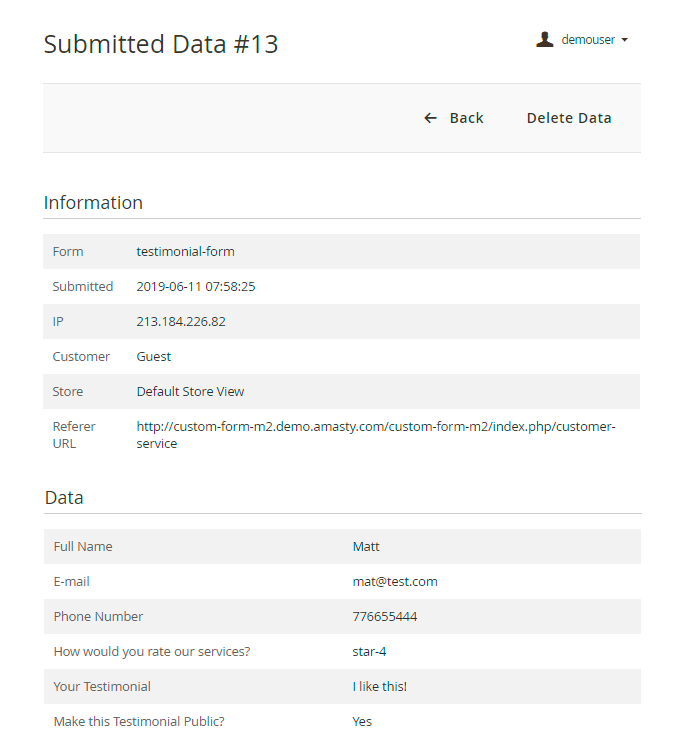
Admin can respond right from the customers' submitted data.
The extension is compatible with AWS S3 storage, allowing user-uploaded data and files to be stored and securely managed in the cloud.
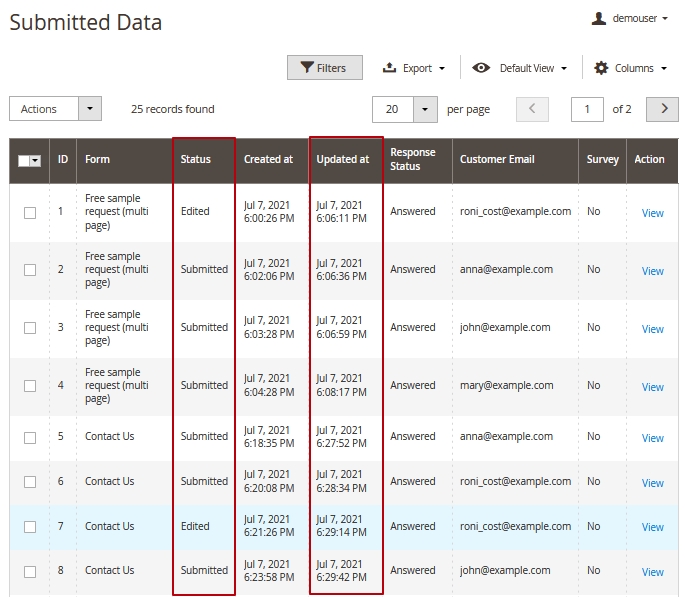
Submitted Data Grid in Custom Form Pro
In the PRO version of the Custom Form extension, the two additional columns are available in the Submitted Data grid:
Status - here you can see whether the particular customer data was edited by customer.
Updated at - in this column you can check, when the data was last time updated.
Google APIs
The module uses the following Google APIs:
Maps JavaScript API - allows you to show and use google map as a field in the form.
Geocoding API - allows you to convert coordinates to an address. Is used for pdf downloads. If API is not connected, the coordinates will be displayed.
Maps Static API - allows you to get a static image of google maps by coordinates. If the API is not connected, the map picture will not be shown
For these services usage, Google charges a fee according to tariffs related to the number of requests to each API separately. Also, Google provides $200 free monthly usage for API services. It equals approximately 10,000 PDF downloads with our Custom Form extension monthly. If you have more than 10,000 PDF downloads per month, please make sure to track your Google Map API quotas. You can check them here. Google Map API pricing can be viewed via the following link.
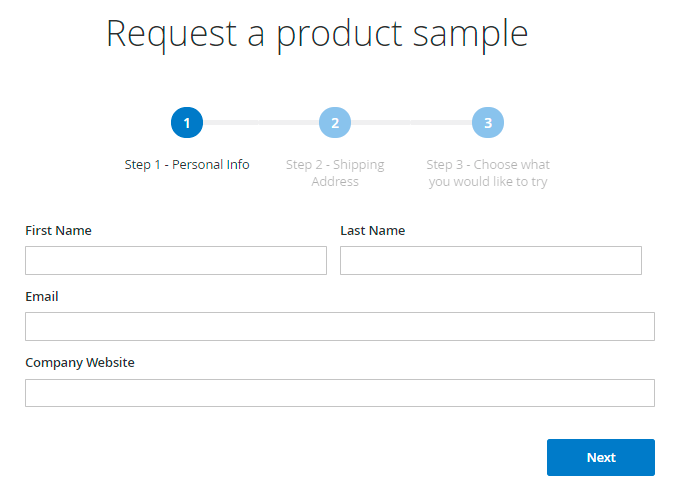
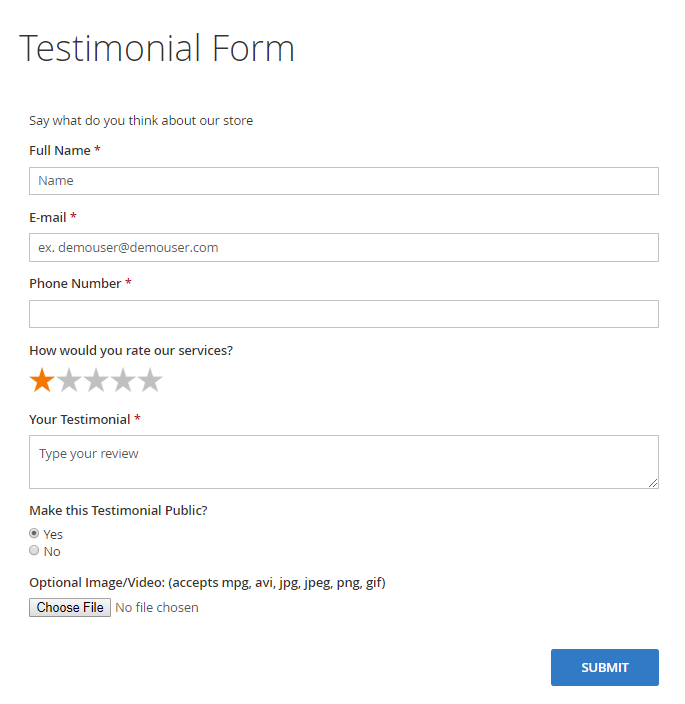
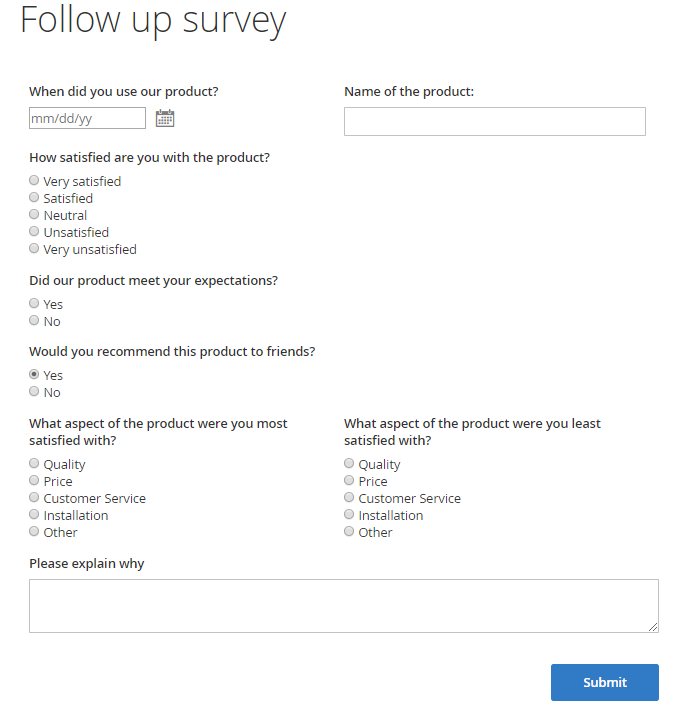
Frontend Examples
Take a look at the Custom Form examples displayed on the frontend. You can enable/disable any field types for each specific form and make necessary fields required.
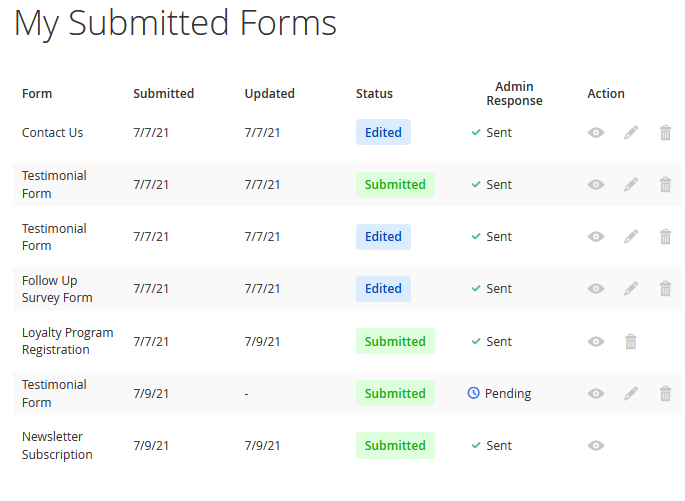
Grid of submitted data in Customer Account (available in Custom Form Pro version):
To enable and configure the Google Invisible reCaptcha for Magento 2 extension, please take a look at the user guide for this module.
Additional packages (provided in composer suggestions)
To make additional functionality available, please install the suggested packages you may need.
Available with no additional fees:
dompdf/dompdf- To use PDF functionality, please install the library dompdf/dompdf.
amasty/module-magento-custom-form-graphql- Install amasty/module-magento-custom-form-graphql module to activate Graphql and Custom Forms integration.
amasty/module-custom-form-to-builder- Install Amasty_CustomFormToBuilder module to activate the integration with Custom Reports Builder extension and create valuable reports about your Custom Forms.
Available as a part of an active product subscription or support subscription:
For Lite and Pro versions:
amasty/custom-form-newsletter-subscription- Install this package in order to use the Newsletter Subscription functionality.
amasty/module-custom-form-hyva- Install CustomFormHyva module to activate the integration with Hyva Theme.
amasty/custom-form-newsletter-subscription- Install this package in order to use the Newsletter Subscription functionality.
amasty/module-ga4-custom-form- Install this package for forms interaction tracking compatibility.
For Pro tariff plan only:
amasty/module-custom-forms-pro-subscription-functionality- Install this package to use custom Departments Email notifications functionality.
PWA for Custom Form (Add-On)
The extension also works smoothly on mobile devices if combined with a ready-made PWA solution, due to which store admin can significantly improve the user shopping experience on smartphones.
The feature can be enabled only after purchasing the PWA for Custom Form Add-On. Also, you need to install a PWA theme first.
In order to correctly install a PWA add-on, please install the corresponding GraphQL system package first. For the correct name of it, please check the composer.json file of the main module. For example, the GraphQL system package name of the PWA add-on for the Blog Pro extension would be the following: amasty/blog-graphql

Please note that custom forms (both on Venia with the integrated add-on and with the help of the original extension) could be also integrated into any place of the CMS pages via widgets, you just have to specify the form ID while creating a widget.
If the add-on is installed, Venia theme will be displayed for this extension in the following way:
Single-page form on mobile devices:
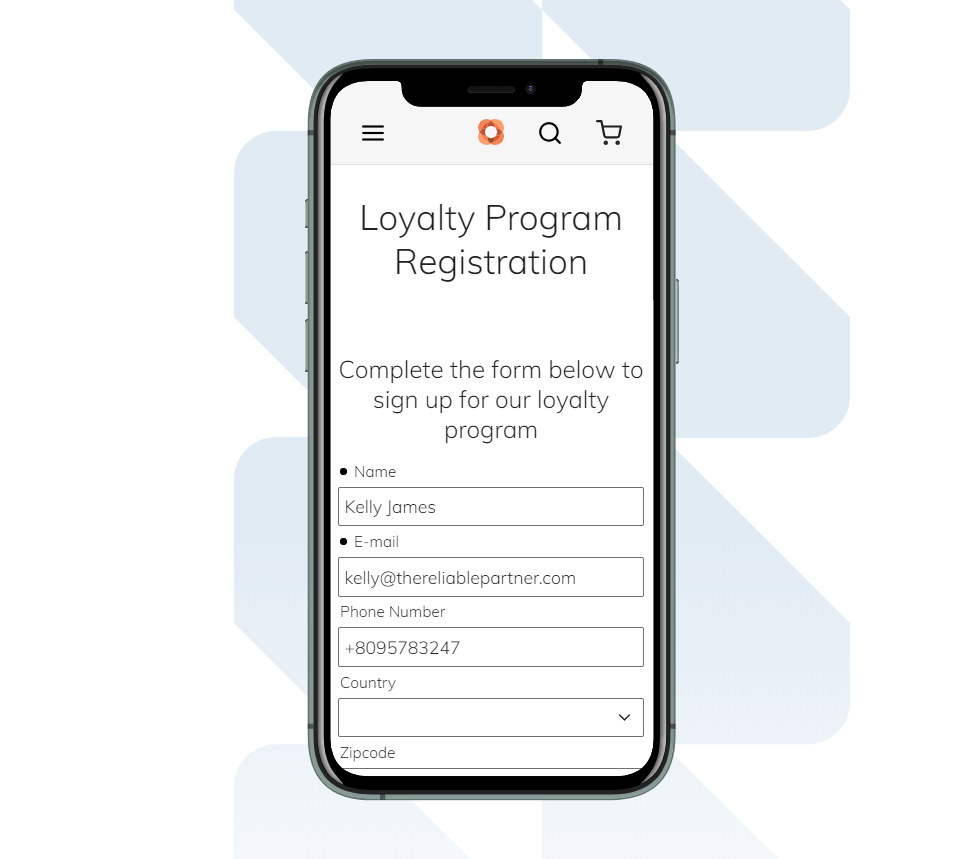
Multi-page form on mobile devices:

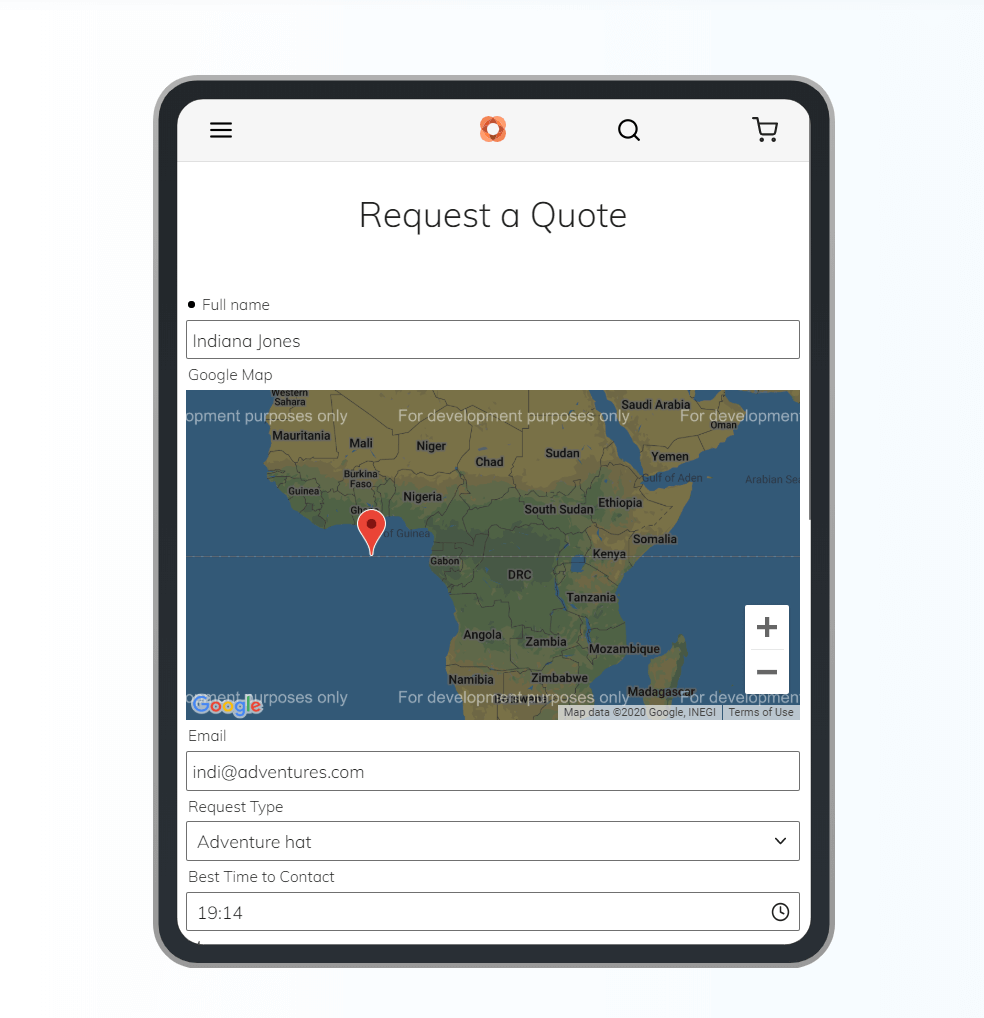
Single-page form with the integrated Google Map on tablets:
Please note that all field types available for the original extension including field dependencies are available for the add-on as well, except for the file upload option (due to the Venia theme limitations).
The Linear and Circle themes for the multi-page forms are not available for this PWA add-on yet as well.
Find out more about Magento PWA integration here.
FAQ
1. Do you have or follow good secure development practices?
- We follow strict development rules regarding our code according to the code standards.
- We take steps to protect against XSS vulnerabilities and keep all extensions up to date to ensure that any known security vulnerabilities are patched.
- We have an experienced team that regularly reviews extensions for any known security vulnerabilities and releases updates to fix them. For example, plain SQL queries and unescaped text is blocked.
2. Do you conduct vulnerability assessment?
- We have implemented automatic code sniffers for the CI\CD process - so we check all our code for security issues.
3. Do you do pentesting or web security auditing?
- Our QA engineers test each feature also for security cases. We check XSS vulnerabilities, SQL injections, and other.
- Also please note that we included Captcha extension into package to prevent vulnerability attacks.
Find out how to install the Custom Form extension for Magento 2 via Composer.
magento_2/custom_form.txt · Last modified: 2025/01/28 13:56 by asemenova