
Sidebar
magento_2:efficient_order_export
Table of Contents
For more details see how Efficient Order Export for Magento 2 extension works.
Guide for Efficient Order Export for Magento 2
Easily manage orders export. Configure flexible export profiles and gather all valuable order data, including the data generated by third-party extensions.
- Rapid export of order, product, shipping & customer info
- Create profiles and automate order export process
- Generate CSV or XML files
- Send export files by email or upload via FTP/SFTP
- Export order data created by third-party extensions
General Settings
To configure the General Settings of the extension please go to Stores → Configuration → Amasty Extensions → Efficient Order Export → General Settings.
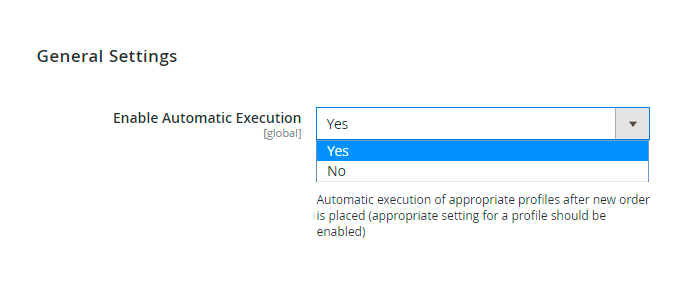
Enable Automatic Execution - Turn this setting to ‘Yes’ to start the order export process automatically after each new order is placed.
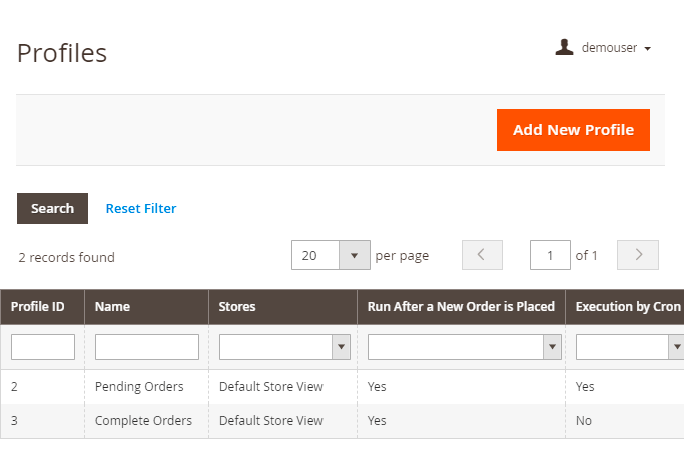
Create Export Profiles
Please go to System → Efficient Order Export section → Profiles to view all available export profiles and create new ones.
Export Profile Settings: General
Profile Information
Click on any export profile in the grid to configure it.
Skip Child Products - Enable this option if you want to exclude child products from export (for example, to export only main configurable products).
Skip Parent Products - If the option is set to 'Yes' the module will ignore parent products (bundle and configurable) during the export process.
Status For Processed Orders
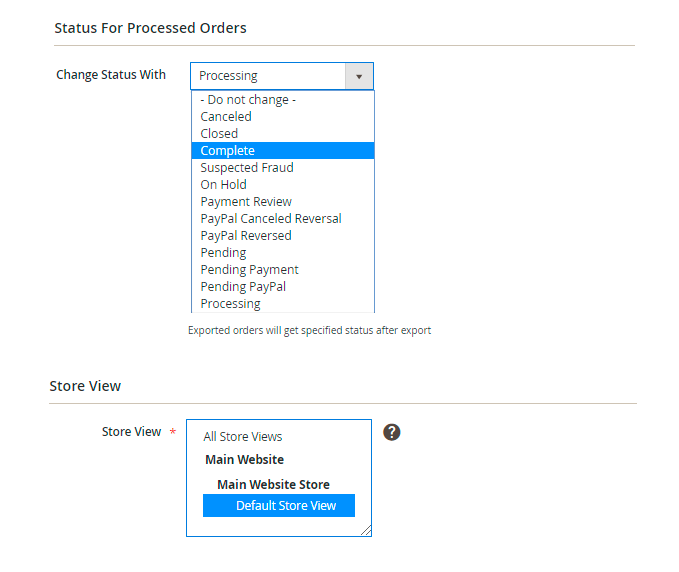
Change Status with - Specify a status that orders will get after export.
Store View - Select store view from which the data should be exported.
Automatic Execution
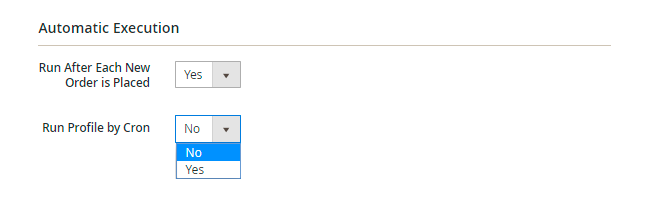
Run After Each New Order is Placed [Automatic Execution] - Turn this setting to ‘Yes’ to start the order export process automatically after each new order is placed for this particular export profile.
Export Profile Settings: Filters
To configure order filters please navigate to System → Profiles → Choose any profile → Order Filters
Order Number Filters
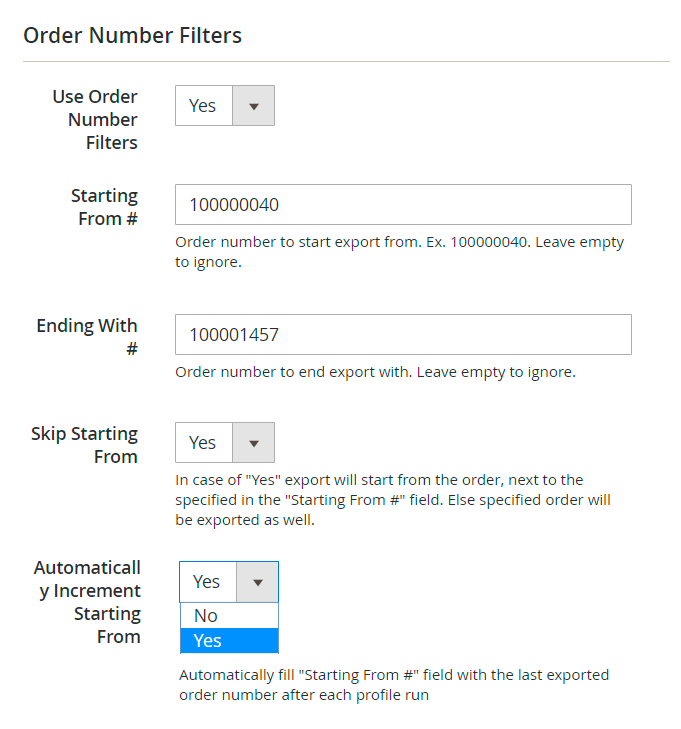
Use Order Number Filters - Turn this setting to 'Yes' if you want to preselect starting and ending order numbers.
Starting From # / Ending with # - Limit the export file with specific starting and ending order numbers. Leave the fields blank to export all order numbers.
Skip Starting from - Switch to 'Yes' to start the export from the order that comes next after the one indicated in the 'Starting From #' field.
Automatically Increment Staring From - Set this option to 'Yes' to automatically populate the 'Starting From #' field with the last exported order. In combination with the enabled 'Skip Starting From' option this would let you export only new orders with each profile run.
Invoice Number Filters
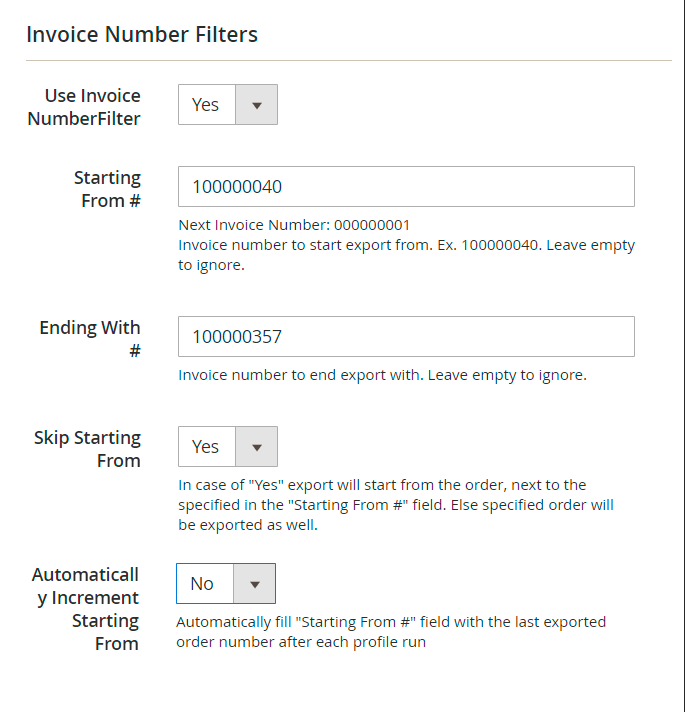
Invoice numbers - Turn these settings to 'Yes' if you want to preselect starting and ending invoice numbers. The settings are similar to the previous settings block.
Shipment Number Filters
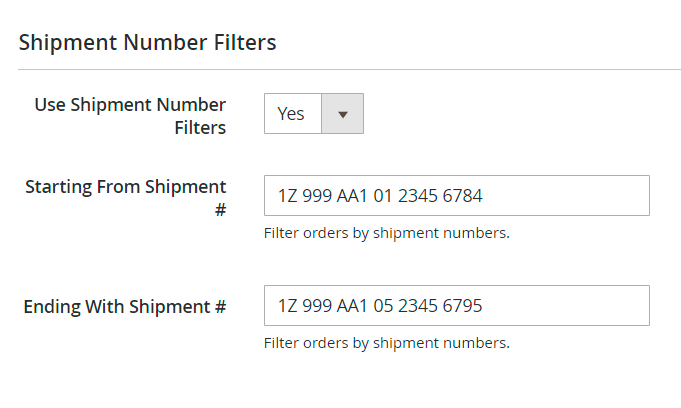
Shipping numbers - Turn these settings to 'Yes' if you want to preselect starting and ending shipment numbers.
Date Range

Date Range - Enable this option and specify a certain date range for which you want to export orders.
Customer Groups
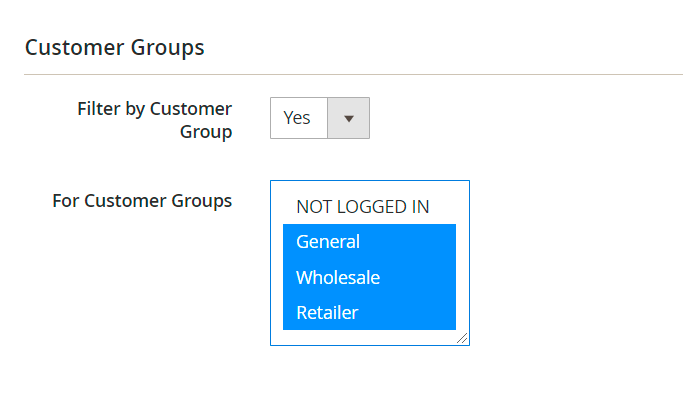
Filter by Customer Group - Turn this setting to 'Yes' if you want to export orders for a particular customer group.
For Customer Groups - Select customer groups for which you’d like to export orders.
Other Export Filters
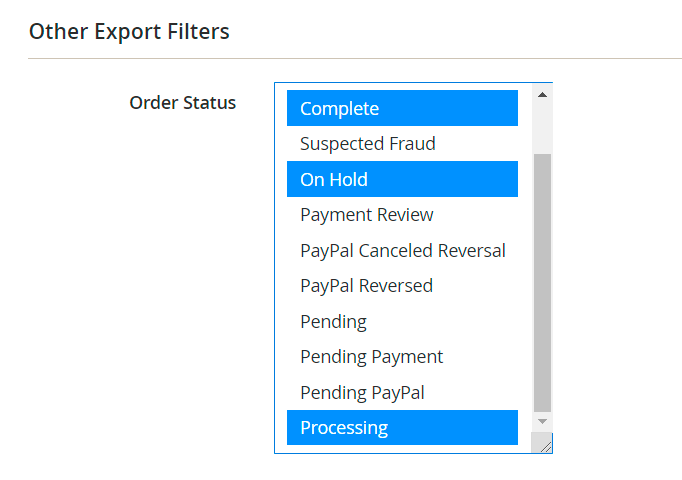
Order Statuses - It's also possible to export orders with particular order statuses.
Export Profile Settings: File Options
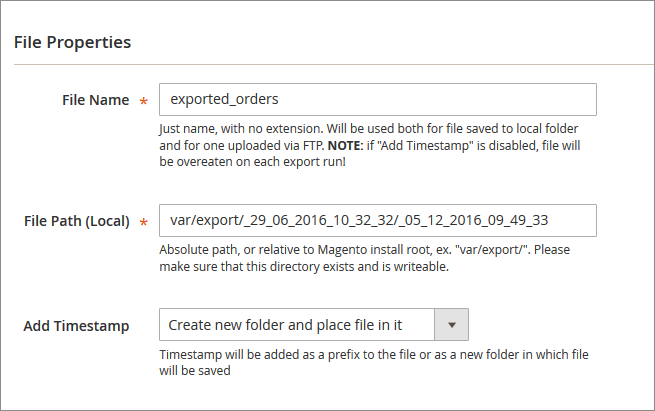
File Name - Select a name of the exported file. Warning! If the 'Add Timestamp' option is disabled, the file will be overwritten on each new export run.
File Path (local) - Specify the path to where the exported file should be placed.
Add Timestamp - You can either add a timestamp to a file name as a prefix or create a new folder to place the file in it.
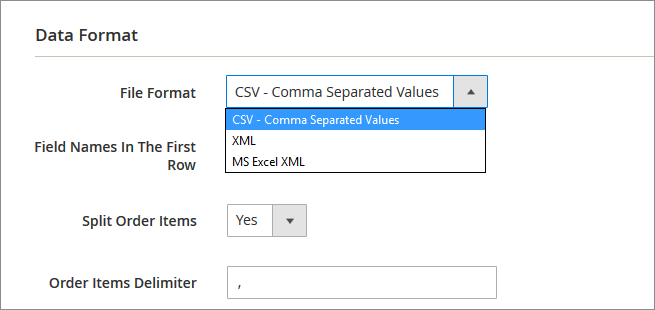
File Format - Choose the format of the file you want to export orders to.
NOTICE: In case you select an XML or CSV format you need to specify additional configuration settings for each of the formats.
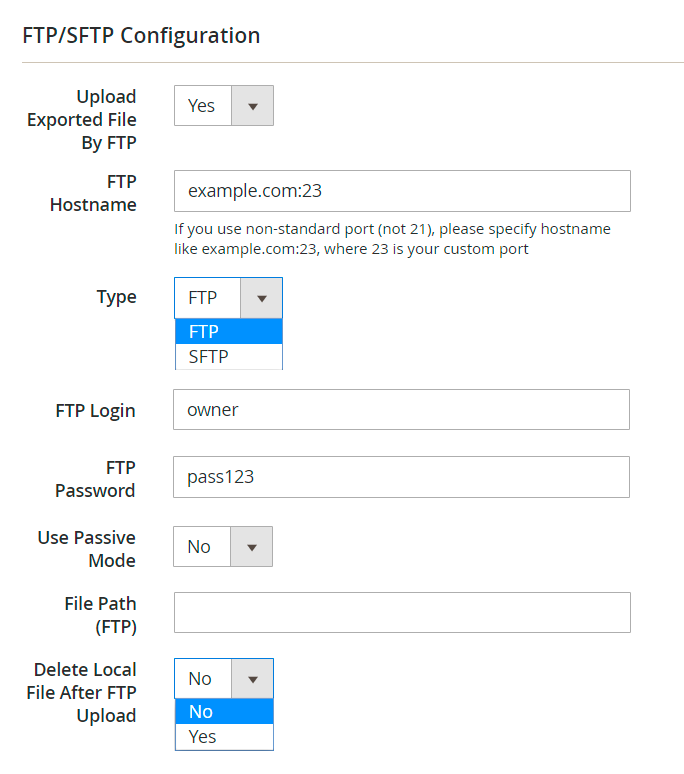
Upload exported File by FTP - You can save the file with exported data either to the server, where Magento 2 is installed or upload it via FTP to a different server.
Type - You can use either the FTP or SFTP type.
Please provide all the necessary info about FTP/SFTP to which you want the files to be uploaded.
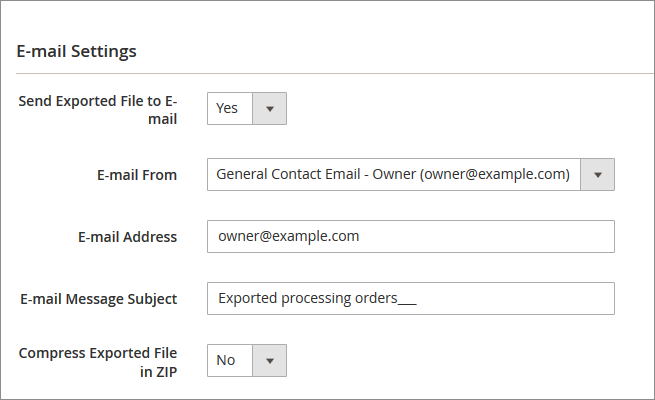
Email Address - Please define an e-mail address and a message subject if you want to receive the file via e-mail.
Export Profile Settings: Filed Mapping
Field Mapping
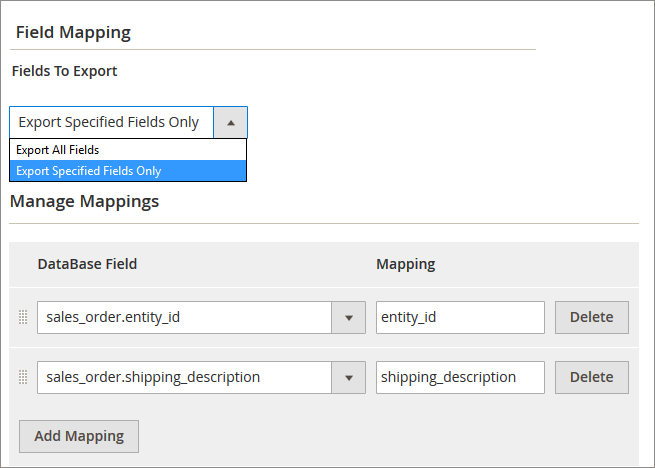
Fields to Export - To export custom product options, please choose ‘Export Specified Fields Only’. It’s also possible to export all the fields.
Manage Mappings
Database Field - Choose the fields that you would like to export in this dropdown.
Mapping - Specify how each field should be named in the exported file.
In the Run History tab you can download the exported file or an archive, containing it.
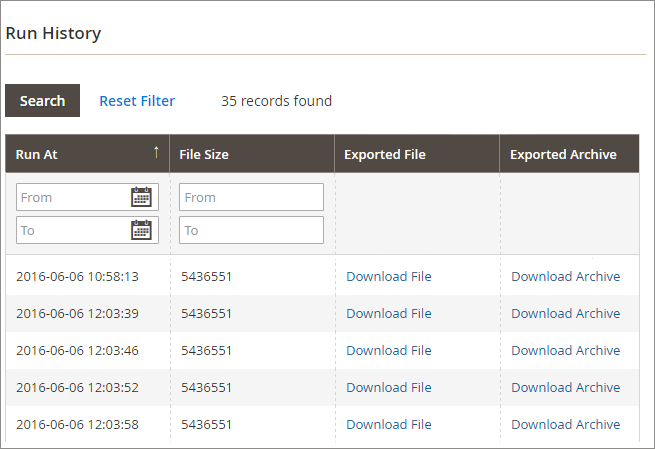
NOTICE: To view history of all existing export profiles, please go to System → Efficient Order Export section → History.
Export of 3-d Party Extension Data
To configure the 3d Party Link please go to System → 3d Party Link. Here you can manage your records on a grid or Add New Thirdparty Profile.
Field Mapping
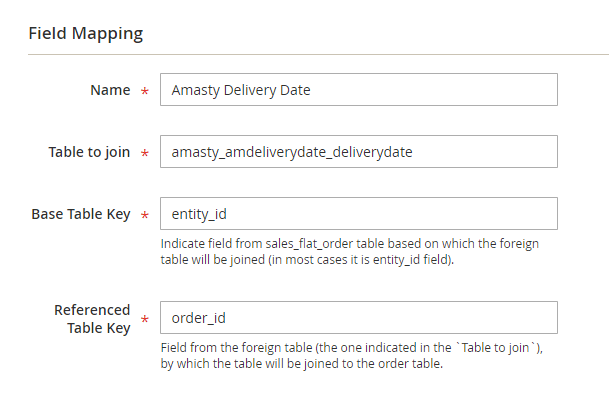
Name - Indicate the field name for the data of the third-party extension.
Table to Join - Indicate db table of the third-party extension, from which the data should be taken.
Base Table Key - Specify to which field of the sales_flat_order table the third-party extension table should be added (in most cases it is the entity_id field).
Referenced Table Key - Indicate a field of the third-party extension table, by which the table will be added to the Magento 2 order table (usually it is the field that contains an order id).
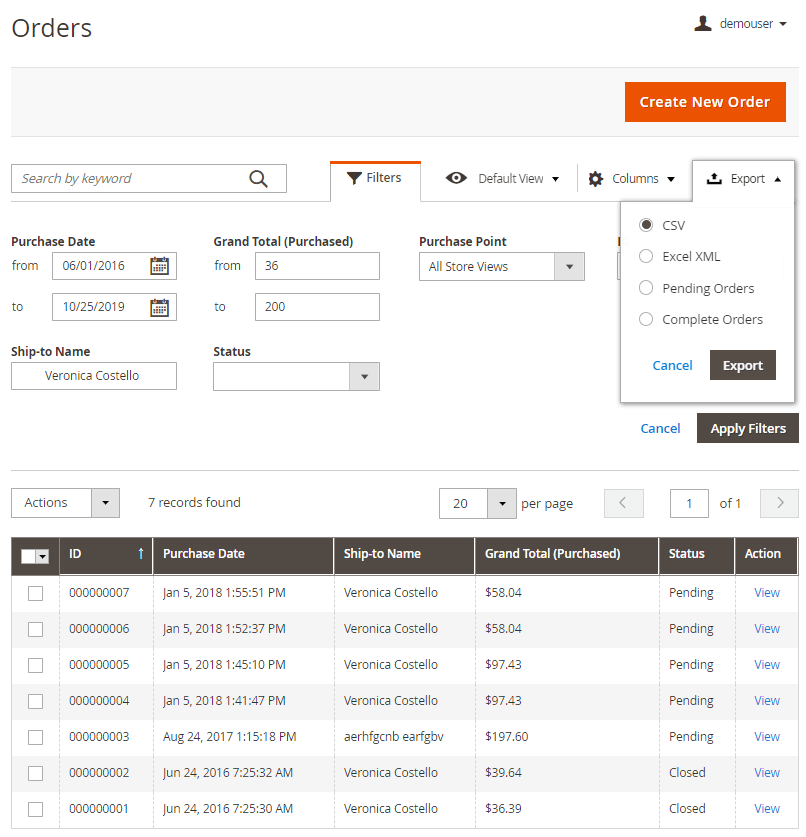
Running export profiles from the Order Grid
Using this Export option you can run any export profile from the ‘Orders’ grid. Just select the required export options.
Running export profile by URL
To set up the export profile run by URL, please, go to Stores → Configuration → Amasty Extensions → Efficient Order Export and expand the Run Profile by URL section.
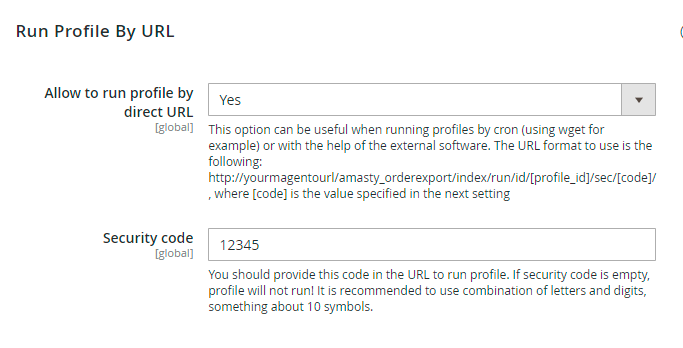
Allow to Run Profile by direct URL — enable this option to get the ability to run export profiles using URL;
Security Code — specify the security code here. It will be used to authorize you when running the export.
The URL to run export profile will be the following:
http://yourmagentourl/amasty_orderexport/index/run/id/[profile_id]/sec/[code]/
where [code] is your security code and [profile_id] is the ID of the profile you want to run. Please remember to replace yourmagentourl with your Magento 2 installation URL.
Find out how to install the Efficient Order Export extension for Magento 2 via Composer.
magento_2/efficient_order_export.txt · Last modified: 2020/03/30 11:24 by tihomirova