
Sidebar
magento_1:abandoned_cart_email
Table of Contents
For more details see the Abandoned Cart Email extension page.
Guide for Abandoned Cart Email
Increase your conversion rate by motivating customers to recover their abandoned carts. Send mass cart reminders, easily customize email templates and generate coupons to encourage visitors come back to your store.
- Create unlimited number of flexible rules
- Capture email early via AJAX
- Use customizable sending schedule
- Automatically generate coupons
- Track sending history
Database Installation
Databases are required for the correct work of the module. Also you need to install php bcmath or gmp extension on your server.
To install the Geo IP database, go to System → Configuration → Amasty Extensions → GeoIP Data.
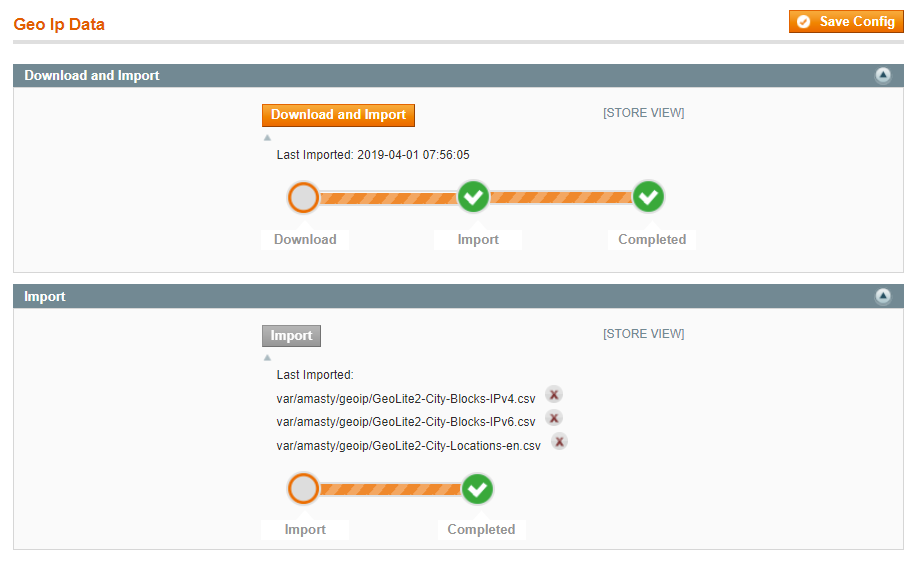
You can get the databases automatically or import your own data.
Hit the Download and Import button to make the extension download the updated CSV dump file and import it into your database automatically.
To import the files from your own source, use the Import option. Path to the files should look like this (the part 'var/amasty' should be replaced with your folders’ names):
var/amasty/geoip/GeoLite2-City-Blocks-IPv4.csv
var/amasty/geoip/GeoLite2-City-Blocks-IPv6.csv
var/amasty/geoip/GeoLite2-City-Locations-en.csv
In the Import section, the Import button is grayed out by default. It will be available right after you upload the CSV files. The red error notification will switch to green success notification when the import is completed.
General Settings
To change settings for Magento Abandoned Cart Email, please go to System > Configuration > Abandoned Cart
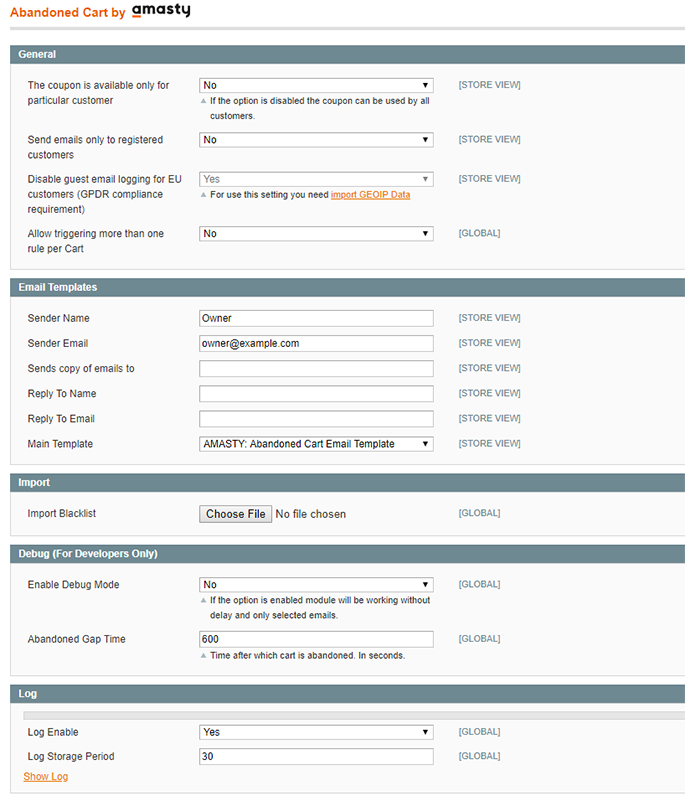
The coupon is available only for particular customer - The extension can generate and add special coupons to abandoned cart emails automatically. Set this option to ‘Yes’ if you want to make the coupon available only to the email recipient. In other words, the coupon code can be used only if a customer gets to a store through the link in the email or if he/she is logged in as an email recipient.
Send emails only to registered customers - Set this option to 'Yes“ if you want to send abandoned cart emails only to registered customers.
Disable guest email logging for EU customers (GDPR compliance requirement) - Set to Yes if you want EU customers' emails not to be saved in the system's base in order to prevent sending unsolicited emails.
Allow triggering more than one rule per Cart - Set to Yes if you want to apply more than one rule per Shopping Cart. This option will let you send not one but several types of messages according to the content of an abandoned cart. For example, you can trigger messages with a free delivery offer on orders over $100 — and simultaneously apply another rule to offer discounts for certain product type to motivate customers to spend more.
Email Templates
Sender Name, Sender Email - Specify general email details of the sender.
Sends copy of emails to - Specify the address to send the email copy
Main Template - choose an email template. To edit or create a template, please, go to System > Transactional Emails.
Import
Import Blacklist - import customer emails that you want to add to your blacklist.
Debug
Enable Debug Mode - In usual mode, abandoned cart emails are sent with a 10 minutes delay after the cart was abandoned. If you enable test/debug mode, the emails will be sent without any delay, but only to the specified email domains. For example, your team would like to test the sending of abandoned cart emails, so you set 'storename.com' in the Permitted Email Domains and after one of the team members, for example, [email protected], leaves the cart, he will receive the email right off the bat if everything works fine.
Log
Log Enable - when enabled, all your steps of rules creation and sending of emails will be recorded in the log. This will help to find mistakes if they are committed.
Log Storage Period - specify the time the log should be saved.
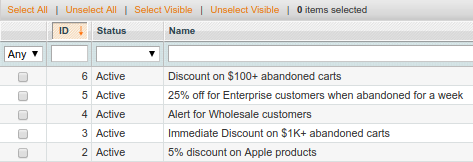
Create New Rule
To create a new rule for abandoned cart emails, go to Promotions > Abandoned Cart Emails > Rules
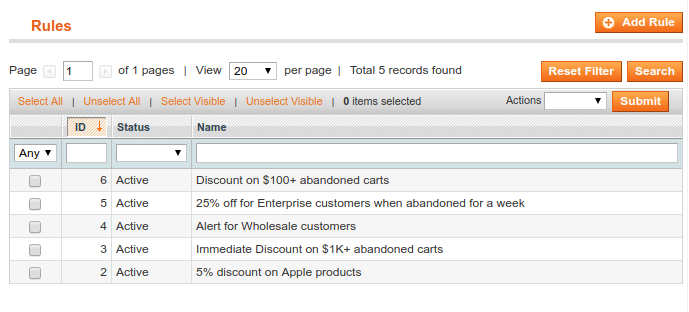
Click Add rule to create a new rule or click on the already existing one to edit it.
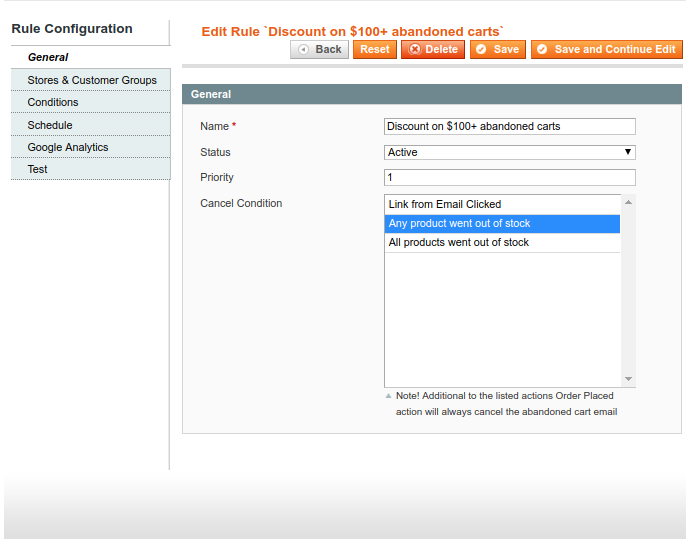
Name - Specify the name of the rule
Status - enable or disable the rule
Priority - specify the priority: Rules with higher priority will be applied first
Cancel Condition - choose the events, that will stop email sending.
Link from email clicked - after a customer clicks on the link in the abandoned cart email, he/she won't receive this emails anymore.
Any product went out of stock - the email sending stops if any of the products in the customer's abandoned cart is out of stock.
All products went out of stock - the email sending stops if all products in the customer's abandoned cart are out of stock.
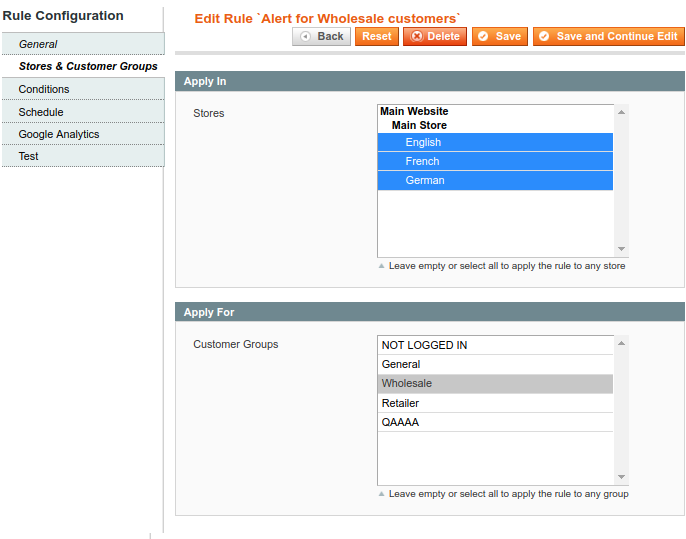
Specify the store view and customer groups to which the rule should be applied.
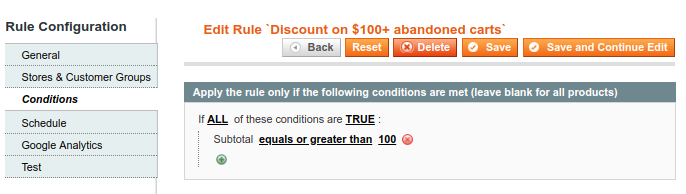
Choose as many conditions as you need to create the most flexible rule. You can specify particular brands, subtotal, country origin etc.
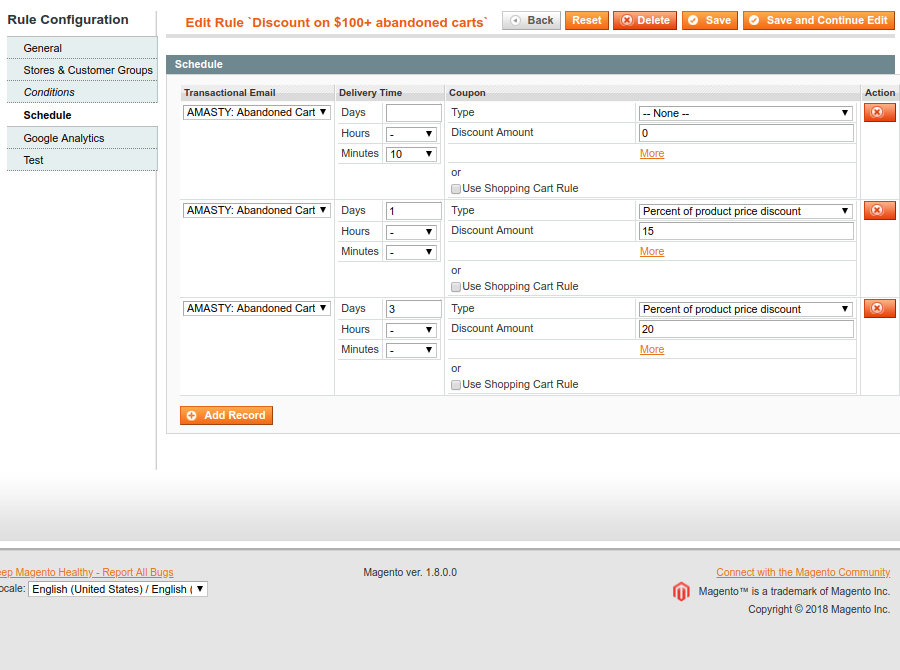
Transactional Email - choose an email template
Delivery Time - set the time intervals after which the cart will be considered abandoned and the email reminder will be sent to a customer.
Coupon - choose a coupon type, a date of its expiration, a discount amount and a cart subtotal for each particular email.
Add Record - You can add as many new scheduled emails as you need.
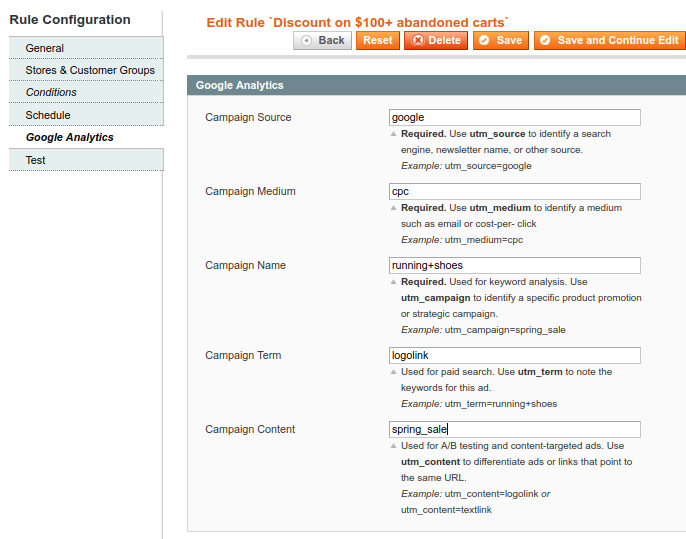
These settings allow you to get Google Analytics statistics in your email campaign.
The fields Campaign Source, Campaign Medium, and Campaign Name are REQUIRED.
The information will be accessible under campaigns in your GA account.

You have the opportunity send test emails to check if everything works fine.
To send test reminder, please choose the email you need and click Run.
Test emails work only for registered users. When a customer adds some items to the cart and then leaves it without making a purchase, his/her email address gets to the test grid.
Emails Queue
Go to Promotions > Abandoned Cart Emails > Emails Queue
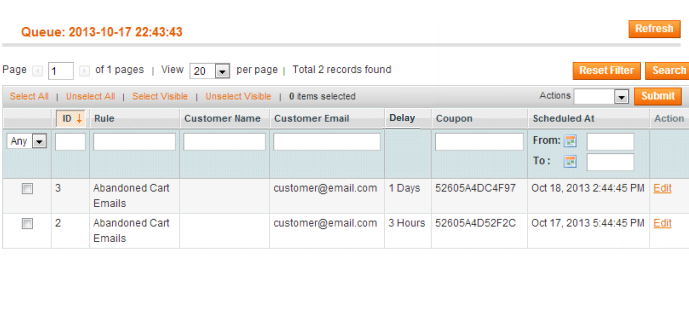
On the queue grid, you can see all emails that are waiting to be sent. You can also see the scheduled sending time and the coupon code.
Click Edit to start editing email templates.
Here you can insert and edit any template you need:
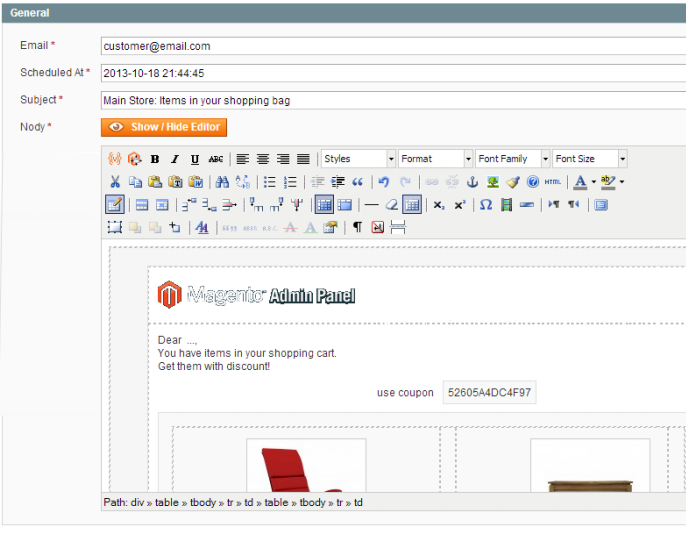
Edit email templates right from the queue grid. You can change customer email address, scheduled sending date and time as well as the subject of your email.
Emails History
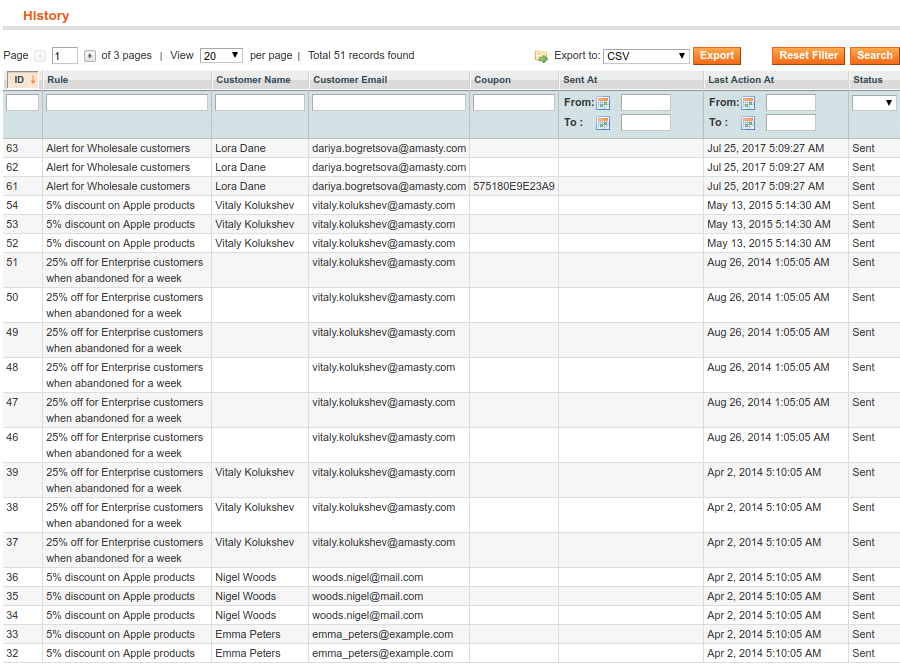
Customer Email - See and export the list of email addresses to which email reminders have already been sent.
Observe email statuses for proper analyzing your email campaign. See how many email recipients recovered their abandoned carts or just clicked on the recovery link.
Emails Black List
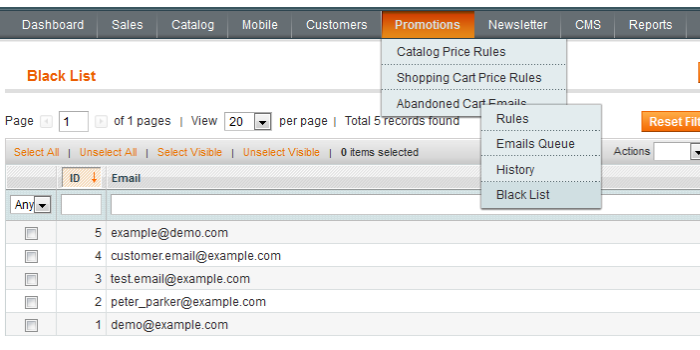
Edit already existing emails on your blacklist or manually add new ones.
How to create e-mail template
- To create a template, go to System → Transactional Emails;
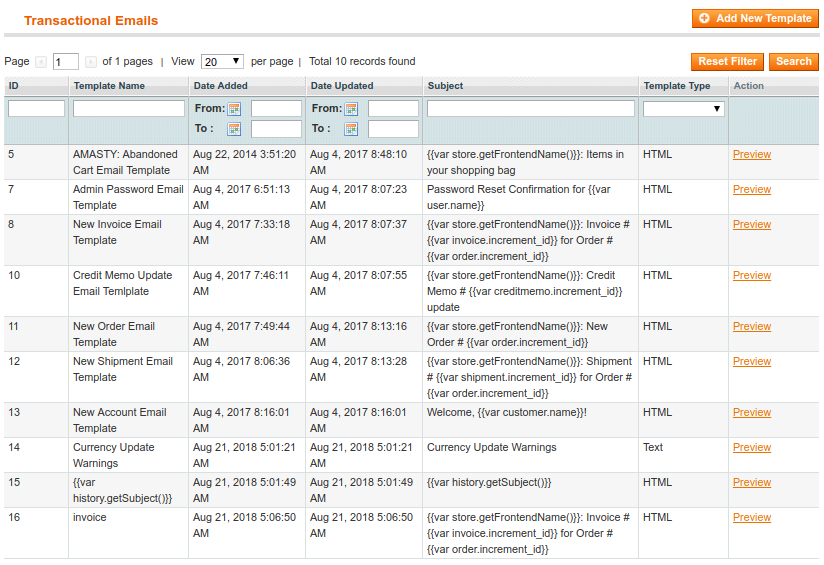
- Hit Add New Template;
- In the Template dropdown, select a certain ready-made template e.g. Amasty: Abandoned Cart Reminder.
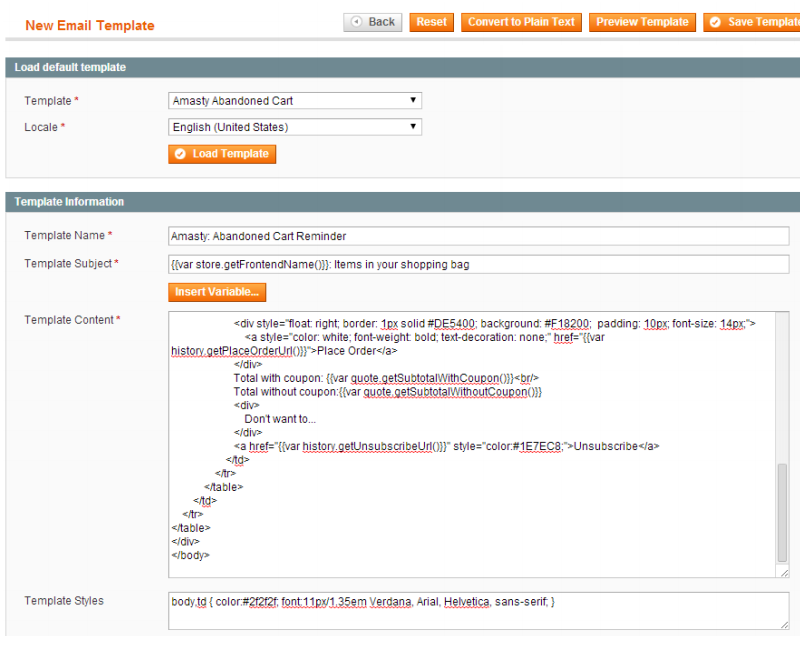
Then hit “Load Template” button. Name the template and edit the code if necessary, then save the template and then it will be available to use in the corresponding rule. Now you can use any templates created in ‘Transactional e’mails’ section for abandoned cart e-mails.
You can create your own template. However, consider that in order to display a template in the Abandoned Cart properly, it has to be created, being modified from the existing templates that are added with the module installation.
To see more templates ready to use on the schedule tab, located at Promotions - Abandoned Cart Emails - Rules, create them on the basis of existing templates, according to the settings below.
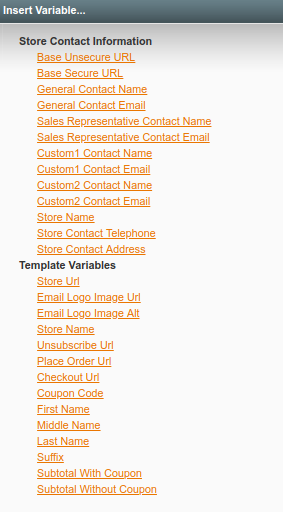
Use variables
- To use default variables, hit Insert Variable button.
- From the list, select the needed variable to insert it in a template.
To use custom variables, go to Template Content field:
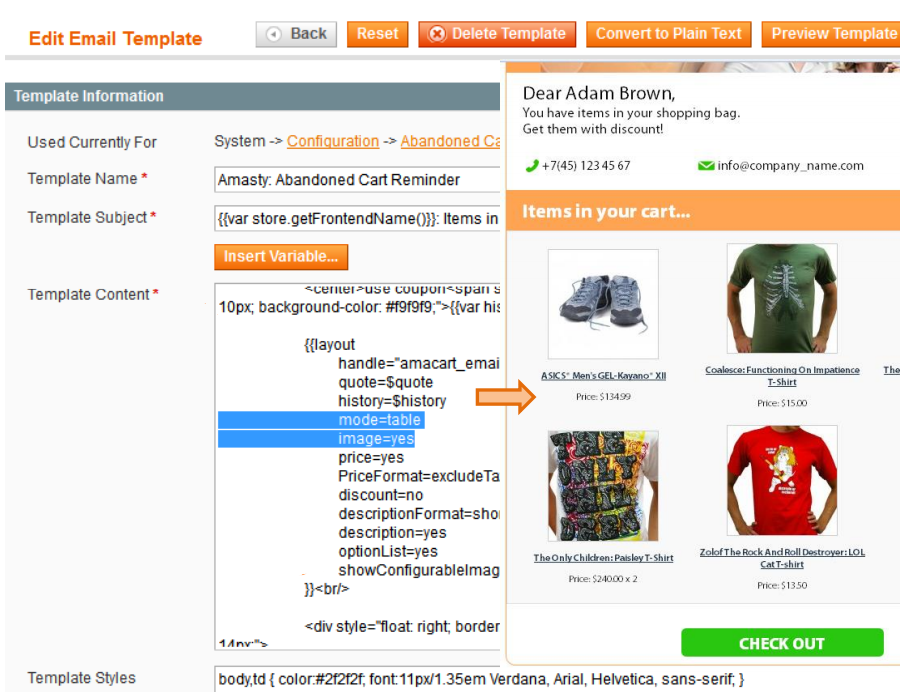
- “mode=table” - Show items to your customers in the table view mode. Just edit the template located in ‘Transactional emails’ section. Set up “mode=table” in HTML content.
- “image=yes” - Set “image=yes” to display product images in your template.
- “showCoonfigurableImage=yes” - displays configurable products’ images in the template.
- “showCoonfigurableImage=no” - displays simple products’ images in the template.
- “mode=list” - You can arrange items in the list mode with their description aside. For this aim, you need to specify “mode=list” in the template HTML content.
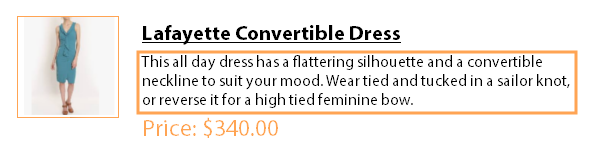
- “descriptionFormat=full”, “descriptionFormat=short” - You can also edit the product description length with “descriptionFormat=full” or “descriptionFormat=short” according to your goals.
A sample: descriptionFormat=short
- “discount=yes” - to display the coupon code, write “discount=yes”. When you specify “discount=yes”, the Discounted Price will be also displayed in the template.
- priceFormat=includeTax,priceFormat=excludeTax - Decide which price to show to customers: tax-included or tax-excluded and than specify the appropriate settings: priceFormat=includeTax or priceFormat=excludeTax.
- “price=yes” or “price=no” - You can show or hide the product price. Set up “price=yes” or “price=no” when editing the template.
- “optionList=yes” or “optionList=no” - You can show or hide configuration options like color, size and etc. for configurable products. Set up “optionList=yes” or “optionList=no” when you edite the template.
- “showConfigurableImage=yes”, “showConfigurableImage=no” - You can show or hide a product image of the parent configurable product.
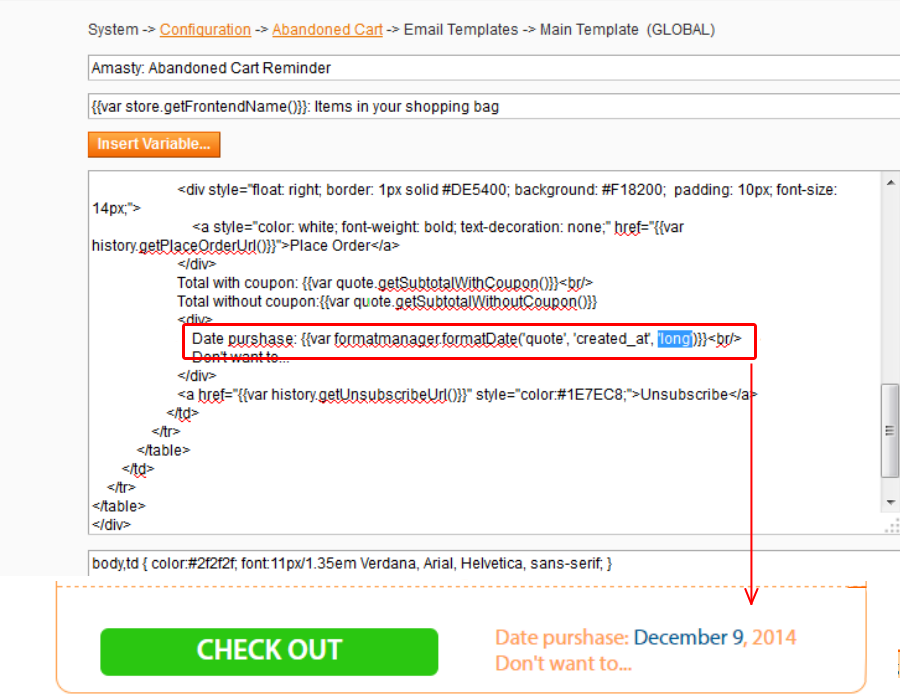
- You can choose whether to use short/long or medium display type. Here you can see the example with long date format.
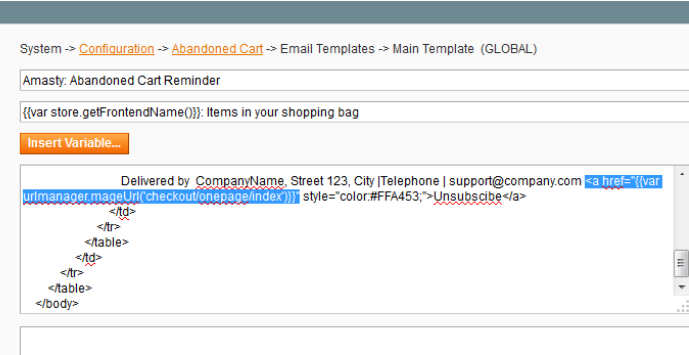
- Use URL manager to automatically create URLS corresponding to Magento requirements.
Template Sample
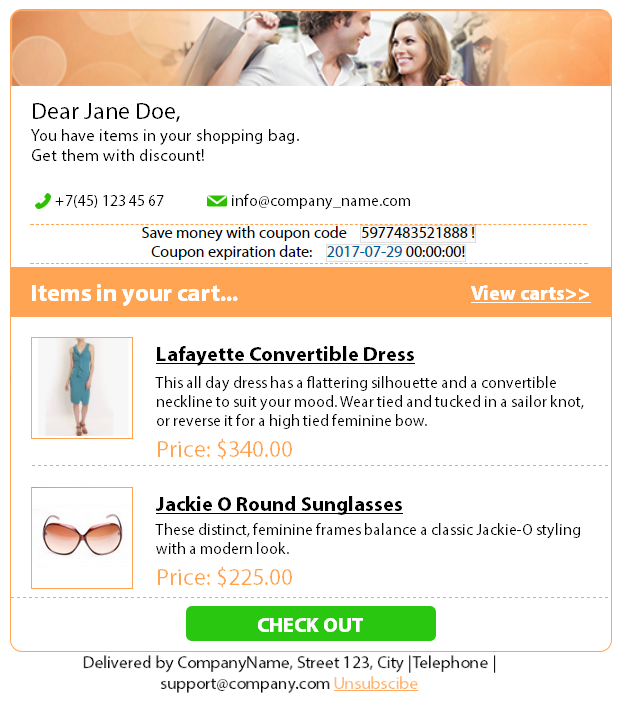
This is the example of one of ready-to-use email templates. Here you can place a coupon code, the coupon expiration date and the complete list of the abandoned cart items.
magento_1/abandoned_cart_email.txt · Last modified: 2020/07/22 12:26 by skudrov