
Sidebar
magento_2:lgpd
Table of Contents
For more details see the LGPD for Magento 2 extension page.
Guide for LGPD for Magento 2
Make your store compliant with the latest Brazil LGPD, EU GDPR and other legislative requirements. Create and manage privacy policy documentation, add consent checkbox to the registration and checkout pages, display cookie settings bar and aplly all features to cover customers' rights.
- Collect consents with privacy policy
- Create multiple consent checkboxes
- Display Cookie Policy popup
- Track privacy policy related activity in the actions log
- Approve or deny requests to delete users' accounts
- Automatically delete personal data
Extension Configuration
To configure the extension, you need to adjust LGPD and Cookie settings separately. First of all, please go to Stores → Configuration → Amasty Extensions → Personal Data Protection.
Expand the General tab.
General

Enabled - set to Yes display the consents on the frontend.
Display Privacy Policy Popup on First Visit - enable the option to display Privacy Policy popup when a new customer opens the website.
If you've just installed the extension, the Privacy Policy template is the following:
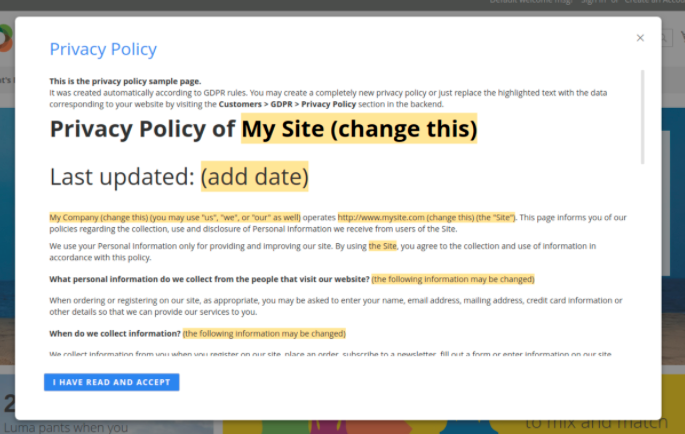
Just replace the highlighted text with the data corresponding to your website by visiting the Privacy Policy section in the backend.
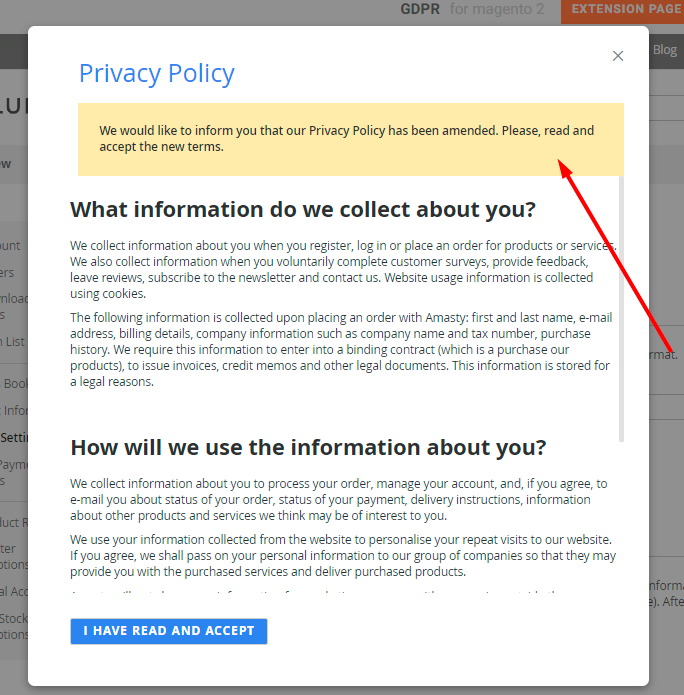
Moreover, the option allows you to display a popup with a new version of Privacy Policy to those users who have not accepted the policy yet with the notification about the updates. See how it works:
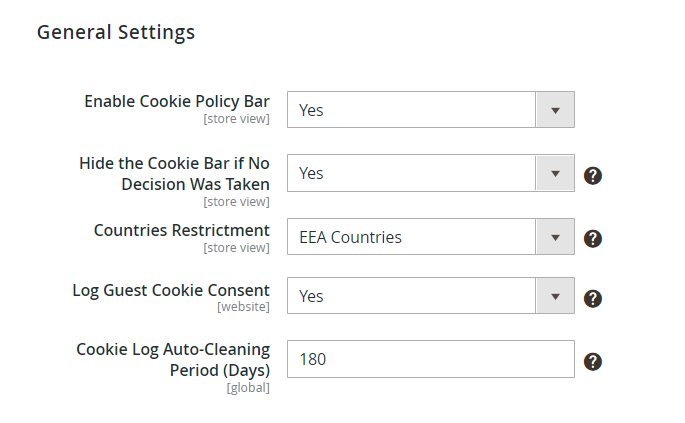
Log Guest Consent - activate this option to log all consents given by guest visitors. Guest data will be displayed in the 'Consent Log' grid.
Log Auto-Cleaning - enable the automatic Consent and Action Logs cleaning.
Log Auto-Cleaning Period (Days) - the records that were saved for a longer period than the specified here will be automatically removed from Consent and Action Logs.
Customer’s Account Privacy Settings
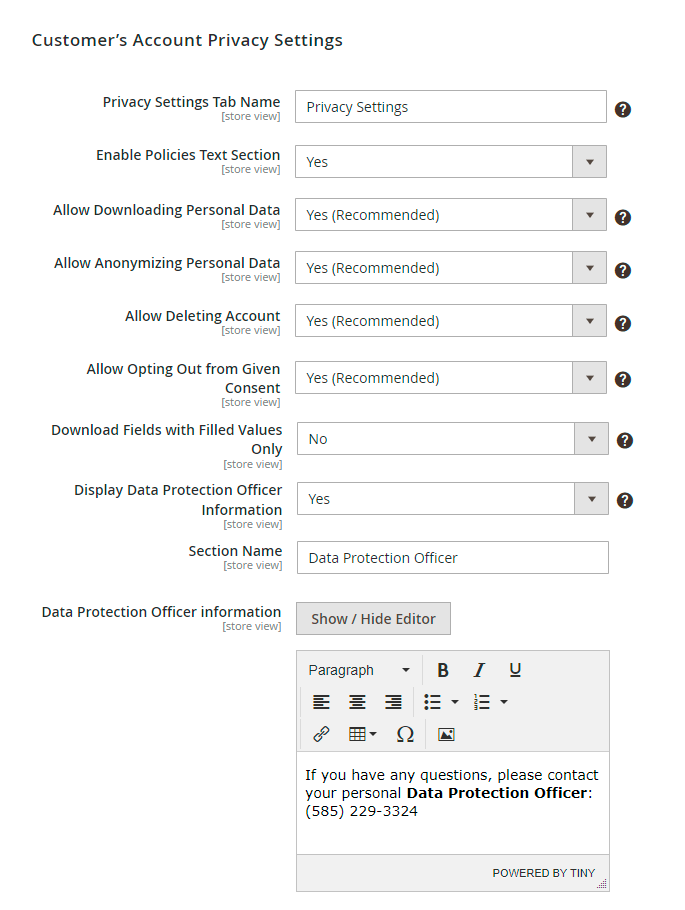
You can display or hide the following sections in the customers' accounts:
Allow Downloading Personal Data - set to Yes to let a customer download personal data in a CSV file.
Allow Anonymizing Personal Data - enable the option to let customers anonymize their personal data.
Allow Deleting Account - switch to Yes if you want a customer to be able to delete account.
Allow Opting Out from Given Consent - If enabled, the section Given Consent will be added to customer account for customers to be able to opt in or opt out from given consent.
The checkboxes with the enabled option ‘Hide the Checkbox after User Gave the Consent' will be displayed under the Given Consent section. When the option 'Hide the Checkbox after User Gave the Consent’ is disabled for checkboxes, they will not be added to the Given Consent section since the system will always display these checkboxes on selected forms even if the consent was given.
Please mind, that these options are enabled by default as they are strongly recommended according to the LGPD.
Display Data Protection Officer Information - if enabled, customers will be able to get information about your Data Protection Officer added to a separate section at their accounts.
Section Name - specify the frontend title for the extra tab.
Data Protection Officer information - provide any information you want to with the help of the editor.
In the customer's account the new tab called Privacy Settings is added:
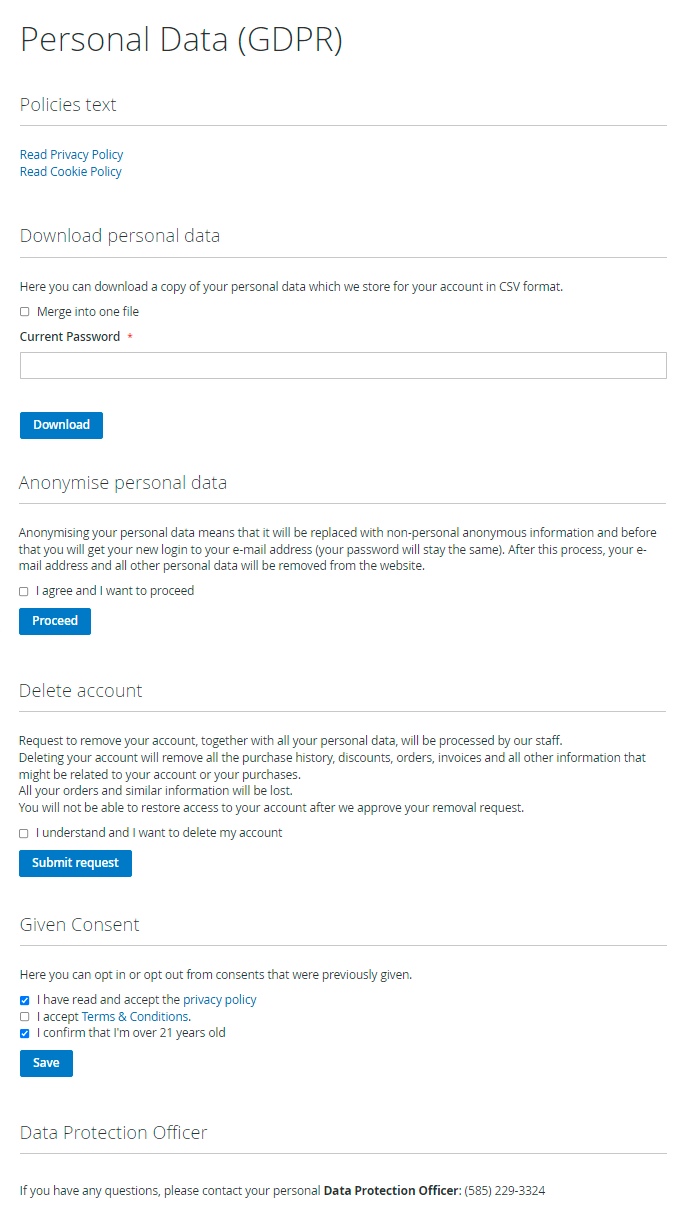
From this page, customers can:
- download all their personal data in the CSV format;
- anonymize their personal information;
- request for account removal;
- opt-in or opt-out from optional consent;
- see the contacts of the DPO.
Privacy Settings for Guests
Guest visitors have also some options to manage their personal data. Guests can't delete their accounts (as they don't have ones), but other options are available for them.
To get the info, guests should go to the Orders and Returns page.
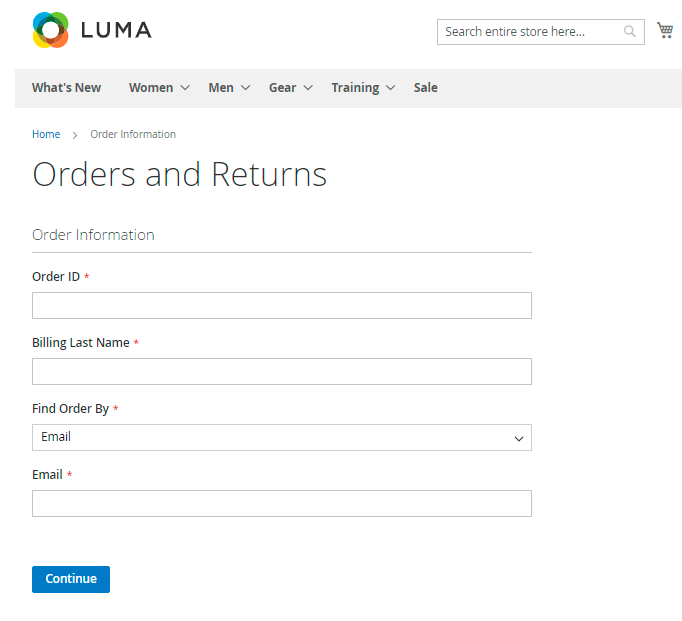
Find a particular order and scroll down.
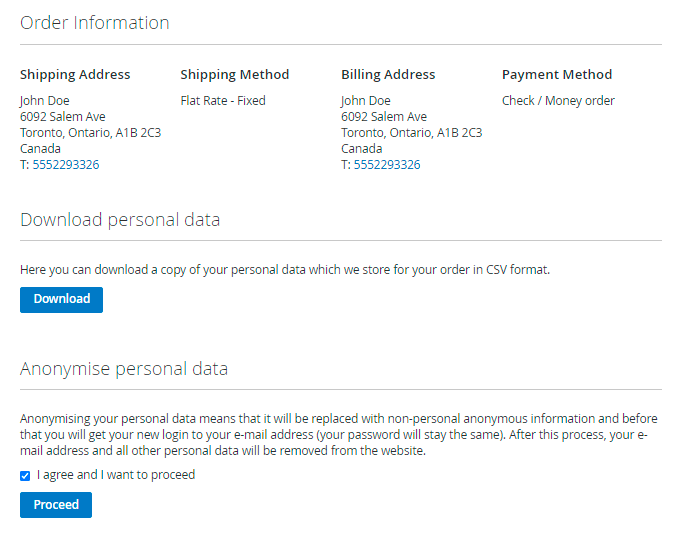
Here a guest visitor can download the data collected during the particular order processing or anonymise it.
Personal Data Deletion and Anonymization
Automatic Personal Data Deletion
In this section you may configure an Automatic Personal Data Deletion for customers that stopped using your website. You can set up the time interval from the last customer's order in days, and after it expires the extension will automatically create a deletion request on the 'Delete Requests' grid.
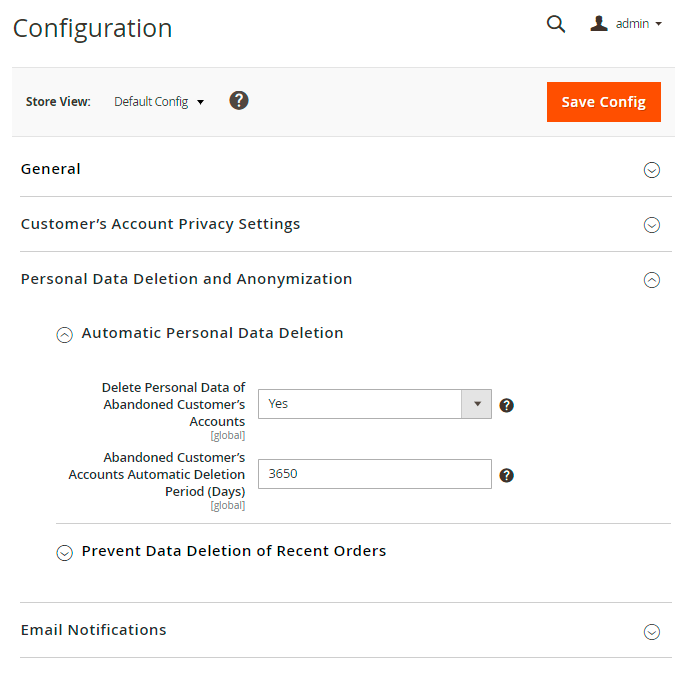
Delete Personal Data of Abandoned Customer’s Accounts - set to Yes to activate an automatic personal data deletion option.
Abandoned Customer’s Accounts Automatic Deletion Period (Days) - specify the particular number of days after which personal data will be removed.
How it works:
The extension will scan customers and their orders. If a customer’s last order was made earlier than the specified number of days, the extension will create a deletion request. You may approve or reject it on a separate 'Delete Requests' grid.
Prevent Data Deletion of Recent Orders
When a customer asks to delete personal data and the request is approved, the extension deletes their account, subscriptions, and the data in orders, invoices, shipments, and credit memos. Given disabled, it could cause problem for a store owner as these should be stored for a specific period of time.
The feature keeps personal data untouched in orders, invoices, shipments and credit memos for the set period after deleting customer’s account. When the period expires, the personal data in the documents will be automatically deleted.

Deletion of Personal Data in Recent Documents - choose Delete to remove data or set to Don't Delete to keep personal data untouched in documents.
Prevent Data Deletion Period (Days) - if you've chosen not to delete data, specify the particular period to keep the data. When the period expires, all the data will be removed.
Anonymization/Deletion of Personal Data for Orders in Specified Status(es) - if the option is set to Don't Allow for Statuses, a customer won’t be allowed anonymizing and deleting their personal data if the order is now in one of the specified statuses. A store admin won't be able to approve a request for personal data deletion as well.
Order Statuses - select the order statuses to which the feature will be applied.
Notifications Configuration
The extension supports two types of email notifications. These are:
- Anonymization Notifications
- Deletion Notifications
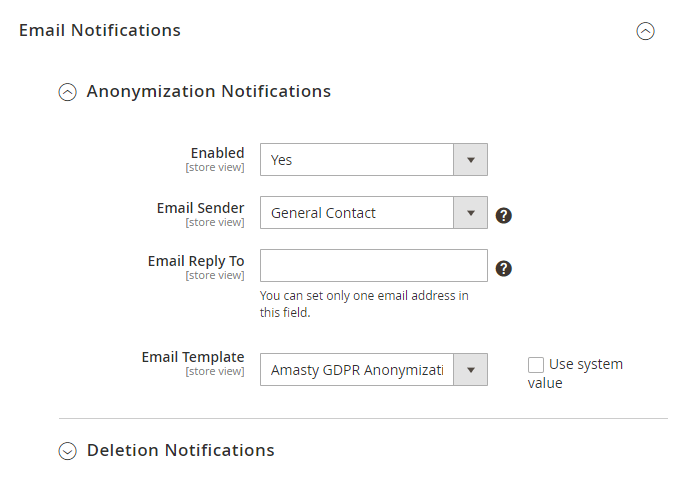
Customers are able to anonymize their personal data. After anonymizing, they will get an email with the new credentials for login their account. For Anonymization Notifications you may specify:
- Email Sender
- Email Reply To
- Email Template
Proceed to Deletion Notifications.
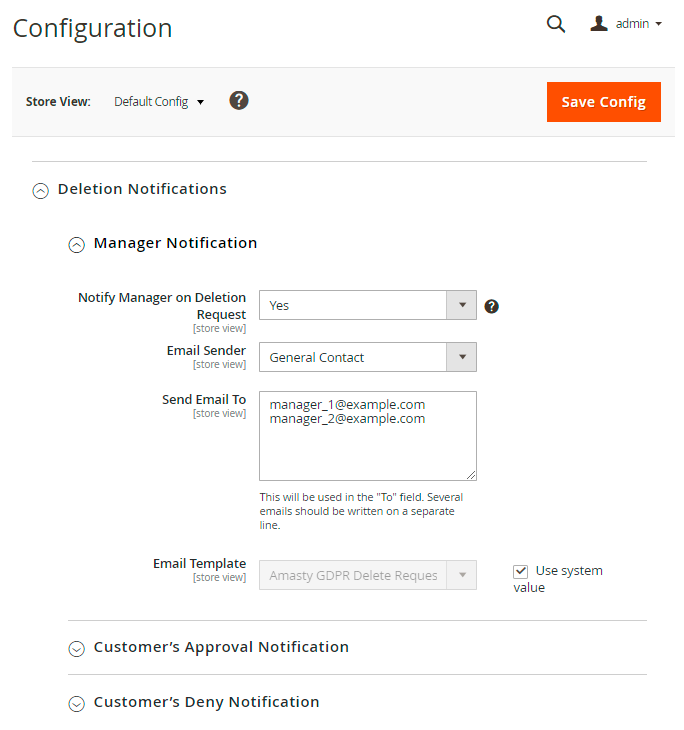
Here you may separately configure notifications for your managers and customers.
For managers it is possible to Notify Manager on Deletion Request and specify:
- Email Sender
- Send Email To
- Email Template
For Customer’s Approval Notification and Customer’s Deny Notification you can preconfigure:
- Email Sender
- Email Reply To
- Email Template
NEW: Now you can translate email templates automatically. Templates will be converted in the appropriate language according to the store view.
Cookie Consent Configuration
To give your customers the opportunity to regulate their cookie usage, please go to Stores → Configuration → Amasty Extensions → Cookie Consent.
Cookie Policy Tab
Expand this tab to configure the basic setting of the extension.
Check this guide to see how to configure each cookie setting properly.
Cookie Bar Types
Cookie Bar Style - choose the cookie bar type suitable for your store:
- Classic bar. It can be displayed either on top or in footer of the page. It contains cookie policy text and buttons.
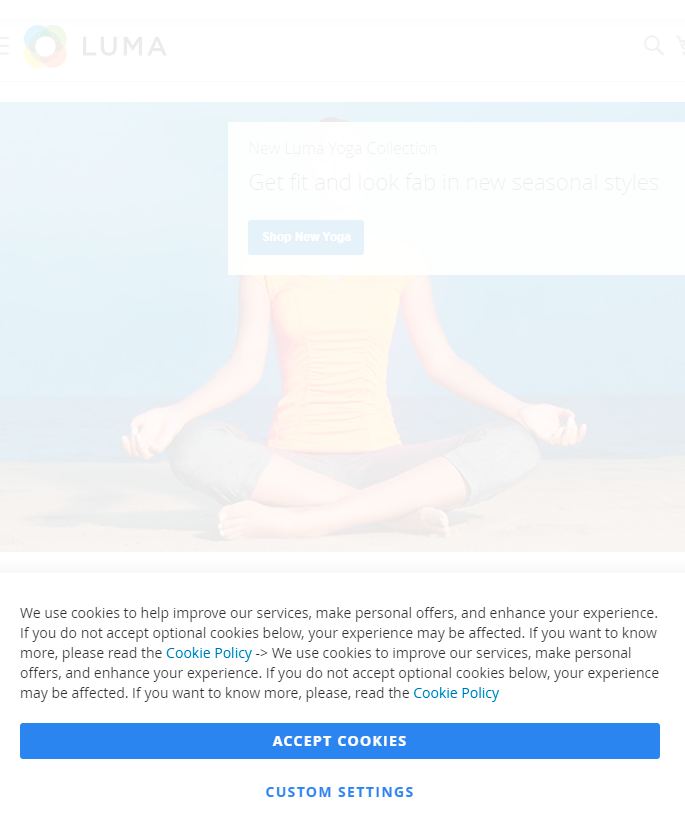
- Side Bar. Pop Up with Toggles contains additional info about each cookie group and a customer can easily adjust the consent within the first interaction.
- Pop Up. It is displayed in the center of a page.
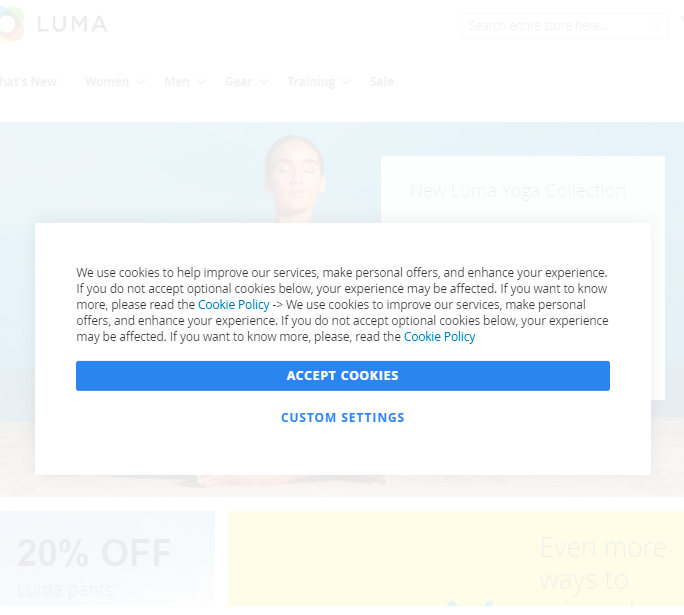
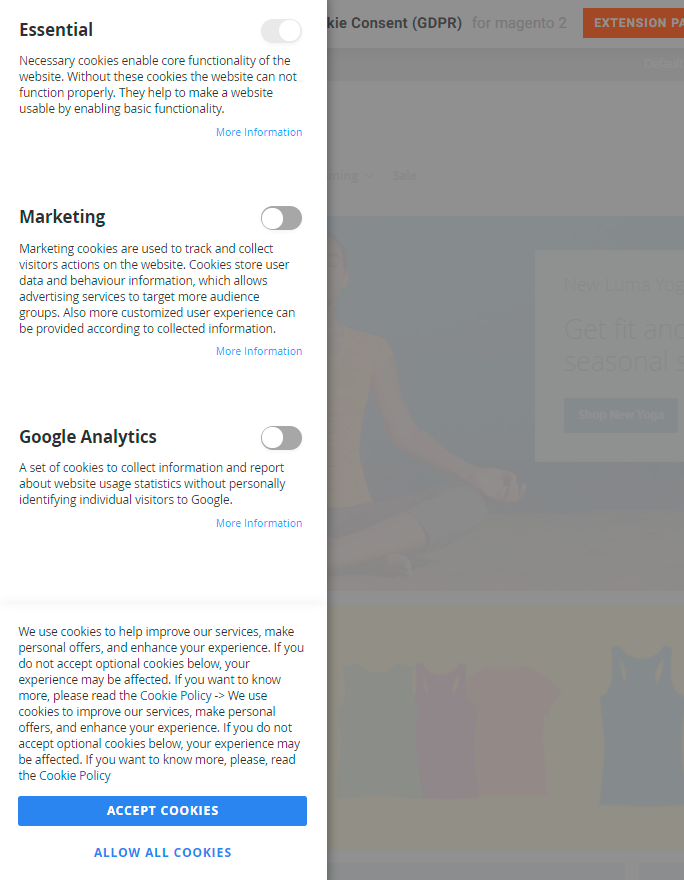
If customers accepts all cookies regardless of a bar type, the cookie bar automatically disappears. If they want to find extra information or allow specific cookies by clicking Custom Cookies (button name is customizable), they will see the following popup:
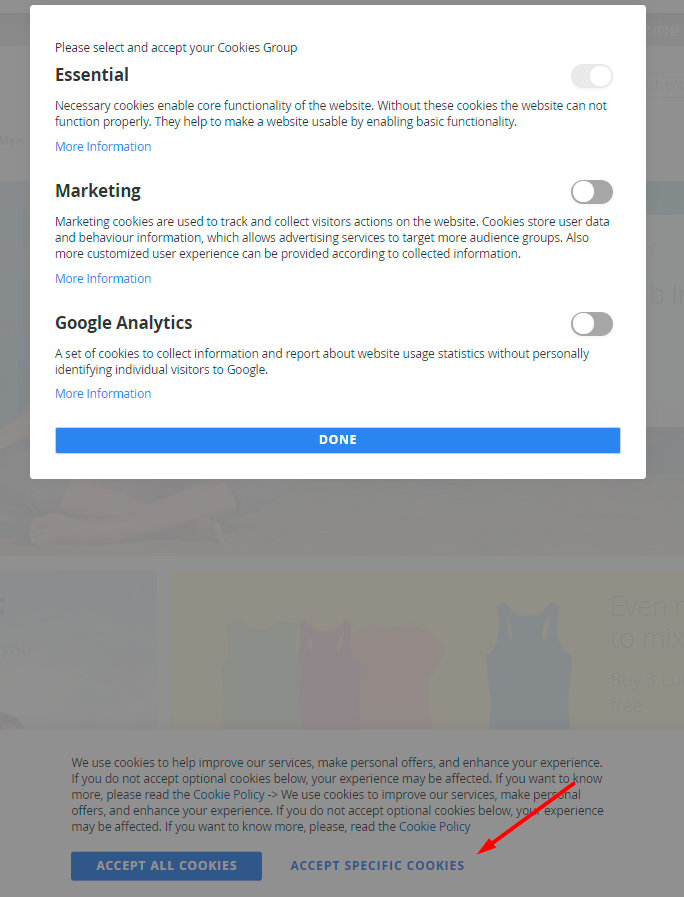
Thus, they can click the toggles and accept the particular cookies only.
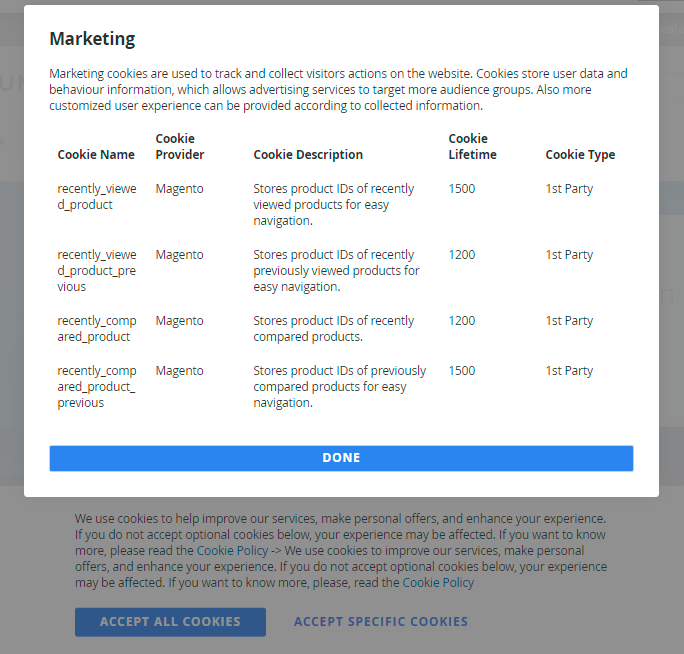
From this popup, they can also find extra details about each cookie type by clicking More Information in the popup and see the info:
Extra Frontend Option
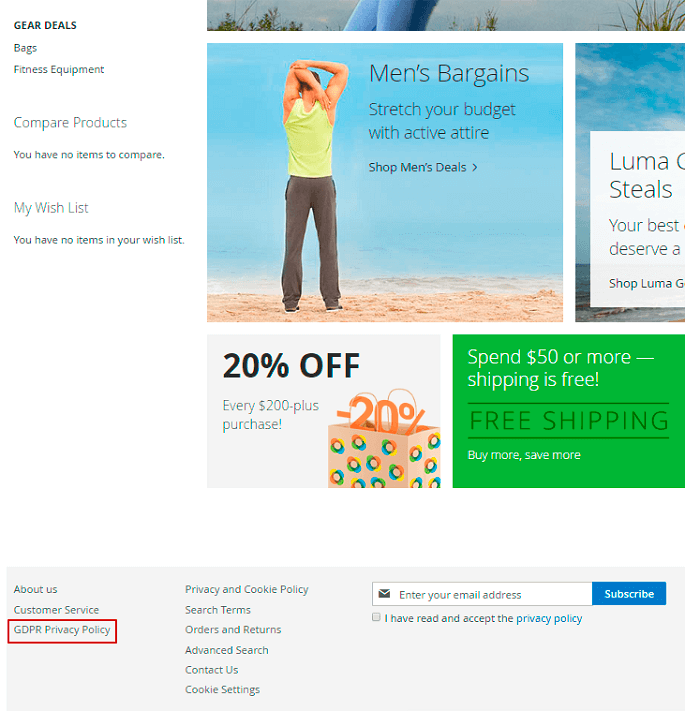
The extension also adds a special link to the store footer so that customers could find information about cookies and revoke prevously given consents any time. The data is also displayed in the pop-up.
See possible customization options and frontend examples in this guide.
Geo IP Data Configuration
The extension uses Geo IP Database to detect site visitors' location. Please, go to Stores → Configuration → Amasty Extensions → Geo IP Data.
Databases are required for the correct work of the LGPD module. Also you need to install php bcmath or gmp extension on your server.
You can get the databases automatically or import your own data.
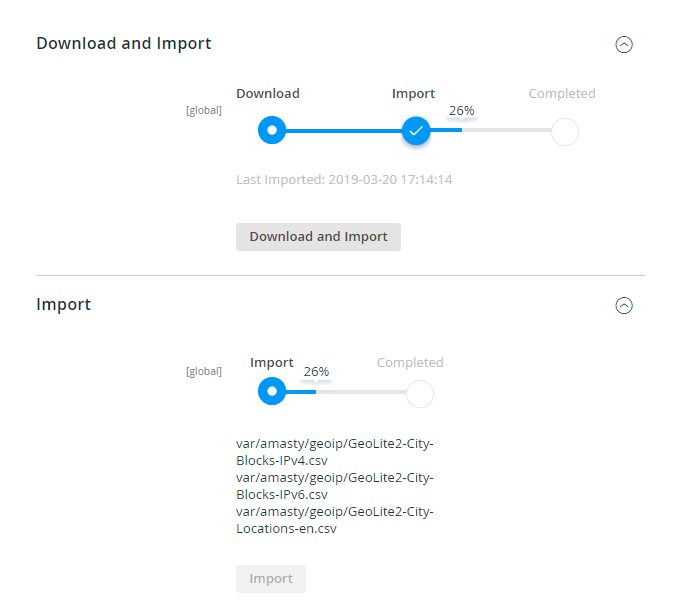
Hit the Download and Import button to make the extension download the updated CSV dump file and import it into your database automatically.
To import the files from your own source, use the Import option. Path to the files should look like this (the part 'var/amasty' should be replaced with your folders’ names):
var/amasty/geoip/GeoLite2-City-Blocks-IPv4.csv
var/amasty/geoip/GeoLite2-City-Blocks-IPv6.csv
var/amasty/geoip/GeoLite2-City-Locations-en.csv
In the Import section, the Import button is grayed out by default. It will be available right after you upload the CSV files. The red error notification will switch to green success notification when the import is completed.
Debug Mode
You can enable IP forcing, which makes it possible to set a specific IP address that will be used instead of the visitor's real IP address when determining geolocation. The feature is useful while configuring or testing the extension.
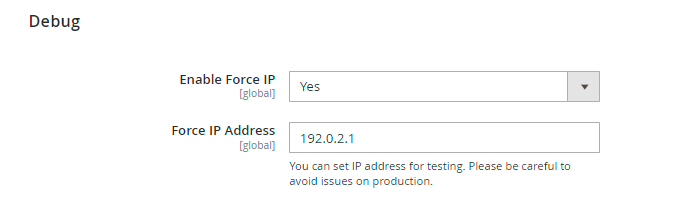
Enable Force IP - set to Yes to replace the real IP address.
Force IP Address - specify the address to use instead of a real one.
Data Management from the Admin Panel
With the extension, you can download, delete or anonymise customers' data from the admin panel. For example, if a customer can't log in to an account and asks you to anonymise the data, you can easily do it.
Proceed to Customers → All Customers and choose a particular one.
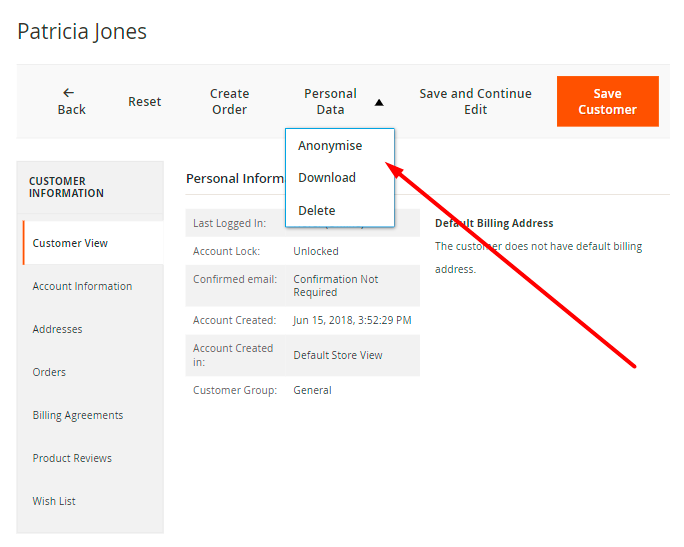
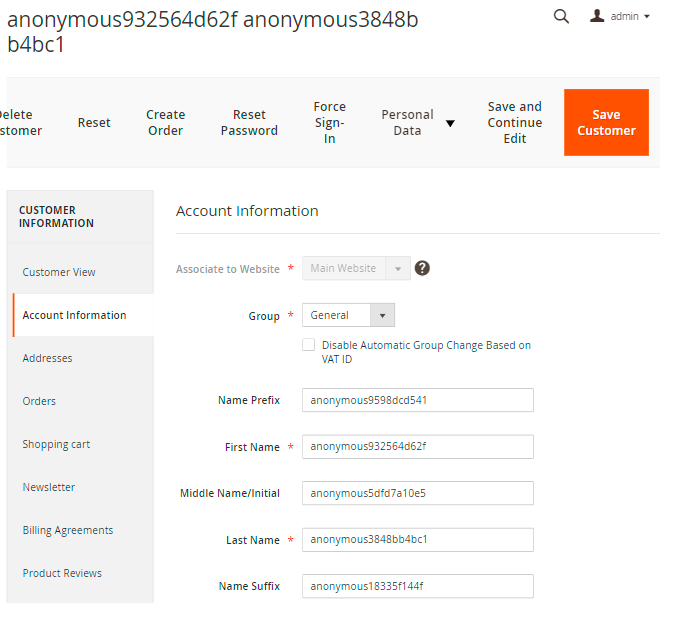
In the Personal Data dropdown you can choose the appropriate action to be done with a customer's data. For example, click Anonymise and confirm the action. Check the result.
Cookie Management Grids
Cookie Grid
To manage all the existing cookies, go to Customers → Cookies.
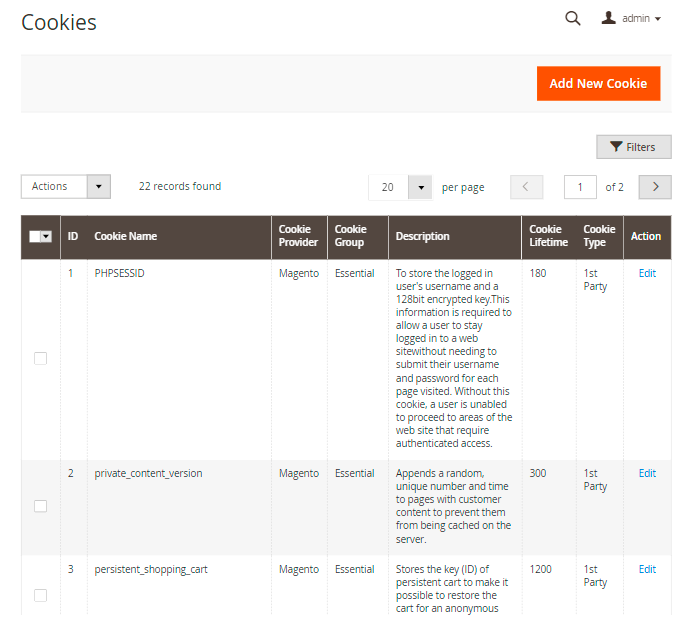
With the extension you can easily track and sort all cookies on a separate grid by its ID, Name, Group, Description and the Lifetime.
To view or change the configuration of a cookie, click Edit in the Action column.
To delete cookies, tick them and choose Delete option in the Actions dropdown menu.
To create a new cookie, hit the Add New Cookie button.
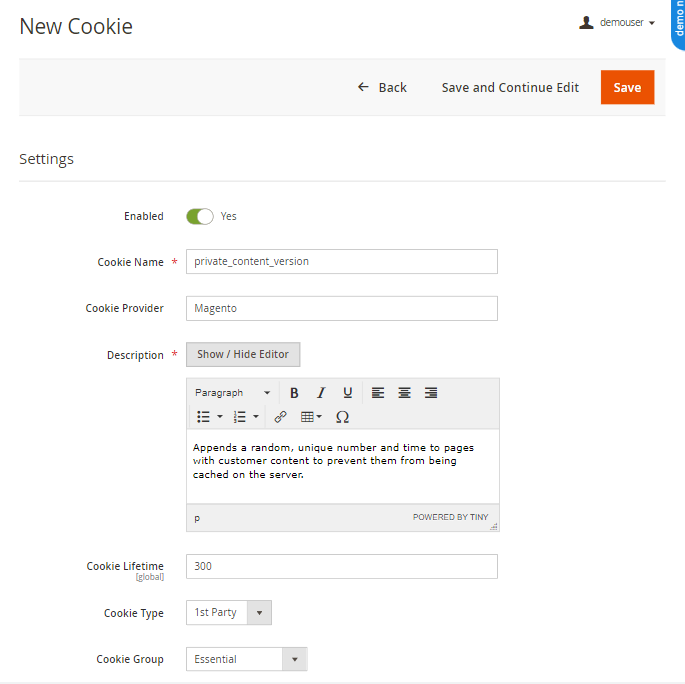
Cookie Name - specify the title of the cookie.
Description - fill in some information about the usage of the cookie.
Cookie Lifetime - set the lifetime of a cookie that will be displayed to customers on the Cookie CMS page.
Cookie Group - assign the cookie to a particular group.
Cookie Categories
To arrange cookies into essential and optional categories, go to Customers → Cookie Groups.
With the extension you can manage all your cookie categories in a handy grid.
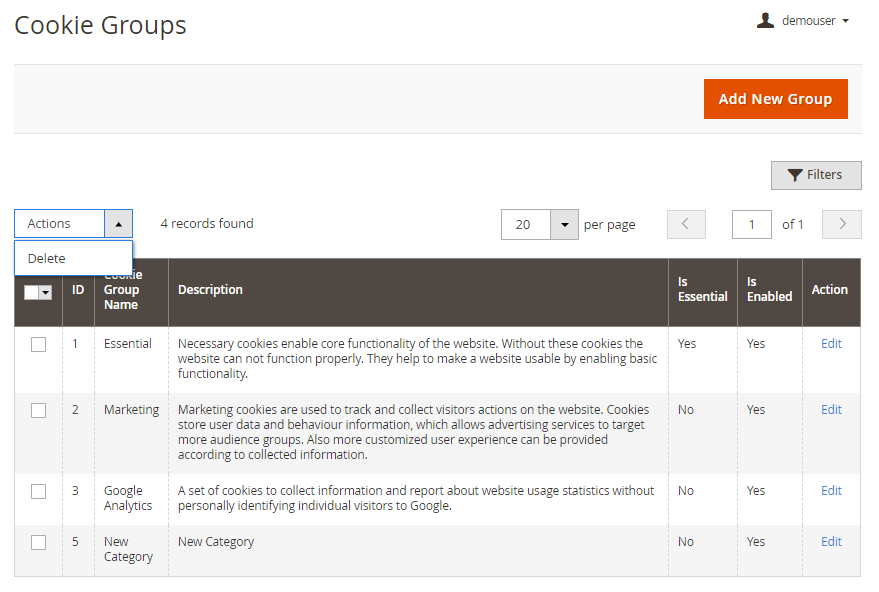
On the grid the ID, Cookie Group Name and Description are displayed. Also you can see if each group Is Essential and Is Enabled.
To configure any group, click Edit in the Action column.
To delete several groups in one click, tick them and choose Delete option in the Actions dropdown menu.
To create a new category, click Add New Group.
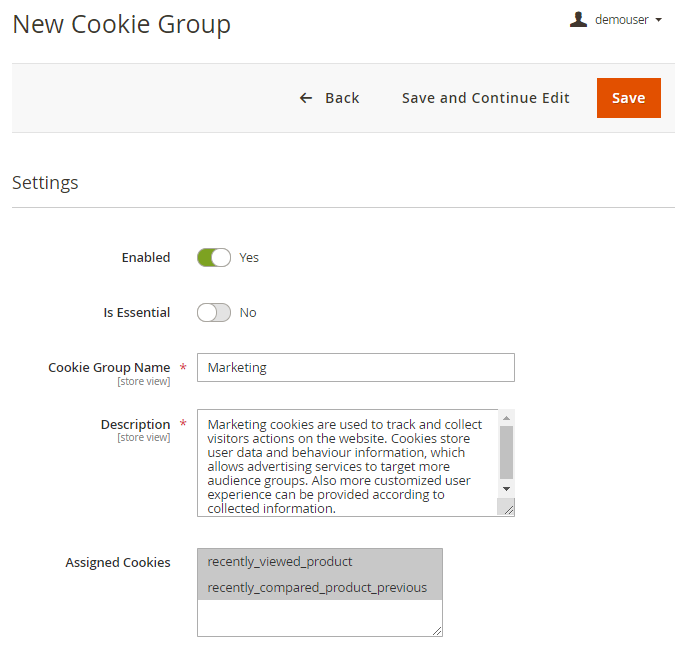
Enabled - choose Yes to activate the group.
Is Essential - set to Yes to make the group obligatory. In this case the customers will have to allow this cookie group to get access to the website.
Cookie Group Name - specify the title of the cookie group that will be displayed to the customers on the frontend and on the grid in admin panel.
Description - fill in the information about the usage of the group so that the customers could decide whether to allow this group or not.
Assigned Cookies - select the cookies to include in the group.
Save the configuration.
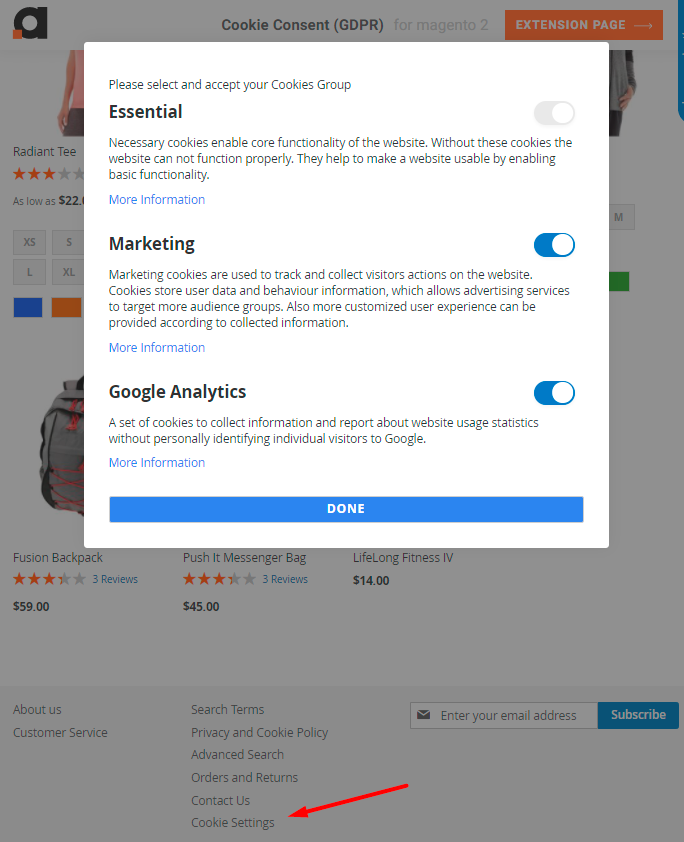
Here customers can choose which cookie categories they allow to process:
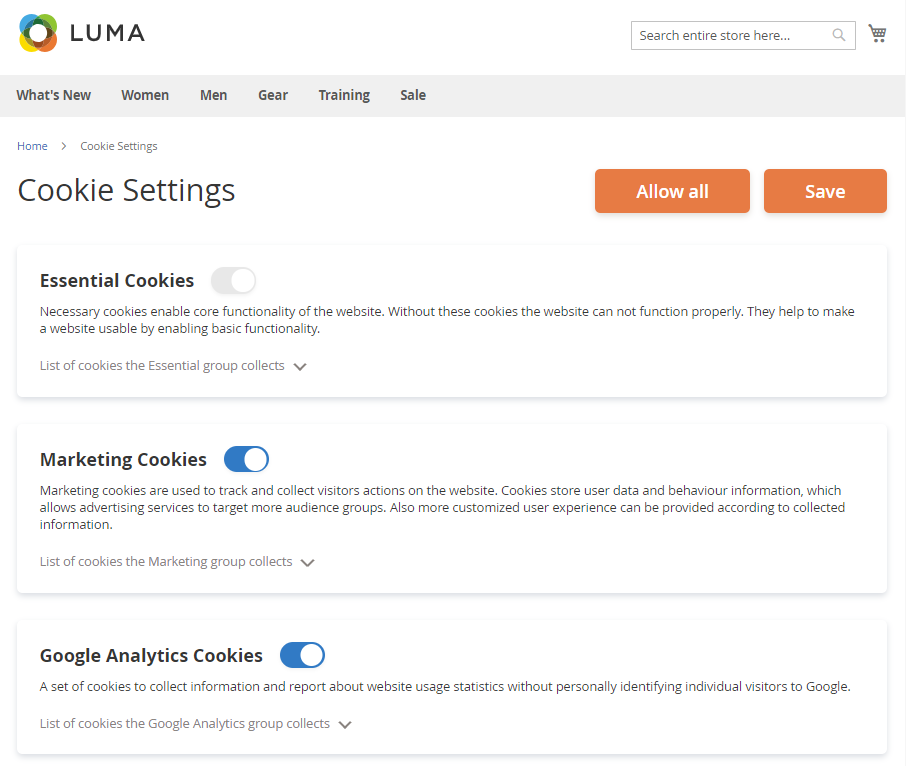
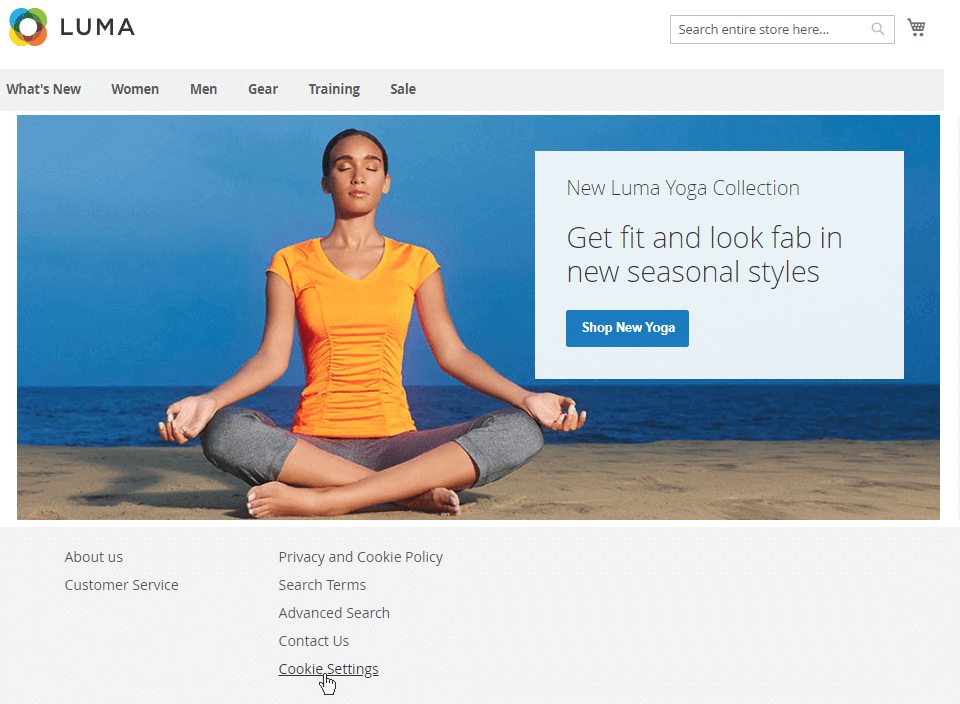
The extension adds a ‘Cookie Settings’ link to the footer so that the customers can easily reset cookie usage conditions any time they need:
Cookie Consents
To find the list of all consents and customers data, go to Customers → Cookie Consents.

You can find all needed info in one place. The grid allows to track consents by customer Name, Email, IP Address, Website, Consent Type, Date and Consent Status. This data can be useful for different consents analysis.
LGPD Management Grids
The module contains the number of grids needed for efficient LGPD management.
Checkboxes Management
With the extension it is possible to create multiple independent checkboxes on a form with their own settings. Please navigate to Amasty → Personal Data Protection → Consent Checkboxes grid to view and manage all checkboxes.
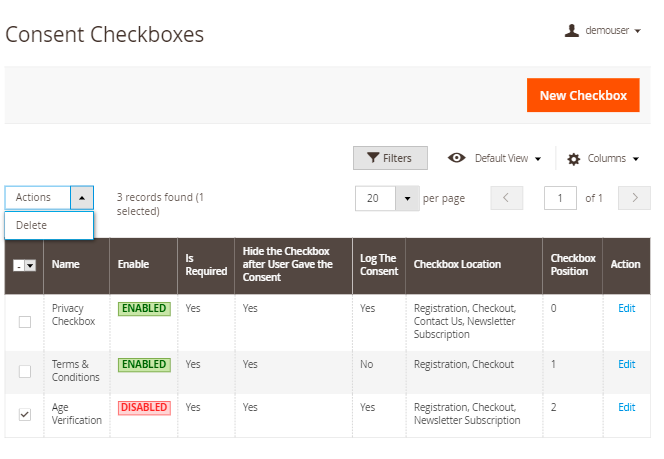
On the grid you can see each checkbox settings.
To remove them in bulk, tick the necessary ones and choose the Delete option in the Actions dropdown.
To create a new one, hit the New Checkbox button.

Checkbox Name - specify the title of a checkbox for internal use.
Checkbox Code - set the code of the checkbox.
Enabled - switch to Yes to activate the check on the frontend.
Confirmation Required - if enabled, a customer will have to give the consent to submit an action.
Hide the Checkbox after User Gave the Consent - if enabled, the system will always log consents to the checkbox. Moreover, the checkbox will be also added to customer account under the section 'Given Consent' to opt in or opt out from consent. The checkbox will be displayed again in case you introduce changes to the privacy policy. If tje option is disabled, an admin can choose whether to log the consents or not.
Log the Consent - if enabled, customer’s consent will be saved in the ‘Consent Log’ grid.
Keep in mind, that if you disable Hide the Checkbox after User Gave the Consent, the checkboxes will not appear in the customer account settings, as customers will have to give their consents every time on the store pages.
Checkbox Position - define the checkbox position among other checkboxes on the frontend. The feature helps to set the order of several checkboxes in case they are displayed in one place. 0 is the highest priority.
Checkbox Location - select the pages and forms to which a particular checkbox will be applied.
Checkbox Text - provide the content of the checkbox. You can use the <a> tag in the text and also the {link} variable to insert the privacy policy link into the checkbox text. Example: I have read and accept the <a href=“{link}”>privacy policy</a>.
Consent Link Type - choose the type of the link: it can be either GDPR Privacy Policy (which is similar to LGPD) link or link to any CMS Page. If the second variant is chosen, select the page to which link will direct customers.
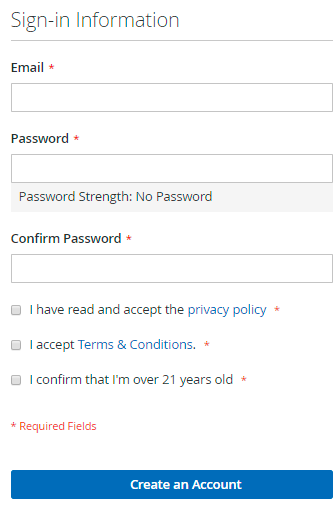
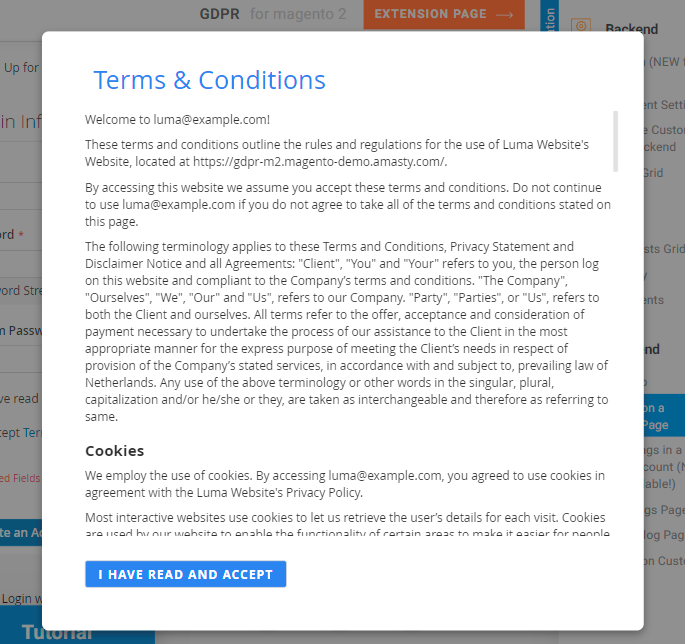
This is how checkboxes are displayed on the registration page:
If a customer clicks on any policy, a CMS page will be displayed in a popup. For instance, click on the Terms & Conditions link:
Countries Restrictment - it is possible to adjust each checkbox visibility according to a customer location. Enable the checkbox for All Countries, EEA Countries or provide Specified Countries in the list below.
Consent Log
Collect and track all customer consents in one grid. Here you will also see if a customer has revoked optional consents at Account Privacy Settings.
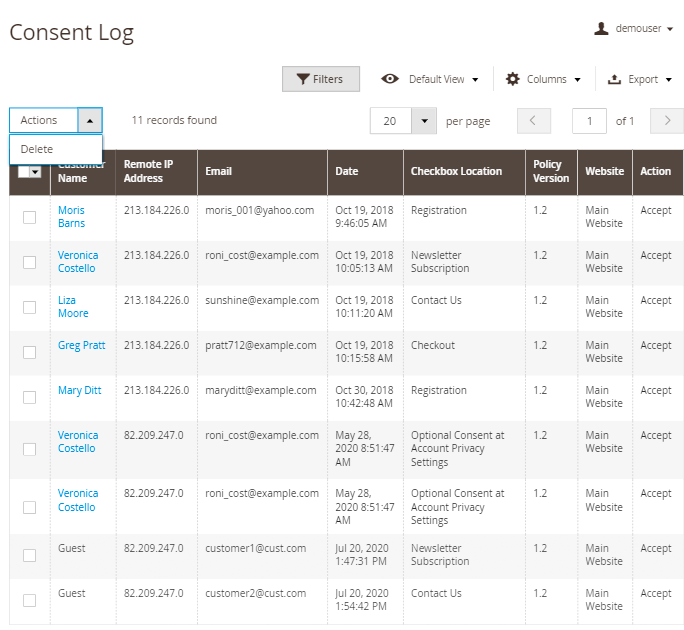
See each Customer Name, Remote IP Address, Email, Checkbox Location, Policy Version, Websites and a customer Action.
For guests, the extension gets all possible data. If, for example, email is not specified, on the grid it will be displayed as '-'. Also, guests will see the checkboxes even though they have already given their consents.
To delete consents in bulk, just tick the necessary ones and choose the Delete options from the Actions dropdown.
You may also apply multiple filters to sort out specific consents.

Action Log
To check customers’ actions, go to Customers → Personal Data Protection → Action Log.
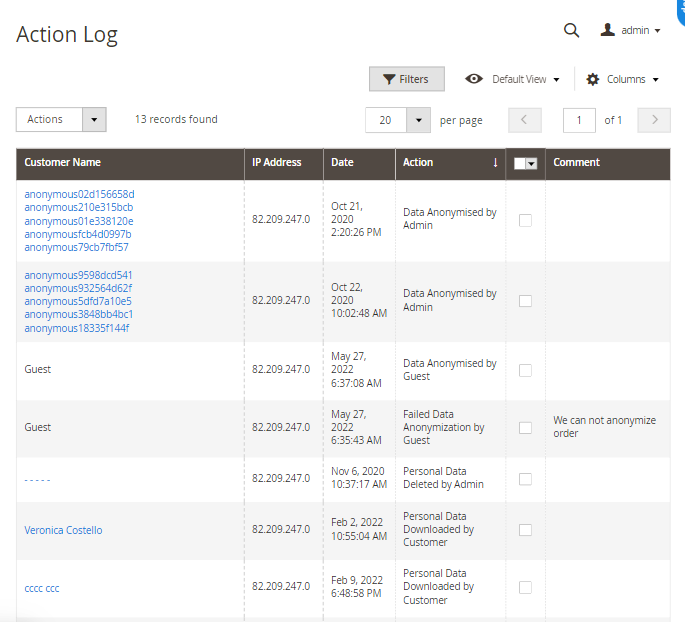
On the grid you can see all actions performed by store users and admins regarding privacy policy consents and the LGPD-related account management.
Filter the data by the following actions:
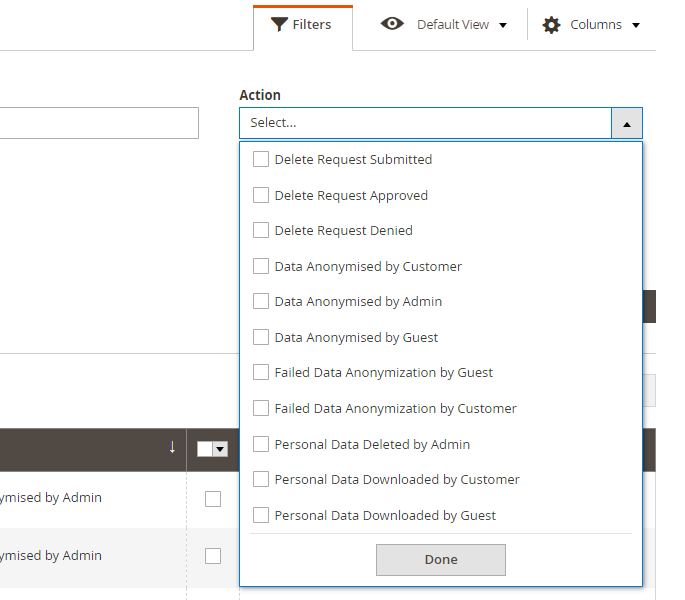
Delete Requests Management
When a customer requests for account removal, the request appears on the special grid. Please, go to Customers → Delete Requests.
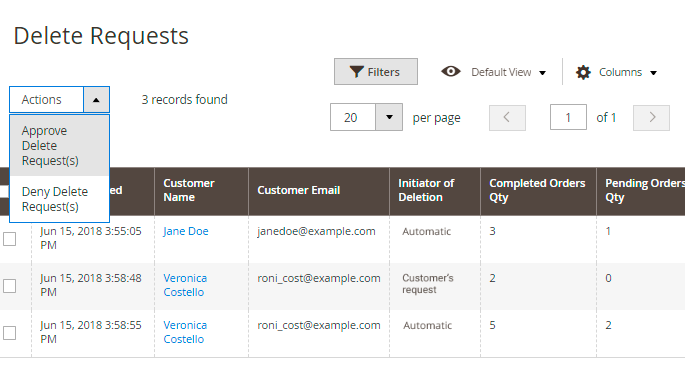
On the grid you can see all incoming requests. You can approve or deny any request:
- Select the requests you want to reply;
- Choose the appropriate option from the Actions dropdown menu;
- Hit the Submit button.
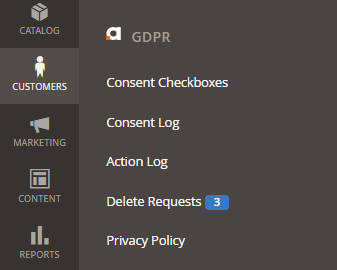
When a new delete request appears, store admin will see the notification in the admin panel.
Privacy Policy Document Management
To manage the privacy policy documentation, please, go to Customers → Privacy Policy.
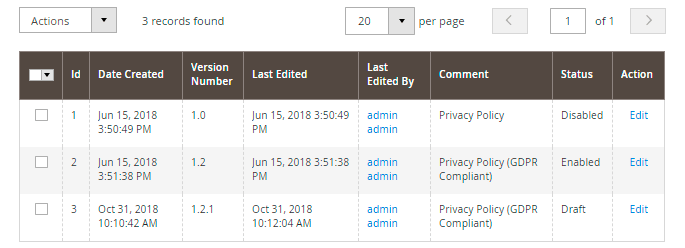
On the grid you can manage the existing privacy policy documents: create, update, and delete them. For your convenience, the inline edit is available:
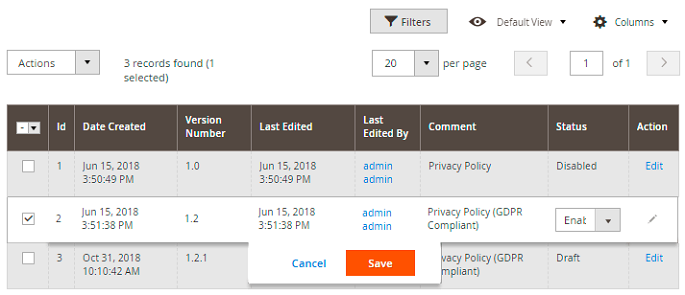
Kindly be informed that Active or Disabled Privacy Policy cannot be amended. Please use the CLONE function to create a new Privacy Policy version and amend the text.
Hit the Add New Policy button to create a new privacy policy document.
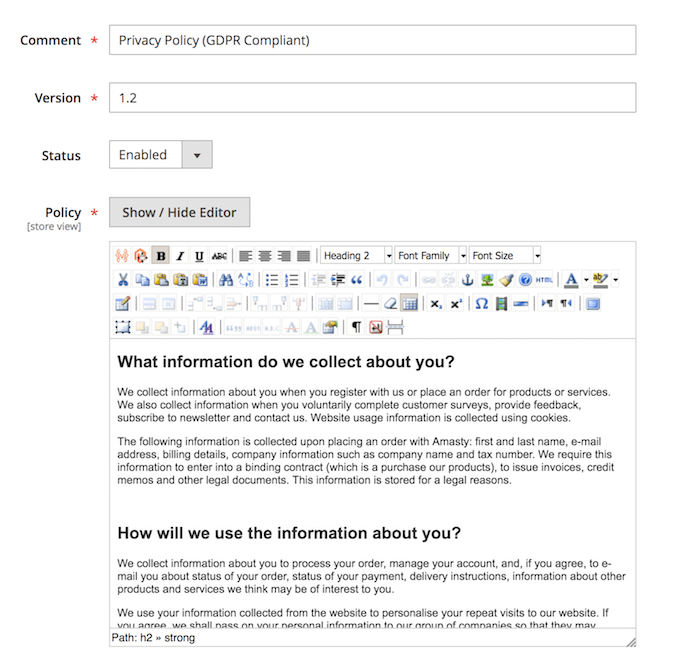
Comment — specify the privacy policy title;
Policy Version — set the privacy policy version;
Policy Status — change the privacy policy status;
Policy Content — fill in the privacy policy text using the WYSIWYG editor.
To create the privacy policy documentation in additional language, please, switch to another store view using the Store View dropdown menu. Choose the required store view and specify the policy in the corresponding language.
When the privacy policy document is ready, hit the Save button to return to the grid. Also, you can state the version as Draft if it is not completely ready.
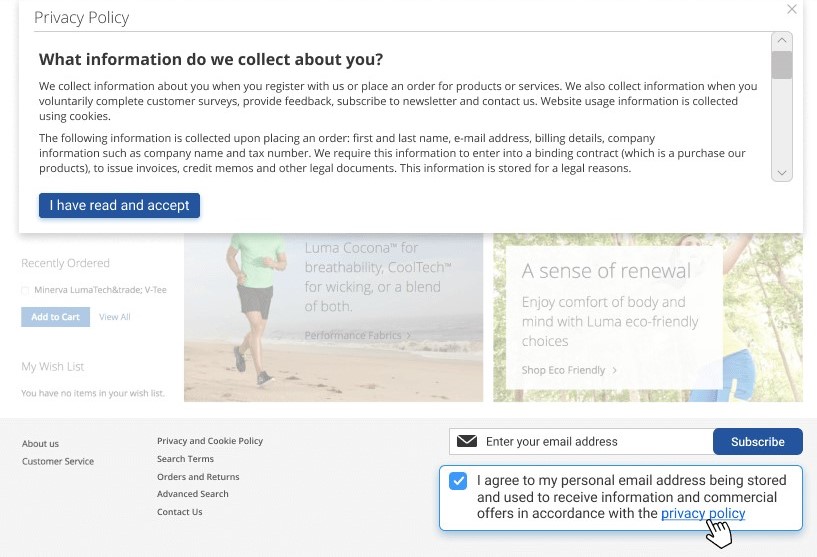
This is how the privacy policy document looks for store visitors:
Place Links To Privacy Policy On Store Pages
To place a link to your Privacy Policy to any store CMS page/block, please, complete the next steps:
1. Create a CMS page and add the 'Amasty Privacy Policy' widget to this page. The widget will automatically display an active Privacy Policy text.
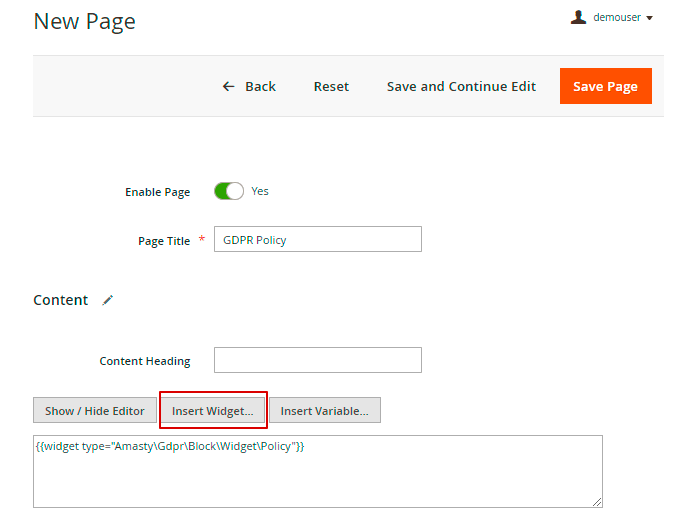
If you want to assign different URLs to multilingual Privacy Policy texts, you should create multiple CMS pages with different URLs and assign each page to a particular store view. Remember to insert the 'Amasty Privacy Policy' widget to each CMS page.
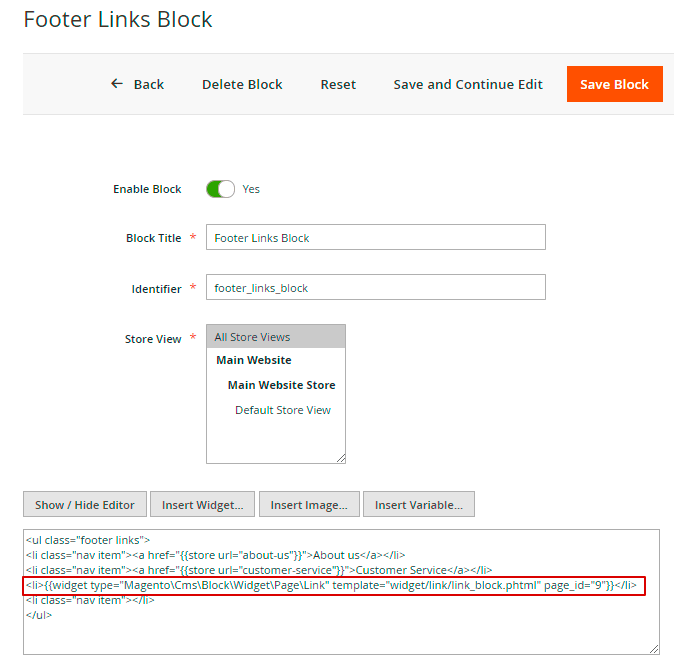
2. Choose any existing CMS page/block to which you want to add a link to a Privacy Policy. Then, via the 'Link to CMS Page' widget, place to this page a link to a CMS page (with a Privacy Policy text), created on the previous step.
3. Check how the link displays on the frontend:
When a customer clicks the link to a CMS page with Privacy Policy, the widget loads the Privacy Policy text according to the store view.
Cron Tasks List
To manage all existing cron tasks, please, go to System → Cron Tasks List.
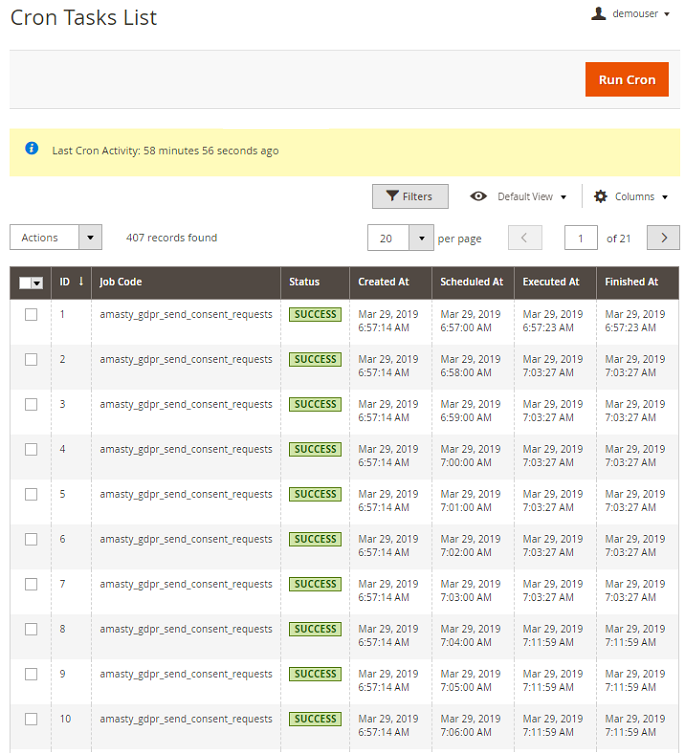
Here, you can see all the existing cron tasks and their statuses. Run cron tasks and generate their schedule by clicking the ‘Run Cron’ button. Also, delete tasks in bulk, apply filtering and sorting options when it is needed.
Find out how to install the LGPD extension via Composer.
magento_2/lgpd.txt · Last modified: 2021/06/04 13:32 by tihomirova