
Sidebar
magento_2:product-option-templates
Table of Contents
For more details see how the Product Option Templates extension works.
Guide for Product Option Templates for Magento 2
Attract more customers to your store by providing multiple product variations with Magento 2 Custom Option. Create an unlimited number of custom option templates, and promptly assign them to your products in bulk.
- Easily offer extra products and services
- Customize options with image, text and color swatches
- Configure smart option dependencies
- Quickly assign option templates to multiple products
- Add free and paid accompanying items to products
- Hyva-ready storefront and Hyva Checkout compatible by default
- WCAG compliance (for Luma Theme)
The Product Option Templates extension for Magento 2 is read compatible with GraphQL. Now you can expose the data you need via GraphQL queries.
The extension is compatible with Hyvä Theme (the compatibility is available as a part of an active product subscription or support subscription). You can find the 'amasty/module-prot-hyva' package for installing in composer suggest.
Easily create product option templates
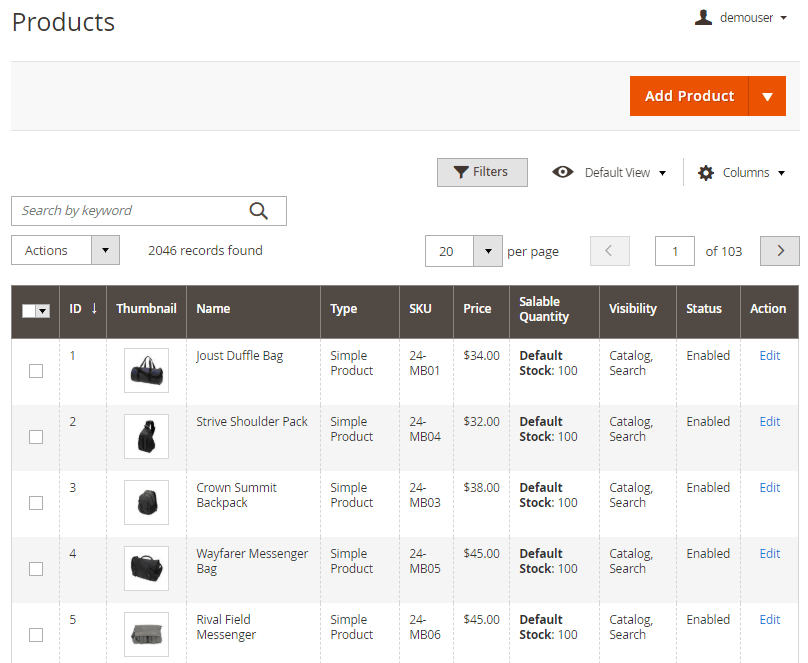
With Magento 2 Product Custom options extension, you can create multiple custom options templates and accurately arrange options for any product. Thus you can easily add such product variations as size, color, print, material, brand, related items or services, etc. To do this, please go to Catalog → Products.
Please, open any product configuration page and go to Customizable Option Templates by Amasty tab.
Click Add New Template button.
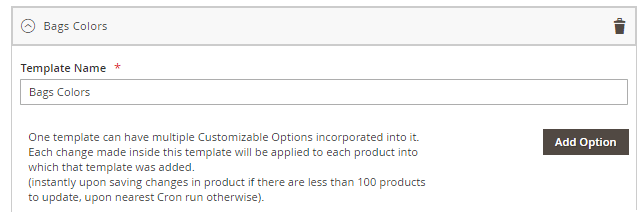
Template Name - give a name to your template.
Each template can contain multiple customizable options incorporated into it. Create as many options as you need via the button Add Option. In this tab, you can specify the Option Title and Option Type. Mark the option Required if needed. Use any input type according to your specific needs: text field, text area, file, drop-down, multi-select, checkboxes, radio buttons, date, time, date & time.
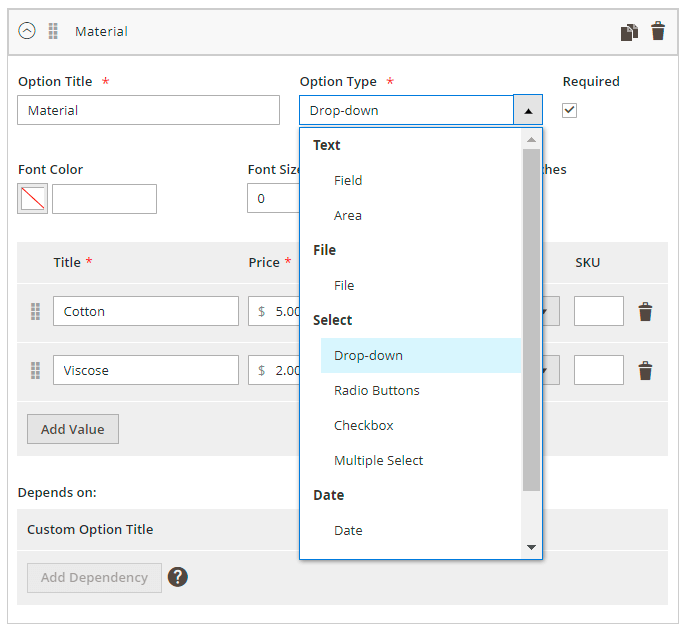
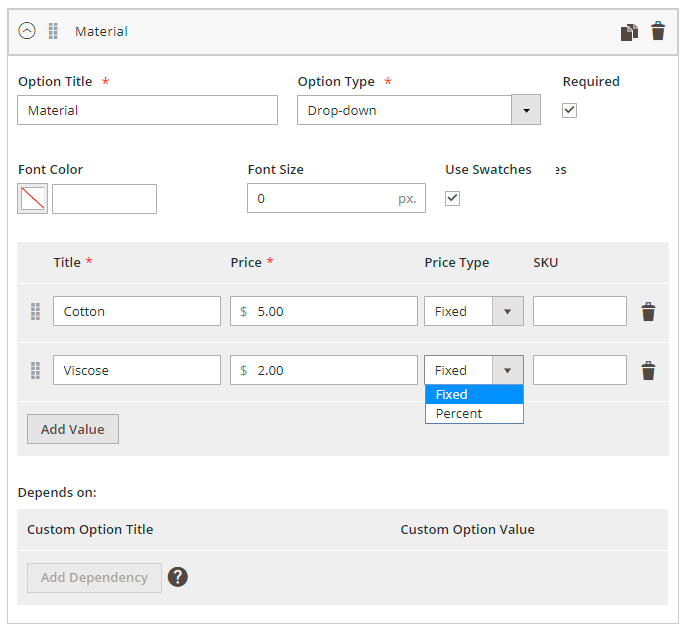
Then, add the option values (product variations) via the button Add Value. Fill in the option values prices, if the overall product price should differ depending on product variations (e.g. different type of material, size, etc.) In this case, the price specifies the surcharge of the option and its value depends on the price type.
Fixed - select this price type and the exact sum of money will be added to the product price.
Percent - choose this option to add percent amount to the product price.
Leave the price fields empty if the overall product cost doesn't change depending on option values.
Specify the option values SKUs. Easily delete any value via the recycle bin button. Note that this operation cannot be undone.
Note, that each change made inside a template will be immediately applied to each product where this template was added.
Now, you can Save the product with the template.
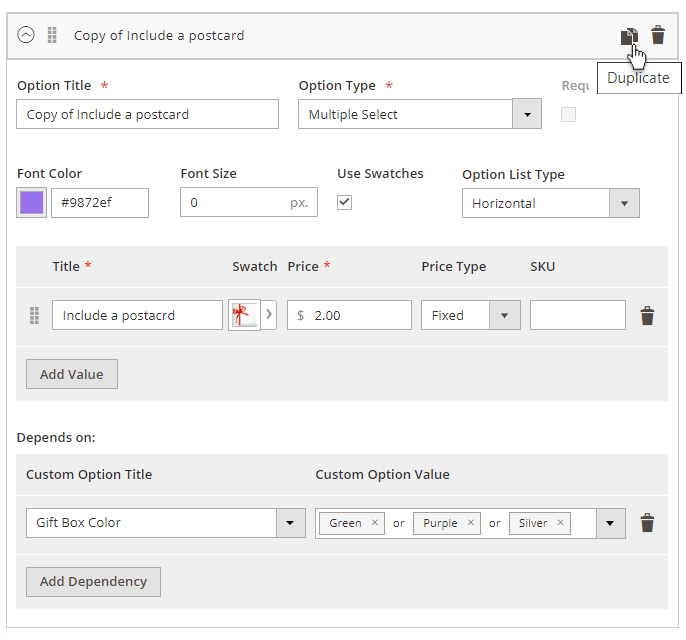
Duplicate product options in one click
Duplicate custom product options by clicking on a little 'copy' sign on the right upper corner of the template's frame. After clicking, the option would be immediately copied and displayed on the bottom, below other product options. You'll recognize it by a title starting with “Copy of [your product option's name]”.
Please note that by duplicating an option, it would be duplicated with its dependency.
How to custom stylize options in templates
With this feature, you can stylize custom options and their values by specifying font size, font color and also by downloading custom images. You can find more info below on how to configure swatches from the custom options and stylize them.
Please note that only ‘Drop-down’ and ‘Multiple select’ types of options could be used for the creation of swatch options. As per all the rest option types, you'd be able to customize font and color of the text only.
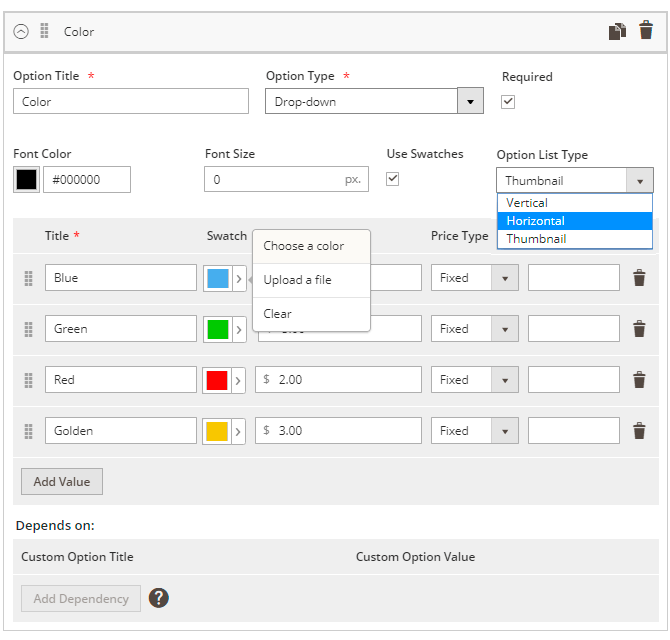
Creating custom options as color swatches
- Select the option type 'Multiple select' or a ‘Drop-down’ and then tick 'Use swatches' checkbox;
- Set up an option title (e.g. 'Blue') and then click on an empty swatch box in the 'Swatch column' to pick up the color you need from the palette. Add as much color options as you need;
- Save the template and check out how the result is displayed on the front.
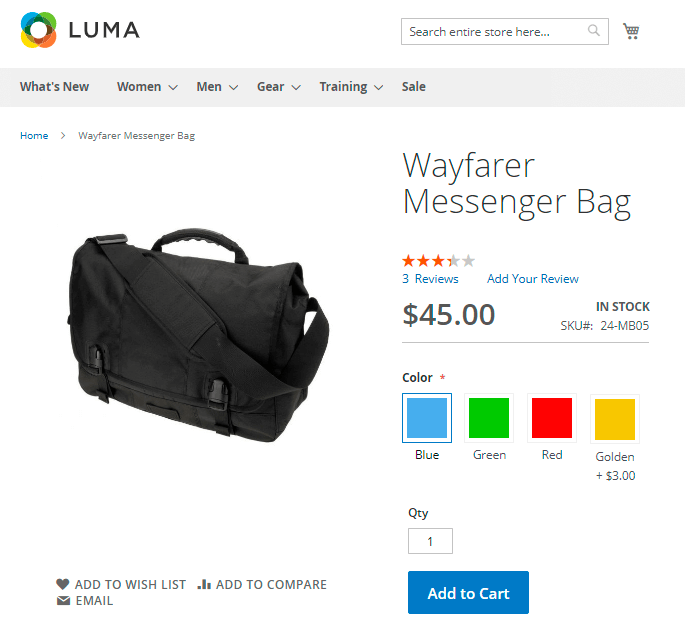
This is an example of customized color swatches of a 'Horizontal' Option List Type.

Please find below an example of how font color and font size could be configured and thus applied to swatch options, e.g. color swatches. This is also an example of a 'Vertical' Option List Type.
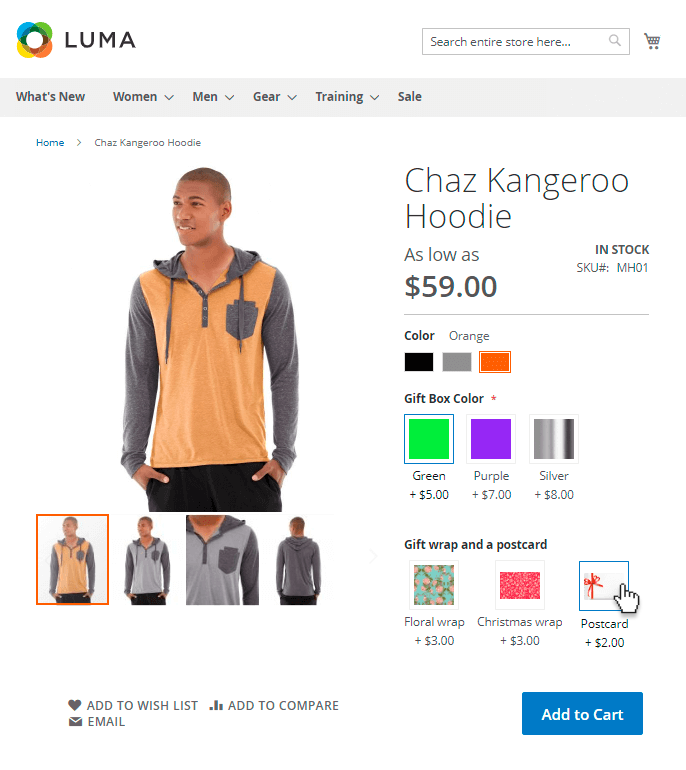
Creating swatches with custom images
- Select option type 'Multiple select' or a ‘Drop-down’ and then tick 'Use swatches' checkbox;
- Set up an option title (e.g. 'Postcard') and then click on empty swatch box in the 'Swatch column' to upload a file you want to be displayed on the front;
- Save the template and check out how the result is displayed on the front.
Creating custom swatch options with a text
- Select the option type 'Multiple select' or a ‘Drop-down’ and then tick 'Use swatches' checkbox;
- Select the option list type 'Thumbnail';
- Do not upload anything to the swatch boxes, just specify the name of an option, e.g. the size of your product (M, S, XL, etc.).
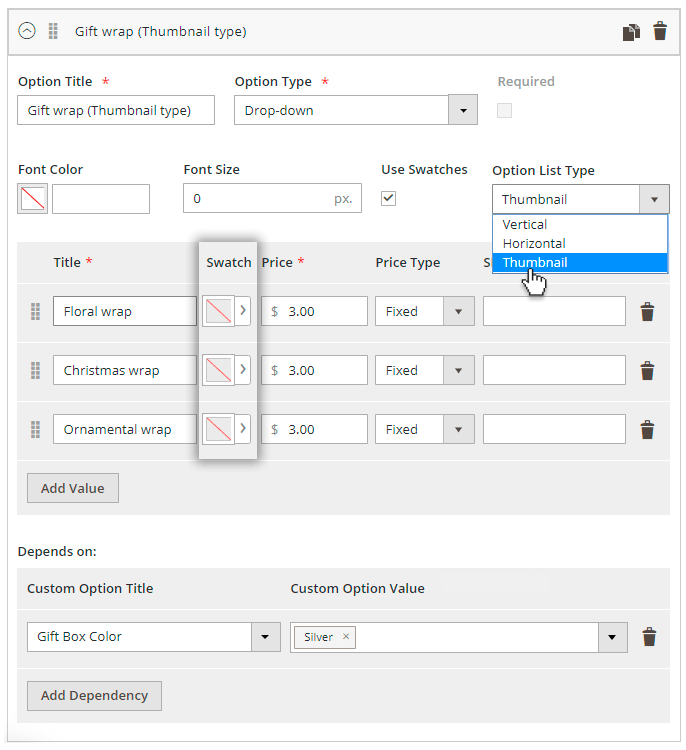
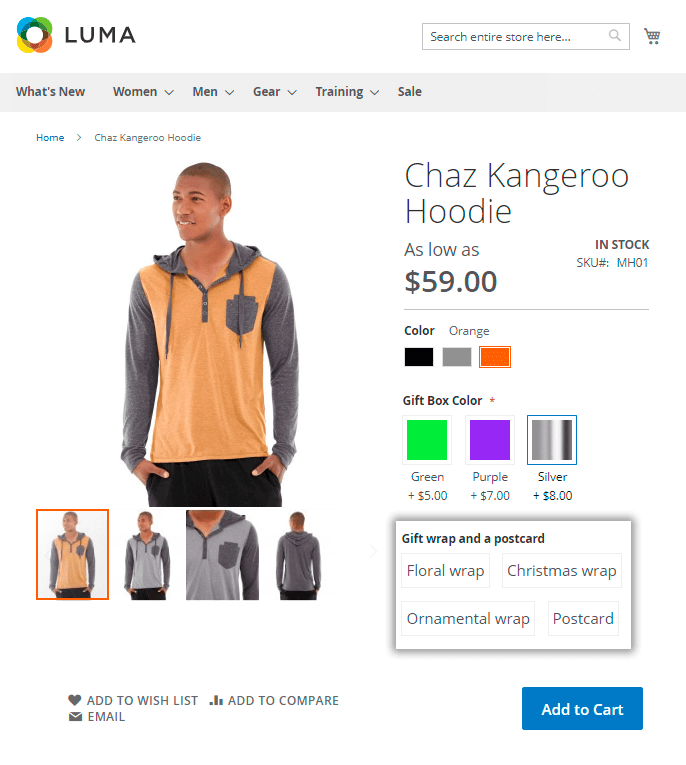
Here's an example of how it could look like on the frontend:
How to create option dependencies
First, you need to make sure that you have at least two options united by one template, otherwise, it would not be possible to select a child option.
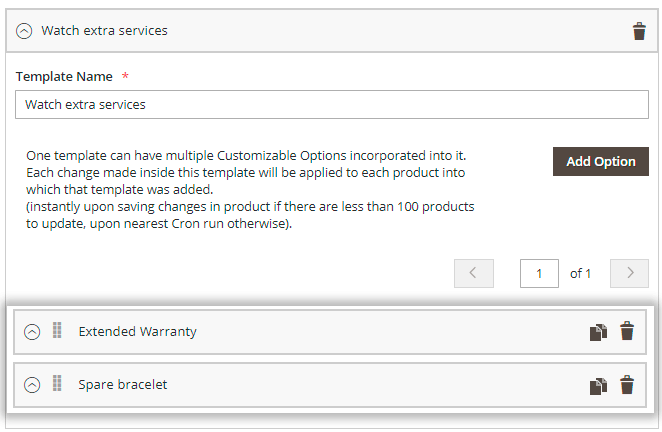
For example, there are two options within the template ‘Watch extra services’, which means that the options ‘Extended Warranty’ and ‘Spare bracelet’ could be configured to be dependent (i.e. selected as a child) one to each other.
Hit the 'Add dependency' button below the child option (e.g. the ‘Extended Warranty’) and then select from the dropdown a parent option thus making it dependent (e.g. the ‘Spare bracelet').

If the child option is not specified for a certain parent one, then no dependency option would be displayed on the frontend.
It’s possible to create dependencies only for the non-required options. I.e. if you tick ‘Required’ for the parent option, the button ‘Add dependency’ automatically becomes disabled.
Please also note that it’s possible to create dependencies only from the select options (dropdown, checkbox, radio button, multi-select).
AND/OR logic of option dependencies
With Product Option Templates for Magento 2 you can create dependencies working based on two types of logic for the available product options: 'AND' and 'OR'.
There is AND logic between separate dependency lines and OR logic between several option's values within one line.
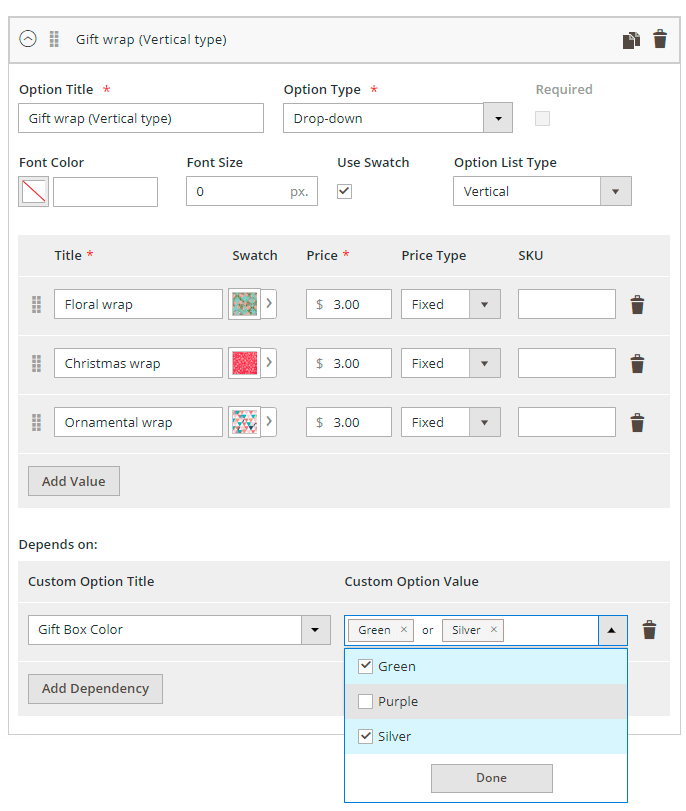
How the 'OR' logic works and how to configure it
The 'OR' logic helps you to offer an additional option to a customer whether a customer chooses a 'parent option A' OR a 'parent option B'.
For example, whether a customer picks the 'Green Gift Box' OR the 'Silver Gift Box', the option to choose a 'Gift Wrap' would become equally available (shown up on the frontend).
Please find an example of the 'OR'-rule dependency configuration on the image below.
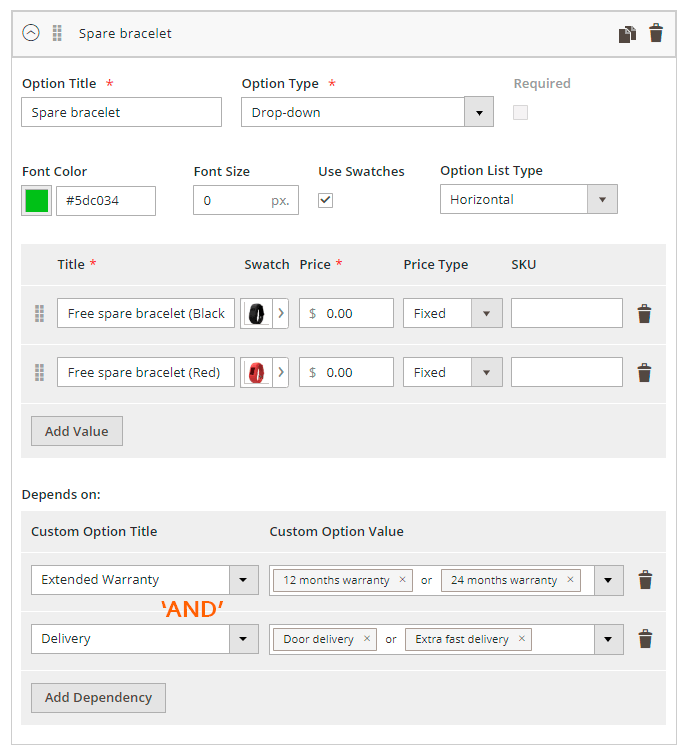
How the 'AND' logic works and how to configure it
If you want your customers to see some options only in case they choose two or more parent options together (e.g. a 'parent option A' AND a 'parent option B'), then you should configure the 'AND'-based logic of dependency.
For example, it helps if you want a customer to be able to choose a spare watch bracelet for free only in case this customer has chosen the '12' or '24 months warranty' and the 'Extra fast delivery'.
Thus, in case a customer chooses the '6 months warranty' and the 'Self-pickup delivery' options, he would not be able to see the 'Free spare bracelet' option. Neither a customer would see it if he chooses the '6 months warranty' and the 'Extra fast delivery', as we have excluded the '6 months warranty' option from our strict 'AND' rule.
Please find below an image of how the configurations for this example would look like.
Here's an example of how it would look like on the frontend:

Assign option templates to products
Once a template is created, you may easily assign it to a particular product or to multiple items. Therefore, there are 2 ways to assign options for goods: in each product settings or via mass action in a product grid. Any template changes will be automatically applied to all assigned products.
Please, return to the Product Grid: Catalog → Products.
Let's see how to assign a template to a particular product on the product settings page. Open any product settings page and scroll to Customizable Option Templates by Amasty tab.
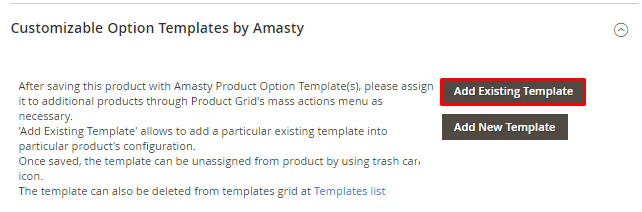
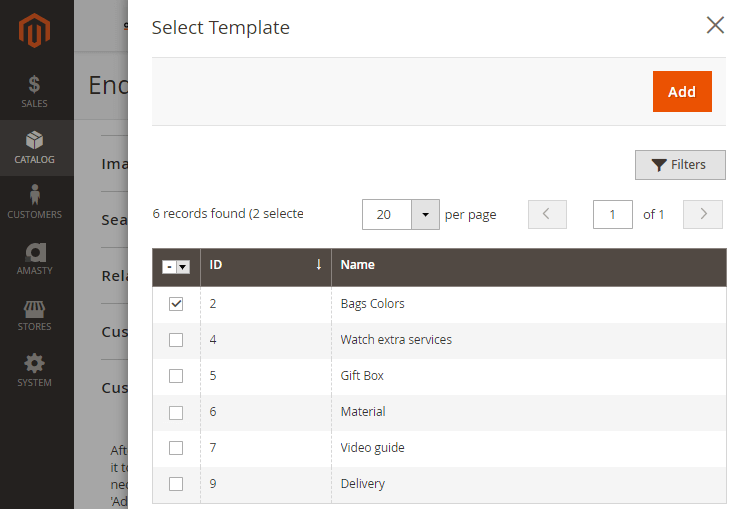
Click the Add Existing Template button to open the templates list. Choose the template, you'd like to add to the product and hit Add in the top right corner.
Check the template options on the product settings page and save the product.
You may apply either one or multiple templates to any product.
Also, you can save your time by assigning a template to multiple products via mass action. Choose all the products you need, using filters.
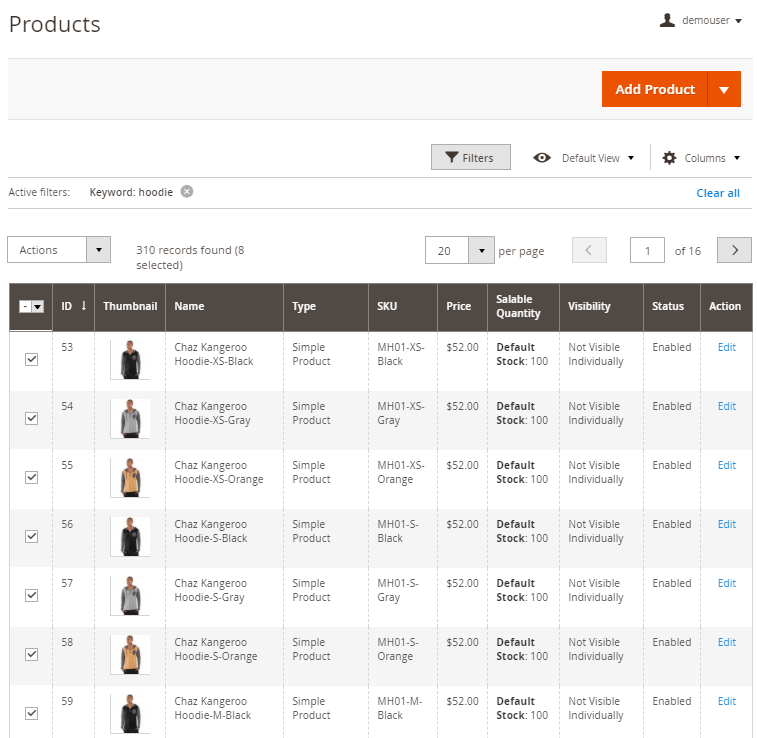
In the Actions tab, click Assign Custom Option Template and specify the one, that should be applied to all chosen products.
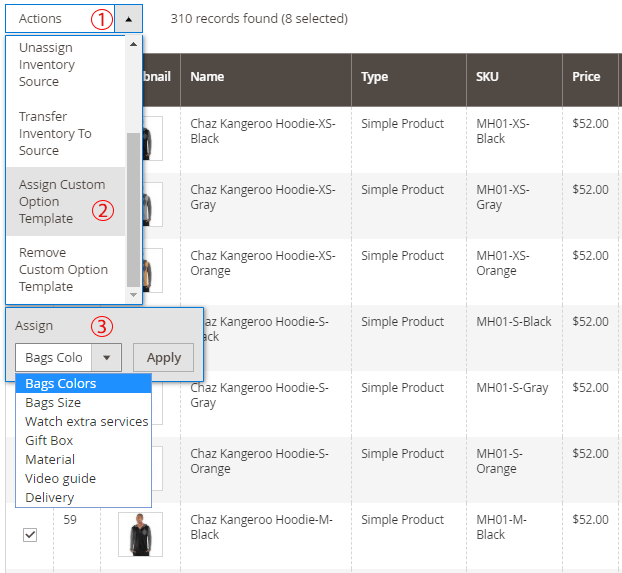
You can also remove a template from the products in bulk. In such a case you should choose the necessary items and hit Remove Custom Option Template in the Actions field.
Also, you can assign or remove templates to one or multiple products via Update Attributes option. Choose all the products you need in the product grid. Then, in the Actions tab, click Update attributes.

In the next window, choose Assign/Remove Custom Option Templates tab. Here you can specify which templates should be assigned or removed from the selected products.
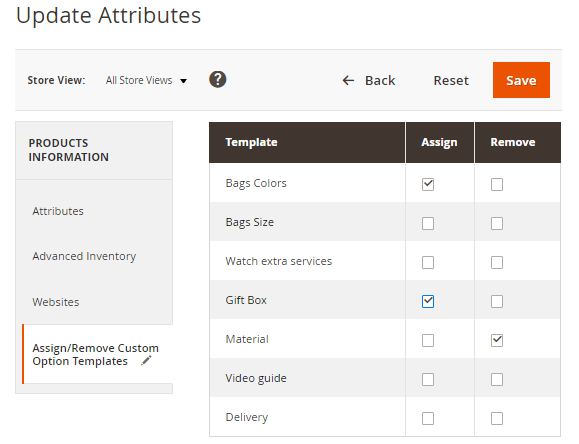
Click Save button.
Manage templates
See all the existing product options templates in a grid: Catalog → Template List. View each template status and the number of products for which it is applied. Delete any of the templates if needed, and it will be automatically removed from all the products. Edit templates right from the grid.

Please note that for now, you won’t be able to apply the mass-assign of products from the templates grid. If you need to do so, please navigate to the product grid (‘Catalog → Products’), select all the needed products and then select 'Assign Custom Option Template' from the ‘Actions’ dropdown to apply the selected custom option for these products.

Find out how to install the Product Option Templates for Magento 2 via Composer.
magento_2/product-option-templates.txt · Last modified: 2025/06/03 13:30 by asemenova