
Sidebar
magento_2:quickbooks_online_integration
Table of Contents
See the way Quickbooks Payments for Magento 2 extension works.
Guide for Quickbooks Payments for Magento 2
Accept online payments faster and securely by integrating your Magento 2 store with the QuickBooks gateway.
- Provide customers with a safe and convenient payment method
- Securely capture payments through 128-bit SSL encryption
- Easily create orders from the backend
- Allow payments from specific countries
- Set minimum and maximum order amount for the payment
- Create a custom title and instructions for the payment method
Payment Gateway Configuration
Prior to configuring the extension, you need to configure the payment gateway for the API connection.
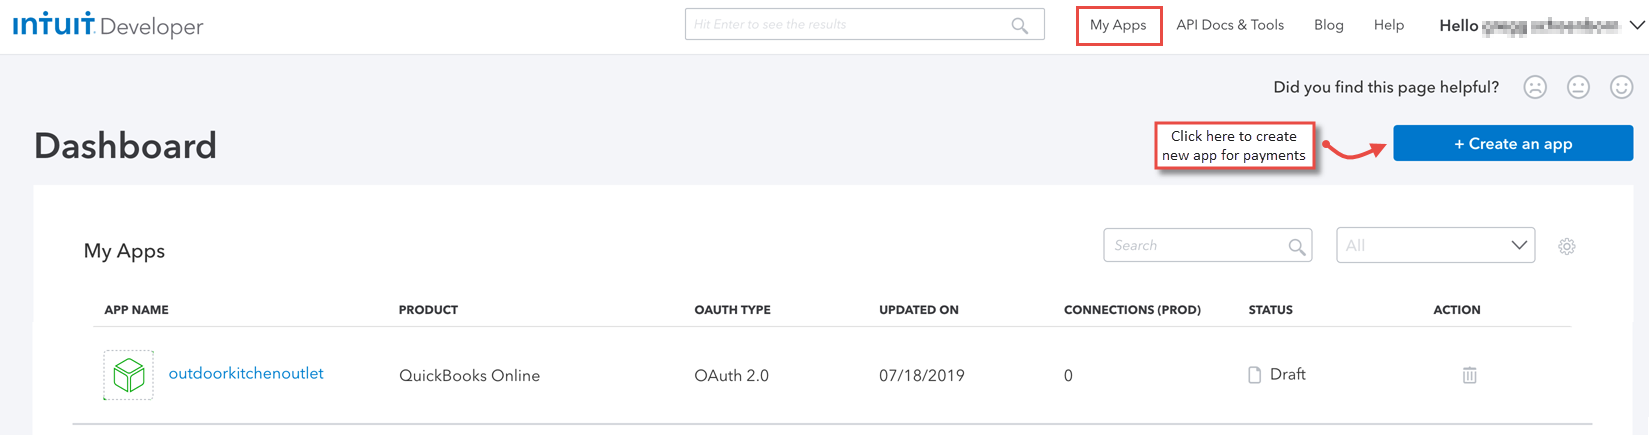
First of all, go to intuit.com and login to your QuickBooks account. Move to the dashboard where you can find apps if you have already added. Click “Create an App” to create a new app for the payment gateway integration.
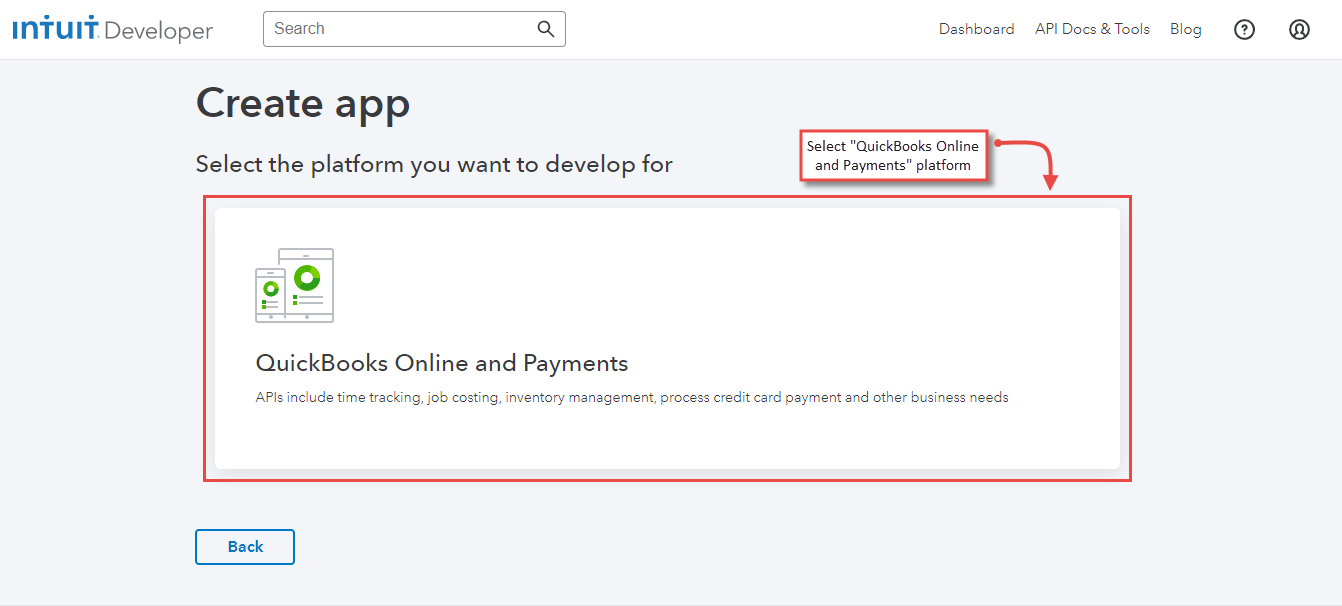
 Select the platform for the app as “QuickBooks Online and Payments”.
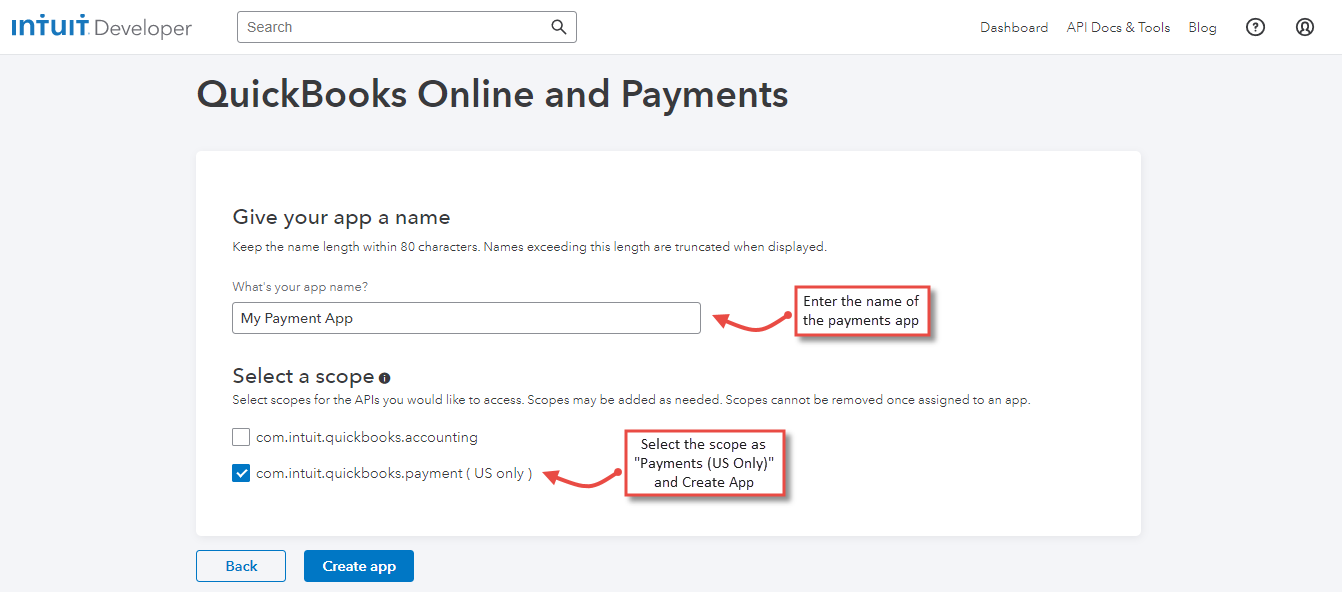
 Enter app name, select the scope as Payments (US Only) and click “Create App”.
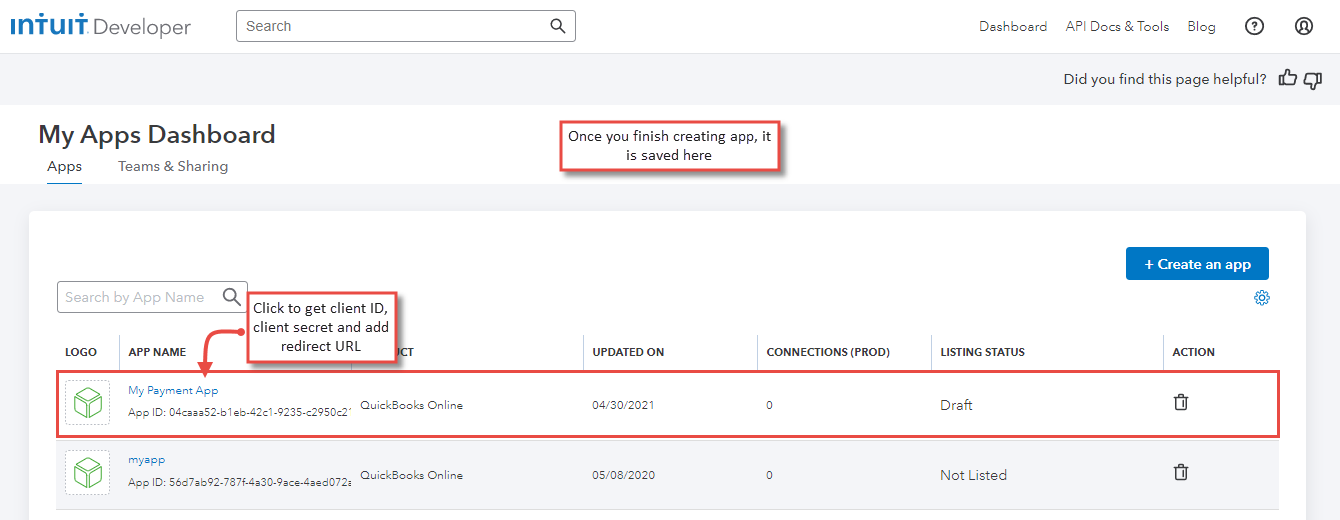
 Once the app has been created, you can see it saved and listed in dashboard. Click on the payment app you created to get the client ID, client secret and add redirect URL.
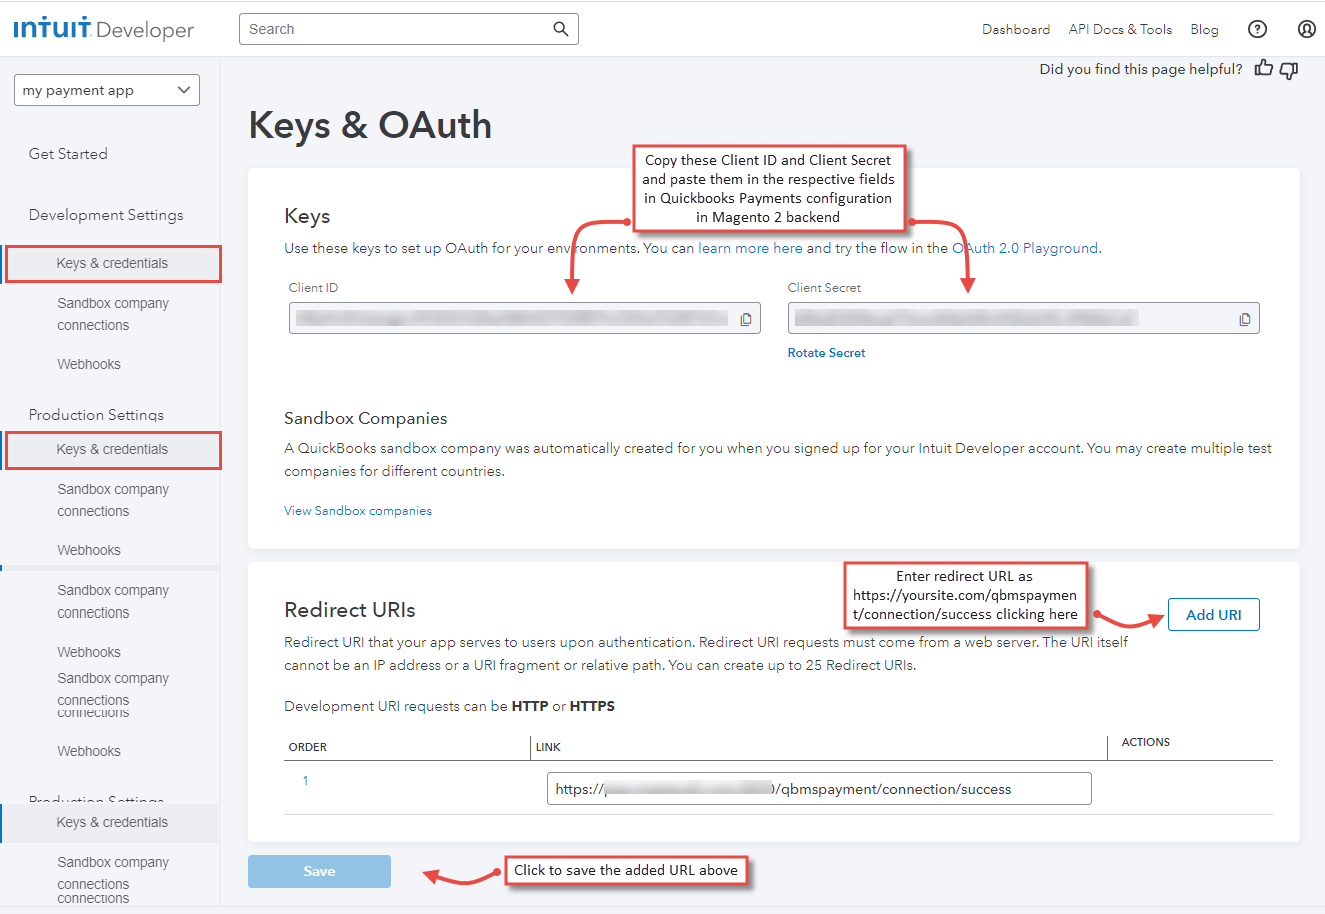
 From the app page, click on “Keys and Credentials” under the development/production mode based on the app you have created for. The values under the client ID and client secret fields need to be copied and added to your Magento 2 extension configuration. Also, add the redirect URL as https://yoursite.com/qbmspayment/connection/success and click Save.
Configuration
For configuring the extension, login to Magento 2, move to Stores > Configuration > Sales > Payment Methods > QuickBooks Payments - Meetanshi, where you can find various settings to configure the extension.
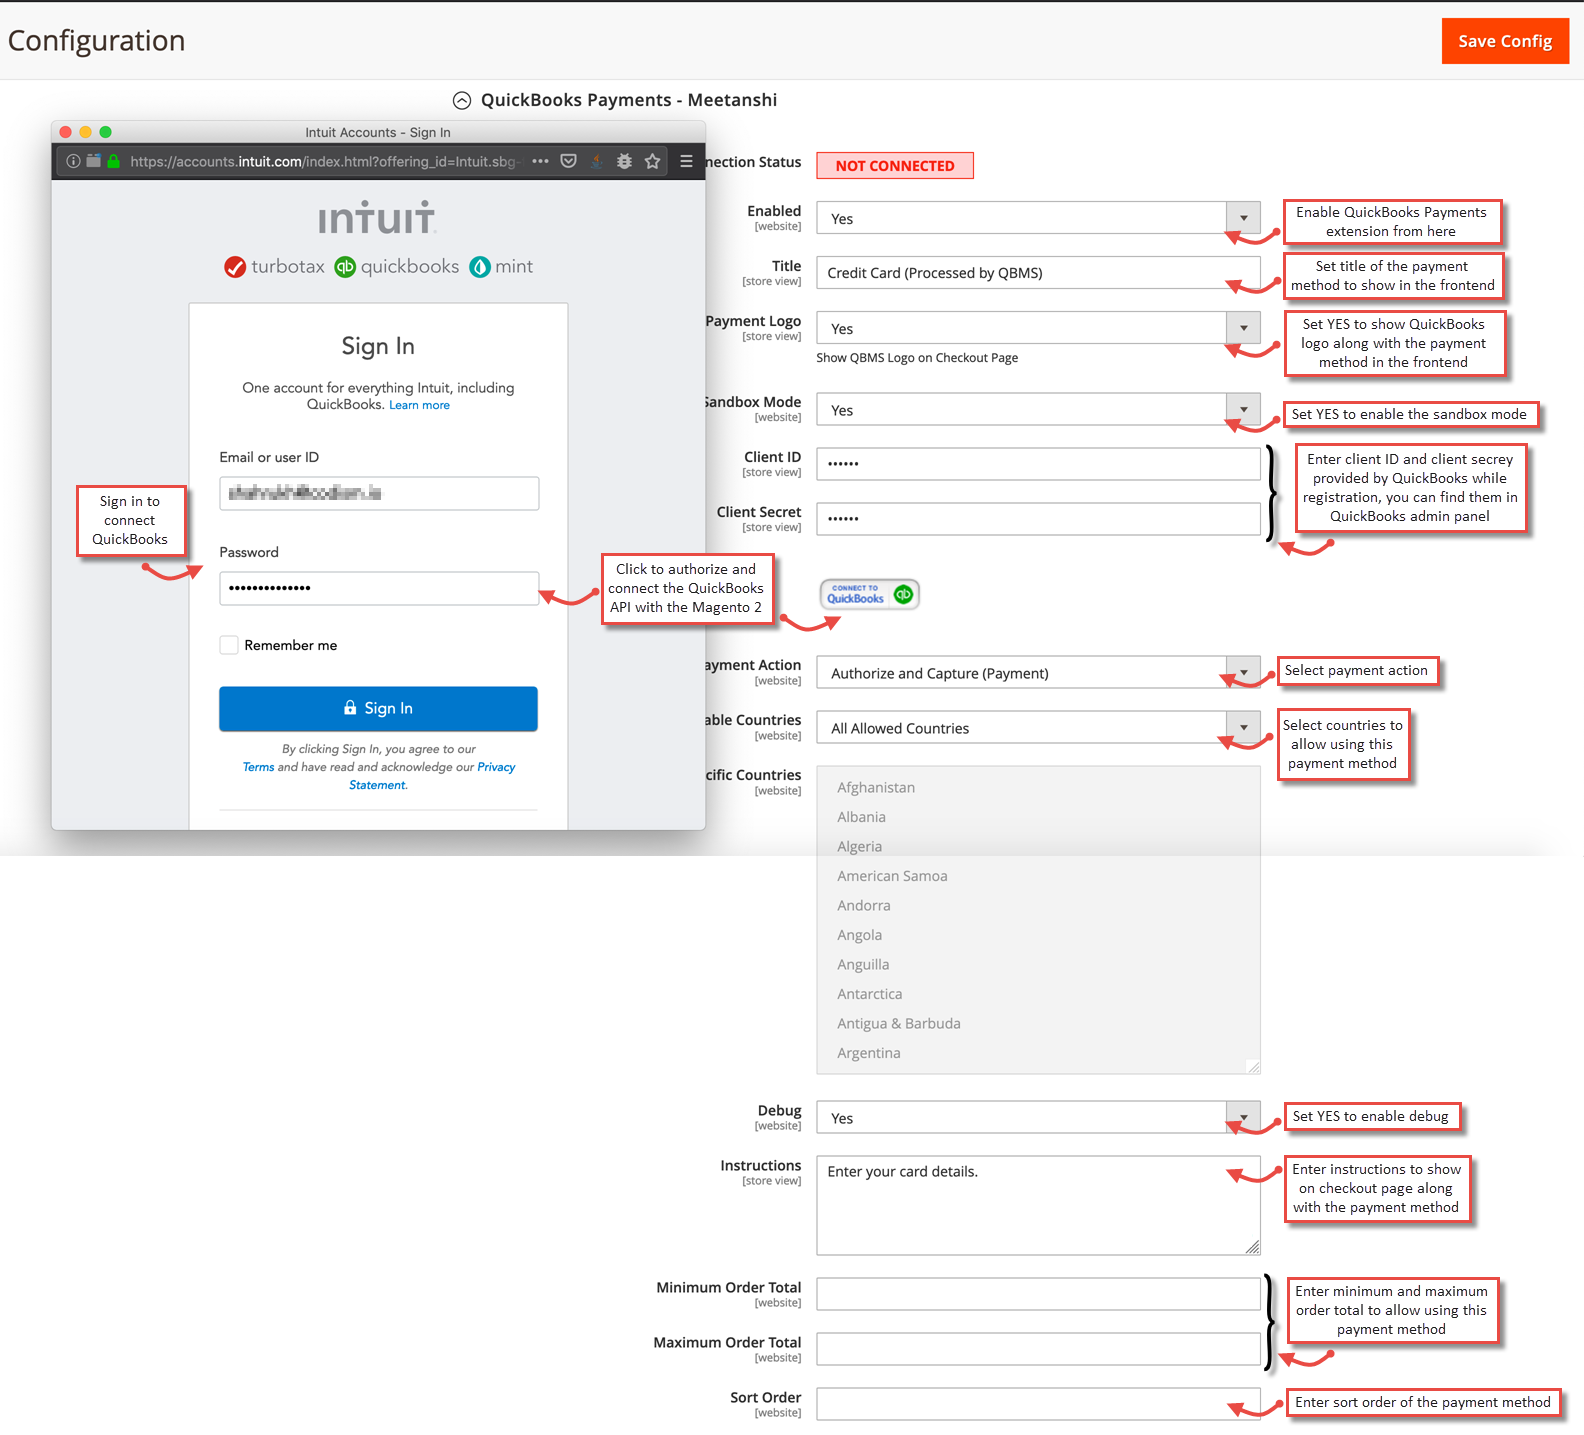
Enabled: Enable or disable QuickBooks Payments extension from here.
Title: Enter title for the QuickBooks Payment method to show in frontend.
Show QuickBooks Payment Logo: Select YES to show QuickBooks logo on the checkout page in the frontend.
Sandbox Mode: Set YES to enable sandbox mode for the payment gateway.
Client ID: Enter the client ID you have copied from the QuickBooks admin panel.
Client Secret: Enter the client secret you have copied from the QuickBooks admin panel.
Payment Action: Select one of the payment actions for the payment capture.
Authorize: Authorizes and validates card for the order amount. The admin has to manually capture the amount (by generating invoice using “Capture Online” option) within the authorization hold period which is 7 business days for QuickBooks payments.
Authorize and Capture: Authorizes and captures the order amount immediately.
Payment from Applicable Countries: Select countries to allow the use of payment method.
Debug: Select YES to enable debug.
Instructions: Enter additional instructions to show on the checkout page in the frontend.
Minimum Order Total: Enter the minimum order total to allow the use of the payment method.
Maximum Order Total: Enter the minimum order total to allow the use of the payment method.
Sort Order: Enter sort order of the payment method.
After configuring the settings, save the configuration and click “Connect to QuickBooks” for the API connectivity. You will get a new window to sign in with the QuickBooks credentials and once you are signed in, the API will be connected successfully.
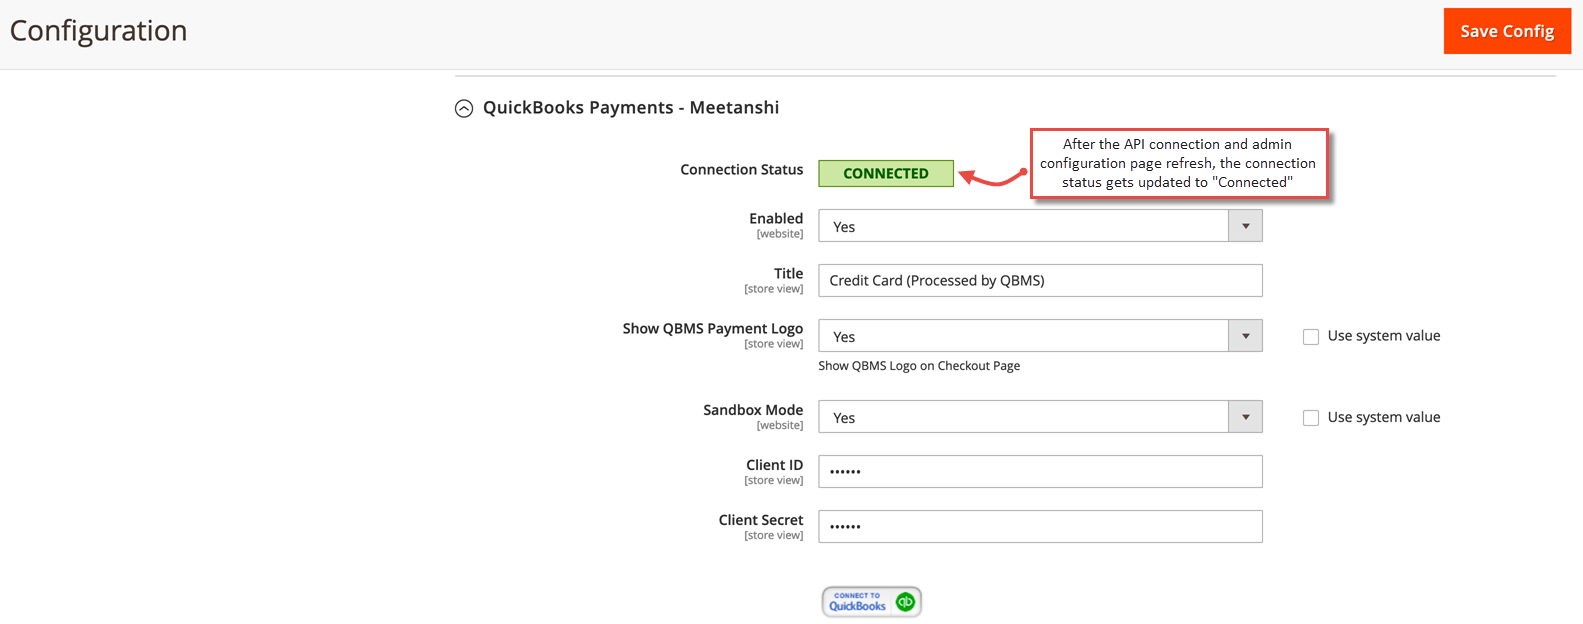
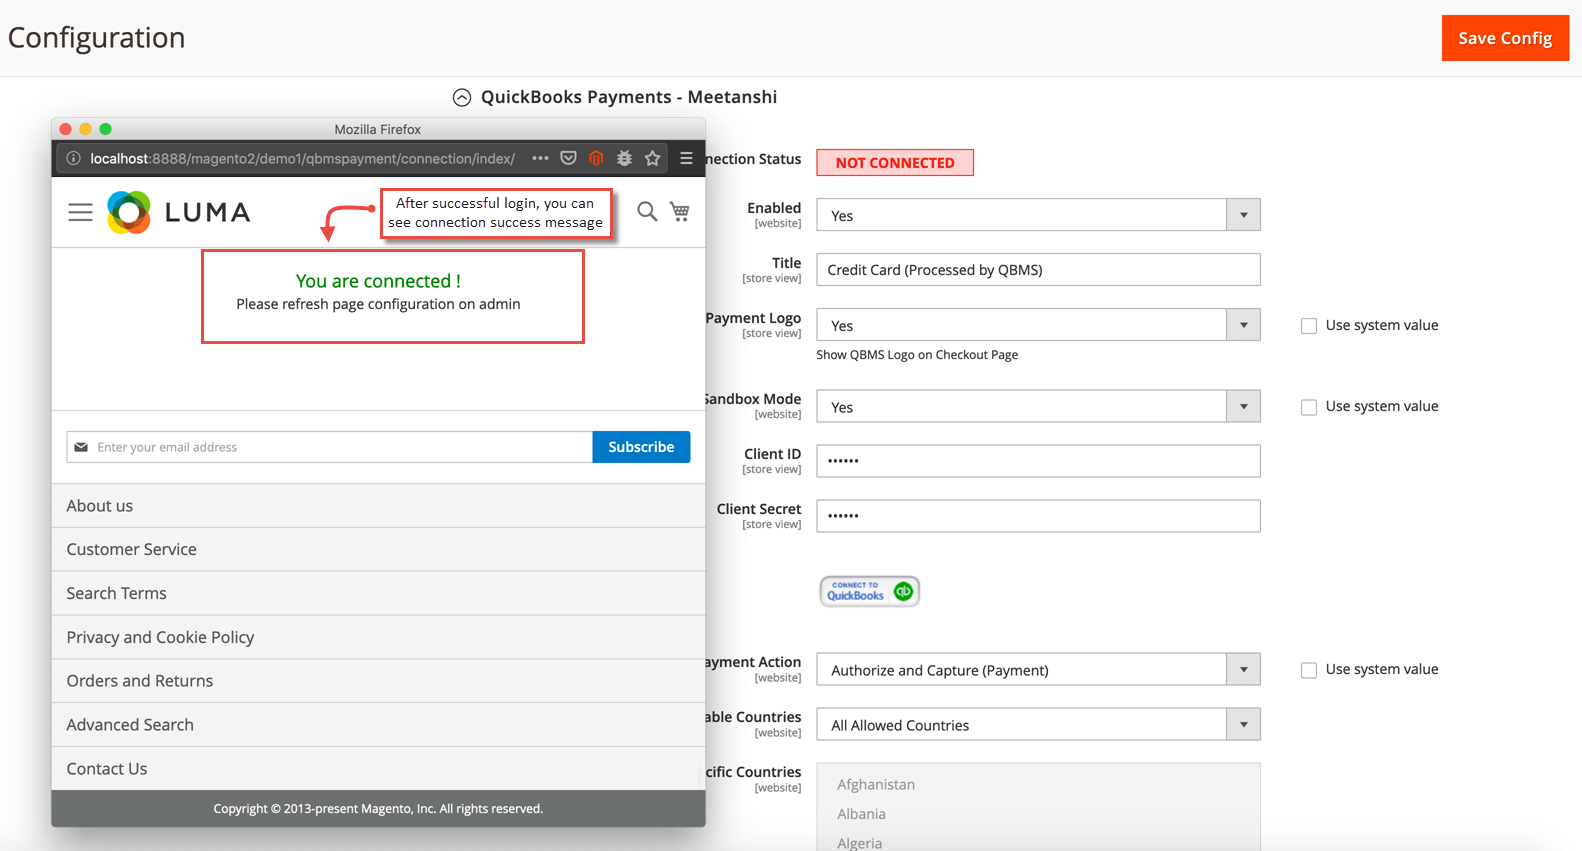 After the API gets connected, close the window and refresh the Magento 2 configuration page and you can see the “Connection Status” as connected.
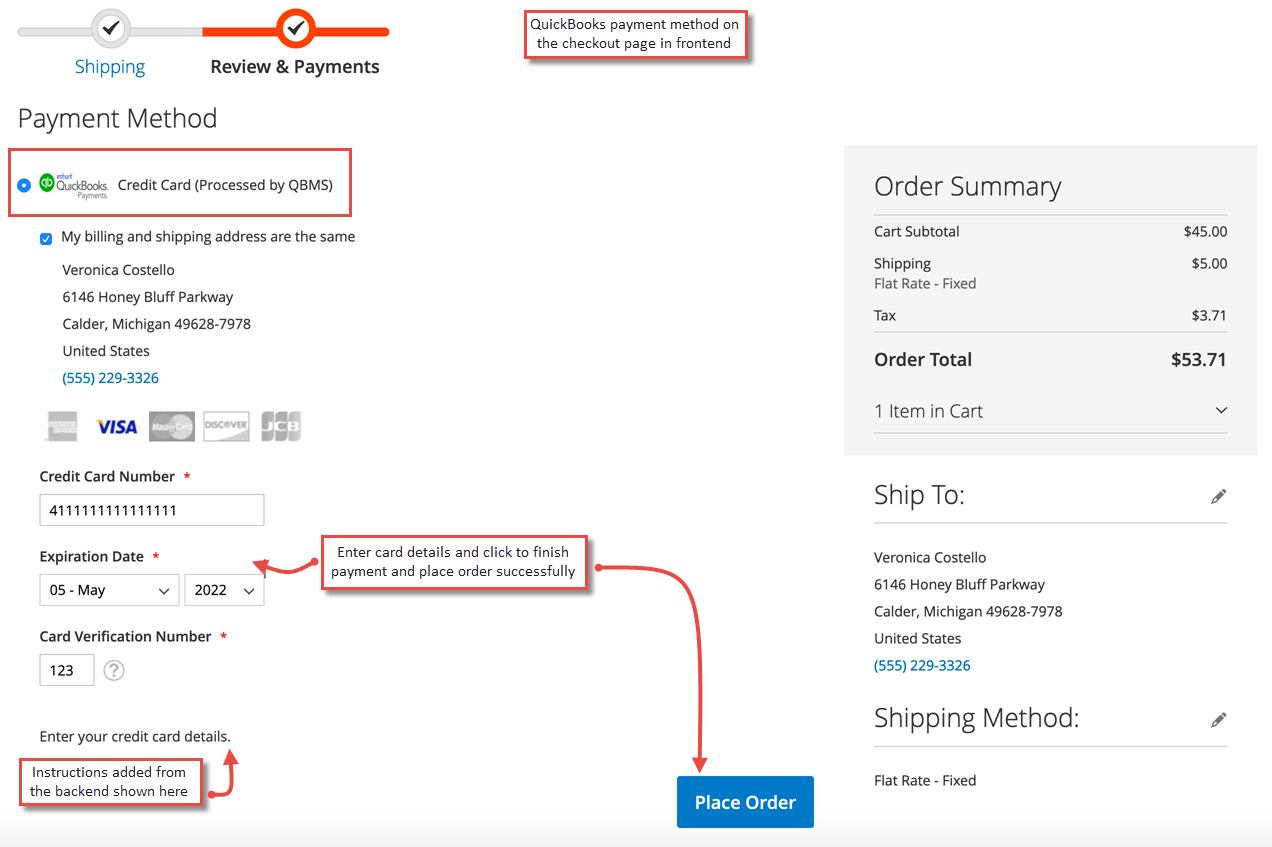
QuickBooks Payments in Frontend
Once the extension is configured, it can be seen enabled on the frontend. Simply add products to cart and at checkout, you can see payment method enabled. Select it, add card details and click to finish payment and place order.
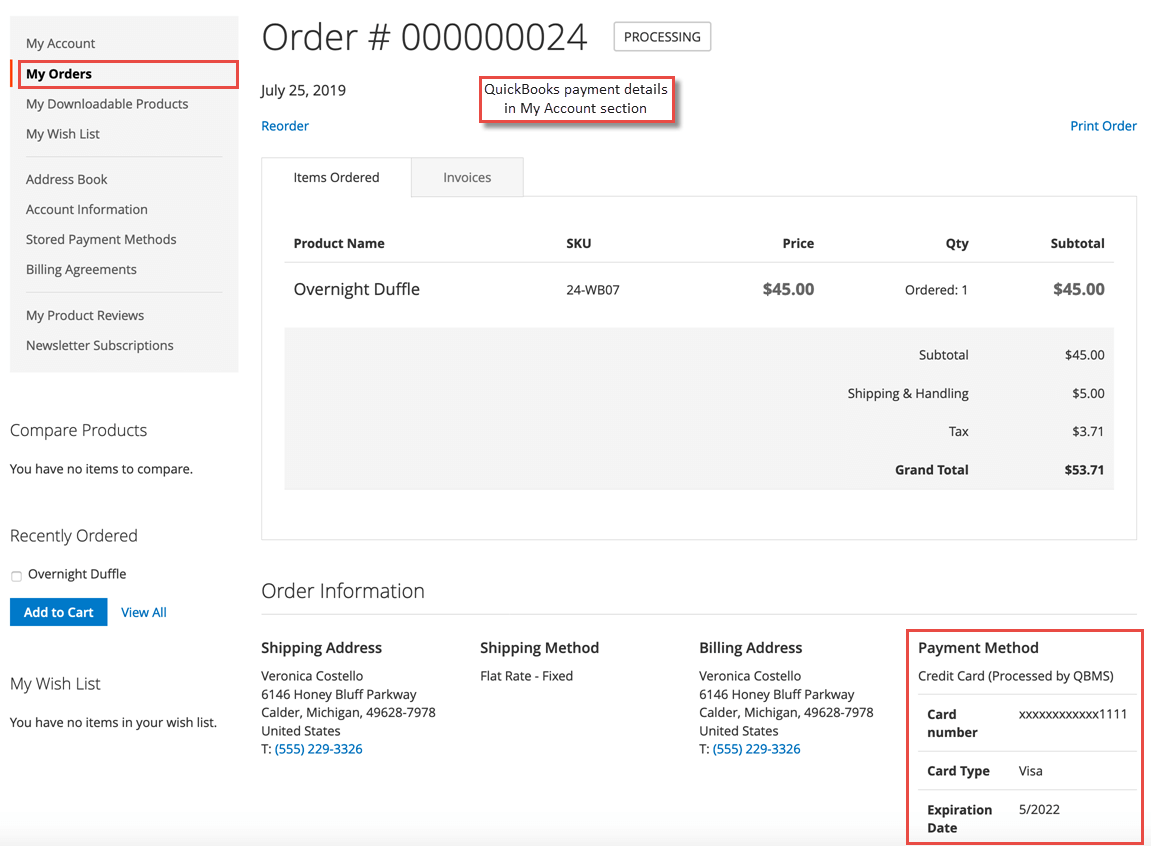
QuickBooks Payment Details in My Account Section
Immediately after the order is placed, the QuickBooks payment details can be seen in order view under My Account section.
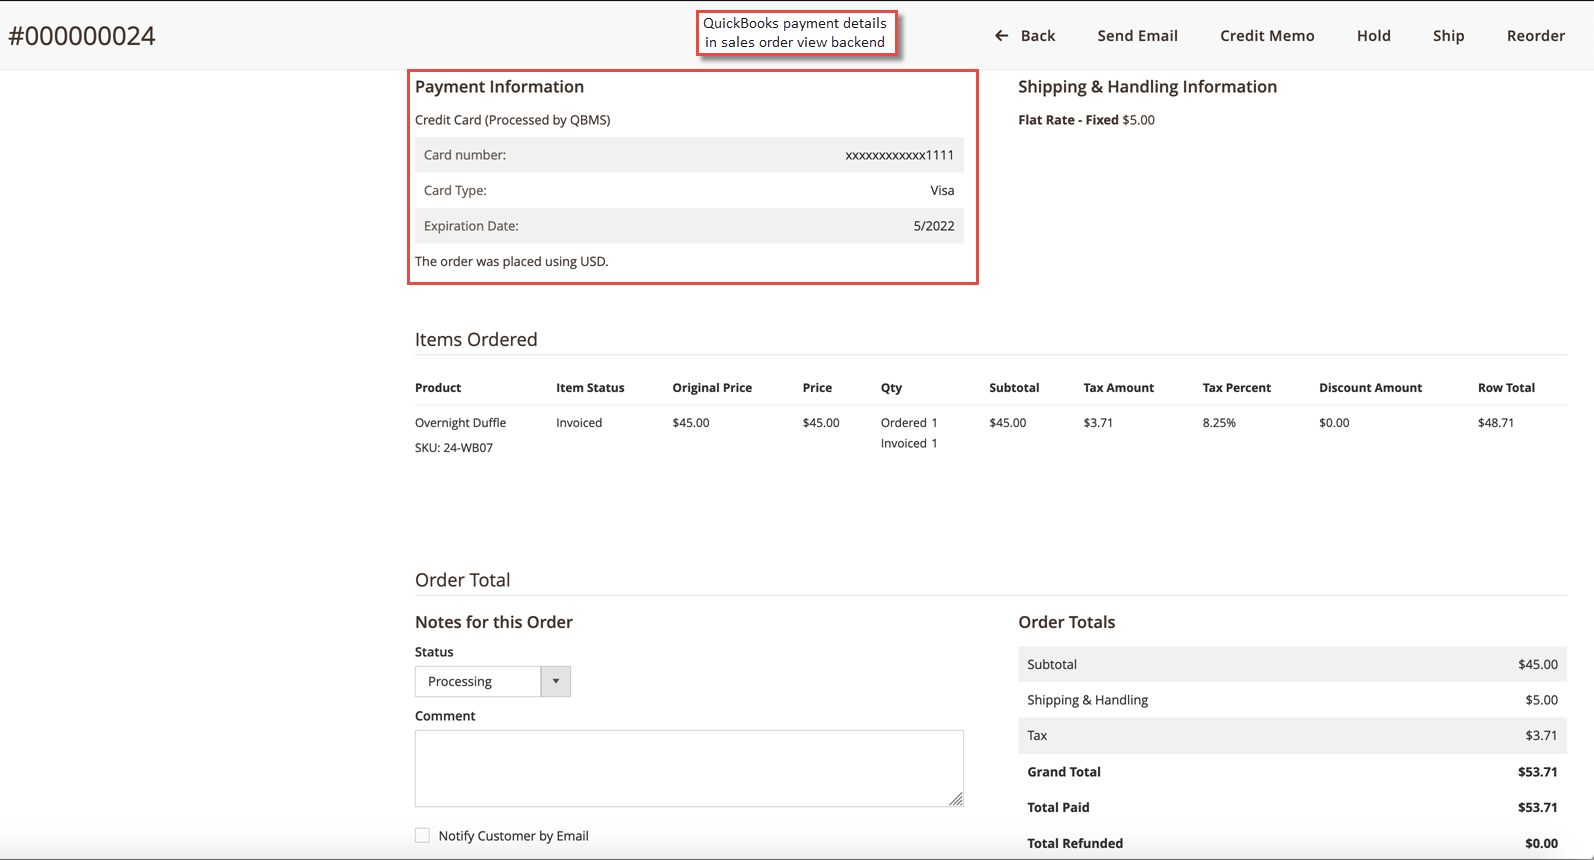
QuickBooks Payment Details in Order View Backend
Apart from My Account section, QuickBooks payment details can be found in the Sales > Orders > Order View section in the backend.
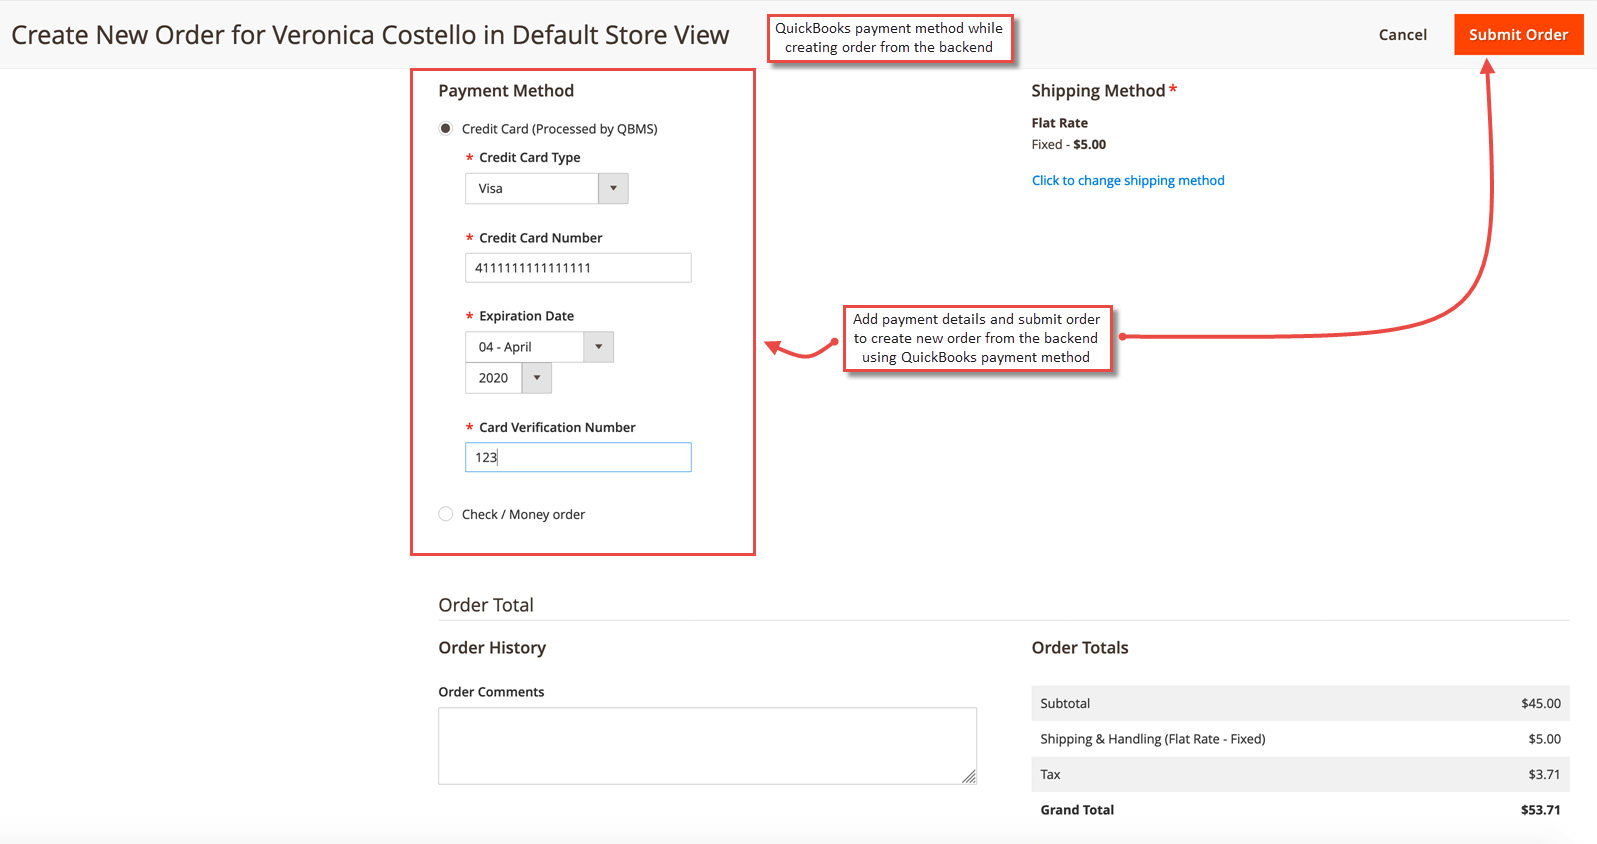
QuickBooks Payment Method for Backend Order
Just as frontend, QuickBooks payment method also works with backend orders. Admin needs to create a new order and select QuickBooks payment method, add card details and click submit order to place an order from backend using the QuickBooks payment method.
Find out how to install the Quickbooks Payments extension for Magento 2 via Composer.
magento_2/quickbooks_online_integration.txt · Last modified: 2022/05/18 09:15 by azolotorevich