
Sidebar
magento_2:countdown-timer
Table of Contents
See the way theCountdown Timer for Magento 2 extension works.
Guide for Countdown Timer for Magento 2
Increase conversion with the Countdown Timer extension for Magento 2 by visualizing your limited offers and motivate customers to make a decision on a purchase faster.
- Design catchy countdown timers with ready-made templates
- Create limited-time offers to speed up purchases
- Easily schedule your countdown timers display
- Attach countdown timers to any products and store pages
- Manage all your countdown timers in one handy grid
- WCAG compliant (for Hyva Theme)
Countdown Timer for Magento 2 extension is fully compatible with Hyvä themes. You can find package for installing in composer suggest.
General Settings
To enable the extension, go to Stores → Configuration → Amasty Extensions → Promotion Countdown.
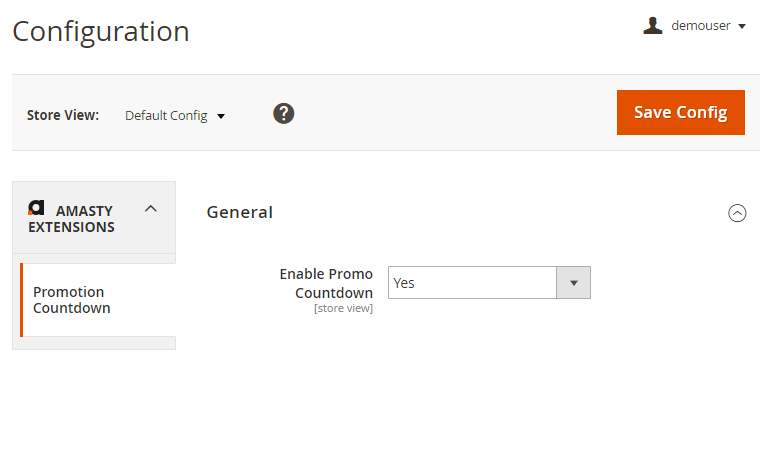
Enable Promo Countdown - set to Yes to activate the module.
Countdown Widgets List
To see and manage all the timers in one grid, go to Amasty → Promotion Countdown → Countdown Widgets List.
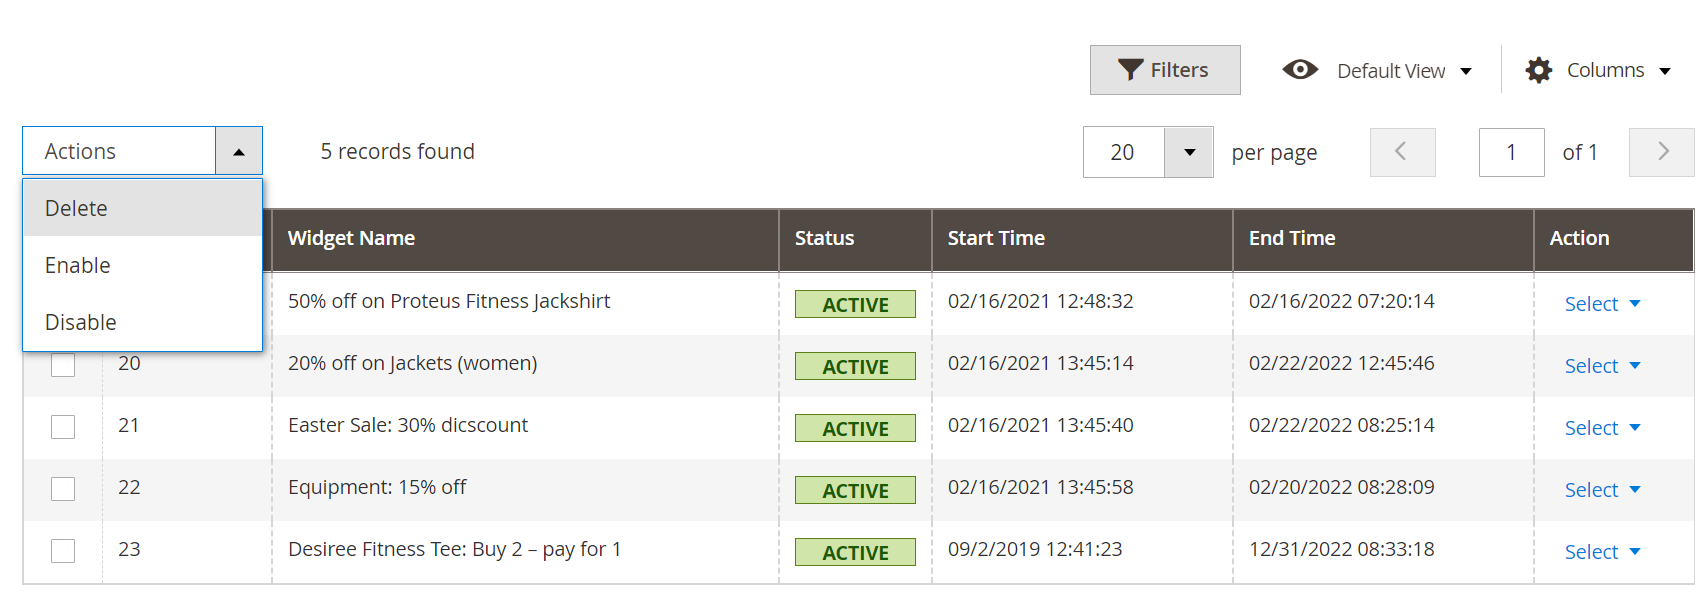
Here you can easily monitor Widget Names, Status, Start Time and End Time.
Edit or Delete the necessary widget via Select button in the Action column.
To delete timers in bulk, tick them and choose Delete option in the Actions dropdown menu.
Click Add Countdown Widget to create a new timer.
Timer Creating
Storefront Properties
Expand this tab to adjust a new timer display on the storefront.
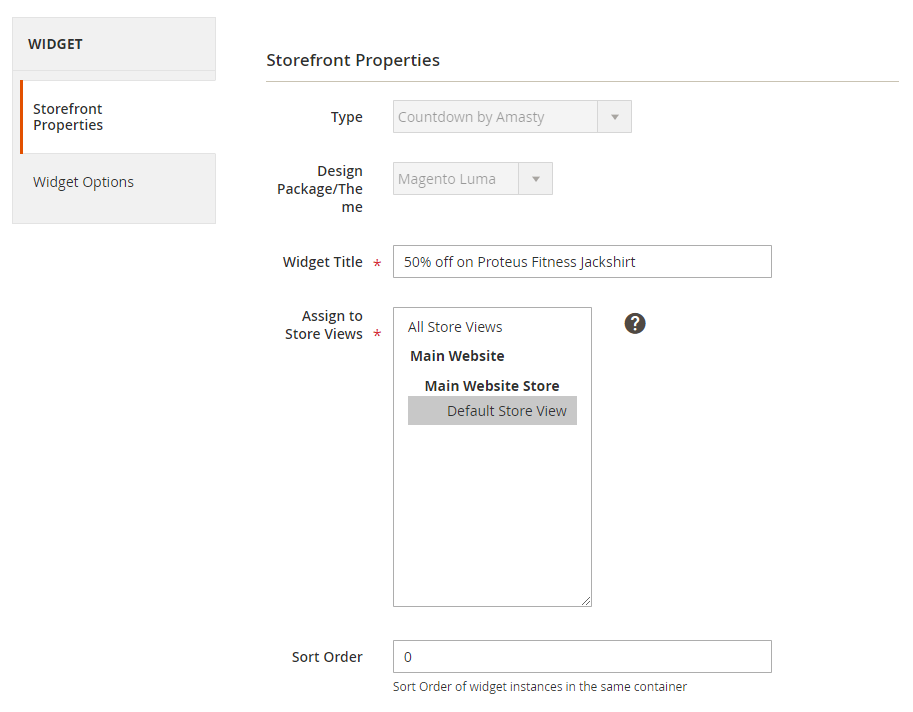
Type - the Countdown by Amasty type of a widget is set by default.
Design Package/Theme - choose the design theme of your webstore.
Widget Title - specify widget’s title that will be displayed on the backend so that you can easily find it in the grid.
Assign to Store Views - select the store views to which the timer should be applied.
Sort Order - specify timer’s position if there are several widgets in the same block. Here 0 is the first position.
In the Layout Updates block you can attach timers to any pages of your webstore.
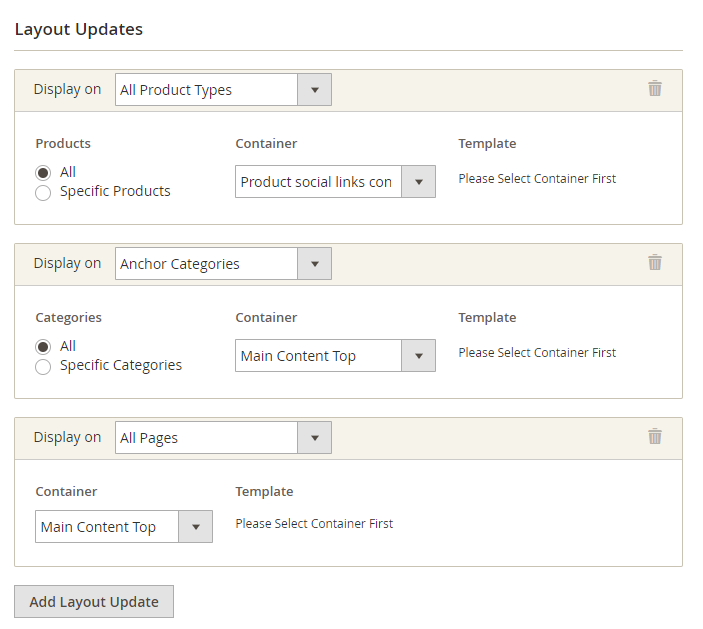
Display on - specify the Categories, Products or Generic Pages to add the widget to.
Container - select the suitable position for the timer.
If you add a widget to product or category pages, you can attach a timer to all products/categories or choose specific ones.
Widget Options
With the Countdown Timer extension you can schedule timers display according to your business needs.
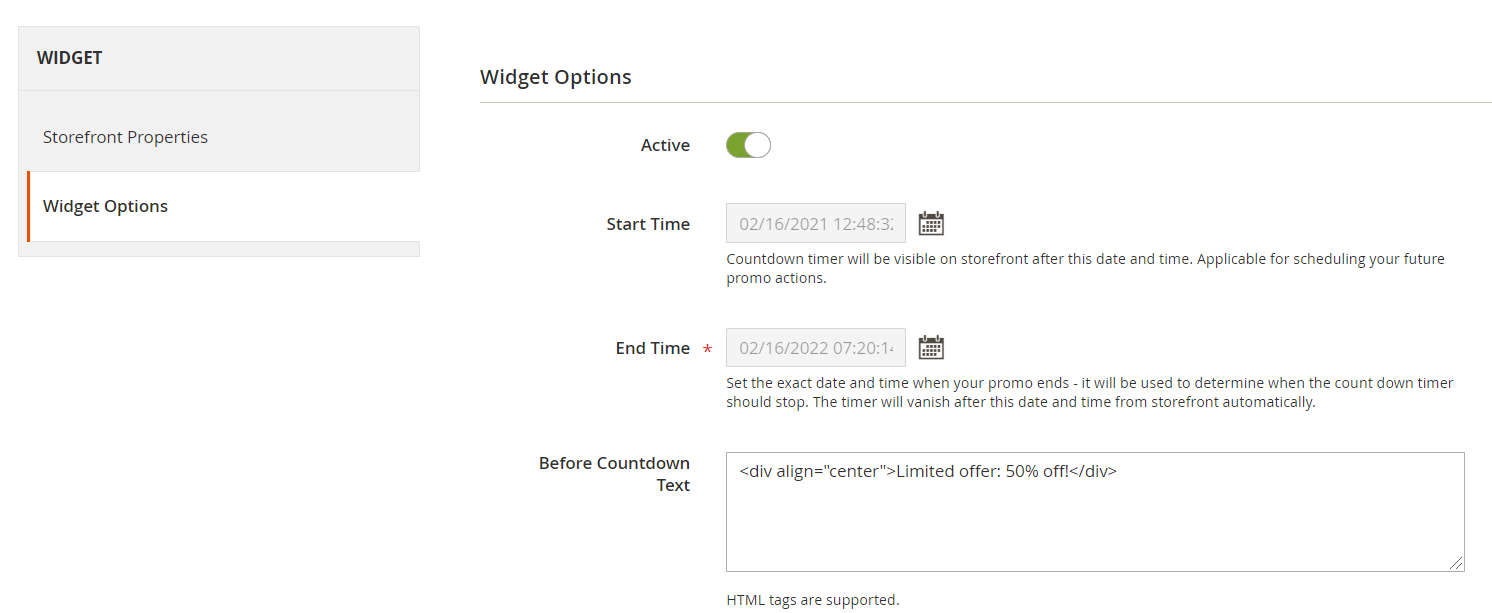
Active - use this toggle to enable/disable the widget.
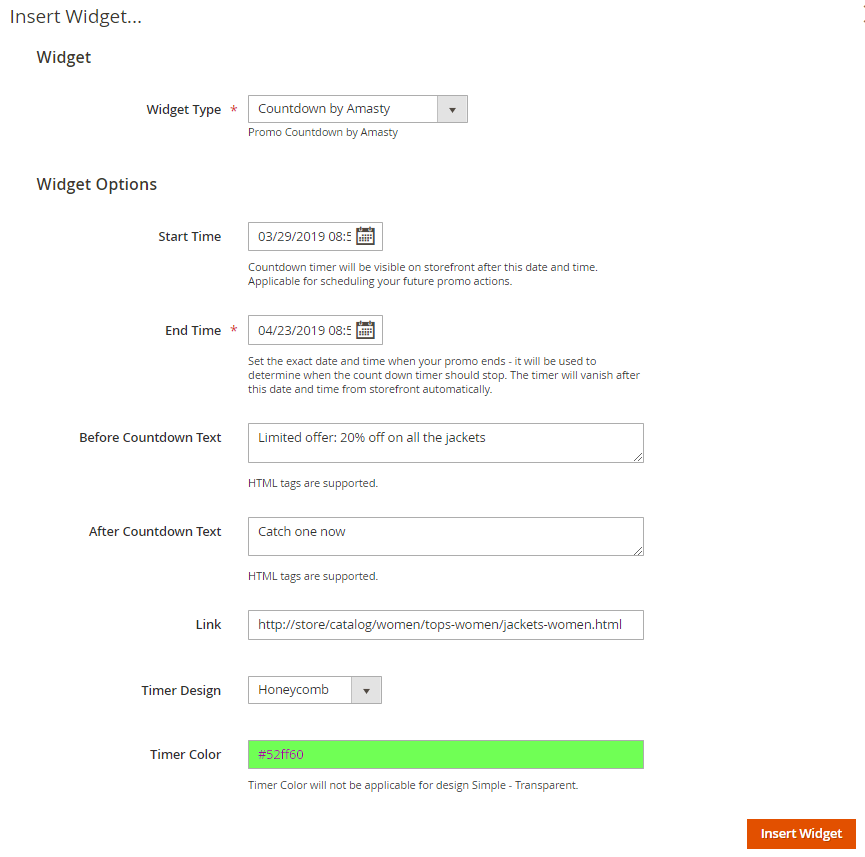
Start Time - set the day and time after which the timer will be visible on the frontend. You are able to apply it to your future actions.
End Time - set the exact date and time when your promo ends: it will be used to determine when the count down timer should stop. The timer will vanish after this date and time from the storefront automatically.
If the Start Time is not specified, the timer will appear as soon as you flush Magento cache.
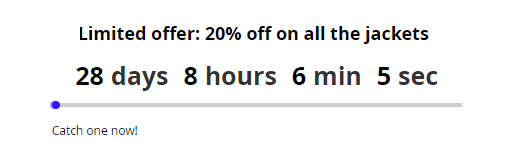
Before Countdown Text - fill in a catchy text to draw customers’ attention to your special offer.
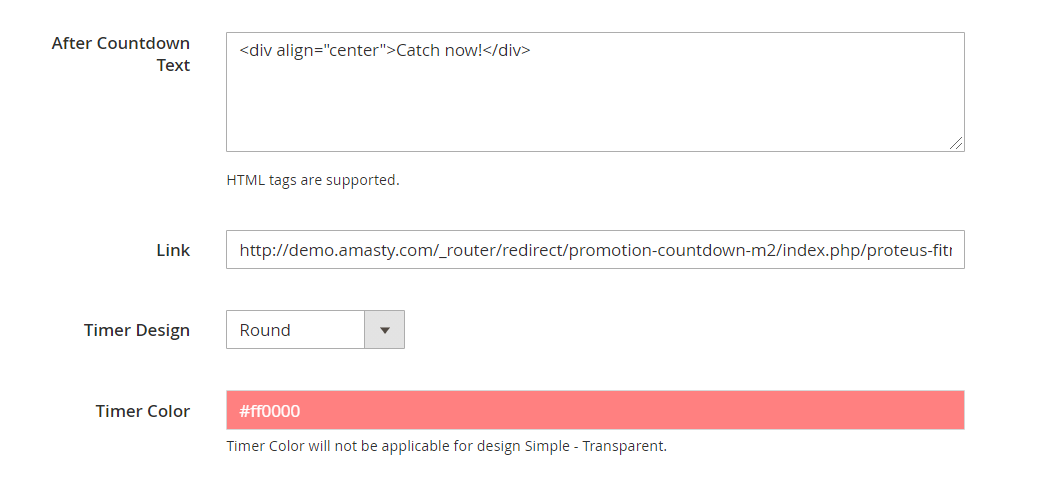 After Countdown Text - provide customers with an encouraging message or some additional information about the offer.
Use HTML tags to customize the message if needed.
Link - fill in a link if you want the timer to be clickable.
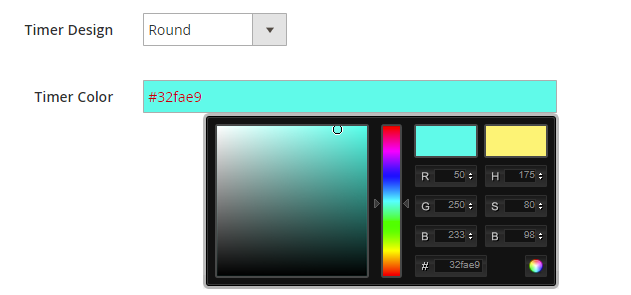
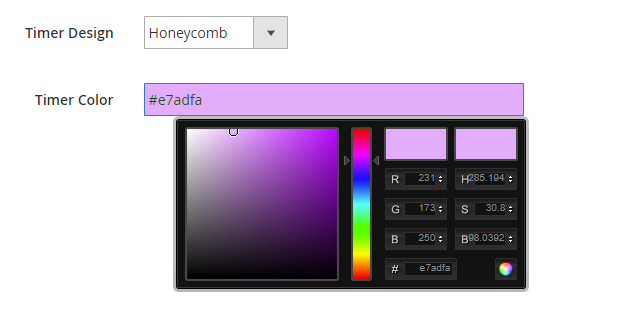
Timer Design
Pick one of 6 ready-made countdown timer design templates and customize it to look catchy and match your store design.
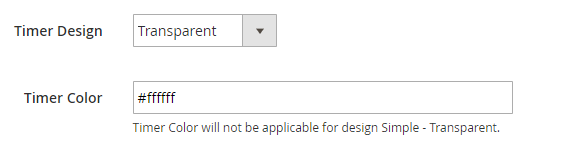
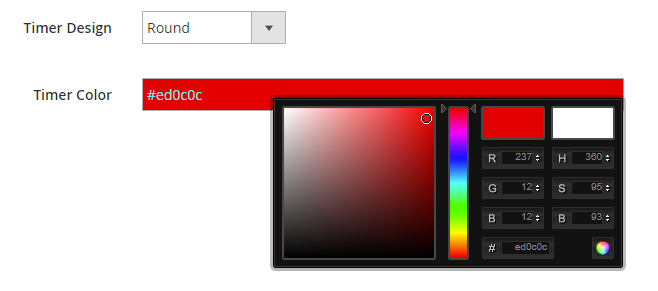
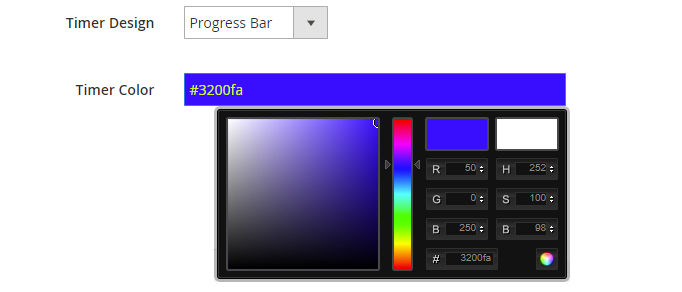
Timer Design - choose the design of the timer.
Timer Color - set the necessary color to fit your website design using a handy color picker tool.
You can use the following designs:
Clear

See how the design will be displayed on the frontend:

Round (Simple)

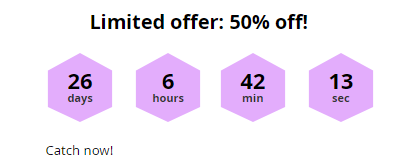
Honeycomb
Transparent
Timer Color will not be applicable for this design.

Round

Progress Bar
When the design is customized, Save the configuration.
To make the timer visible, you need to Flush Magento Cache in the System → Cache Management section.
Timer on a CMS page
Countdown Timer extension also allows to place a widget in any block of any CMS page. To add a timer, please go to Content → Pages and choose a CMS page you need.
In the Content block click Show/Hide Editor. Then press the Insert Widget button.
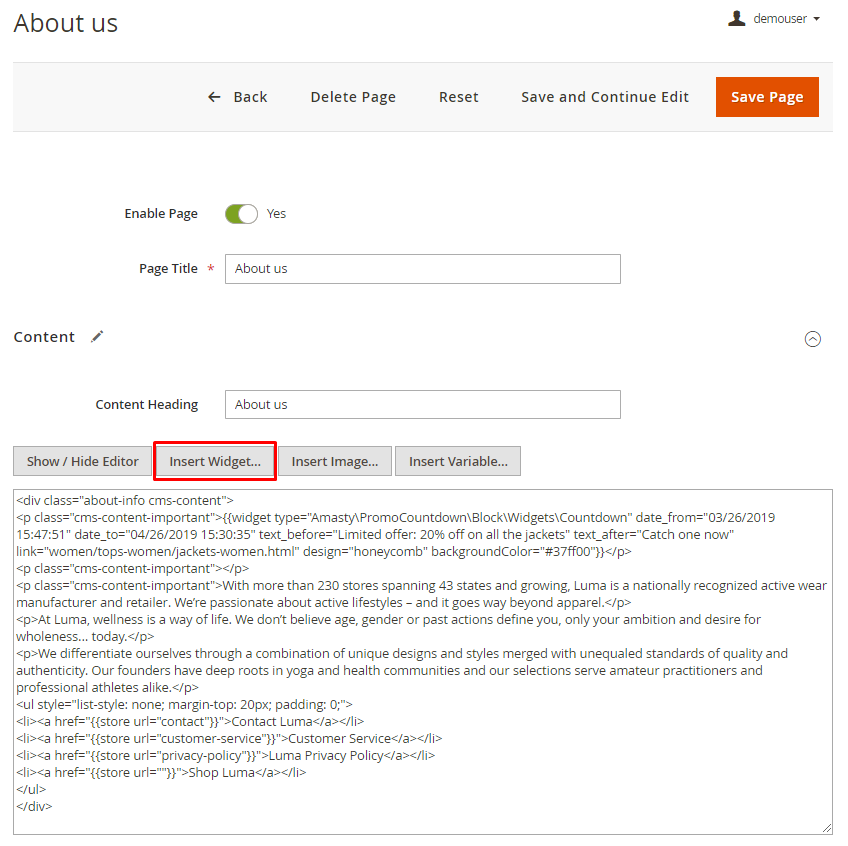
Choose Countdown by Amasty as a widget type, configure the timer and hit the Insert Widget button one more time.
The widgets created right in the CMS pages won’t be displayed in the Countdown Widgets List grid.
Frontend Examples
Decrease customers’ decision-making time by showing a countdown timer on product pages.

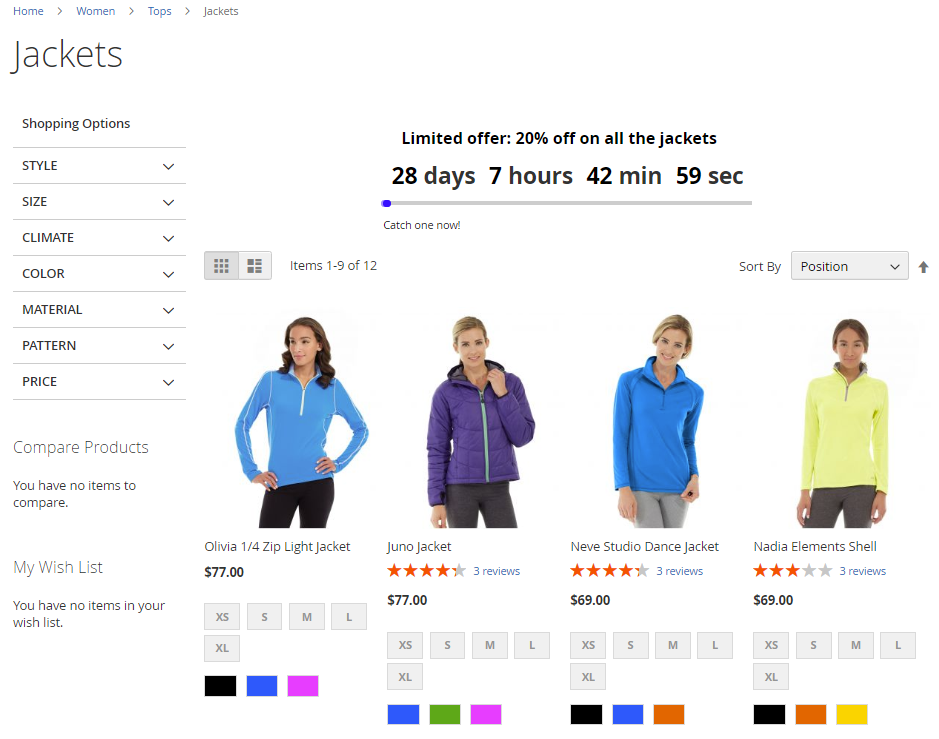
Easily visualize your limited-time offer on category pages.
Draw customers’ attention to your special offers by adding a timer to any CMS page.

Prevent losing potential customers by making your site perform better with Google Page Speed Optimizer for Magento 2 extension.
Find out how to install the Countdown Timer for Magento 2 via Composer.
magento_2/countdown-timer.txt · Last modified: 2025/05/14 10:35 by avronskaya