
Sidebar
magento_1:product-parts-finder
Table of Contents
For more details see the Product Parts Finder extension page.
Guide for Product Parts Finder
Setting up Finder step by step
Step 1. Preparations
In our sample web store, we are selling car parts. There is a wide variety of products and we want our customers to be able to find the part they need faster.
Let's filter the wheels collection to display only the wheel which will fit a particular car.
Let's do this using the extension. Configure the Finder to filter Wheels category to display wheels for a selected car only.
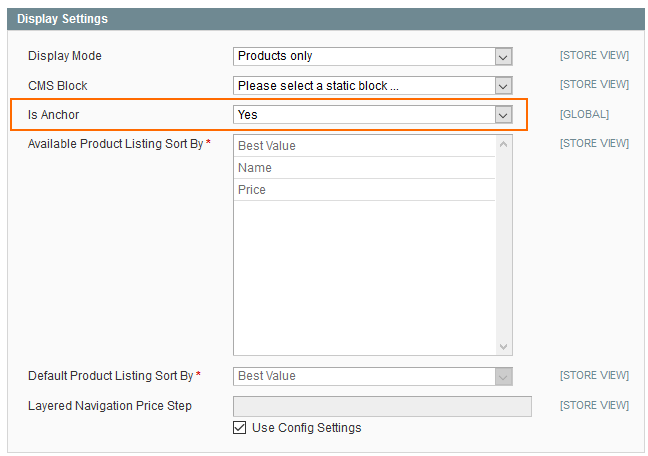
If in your store wheels are distributed among different categories, you should set the Anchor on a parent category.
Achieve extra page speed optimization with the special Google toolkit adapted to Magento.
Step 2. Creating Finder
Since we want to filter wheels let's highlight three most important variables for a Finder: car make, car model and wheel diameter.
 Once you hit the Add Finder button you will need to specify the number of dropdowns.
You can set the number of dropdowns only when creating a new Finder.
Second important setting there is Custom Destination URL. There you set the page to which the Finder block will redirect you after you hit the Find button. This setting can be changed at any time.
Hit Save to proceed.
Step 3. Filling up Finder
The easiest way to fill up Finder with products is to utilize a CSV import feature. For this, you will need to compile a CSV file with the data containing all the variations for Make, Model and Diameter and assign these variations to the products in Magento Catalog.
Deciding on CSV format is very simple: count the number of dropdowns you have and add one more for a SKU column. In our case there are three dropdowns, adding one makes it four-column CSV.
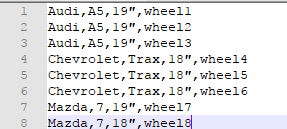 This is how a ready-for-import CSV file looks like.
Open the Import tab, drag and drop the CSV and hit Import. After the import is done hit the Save button.
Step 4. Placing Finder block
To use finder on the home page or on the category without products, we do recommend to add the finder block to the root category.
Open the Finder you've just created and navigate to the Get Finder Code tab.
 Use the marked XML code in the Wheels' category layout update.
Then open Catalog > Manage Categories, select the Wheels category, navigate to Custom Design tab and look for Custom Layout Update. Insert the code.
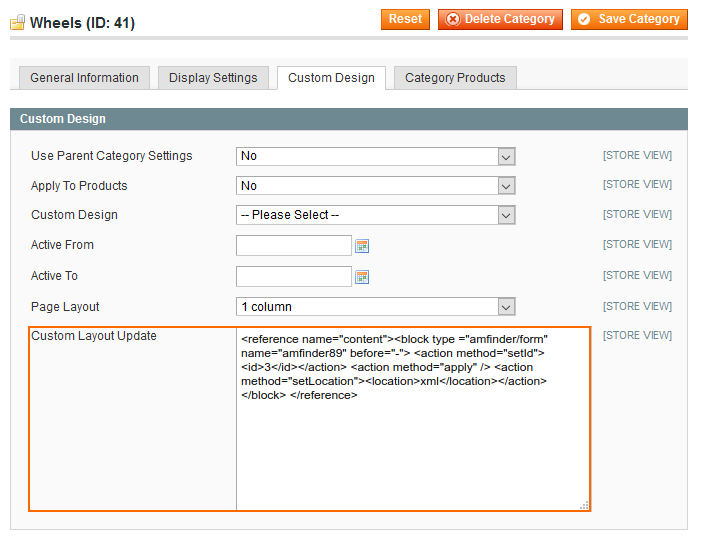
Hit Save Category and it's done.
Step 5. Checking the result
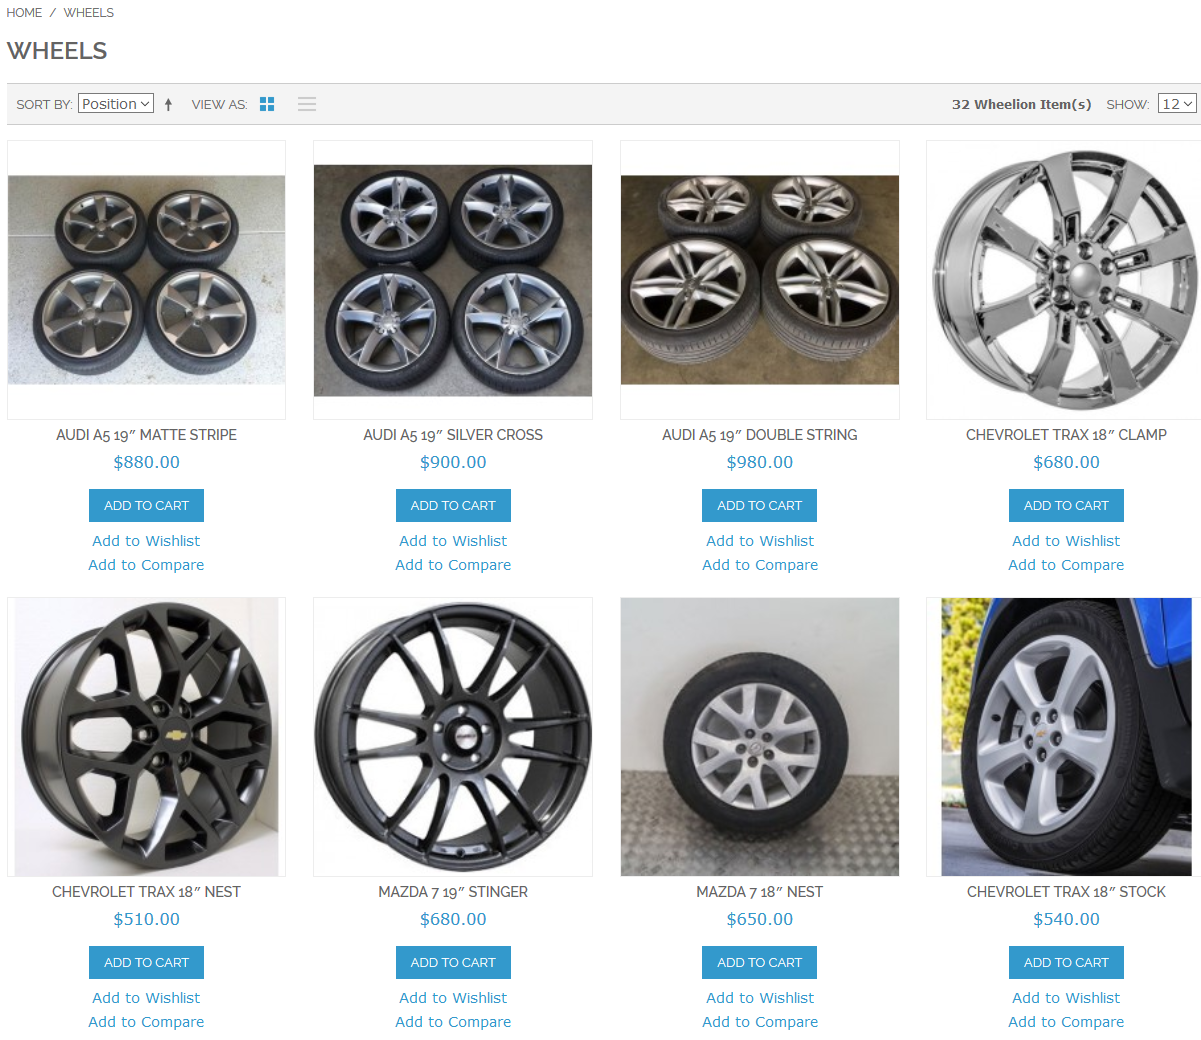
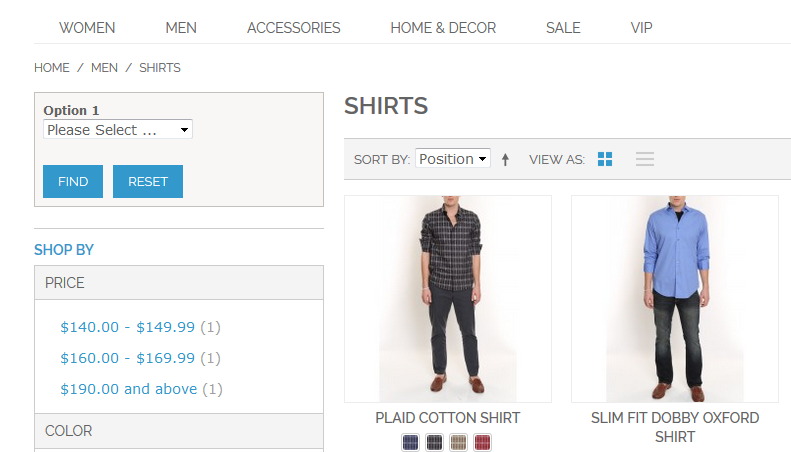
When you open the Wheels category in the store front, you can see the Finder block.
 Since no selection is made all products from the category are displayed.
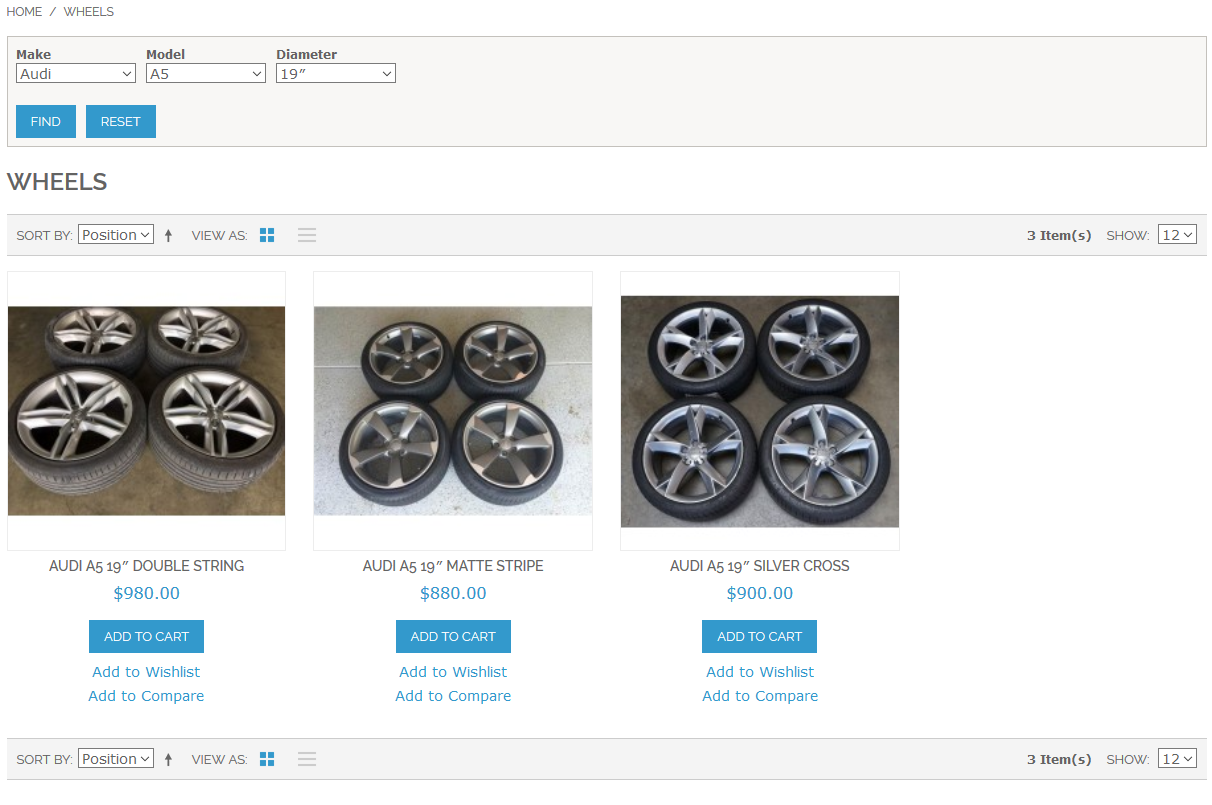 Filtering, you can see only the products which SKUs you have assigned in a CSV file for Audi - A5 - 19″ selection.
General extension settings
Settings are located in: System > Configuration > Amasty Extensions > Product Parts Finder

- Use `universal` products - this setting enables and disables Universal products in one click.
- Display `Find` button when - here you can set when to show the Find button, only when all dropdowns are selected or when only one dropdown is selected.
- Show `universal` products last - when enabled, Universal products will be put in the end of filtered results.
- Apply filter for current category only - useful when you have one Finder instance across the whole store, but you don't want to save the selection a customer made when he/she browses the entire catalog.
- Custom Destination URL - sets the destination for Find button redirect. Can be set individually for each Finder instance.
- Use Param in URL - controls whether to add or not to add Finder search parameters in the URL.
- Start search when the value in the last dropdown is selected - when enabled, the Finder will start searching as soon as the value in the last dropdown is selected. Otherwise, the search will commence only after hitting the Find button.
- Reset finder to - sets the destination of Reset button.
- Clear other (previous) finders conditions - when enabled and you have more than one Finder instance on the page, only selection in the active instance will apply filtering, all other Finders will be reset.
- Do Not Apply Finders on Site Search - when disabled, filtering will work on Catalog Search Results page too.
- Redirect to product page when there is only one product in results - when enabled, it automatically redirects to the corresponding product page if there is only one product left after filtering.
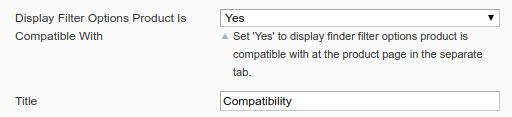
Display Compatible Options At The Product Page - Enable the feature to display a compatibility tab on a product page. The tab displays all the finder's options, the product is compatible with. The tab is active on the product pages after a search by Finder.
Set the Title of the compatibility tab. The tab is displayed on the product pages.
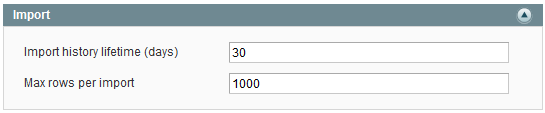
- Import history lifetime (days) - sets the lifetime of import error log.
- Max rows per import - a batch size in lines which the import script will try to process at once.
New Finder settings
General settings
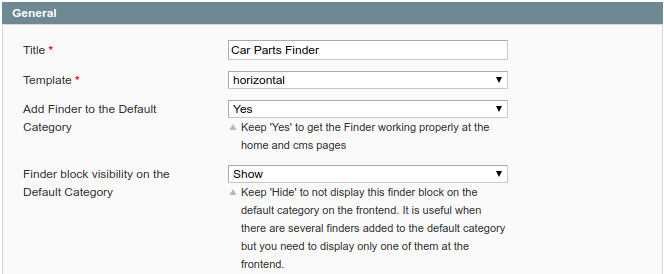
- Title - name of the Finder instance.
- Template - select from two available templates (horizontal, vertical) which determine how the Finder block will look on store pages.
It is set to horizontal (which is responsive) by default.
- Add finder to the Default Category - Set to Yes to manager a proper filter's performance on default category.
- Add the finder block in - Place the product finder in particular themes, categories, and other locations. Possible options: left, left_first (rwd theme), right, content, footer.
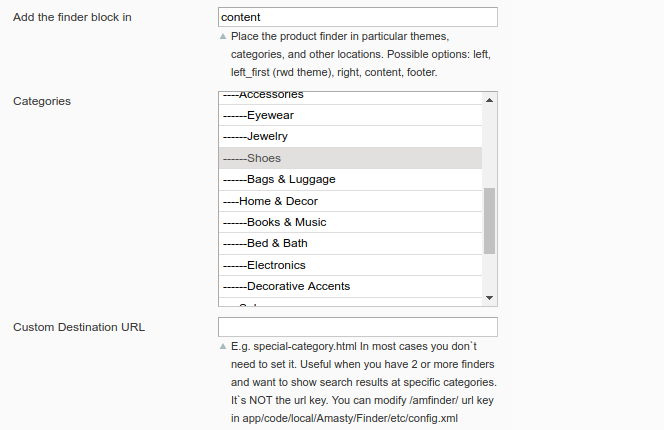
- Category - Multi-select categories, where a finder should be displayed;
- Custom Destination URL - sets the destination for the Find button redirect.
Dropdown settings. There is no limit to the number of dropdowns in a single Finder instance.

- Name - name of the dropdown in the Finder block.
- Sort - sort order for rows in dropdown
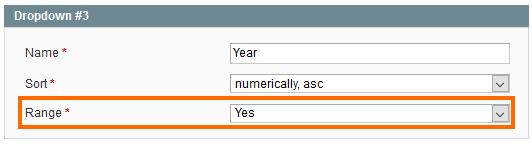
- Range - if you enable this option and then import the data for this dropdown using ranges like “2006-2017” in CSV, the Finder will automatically create rows for each individual value in the range.
Import
You can import records in finder in two formats: CSV and XLS (XLSX).
Deciding on CSV format is very simple: count the number of dropdowns you have and add one more for the SKU column. For example, if you have three dropdowns, adding one makes it four-column CSV. The same goes for XLS format.
There are two ways to import files into the Finder: manually from the Finder page or by uploading the file to the specific folder in the Magento directory. The latter is useful when you want to import a large file which your web-server might not allow to upload due to size restrictions.
To import files from the Folder in Magento you should put the file to the following directory: /magento_folder/media/amfinder/ftp_import/finder_id/
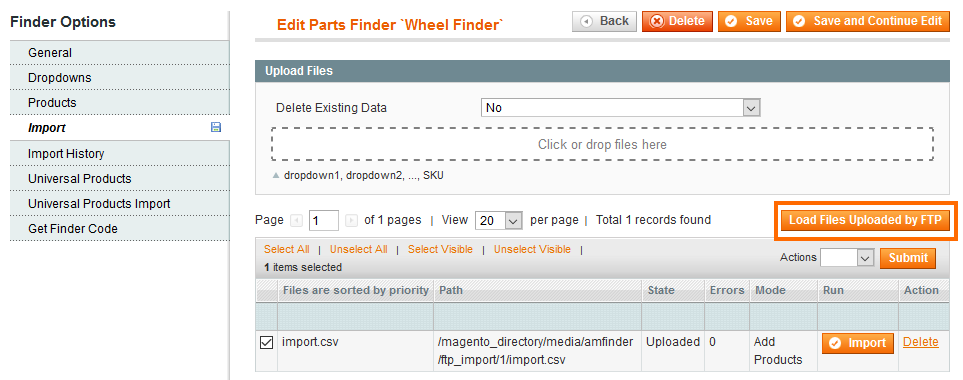 Please note that the finder_id part in the path should be replaced with the ID of the Finder you want to import the file into. After the file upload is done, open the Finder and hit Load Files Uploaded by FTP in the Import tab and the file you've uploaded will appear ready to import.
SKU bundling
If certain selection can output multiple different SKUs in the result, you can bundle these SKUs and import the whole thing in one line. Here's the example: Make1,Model1,Year1,“sku1,sku2,sku3,sku4,sku5,sku6” Make1,Model2,Year2,“sku3,sku4,sku5,sku6,sku7,sku8”
With these two lines Finder will generate twelve unique records, one for each Make-Model-Year-SKU combination.
Please note that bundling only works for SKUs
Generating Range
By enabling Range in dropdown settings you'll be able to automatically generate records for numeric data, like a list of years.
Now, when you import a CSV or XLS file you can simply define a range like “2001-2017” and it will generate 17 records automatically when the file is imported.
Here's how the CSV example may look like: Make1,Model1,“2001-2017”,SKU1
The example above will create 17 records in the Finder database which will differ only by the Year value.
How to manage compatibility with Smartwave Ajaxcatalog
1. To manage compatibility with Smartwave Ajaxcatalog, find and edit a file: app/code/local/Smartwave/Ajaxcatalog/controllers/Catalog/CategoryController.php
2. After a line
$this->generateLayoutXml()->generateLayoutBlocks(); /*Generate new blocks*/
3. Add
/*compatibility with Amasty Finder*/
$html = $this->getLayout()->createBlock('cms/block')
->setBlockId(Mage::registry('current_category')->getLandingPage())
->toHtml();
Troubleshooter & How-to's
Troubleshooting checklist
- Make sure that the Finder block is displayed on the results page. The Finder will filter products only if it is placed on the page. If you don't want it to be displayed you can hide it with CSS, but you still need to place the block on the results page.
- Make sure that there are products to filter on the page which the Finder uses to display results. The Finder works as a product filter. If there are no products to filter from the Finder won't be able to do much.
- Hit the 'Save' button in the Finder one more time. Will prove useful if you've added records in the Finder first and only after that imported products in your Catalog. Hitting Save button will make the Finder to “bind” SKUs in the Finder with the SKUs in your Catalog.
How to add Finder block to a category
Open the following file:
\app\design\frontend\base\default\layout\amfinder.xml
There you can find commented part of example code:

Simply move the XML comment marked above like this:

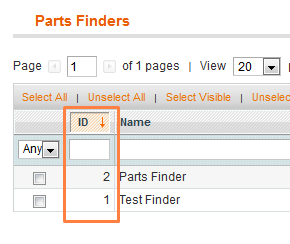
This will add finder with ID=1 to a top of a category page. If you want to place here the finder with a different ID simply replace the 1 inside id tag with the ID of your finder.
You can check finder IDs on the Parts Finder grid:
Save changes and flush Magento cache. Done!
How to add Finder block to other places
In the same exact file as before:
\app\design\frontend\base\default\layout\amfinder.xml
Find the same exact code:
Move the comment marking and see the marked part of the code:
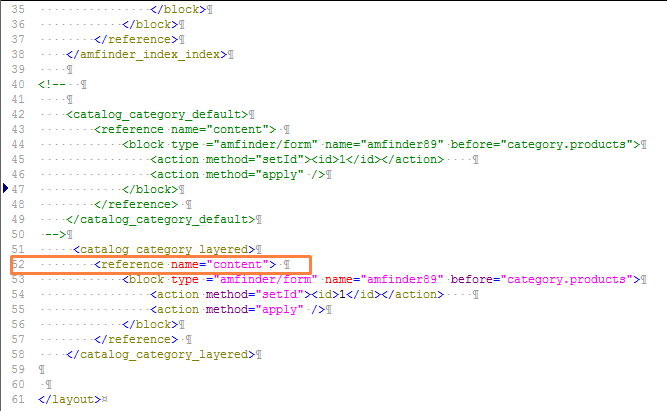
This is where we define the place for the Finder block on the page by changing the content.
Instructions below are for Magento RWD theme. If you use a custom theme then the reference names may be different.
Since we're using catalog_category_layered we should look for it in the theme files. In case it's RWD, here: /app/design/frontend/rwd/default/layout/catalog.xml
Here are our reference options:
 It looks like we can put the Finder block in the product list or in the left sidebar. The Sidebar is a good option, let's try it.
To add the Finder block to a sidebar we need to change the reference value to left_first. Also, we want to place the Finder before the navigation block. Since from the look of catalog.xml we know that navigation's block name is catalog.leftnav all we need to do is to mark that we want the Finder block to be placed before catalog.leftnav.
Here's how the code will look like with the changes applied above:

And here's the result of our work:
magento_1/product-parts-finder.txt · Last modified: 2019/07/22 13:53 by skudrov