
Sidebar
magento_2:push_notifications
Table of Contents
For more details see how the Push Notifications for Magento 2 extension works.
Guide for Push Notifications for Magento 2
With Magento 2 Push Notifications, get higher conversion rates and, thus, increase profits by reinforcing contacts with your target customers. Send attractive push notifications to trigger repeat purchases and maintain customers' loyalty.
- Contact your customers via their web-browsers;
- Customize notifications to make them irresistible to customers;
- Gather statistics to make data-driven decisions;
- Motivate customers to subscribe for notifications (the easiest one-click process);
- Keep your customers timely informed: they will instantly see notifications
- Compliance with WCAG 2.2 level AA requirements (for Hyvä Theme)
- The extension is not compatible with Apple mobile platforms;
- Push notifications don't work with Safari browser on Mac;
- The module is also not compatible with EDGE browser.
Magento 2 Push Notifications extension is compatible with Hyvä Theme.
Hyvä compatibility (including WCAG compliance) is available only as a part of an active product subscription or support subscription and requires installing the 'amasty/module-push-notifications-hyva' package, which you can find in composer suggest.
In Push Notifications FAQ you can find answers to the most popular questions about the extension functionality.
Database Installation
This product includes GeoLite2 Data created by MaxMind, available from 24.10.2023 (last update date).
To install the GeoIP database, go to Stores → Configuration → Amasty Extensions → GeoIP Data.
Databases are required for the correct work of the module. Also you need to install php bcmath or gmp extension on your server.
You can get the databases automatically or import your own data.
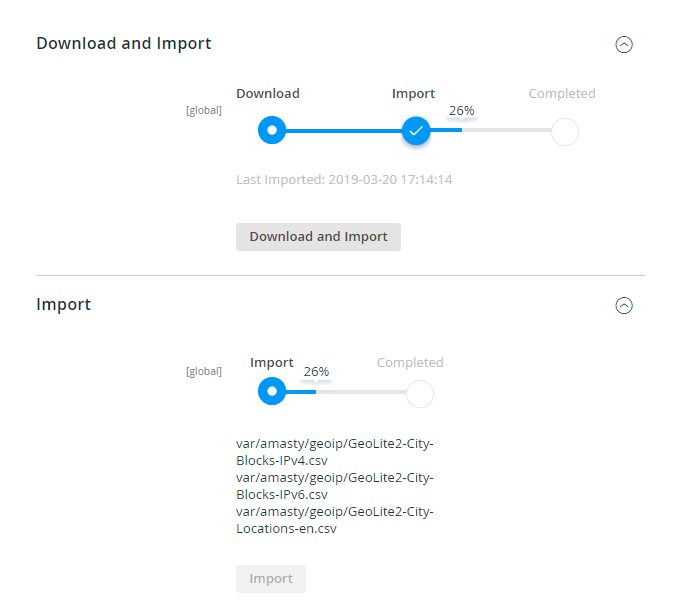
Hit the Download and Import button to make the extension download the updated CSV dump file and import it into your database automatically.
To import the files from your own source, use the Import option. Path to the files should look like this (the part 'var/amasty' should be replaced with your folders’ names):
var/amasty/geoip/GeoLite2-City-Blocks-IPv4.csv
var/amasty/geoip/GeoLite2-City-Blocks-IPv6.csv
var/amasty/geoip/GeoLite2-City-Locations-en.csv
In the Import section, the Import button is grayed out by default. It will be available right after you upload the CSV files. The red error notification will switch to green success notification when the import is completed.
IP Database Update Settings
The database included in the extension was last updated on October 24, 2023. To keep the IP database current, you can update it using one of two methods.
Please note that regardless of the updating method chosen, you need to import the IP database first.

Refresh IP Database - select the appropriate method for refreshing the IP database:
- Manually - to manually upload the updated database files;
- Update via Amasty Service - to update the database automatically and regularly via Amasty Service, which is complimentary for you until August 2024.
Debug Mode
You can enable IP forcing, which makes it possible to set a specific IP address that will be used instead of the visitor's real IP address when determining geolocation. The feature is useful while configuring or testing the extension.
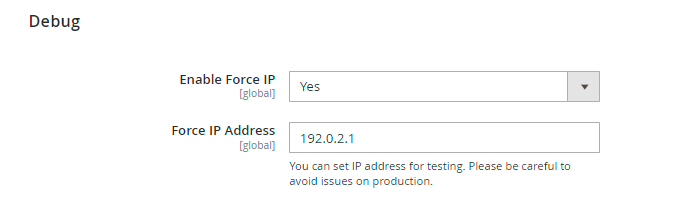
Enable Force IP - set to Yes to replace the real IP address.
Force IP Address - specify the address to use instead of a real one.
General Settings
To configure the extension, please, go to Stores → Сonfiguration → Amasty extensions → Push Notifications.

Please note that the extension requires the google/apiclient library. It can be installed via composer by running composer require google/apiclient:^2.15.0 –with-all-dependencies
Firebase completely ceases support for the Cloud Messaging API Legacy functionality in June 2024 and requires migration to the HTTP v1 API at the earliest opportunity. As this Magento 2 Push Notifications extension integrates with Firebase, it will be switched to HTTP v1 API functionality starting from the 1.6.0 version. Therefore, after updating the extension to version 1.6.0 or above, it's necessary to reconfigure the extension just once as outlined below. This reconfiguration is crucial to continue sending push notifications using the extension.
In the General Settings section, enable the extension and enter the Firebase Project ID, Sender ID, API Key, App ID, and Firebase Json Config Path in the appropriate fields.
To get these details, navigate to your Firebase Console account and take the following steps:
1. Add a new project or open the existing one;
2. Go to Project Overview → Project Settings:

3. Open Service Accounts tab and click the Generate new private key button:

4. Once the file is downloaded, upload the key to your Magento root folder and specify the path in the Firebase Json Config File Path setting of the extension, starting with a slash (/);
5. Then, go back to the Project Settings and open the Cloud Messaging tab:

6. Copy the Sender ID and insert it into the corresponding setting in the extension;
7. After this, find and copy the Project ID in the General tab of the Firebase Console. Paste it into the Project ID field;

8. The next step is to register your app in the General tab of the Firebase Console:

9. Finally, find and copy the apiKey and the appId and insert them into the appropriate fields of the extension (API Key and App ID).

In the Design Settings section, insert an image/logo that will be displayed in push notifications by default (unless you upload another image while configuring a campaign).
Prompt (Subscription Pop-up) Settings

In the Prompt (Subscription Pop-up) Settings section, specify the next settings:
Enabled - enable the prompt message (subscription pop-up) to collect customers consents for the subscription. The subscription process does not require any customers' info.
Customers will get your notifications only after they leave their consents to receive them (subscribe).
Enable prompt for - configure display options for different devices. Uncheck Mobile and Tablet, if the subscription pop-up prevents viewing the site's content on these devices.
Prompt text - specify the text you want to display in the subscription pop-up. Make it as attractive to customers as possible (for example, offer them to subscribe to get special deals) - on this step your aim is to motivate customers to leave a consent for getting notifications.
Prompt Position - adjust the settings to put the notification pop-up in the proper position, where it won't hide other elements of your site.
Show delay (seconds) - set up the time interval between a page load and the subscription pop-up appearance.
Set the frequency of prompt display for the same customer - choose how frequently to show the prompt to those who haven't subscribed yet. Available frequency:
- Every Time
- Hourly
- Daily
- Weekly
Show the prompt on all pages - enable if you want to show the subscription pop-up on each page of your store website. Otherwise, list the pages to place the prompt on in the following field - Pages to show the prompt on. Place each page on a separate line.
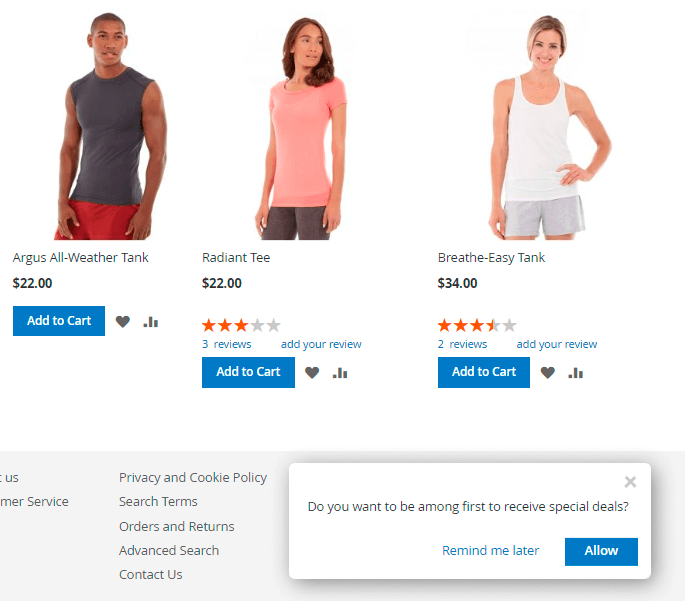
Here's the example of how the subscription pop-up will be displayed to customers:
No Spam
In the No Spam section, specify the Max. number of notifications per customer daily. This feature is designed to protect your notifications from being regarded by customers as spam.
Campaign Creation
To launch a campaign or manage the existing ones, go to Marketing → Campaigns.

On the campaigns grid:
- Have a complete picture of your campaigns - easily detect active/inactive, scheduled and passed campaigns;
- See and analyze the results of past campaigns - see the number of subscribers, the number of received notifications and the number of clicks in the context of each campaign;
- Choose to edit any campaign in case of need;
- Send test notifications.
To create a new campaign, click the New Campaign button.
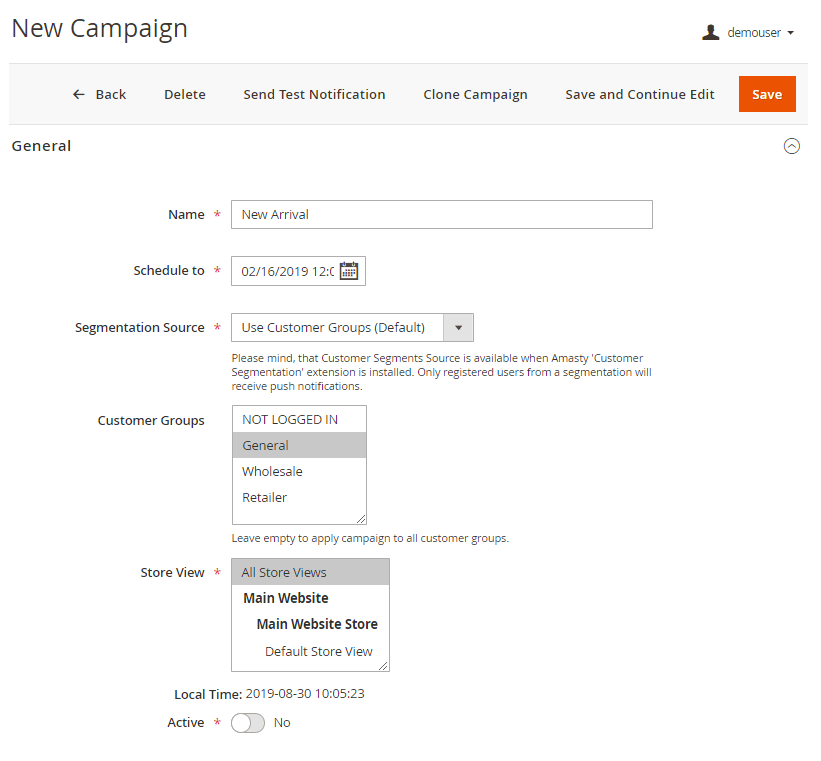
In the General section, specify the next fields:
Name - give a name to your campaign;
Schedule to - choose the date and time (accurately to seconds) to launch your campaign;
Segmentation Source - this option allows to segment customers by groups (you may apply campaign to particular groups of customers);
Customer Groups - specify customer groups to show push notifications to, or leave the field empty to apply campaign to all customer groups;
Add Magento 2 Customer Segmentation to accurately specify customer segments for push notifications.
Store View - define store views to which you launch the campaign;
Active - enable or disable the campaign.
Now, let's proceed to the Notification Settings section.
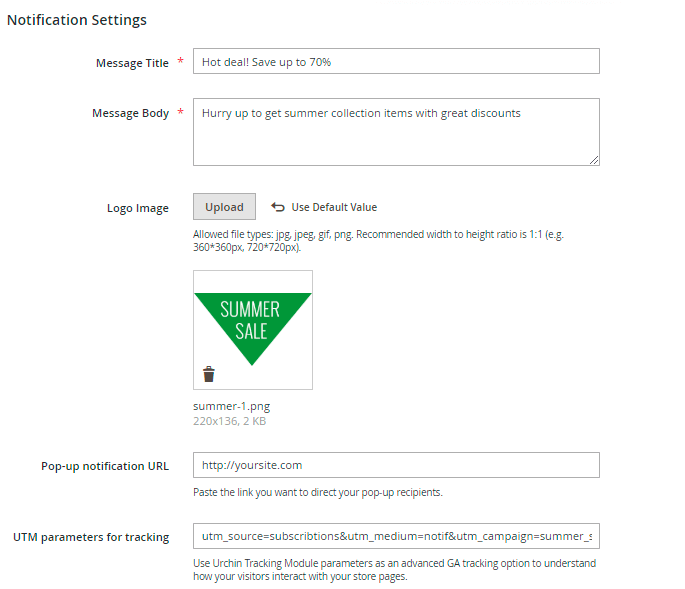
Message Title - specify the title for push notifications - formulate the core incentive;
Message Body - specify the body text for push notifications;
Logo image - insert an image/logo you want to display in the campaign's notifications (when not inserted, the default logo will be used);
Pop-up notification URL - provide the link you want to direct your subscribers to;
UTM parameters for tracking - specify UTM parameters to track your visitors and understand how they interact with your store pages.
Analytics dashboard
For profound analyses of campaigns held, check the Analytics Dashboard located at Marketing → Dashboard.
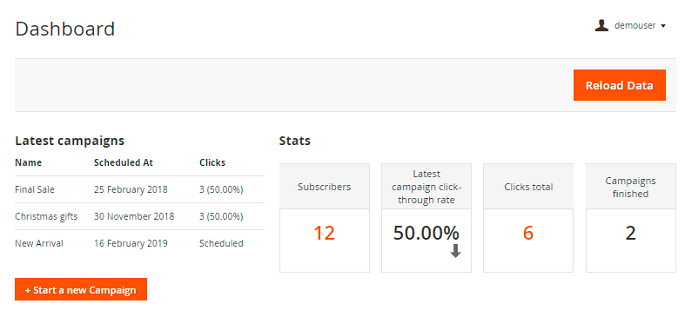
Use the statistics gained to improve your campaigns and maximize profits. The data available:
- The number of clicks and a click-through rate for each campaign individually (in the Latest Campaigns section);
- The total amount of clicks for all campaigns;
- The total amount of subscribers;
- The total amount of finished campaigns.
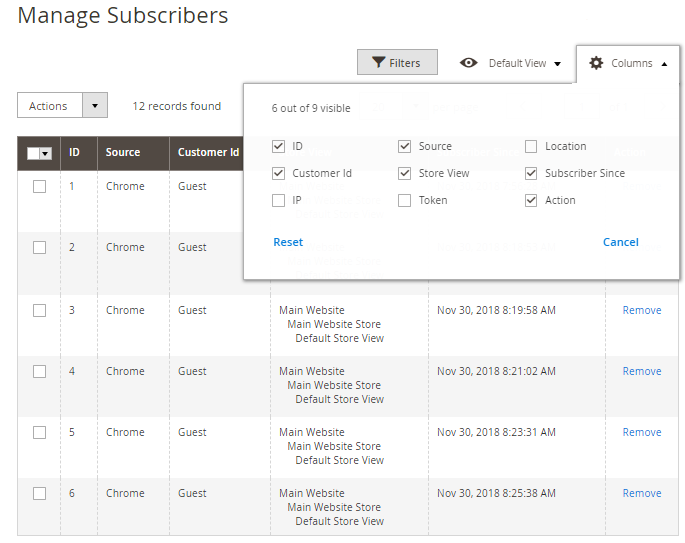
Subscribers
To see all the subscribers with the accompanying data, go to Marketing → Subscribers.
Get and analyze all the necessary information about your subscribers (your main target audience), e.g. their location, source, store view, the date of the subscription, etc.
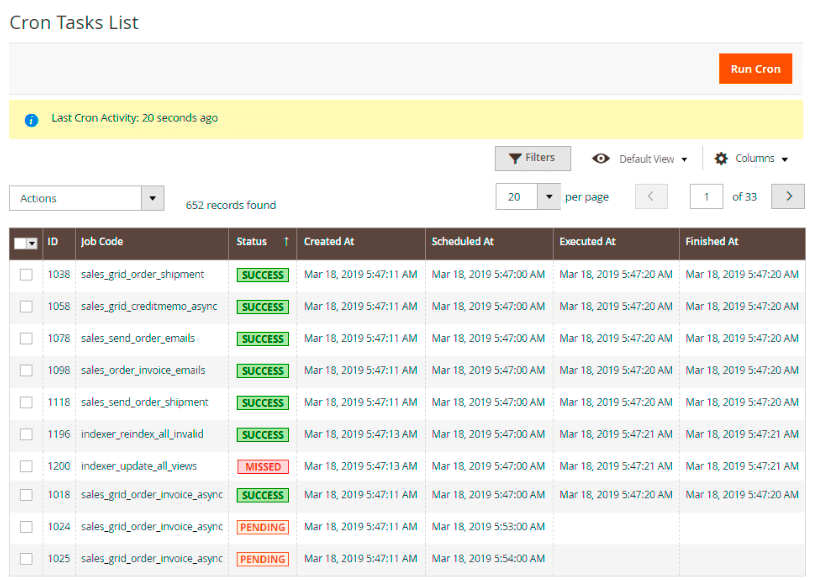
Cron Tasks List
Magento 2 Push Notifications extension is preintegrated with Cron Tasks List to provide store owners with an opportunity to track and manage all cron tasks running in the website background.
To view all scheduled and executed cron tasks, go to System → Cron Tasks List
Run all cron tasks and generate their schedule by clicking the ‘Run Cron’ button. Also you can delete separate tasks in bulk, apply filtering and sorting options when it is needed.
Find out how to install the Push Notifications extension via Composer.
magento_2/push_notifications.txt · Last modified: 2025/06/09 12:19 by kkondrateva