
Sidebar
magento_2:google_invisible-recaptcha-m2
Table of Contents
For more details see how the Google Invisible reCaptcha extension works.
Guide for Google Invisible reCaptcha for Magento 2 (enable Captcha)
Google invisible reCaptcha protects your store from spam and fraud while letting real customers pass through easily. But anyway Captcha integration takes time and coding effort. To minimize your developer's work, we created an Invisible Captcha solution. Now it's enough just to fill some settings fields to secure your store.
- Manage your captcha settings in one place
- Make changes without digging into a website code
- Protect your store with the latest security option
- Compliance with Hyvä Theme Content Security Policies
Add Google Invisible reCaptcha to any forms on your website easily. The module enables you to protect your store from bots without any coding.
Magento 2 Google Invisible reCaptcha extension is compatible with Hyvä themes. You can find the amasty/module-invisible-captcha-hyva package for installing in composer suggest (Note: the compatibility is available as part of an active product subscription or Support Subscription).
The extension is fully compliant with the WCAG and ADA rules:
- Captcha images are static;
- Customers can use the audio Captcha;
- It is also readable for people with color blindness.
NEW: The module's frontend content is available in the German language! You can download the sample file with the translated frontend phrases below:
In Google Invisible reCaptcha FAQ you can find answers to the most popular questions about the extension functionality.
General Settings
To get the access to the 'Invisible Captcha' settings, please go to Stores → Configuration → Amasty extensions → Google Invisible Captcha and expand the General Settings section.
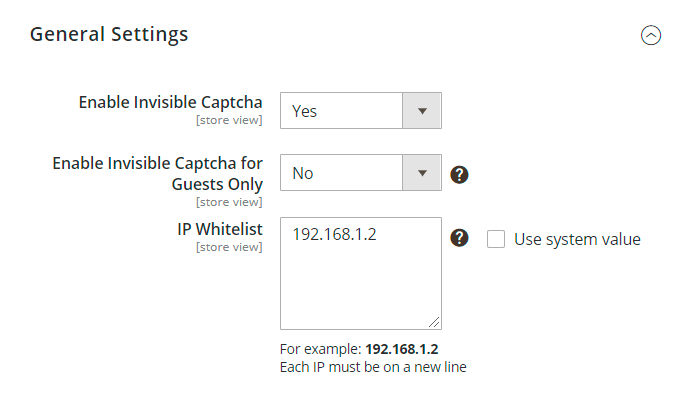
Enable invisible captcha - choose 'Yes' to enable captcha on your Magento 2 website.
Enable Invisible Captcha for Guests Only - set 'Yes' to enable captcha only for the visitors in a guest mode. Registered users will not interact with recaptcha if this setting is enabled.
IP Whitelist - specify IP's one per line if you want to whitelist them. Invisible Captcha will be disabled for the specified IP addresses.
Captcha Setup - Captcha Version 2
After you selected the version of the reCaptcha, configure the way it will be displayed on the website.
This section will be displayed when the selected version is the reCaptcha v2.
Captcha Version - choose 'Version 2' from the dropdown.
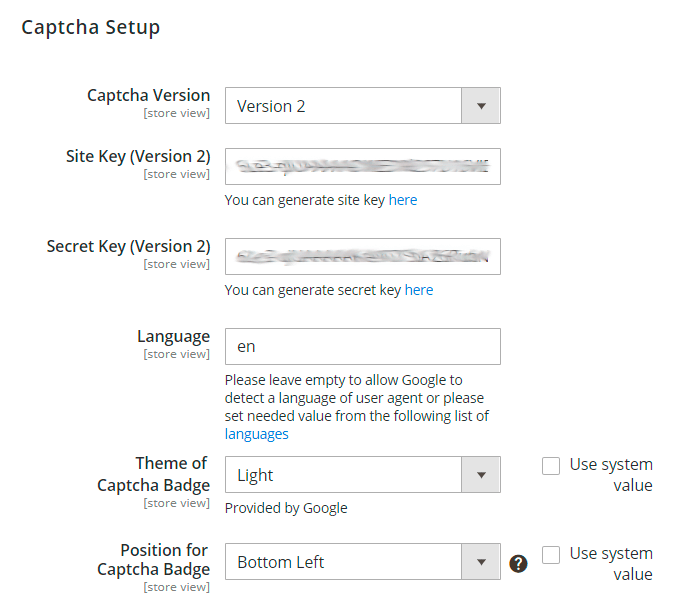
Site Key and Secret Key - enter the values of both keys you obtained on the Admin panel in Google. To learn step-by-step how to get Site Key and Secret Key, please read the Connect reCaptcha to the Extension block.
Next, you can specify the Language of the Google Invisible reCaptcha that will be used for all users instead of their browsers' preferences. You can see the list of the available languages here. By default, this option is set to en for the English language. If set empty, Google will autodetect the language based on the User Agent data.
Theme of Captcha Badge - select the theme that will be displayed on the frontend. Learn more about the available themes here.
Position for Captcha Badge - choose a suitable place for captcha.
The extension does not support the inline position for the Captcha Badge, because explicitly renders the reCAPTCHA widget.
Captcha Setup - Captcha Version 3
This section will be displayed when the selected version is the reCaptcha v3.
Captcha Version - choose 'Version 3' from the dropdown.
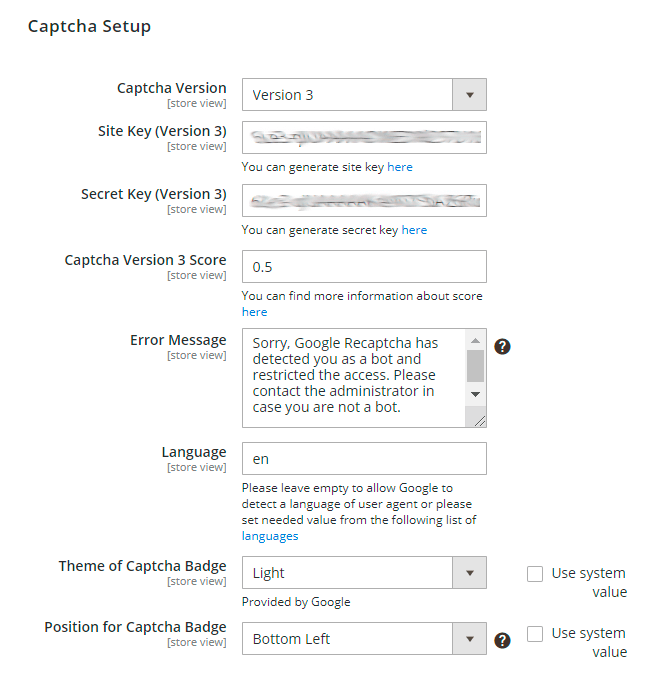
Site Key and Secret Key - enter the values of both keys you obtained on the Admin panel in Google. To learn step-by-step how to get Site Key and Secret Key, please read the Connect reCaptcha to the Extension block.
Captcha Version 3 Score - set the number between 0.0 to 1.0 to indicate the acceptable score for an interaction. Learn more about the score. By default, the number is set at 0.5.
Error Message - customize the message that will be displayed in case the reCaptcha detects a bot.
Like in reCaptcha v2, admins can adjust the language, reCaptcha badge theme, and location on the page. To do so, manage the following settings.
Language - choose the Google Invisible reCaptcha language that will be used for all users instead of their browsers' preferences. You can see the list of the available languages here. By default, this option is set to en for the English language. If set empty, Google will autodetect the language based on the User Agent data.
Theme of Captcha Badge - select the theme that will be displayed on the frontend. Learn more about the available themes here.
Position for Captcha Badge - choose a suitable place for captcha.
The extension does not support the inline position for the Captcha Badge, because explicitly renders the reCAPTCHA widget.
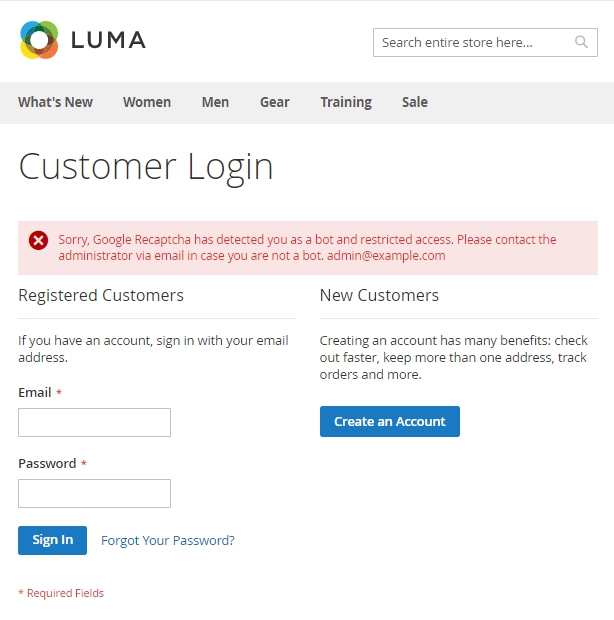
On the example above, the custom error message is displayed. To adjust the text, edit the Error Message setting.
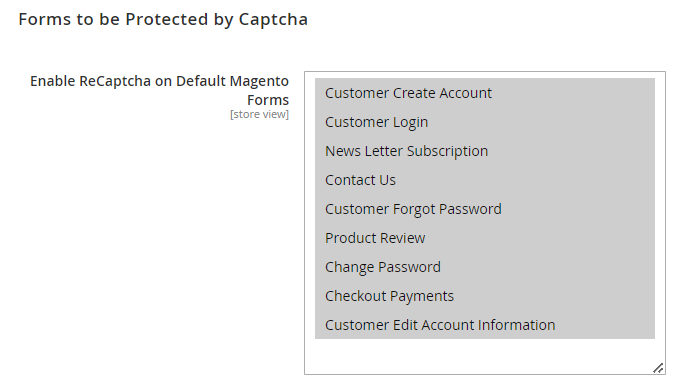
Forms to be Protected by Captcha
To add Google Invisible reCaptcha to any custom form on your website, please go to the 'Forms to be Protected by Captcha' section.
Please note that Captcha validation on the Checkout Page doesn't work with the PayPal through Braintree payment method.
Enable ReCaptcha on Default Magento Forms - choose from the list on which default Magento forms to enable ReCaptcha.
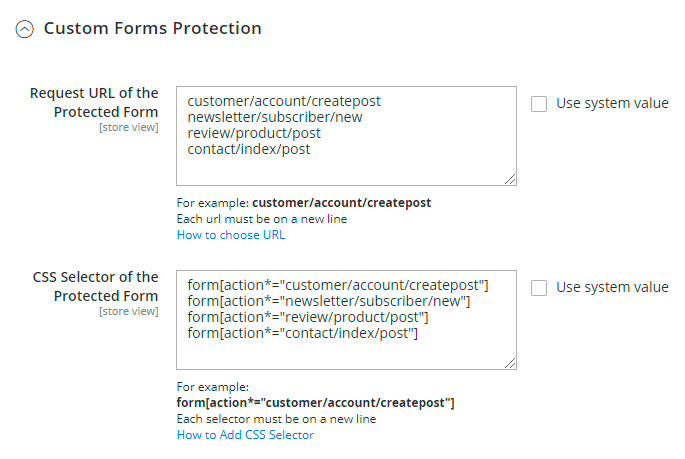
CSS Selector of the Protected Form - fill this field by analogy with an example on the screen.
In the Request URL of the Protected Form field, you need to put the URL where a form is sent.
Note! It’s not the URL where your form is located.
For example, you would like to add a Google reCAPTCHA to a registration form. This is how to get the URL:
1. Go to the registration form page.
2. Fill in the form.
3. Open the 'Inspect' window, and then the 'Network' tab.
4. After submitting the form you need to find a request with POST in the 'Method' column and 302 Status.

5. Click on this request and in the 'Headers' tab find a 'Request URL'. Сopy the path from the URL (in our example it is customer/account/createpost/).

6. Paste the URL in the Request URL of the Protected Form field.
In the CSS Selector of the Protected Form field, you need to put a CSS selector of the form.
For example, this is how to get a CSS selector for 'Create an account' form:
1. Go to the Create an account page and open the Inspect window.
2. Find the HTML code of the form, click on the right mouse button and choose Copy → Copy selector
Note! You should be 100% sure that the selector is unique. Otherwise, Google CAPTCHA would be added to all elements that have this selector name. Ask your developer to check it.
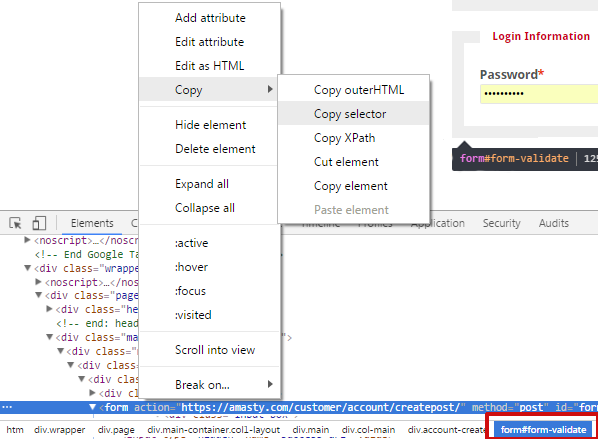
3. In our case, the selector is .customer-account-create .account-create form and we add it to the CSS Selector of the Protected Form field.
Don't forget to click the 'Save' button after you add a CAPTCHA to all forms that you need.
The extension supports four forms by default. In case you don't need any of them, you can disable these forms manually.
Invisible Captcha for Amasty Extensions
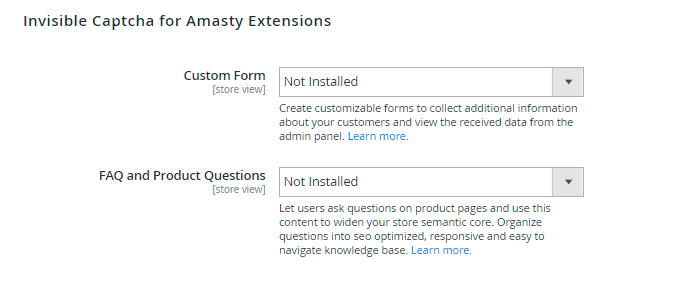
In this section, you can enable or disable the Google Invisible reCaptcha for supported Amasty modules. Choose Yes to enable the Captcha for the extensions or No to disable it. Please note that you will get the Not Installed status when you do not have the appropriate extension.
Create customizable forms to collect additional information about your customers and view the received data from the admin panel with Magento 2 Custom Forms extension. See how it works here.
Let users ask questions on product pages and use this content to widen your store semantic core. Apply FAQ and Product Questions for Magento 2 to organize questions into seo optimized, responsive and easy to navigate knowledge base. Explore how it works from our demo.
Connect reCaptcha to the Extension
The process of creating the Site Key and Secret Key is similar for both versions of reCaptcha.
To get the Site key and Secret key click the link.
The API keys for reCaptcha v2 and reCaptcha v3 are different. If you are switching the reCaptcha version, please make sure you entered the correct keys.
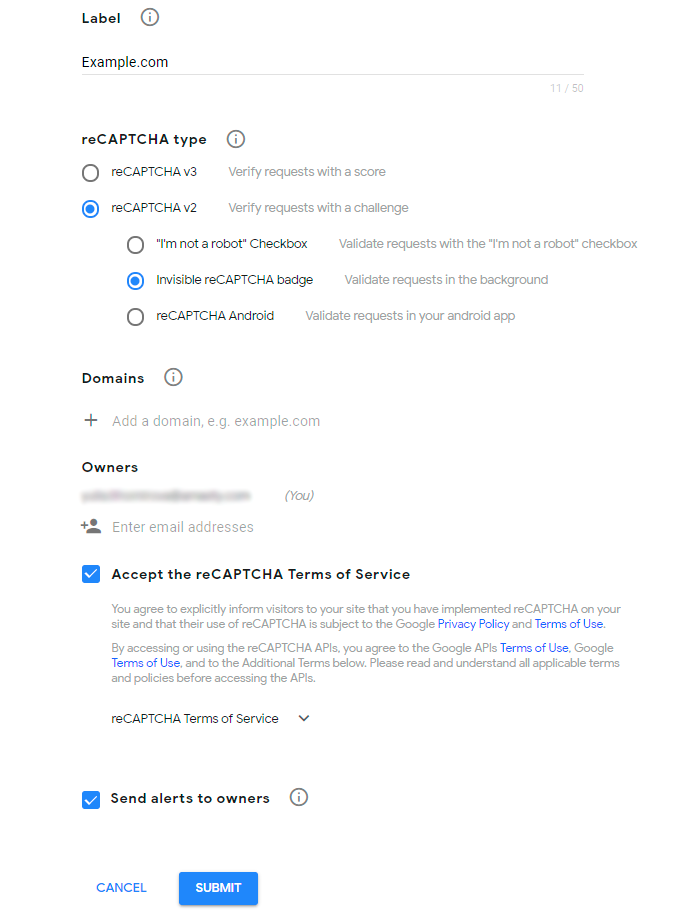
Then, set the name, select the Invisible reCAPTCHA option, define the domain of your website, tick the Terms of service checkbox and press the Submit button.
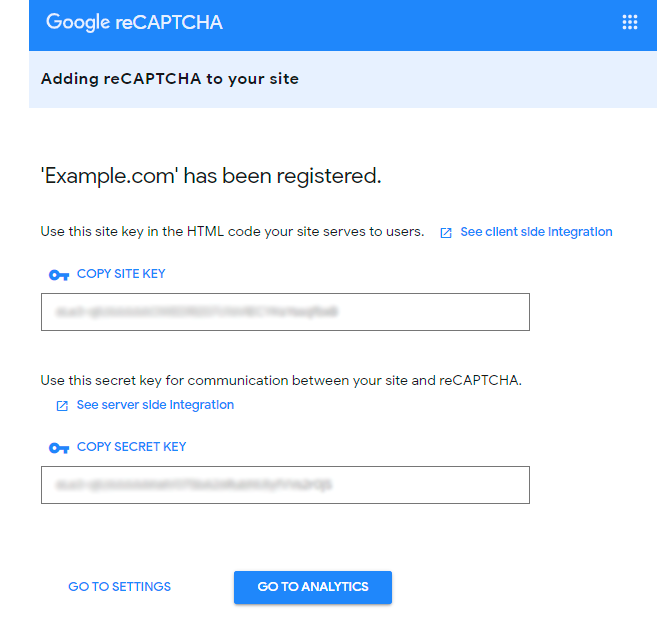
Copy the keys from this page:
How to Check Invisible reCaptcha
When everything is set, it is important to check how reCaptcha works. Please, follow these steps:
- Open the page which has a form protected by Google Invisible reCaptcha;
- Open your browser console;
- Choose to perform like any other browser or device;
- Try submitting the form several times until Google shows you the reCaptcha test.
Find out how to install the Google Invisible reCaptcha extension for Magento 2 via Composer.
magento_2/google_invisible-recaptcha-m2.txt · Last modified: 2025/06/17 08:39 by kkondrateva