
Sidebar
magento_2:promo-banners
Table of Contents
For more details see how the Promo Banners for Magento 2 extension works.
Guide for Promo Banners for Magento 2
With the Amasty Promo Banners extension, you can easily enhance your advertising actions. Use a great variety of conditions and rules to display an appropriate banner in any place of your webshop for any marketing campaign.
- Add banners to the product pages, category pages and carts
- Adjust banners display by setting conditions
- Choose the most suitable position for banners
- Show promo banners based on product attributes
- Add lists of promo items to banners
The extension is compatible with Hyvä Theme. You can find the 'amasty/module-promo-banners-hyva-compatibility' package for installing in composer suggest (Note: the compatibility is available as a part of an active product subscription or support subscription).
The extension is compatible with GraphQL (read only). You can find the 'amasty/module-promo-banners-graphql' package for installing in composer suggest (Note: the compatibility is available as a part of an active product subscription or support subscription).
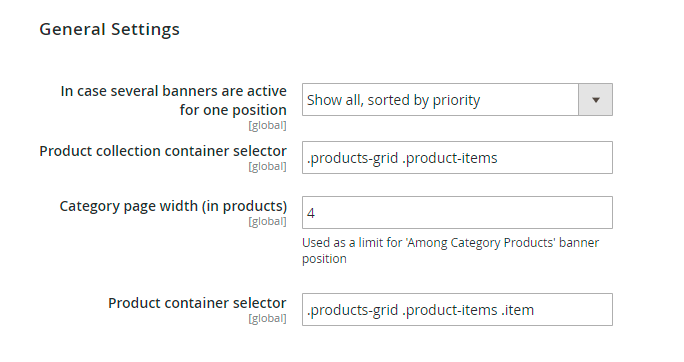
General Settings
Display banners according to the priority. To manage settings, go to Admin Panel → Stores → Configuration → Amasty Extension → Promo Banners.
- To display one promo banner per page position, select Show only one with the highest priority. A banner with the highest priority will be applied. If there are Banner A with priority 2 and Banner B with priority 1, the Banner A will be applied.
- To display several banners per one position at once, select Show all, sorted by priority. All the banners that meet the conditions will be displayed. A banner with the highest priority will be displayed above the ones with lower priority.
Category page width (in products) - specify the number of products that is displayed per line on the category page / product listing page according to the chosen theme. Non-actual values may lead to incorrect banner position calculation.
Use this video guide to check the most common use cases configuration:

Banner General
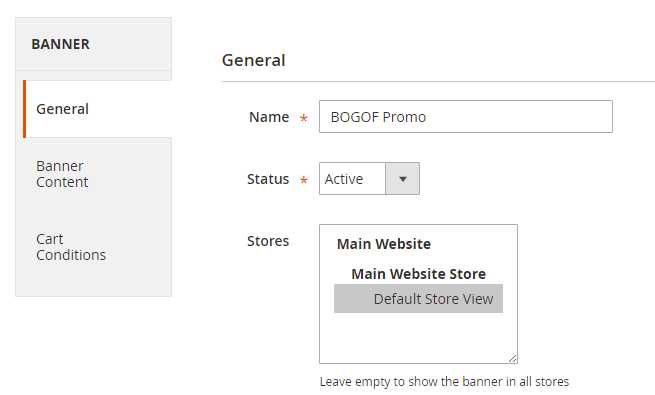
To create banners and set up rules for their display, go to admin panel → Marketing → Banners. To create a banner, click Add Banner button.
Name - Select an appropriate name for a promo banner.
Status - You can activate or deactivate a banner in this field.
Stores - Select stores, where your promo banner should be displayed.
Customer Groups - Select an appropriate group of customers to display a promo banner to.
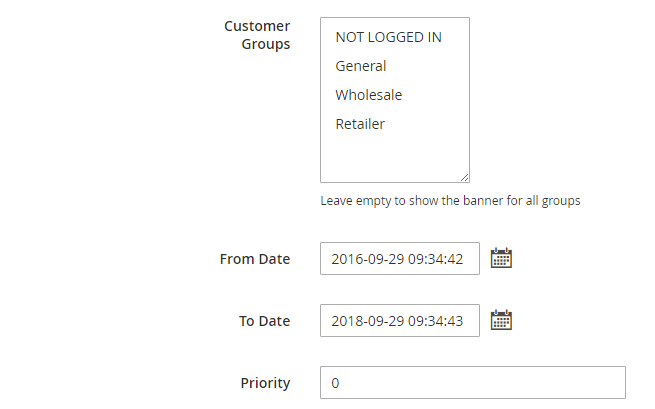
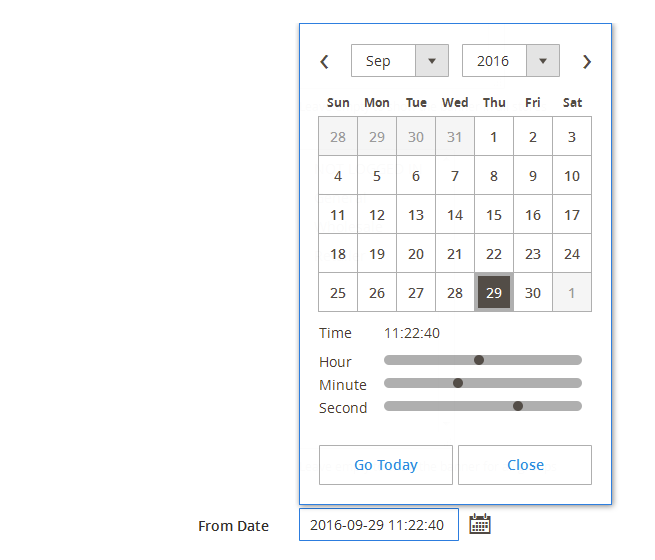
From Date - To Date - Apply a time interval, when a promo banner is activated.
There is an intuitive user-friendly calendar. Select a month and a year from dropdowns, pick a day on the grid. There are UI sliders to easily select Hour, Minute, Second.
Priority - The priority takes effect when several banners are displayed in the same position. Banners with the highest priority will be displayed at the top.
Banner Content
Choose Position to place promo banner on your webshop pages.
- Above cart. The banner is displayed on the shopping cart page, above the list of items added to cart.
- Cart Page (Below Total). The banner is displayed below the Cart Total on the Shopping Cart Page.
- Sidebar Additional. You can place banners on the sidebars of the product pages.
- Sidebar Main. The banner is displayed on all pages in the sidebar.
- Product Page (Top/Bottom). The banner is displayed on a product page, above/under the product image and description.
- Product Page (Bellow Cart Button). The banner is displayed on a product page, under the Add to Cart button.
- Category Page (Top/Bottom). The banner is displayed on the selected category pages.
- Category Page (Below Cart Button). The banner is displayed on a category page, under the Add to Cart button.
- Catalog Search (Top). The banner is displayed on top of the Catalog Page.
- On Top of Page. The banner is shown on the very top of the selected page.
- Home Page Under Menu. Displays a banner right under the main menu of your site.
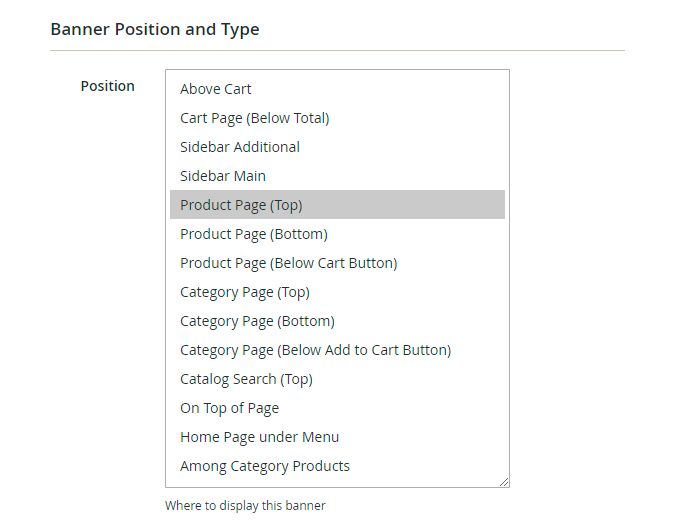
Among Category Products. You can place a banner on the category page on the grid of products. After you select this position, two new fields will appear. (In Product line number, input a number of a tier on the product's grid, where you want to display a banner. In Banner width, select a number of products' positions you want to cover with a banner)

Max Banner width (number of products) - This field indicates the width of the banner, calculated based on the number of products in a row.
Position in Row - The banner is positioned in the row based on the product number specified in this setting.
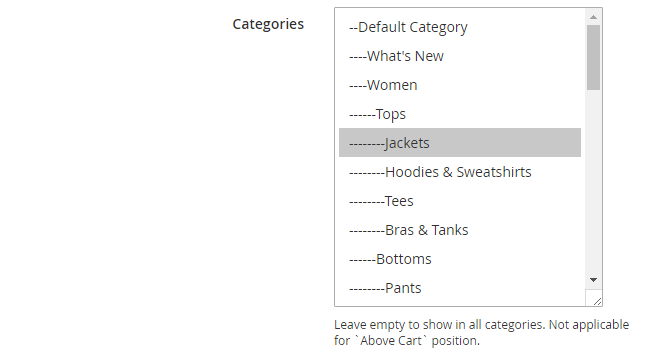
When Position is selected, you can choose product categories for which a banner should be displayed.
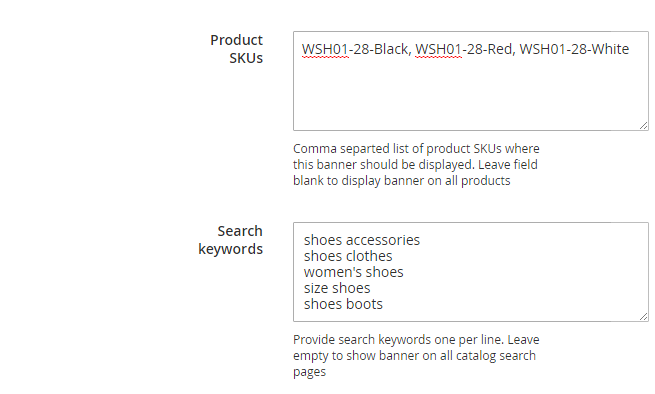
Product SKUs. You can also specify SKUs of particular products on pages, where banner should be displayed.
Search Keywords. Allows displaying this banner on Magento Search Results page. To show the banner on all catalog search pages, leave empty.
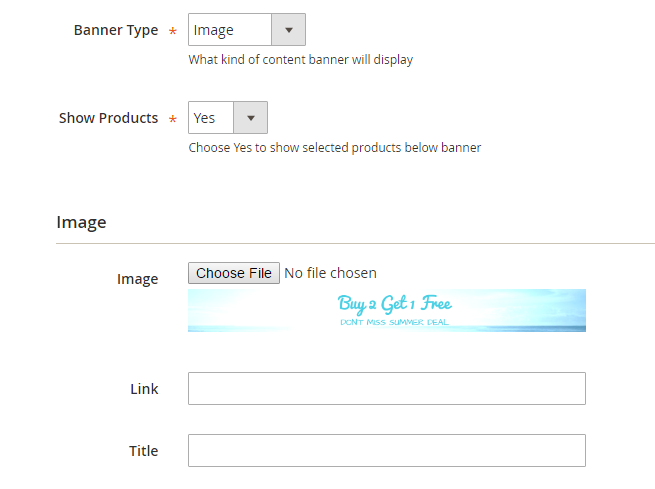
Banner Type
The extension offers three types of promo banners. Choose whether to use Image, CMS Block, or HTML Text for your promo campaign.
Image. Simply upload a picture of any format or insert a link to any image in the web. Name it.
CMS Block. Choose from available or create a new CMS block for a proper marketing campaign.

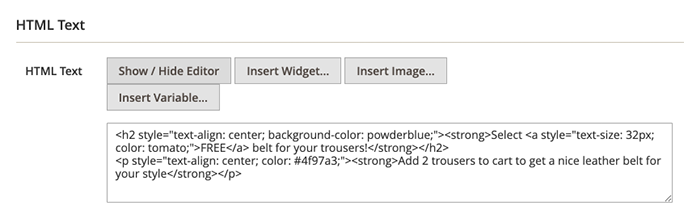
HTML Text. You can create a catchy banner, using HTML code. Easily insert media in banner and provide necessary links.

Please note that in the Magento 2.3 and higher, the module uses the TinyMCE4 editor. To adjust the banner's background or text colours, you can use HTML styles. In the editor, it will look something like on the screenshot below.
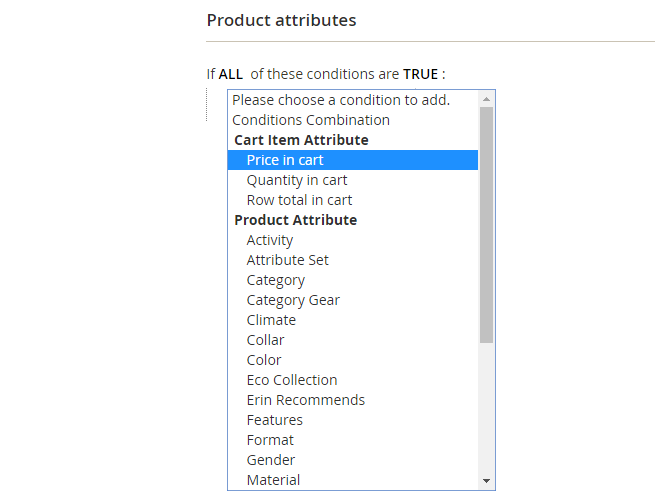
Product Attributes
You can show a banner on pages of products, which utilize specific attributes. Or depending on cart attributes. For instance, choose colour - green and material - wool, to see a label being displayed on the pages of products, that contain these colour and material.
Products
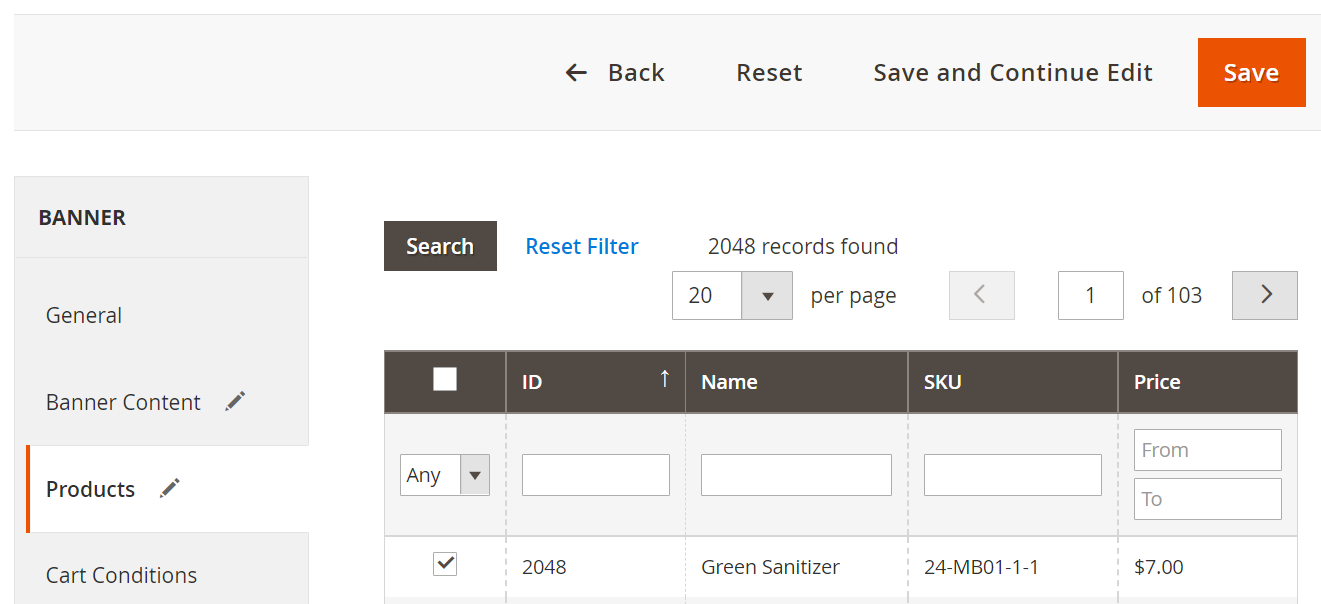
You can add a list of products to your HTML-, Image- or CMS- block banner. Set Show Products option to Yes to enable this feature.
Go to the Products tab and select the items which should be displayed in the list of products on the banner.
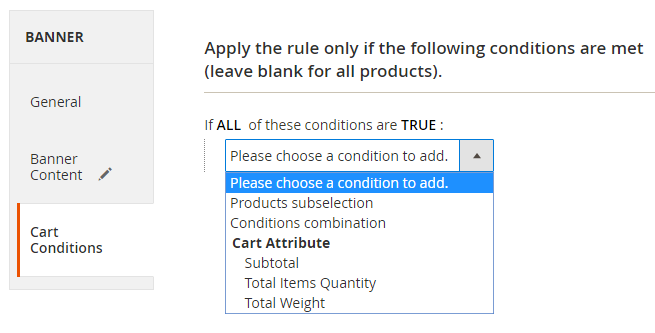
Cart Conditions
At the Conditions tab, you can select conditions for a banner display. If conditions are met by the products in the cart, the banner will be displayed.
Segments
This functionality works by default in Magento EE. To allow it in a Magento CE, you need to install the Customer Segmentation extension.
At the Segments tab, you can select user segments to adjust the users' list who will see the banners. This way, you can set highly specific banner promotions and show banners only to customers who are most likely to be interested in your offer.
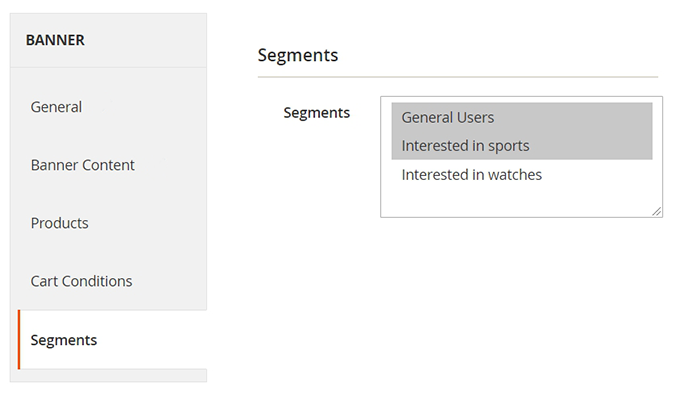
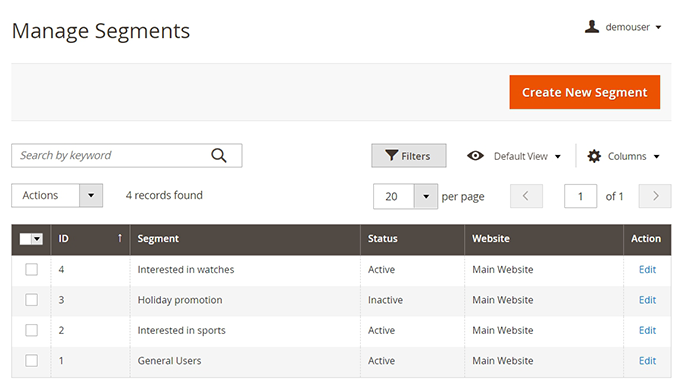
To configure the segments, please go to the Admin Panel → Customers → Manage Segments.
Here you will see the Manage Segments Grid, where you can edit, delete existing segments. To add a new segment, please press the Create New Segment button.
On New Segment configuration page, fill in all necessary fields to adjust the segment for your needs.
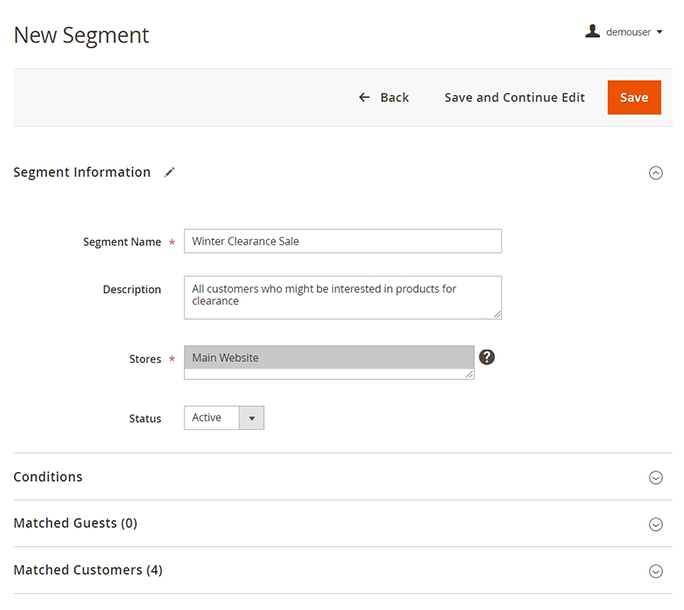
Segment Name - enter the name for the segment. It will be visible when configuring the Segments option for promo banners.
Description - add a description with some additional info, if needed.
Stores - choose the list of store views, for which the segment will be activated.
Status - set to Active, if you wish to turn on the segment. Set to Inactive to disable the segment.
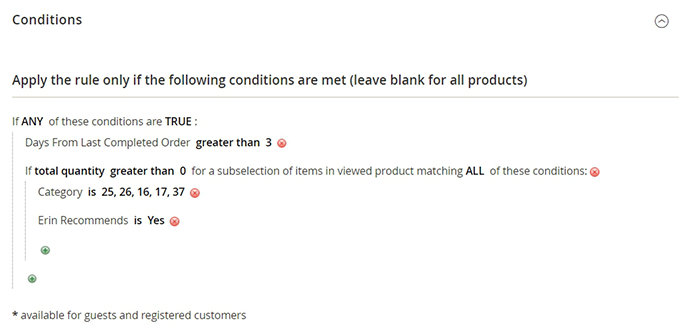
On the Condition tab you can configure the rules for customers segmentation. It is possible to precisely select customers that might be interested in a new promotional offer based on last viewed products and/or products in a wishlist.
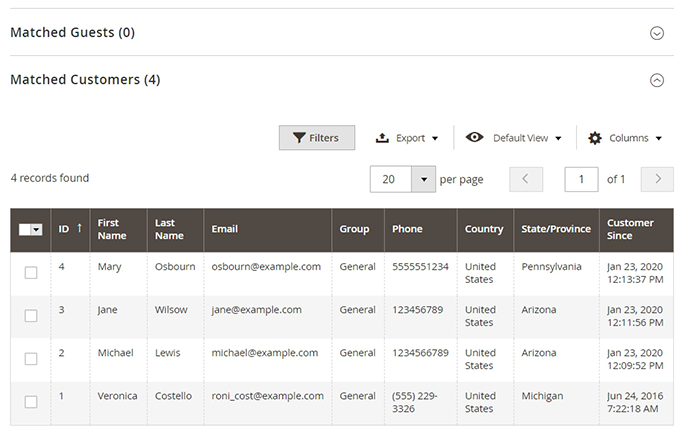
Below, you can see all the customers and guests that match the created conditions.
Use Case: add Trust Badges to your store pages
With the Promo Banners extension,you can do more than just display promotional banners on your store pages — you can also easily add various trust badges. Whether you want to highlight security, payment options, or shipping guarantees, trust badges can be seamlessly added to product, category, or shopping cart pages.
To do this, follow these steps:
- Сombine the needed icons into a single banner using any graphic editor
- Save the banner
- Apply it to your desired website pages through the standard banner settings, described above.
For your convenience, we've also prepared a ready-made pack of trust badges, featuring both individual badges and banners with multiple badges. You can either use our pre-designed pack or create your own custom badges to suit your needs.
See the example of trust badges on Product Page

and on Shopping Cart Page

GraphQL Requests Examples
Request for banners:
 query {
  amPromoBanners(
    uid: "NA==",
    cartId: "Your cart id string",
    pageType: "category"
  ) {
       position
       items {
          ruleId,
          ruleName,
          productLineNumber,
          positionInProductRow,
          afterProductNum,
          nProductWidth,
          bannerType,
          productIds,
          image {
            image
            link
            title
          },
          cmsBlockIdentifier,
          htmlText,
          priority
       }
    }
}
Request to receive module configurations:
query {
  storeConfig {
    amasty_promo_banners_single_per_position,
    amasty_promo_banners_product_container,
    amasty_promo_banners_product_item,
    amasty_promo_banners_max_banner_width
  }
}
Storefront Examples
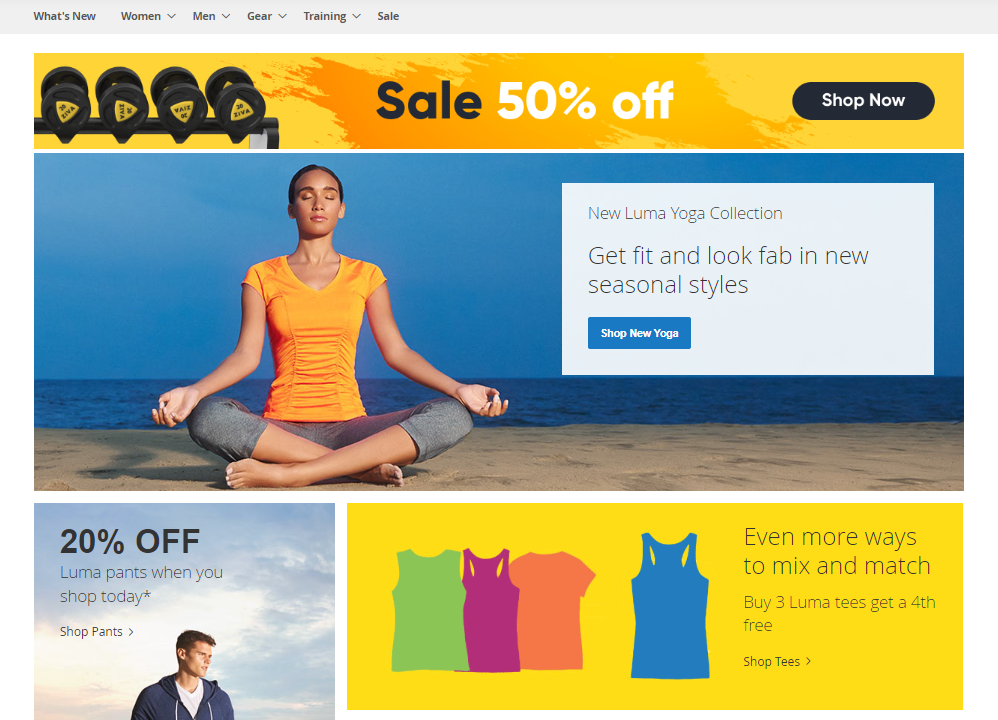
Promo banner at the Home page
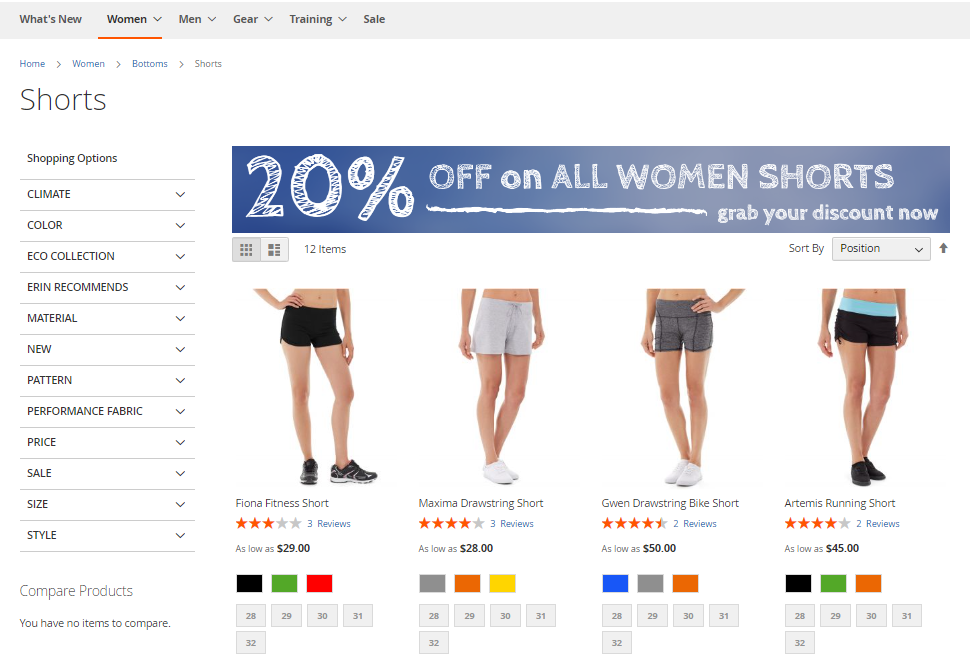
Promo banner at the Category page
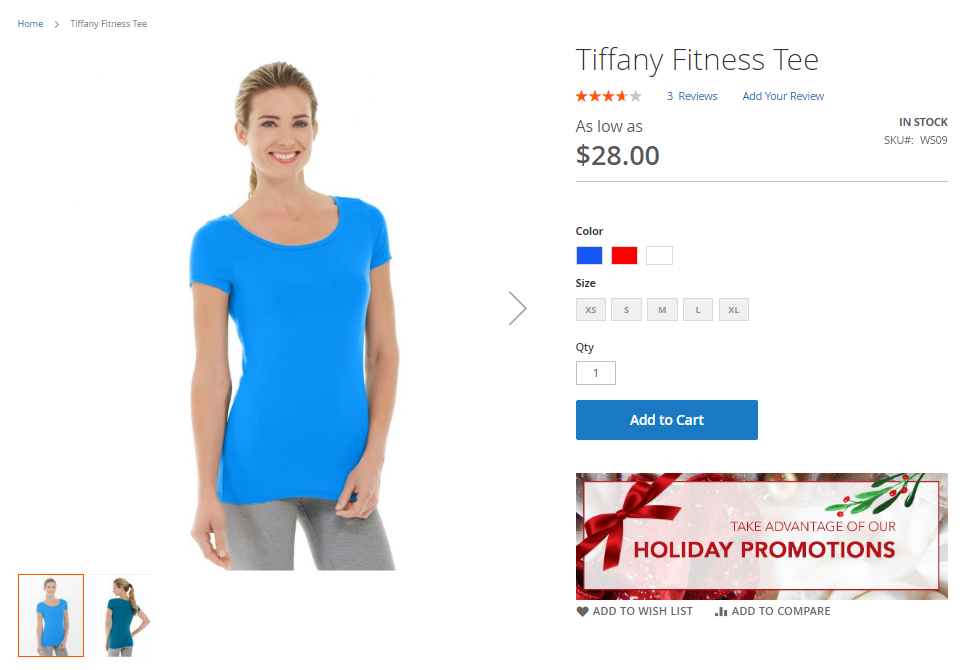
Promo banner at the Product page
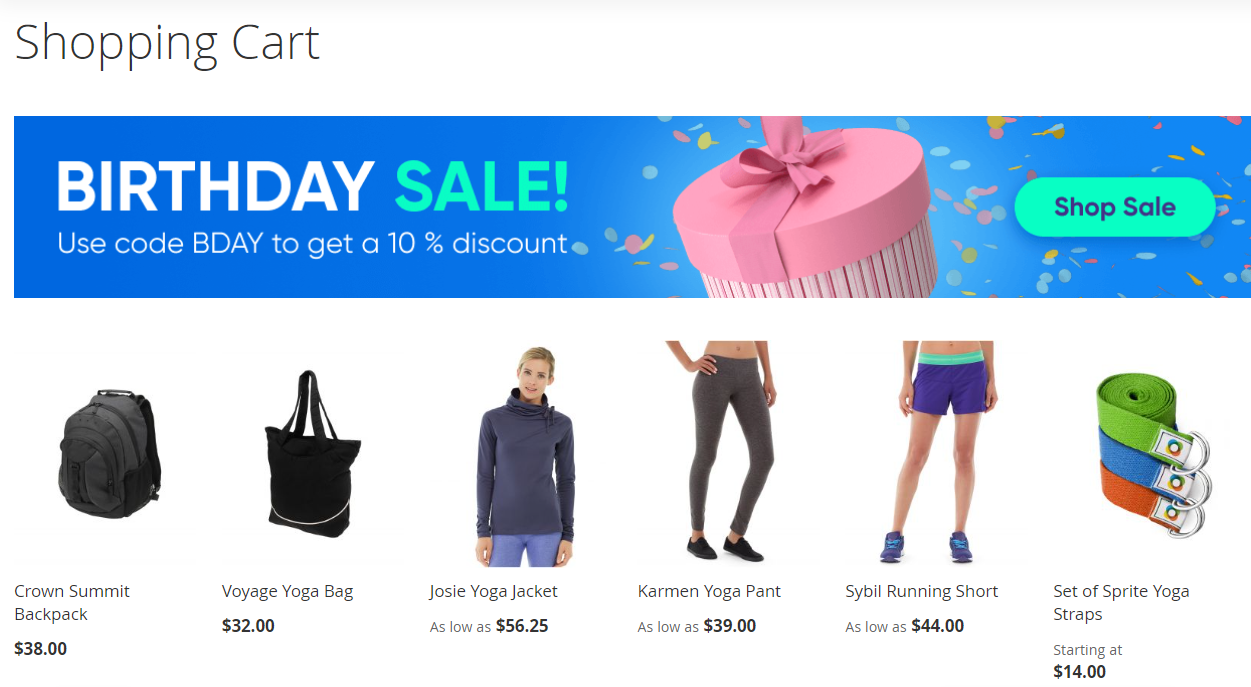
Promo banner at the Shopping Cart
Find out how to install the Promo Banners extension for Magento 2 via Composer.
magento_2/promo-banners.txt · Last modified: 2025/03/12 14:27 by avronskaya