
Sidebar
magento_2:affiliate
Table of Contents
For more details see how the Affiliate for Magento 2 extension works.
Guide for Affiliate for Magento 2
Magento 2 Affiliate extension lets store admins run full featured affiliate programs to effectively drive sales from additional channels. Due to the module, administrators will be able to provide affiliates with ready-to-use promo materials and detailed stats reports. Clear settings ensure easy affiliate accounts management, let store admins regulate commissions and track withdrawals.
- Run multiple affiliate programs at a time
- Configure commissions for each particular program
- Set up discounts and payout requirements
- Easily upload promo materials
- Manage affiliate accounts and transactions
Explore our internal Knowledge Base to gain even more valuable insights and uncover answers to popular questions about the configuration and features of the Magento 2 Affiliate extension.
The Affiliate extension is now compatible with the Hyvä Theme and Hyvä Checkout. You can find the 'amasty/module-affiliate-hyva' package for installing in composer suggest (Note: this compatibility is available as a part of an active product subscription or support subscription).
Configuration Settings
To configure general extension settings please go to Stores → Configuration → Amasty Extensions → Affiliates.
We refactored the extension's codebase to ensure maximal performance and improved stability with the latest Magento versions. Legacy code which was used for legacy Magento versions support has been removed. Now the extension is compatible with Magento v2.3.1 and higher. Please, be careful when updating the module, if your Magento version is older than v2.3.1
General Settings
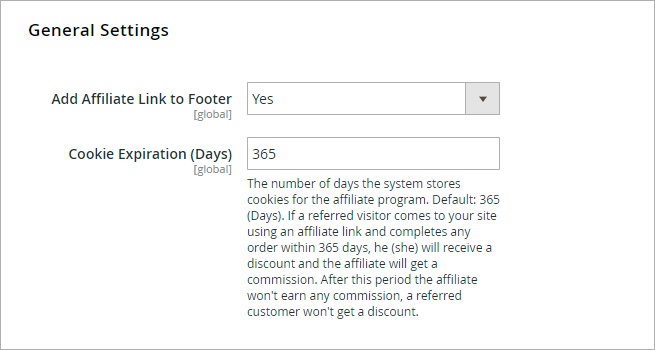
Add Affiliate Link to Footer - enable this option to add a link to the Affiliate landing page to your store footer.
Cookie Expiration (Days) - Specify a custom cookie expiration period. By default, it's set to 365 days. It means that once a customer comes to a publisher's website using an affiliate link, the store page creates a cookie. If a referred visitor comes to your site using an affiliate link and completes any order within 365 days, he (she) will receive a discount and the affiliate will get a commission. After this period the affiliate won't earn any commission, a referred customer won't get a discount.
Hide Sign Up Block for - this setting determines which customer groups can join the Affiliate Program by signing up through the Affiliate Program block. By configuring customer groups, the admin can also restrict the ability to send requests to join the Affiliate Program. Current affiliates continue to have access to the Affiliate Program as usual.
Please note, the functionality of Hide Sign Up Block for is available as part of an active product subscription or support subscription.
Account

Affiliate Approval Mode - is defined by 2 variants:
- Automatically - is a default setting;
- Manually - newly created affiliate accounts are approved by the administrator on the Affiliate Accounts grid. Manual Approval mode also have 2 statuses: Pending Approval and Rejected.
Please note, the functionality of Affiliate Approval Mode is available as part of an active product subscription or support subscription.
Please note While choosing Manually Approving Mode - all affiliate accounts that were created recently located in “Pending Approval” status on the Affiliate Accounts grid.
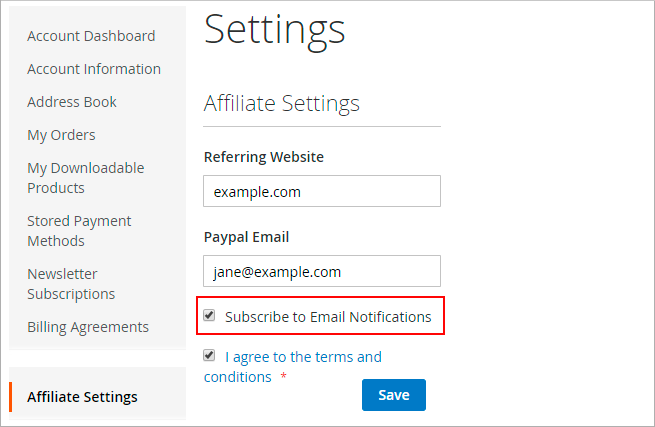
Checked “Email Notifications” by Default - If the option is enabled, the “Email notifications” subscription will be automatically checked in the affiliate account.
See the example below:
Add Program Description to Affiliate Account - the specified text will be displayed on the front in Affiliate Programs tab.
Affiliate URL Settings
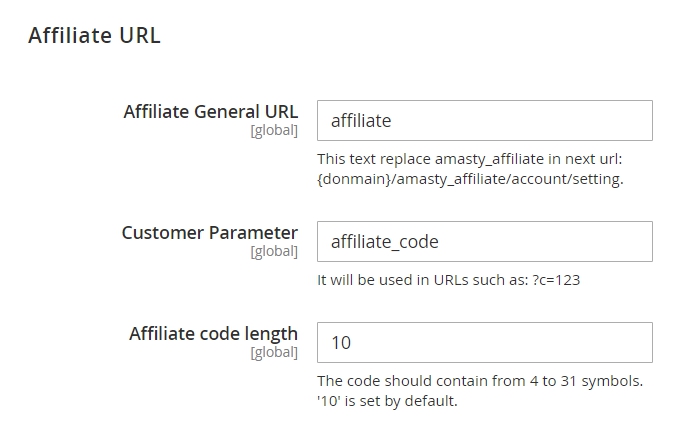
Affiliate General URL - Specify the custom text that will replace amasty_affiliate in the URL of the customer account.
Customer Parameter - Specify the code that will be used in URLs such as: ?c=123
Affiliate code length - The code should contain from 4 to 31 symbols. '10' is set by default.
Commission Workflow
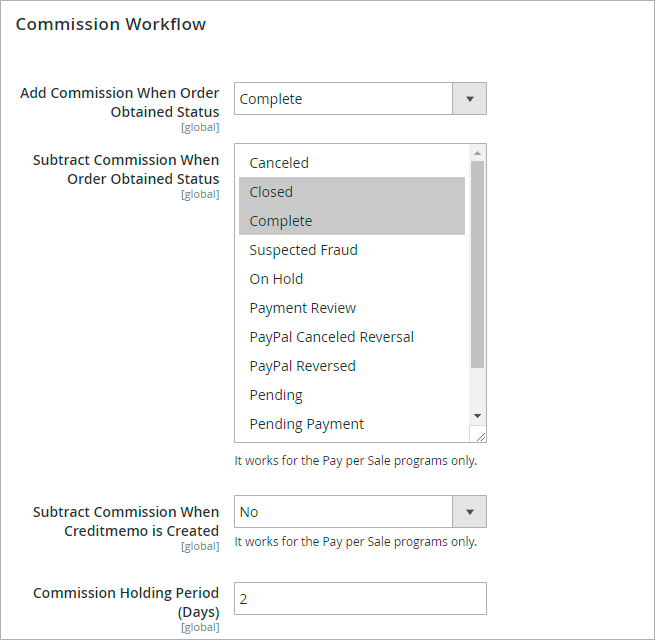
Add Commission When Order Obtained Status - Choose the order status that will trigger adding an affiliate commission.
Subtract Commission When Order Obtained Status - Choose the order status that will trigger commission subtraction.
Subtract Commission When Creditmemo is Created - enable this option for Pay Per Sale programs only when a Creditmemo is created.
Commission Holding Period (Days) - Specify the commission 'on hold' period after which the commission will be added to the affiliate's balance. While the commission in on hold it can't be used for withdrawal requests.
Commission Configuration
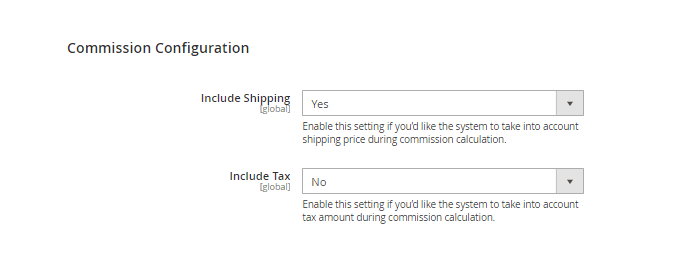
Include Shipping - Enable this setting if you’d like the system to take into account shipping price during commission calculation.
Include Tax - Enable this setting if you’d like the system to take into account tax amount during commission calculation.
Withdrawal Configuration
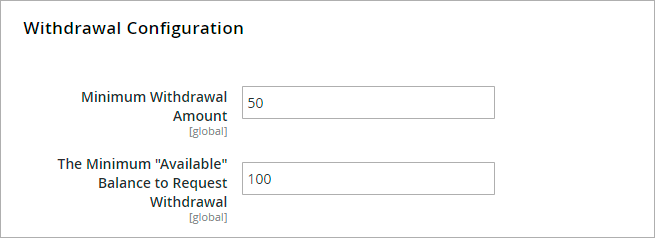
Minimum Withdrawal Amount - Set the minimum amount that can be specified by an affiliate within one request. E.g. if the amount equals to 50, affiliates can't request withdrawals lower than the specified amount.
The Minimum “Available” Balance to Request Withdrawal - If an affiliate balance is lower than the specified amount, he/she won't be able to request any withdrawals.
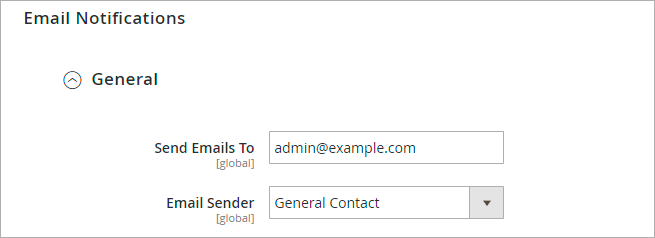
Email Notifications
In this section you can easily activate different email notification types for affiliates and store admins. If you want to edit ready-to-use templates or create a new one please go to Marketing → Communications → Email Templates.

Use this section to specify where to send emails to and the source for the email sender.
Please note that the functionality of Sign Up is Rejected is available as part of an active product subscription or support subscription.
 Use this section to choose what kind of emails will be sent to affiliates and pick relevant templates for them.
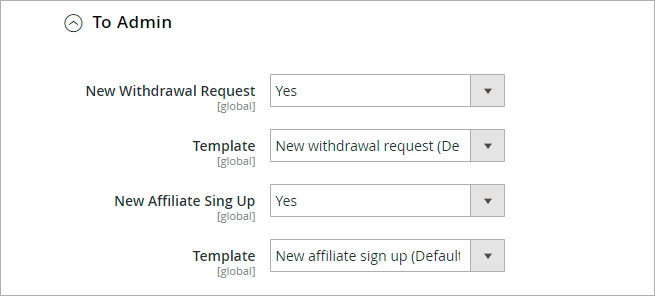
Use this section to choose what kind of emails will be sent to admin users and pick relevant templates for them.
Refer Friends Settings
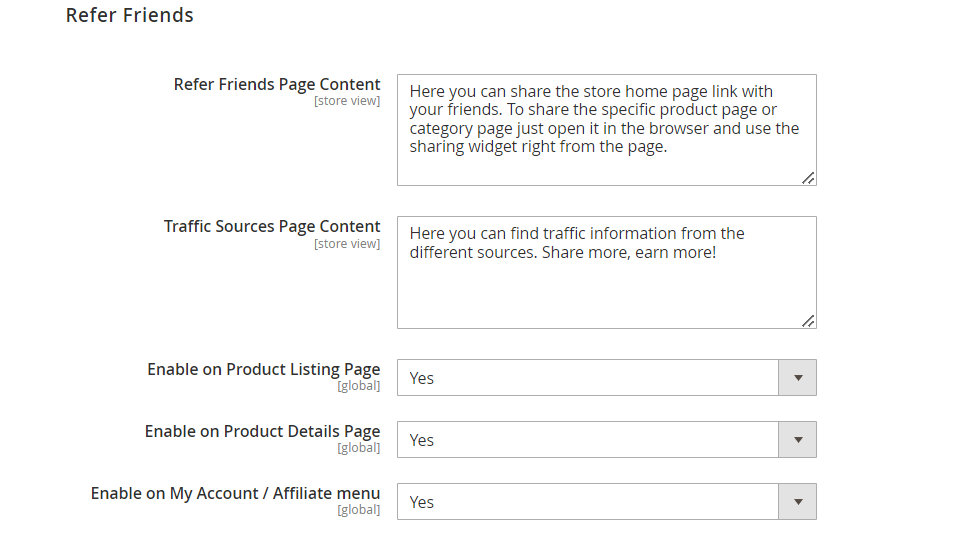
Refer Friends Page Content - Specify a custom text that will be displayed on the affiliate account page in the corresponding tab.

Traffic sources page content - specify a custom text that will be displayed in the customer account page for the 'Traffic Sources' tab.
Enable on Product Listing Page, Enable on Product Details Page, Enable on My Account / Affiliate menu - all these settings are used to display the social buttons for registered affiliates on store pages.
Terms and Conditions
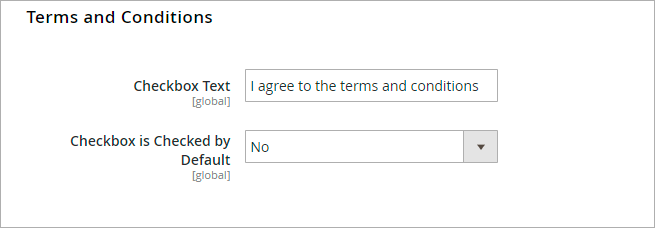
Checkbox Text - the Terms and Conditions checkbox is displayed in the affiliate account registration page. Here you can specify a custom text that will be placed with the checkbox.
Checkbox is Checked by Default - Choose whether the Terms and Conditions checkbox will be checked by default.
Manage Programs
To edit or create affiliate programs go to Marketing → Affiliate → Manage Programs.
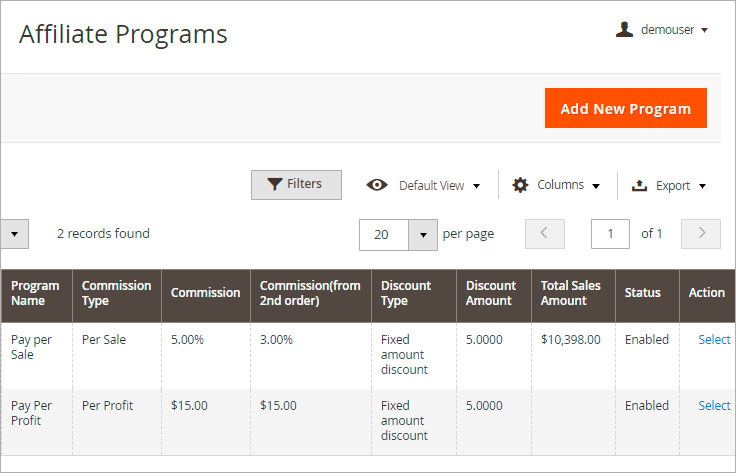
Affiliate Programs - on the affiliate programs grid store admins will see all already created programs. It's also possible to view the details of each particular program. To add a new program please click the Add New Program button.
Create a New Program
General Information
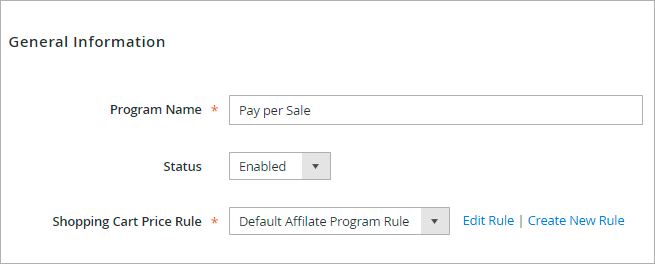
Program Name - Specify a program name that will be used in the admin panel as well as shown in an affiliate account.
Status - enable/disable the program.
Shopping Cart Price Rule - The module uses the standard Magento shopping cart price rules to let you set discounts for referral customers. It's possible to use a different rule for each new affiliate program. You can use and edit either the default rule or create a new one. Pay attention that only those rules will be available, where the option Coupon is set to Specific Coupon and the Use Auto Generation option is enabled.
While creating a new rule, please, use Specific Coupons and enable the Use Auto Generation option. The module doesn't support rules with coupons specified manually.
Comission Configuration
If the commission type is percent, its value is dynamic and based on the store profit margin (order total after discount, before taxes). If the commission type is fixed, its value is always static.
Please note that the functionality of Affiliate mode commission is available as part of an active product subscription or support subscription.

Affiliate Mode - includes 2 options. Select the option that needed:
- Constant commission - set as default;
- Tier Commission.
Using Tier Comission, admin can set commissions for different affiliate groups.
Pay Commission- The module offers two commission variants:
- Pay Per Sale - an affiliate will get a commission from each order made by their referral.
- Pay Per Profit - an affiliate will get a commission from the particular orders value. For this type, you need to specify Amount Pay Commission setting. E.g. If an 'amount pay commission' equals to $500, the affiliate will receive the commission only when the overall orders amount becomes equal or higher than $500.
Commission Type - Use either Percent or Fixed commission type.
Commission Value - Specify the commission value.
Restrict Transactions to N Orders - Specify the number of orders the affiliate will earn the commission for with one shared coupon code or referral link. Enter the value more than 0 to use this feature.
Use different commission from 2nd order of a Customer - The module lets specifying a different commission starting from the 2nd order made by a referral. This option is available for the Pay Per Sale type only.
Keep paying commissions to the first affiliate - If the option is enabled, when a customer first buys products using the affiliate A's link but later makes purchases using the affiliate B's links, the transaction will still be counted for the affiliate A.
Commission Calculation
Please note that this configuration is applicable to the Percent Commission Type only.
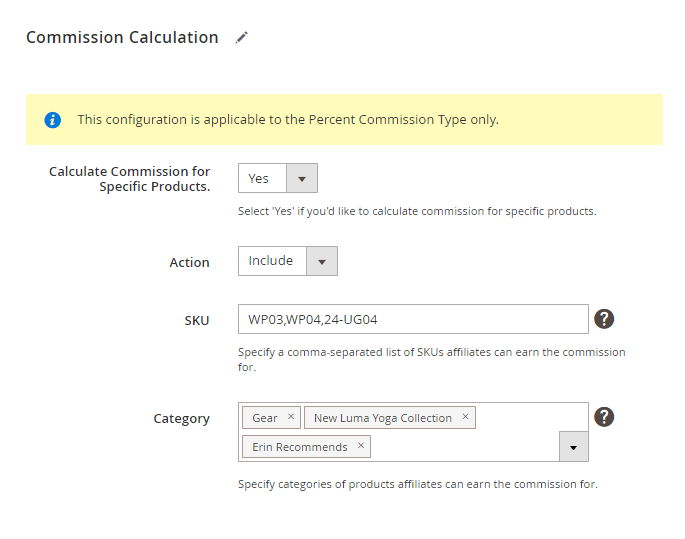
Calculate Commission for Specific Products - Select 'Yes' if you'd like to calculate commission for specific products.
Action - Include or exclude commission for the specific products (selected by SKU) or product categories. To specify them, please use the two more settings below.
Enter the details either in SKU or Category field to make this feature work. Otherwise, it'll be ignored and commission will be calculated for all products.
SKU - Specify a comma-separated list of SKUs affiliates can earn the commission for.
Category - Specify categories of products affiliates can earn the commission for.
Customers and Customer Group
Unless a particular Group (or Customer) is selected here, any Customer who is allowed to be an Affiliate may issue Coupons and Affiliate links related to this Program. Customers selected in Customers list will be allowed regardless of this program's Customer Groups configuration.
Does not affect which Customers may use Affiliate links and Coupons.
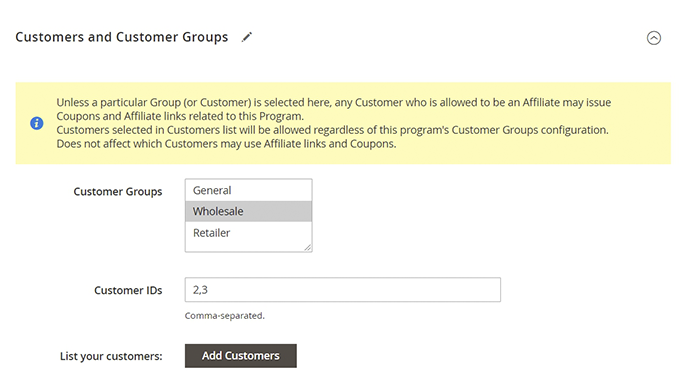
In the Customers and Customer Group tab store owners can adjust the program more precisely by adding certain customers of choice. It is highly helpful in cases when you want to promote top-performing affiliates and give them the perks of a more advanced tier of the affiliate program.
Customer Group - choose the main customer group, to which the newly created affiliated program will be applied.
Customer IDs - enter the IDs of specific customers that you want to allow using this program. In this field, you need to enter the IDs manually. Or, use the List Your Customers button Add Customers to open a pop-up window with a list of all customers.
This is an example of how the pop-up with a list of all customer looks like:
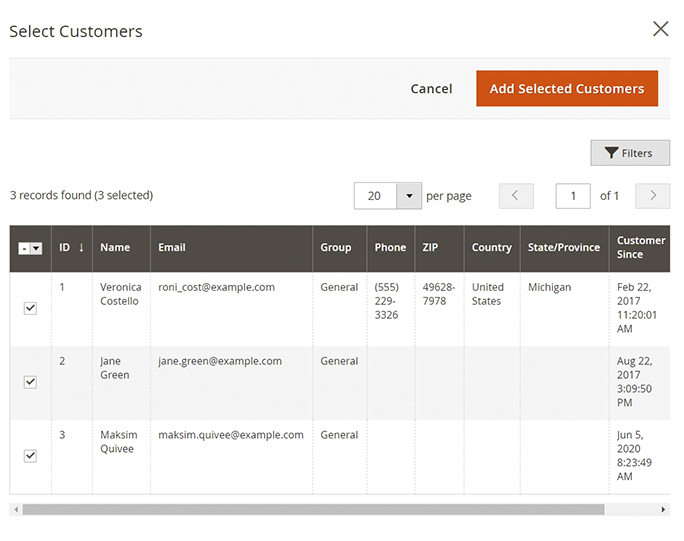
Select the customers whom you want to grant permission to use this affiliate program.
Kindly note that by adding customers in the Customers and Customer Group, the extension will allow them to use the specified affiliate program regardless of their customer group.
For example, you have User A in the general group with ID=352. User A brings lots of value to your store, as his referral links are popular and generate many purchases. You agreed to move User A to a more advanced affiliate program for wholesalers, named 'Special Plan'. To do that, simply go to the 'Special Plan' settings and enter the number '352' (User A's ID) in the Customer IDs setting of the Customers and Customer Group tab. Then, the affiliate program 'Special Plan' will appear in User A's customer account. But User A still will be a General group customer.
In case changes in Customer Group for affiliate-user or affiliate program settings led to the exclusion of affiliate-user from the affiliate program, the coupon codes generated for this affiliate will stop working.
Manage Groups
Go to Amasty > Affiliate > Manage Groups
Please note, the functionality of Manage Groups is available as part of an active product subscription or support subscription.

Name - Specify a group name that will be used in the admin panel to specify the affiliate groups.
Priority - set the priority of the group to determine the order of the groups in which customers can be included. Also, the customers may be included into several groups according to the conditions and then it will be determined by the priority of the groups.
Description - describe the new Affiliate Group.
Conditions - choose the conditions to define the customers that will be assigned to the group (don't add conditions if rule is applied to all customers).
Assigned Affiliates - in this table will display the customer's ID that falls under the conditions of the groups. This fieldset will display only after the admin saved all changes for groups.
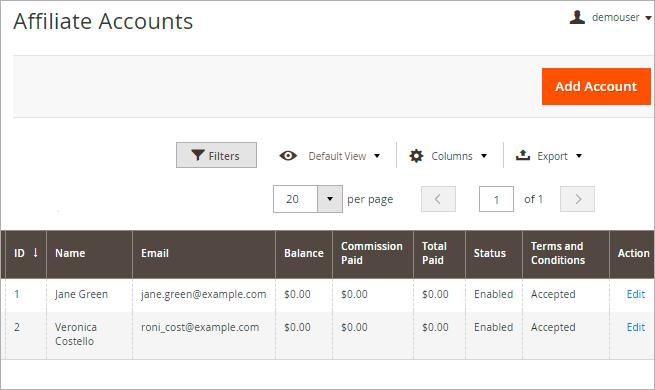
Manage Accounts
To create a new affiliate account from the admin panel or to manage already existing ones go to Marketing → Affiliate → Manage Accounts.
All the existing customers have the opportunity to create affiliate accounts. Let's see what the process is.
At first, a customer in his customer account should go to the Affiliate Settings tab and agree with Terms and Conditions.

Remember, that you can create affiliate accounts on the grid only after the customer agreed with terms and conditions in his customer account.
To add a new account click the Add Account button and fill in affiliate information like you usually do when creating a customer from the admin panel.
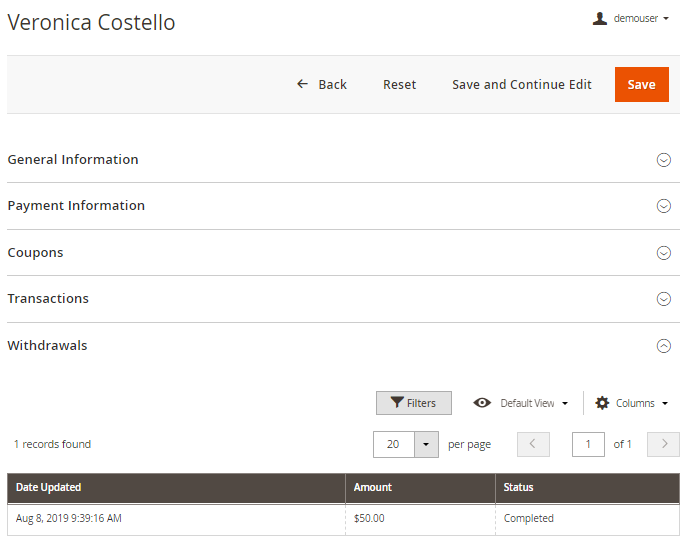
To see the details of a specific affiliate, please click the Edit link for the corresponding affiliate on the grid.
On each affiliate account page you'll find the following info:
- General Information

- Payment Information
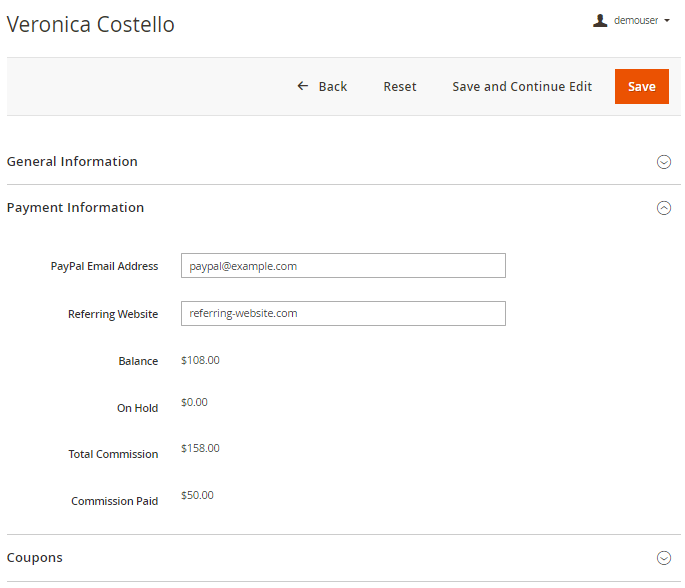
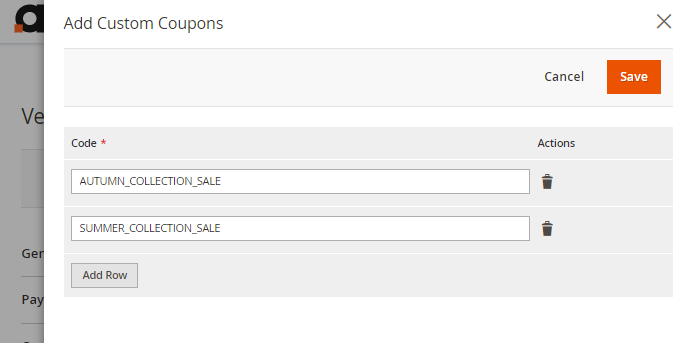
- Coupons
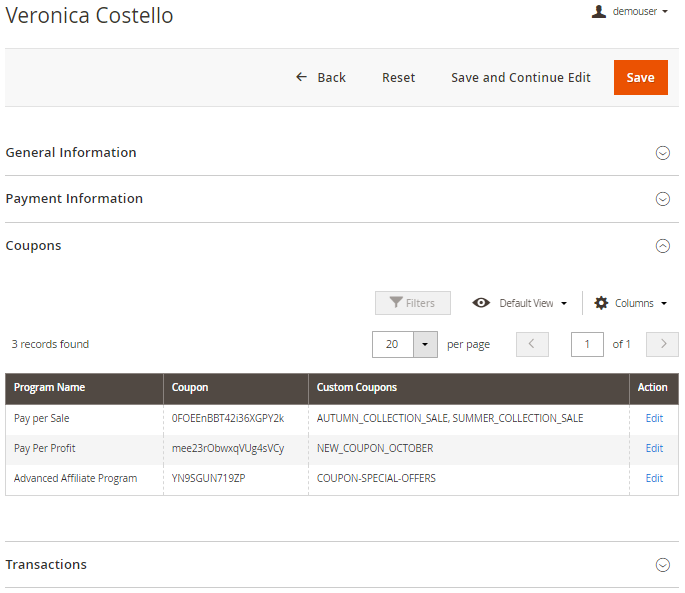
You may assign to affiliates as auto-generated coupon codes so custom ones.
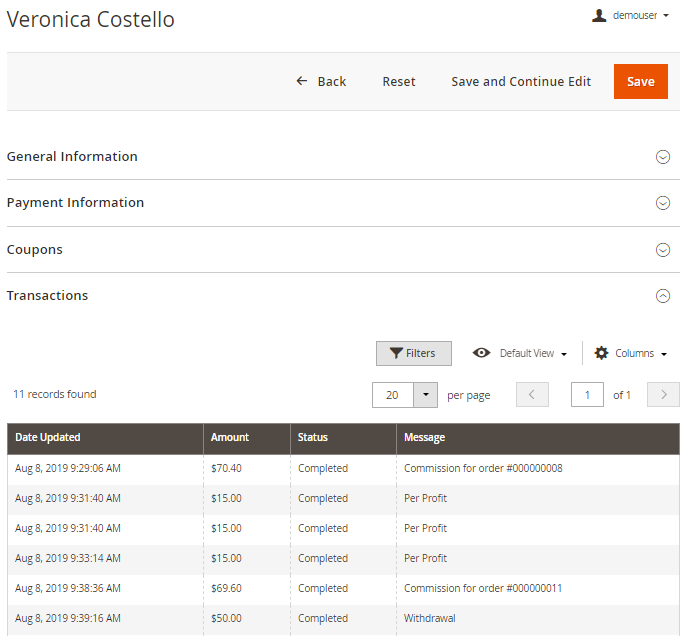
- Transactions
- Withdrawals
You can also enable or disable a customer's affiliate account: please, go to Customers → All Customers and click to edit the necessary customer's account. Then go to the Affiliate Account tab.

Disable the affiliate account if you want to remove the customer from affiliates. In this case, the customer receives a letter with a suggestion to contact the administrator.
Set Receive Notifications to Yes if you want the customer to receive notifications about the affiliate program.
Allow Setting Custom Affiliate Code - Select ‘Yes’ if you’d like to set a custom affiliate code that will be used in the referral links. Important! Referral links with the old affiliate code will become invalid.
Custom Affiliate Code - Use this field to update the default affiliate code with the custom value.
See how this will be displayed in Customer Account on the frontend for your customers:

Manage Banners
To manage affiliate banners or create a new one go to Marketing → Affiliate → Manage Banners.
There are 2 banner types:
- Image
- Text

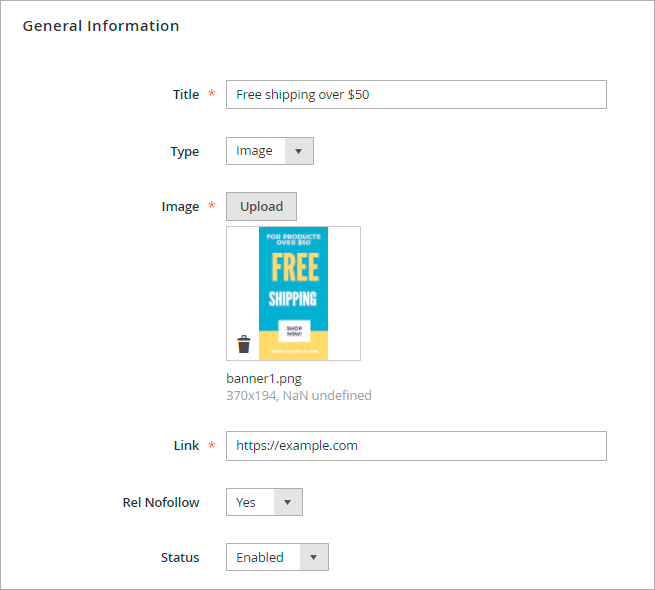
On the Manage Banners Page, you can edit already created banners or click the Add Banner button to upload a new one.
On the Banner Settings page you can upload a banner image (for the Image type), or specify a promo text (for the Text type).
Try this Magento 2 Data Feed Manager to easily provide your affiliates with data feeds that they need to deal with product-focused sites and merchandising tools.
Manage Transactions
To manage affiliate transactions go to Marketing → Affiliate → Manage Transactions.

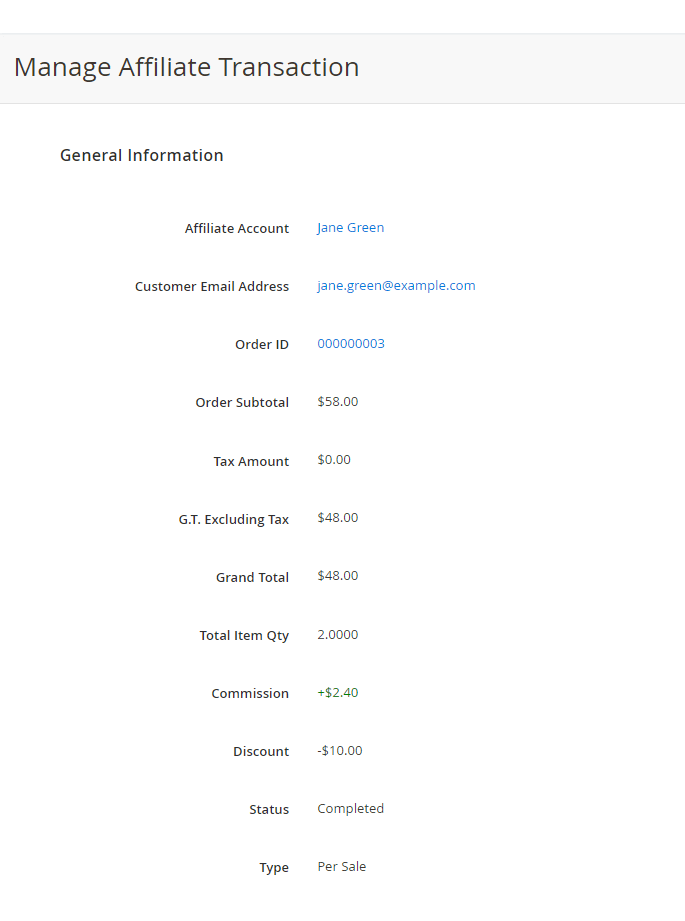
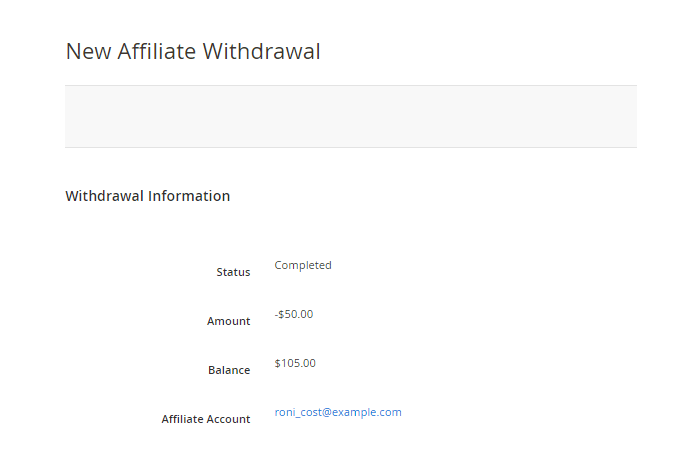
On the Manage Transactions grid, an admin user can see all affiliate transactions. To view the details of any particular transaction simply click the View link on the grid.
Below you can see the example of transaction details page:
Manage Withdrawals
To manage withdrawals please go to Marketing → Affiliate → Manage Withdrawals.
Now it is possible to Approve or Cancel Affiliate Withdrawals through mass actions (Please, note, this functionality is available as part of an active product subscription or support subscription).
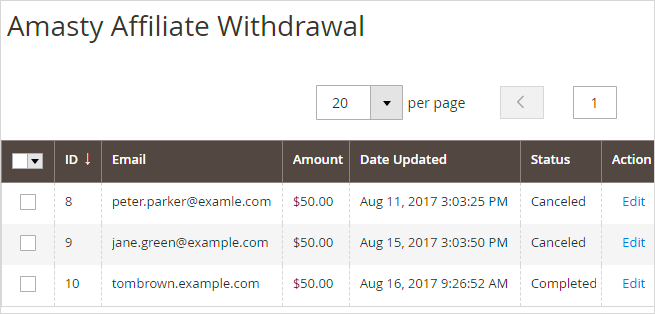
The module doesn't have any built-in payment systems, it only tracks and displays withdrawal details. Therefore, the affiliate commissions are paid with the help any methods or 3-d party services chosen by store administrators.
Affiliate Account
To become an affiliate a user needs to create a customer account on your website and then one the Affiliate Settings Tab.
Account Settings
To get subscribed to the affiliate program a user should fill in the form and click the Save button. The request doesn't require any confirmation. Once the form is saved, the user automatically becomes an affiliate and additional setting tabs appear in the account.
Affiliate Programs
Here an affiliate can view the list of all available affiliate programs. An affiliate automatically takes part in all active programs.

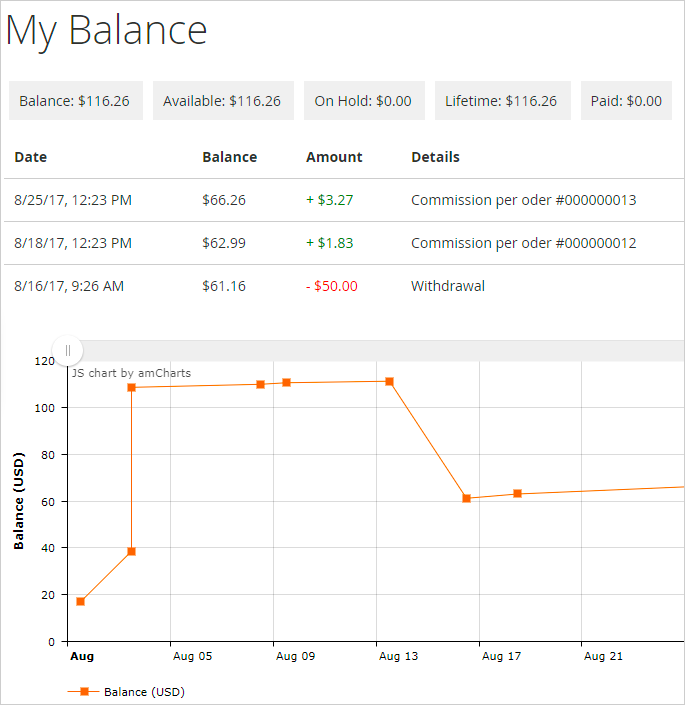
My Balance
In the 'My Balance' tab an affiliate will be able to check his/her current balance.
Promo Data
In this tab, an affiliate will be able to copy coupon codes and banners to run an affiliate program on his/her website.

An affiliate can use any of the banners from his/her account.

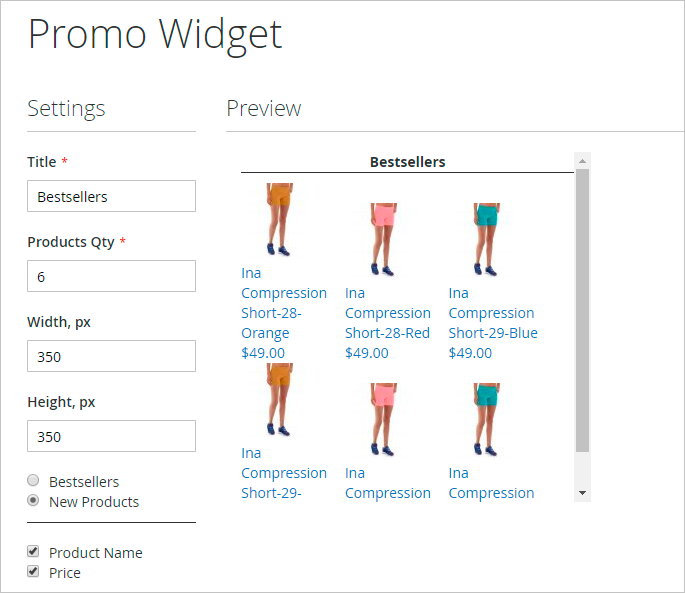
Promo Wdigets
It's possible to generate and edit promo widgets right in the account.
Traffic Sources
Affiliates can see a detailed report on traffic sources. The statistics show the number of successful purchases made, grouped by methods of affiliate link/coupon sharing.

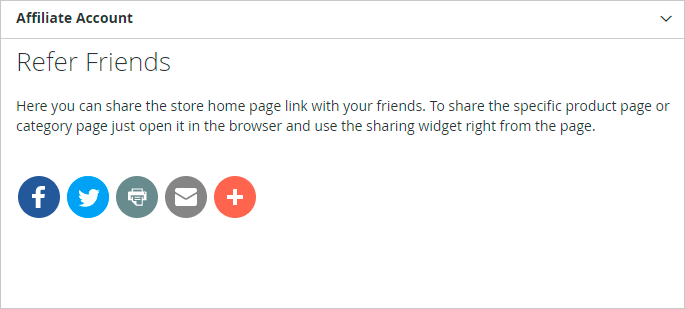
Refer Friends
Let affiliates share your store pages on social networks. All registered affiliates will be able to share any product and category pages as well as the store home page.
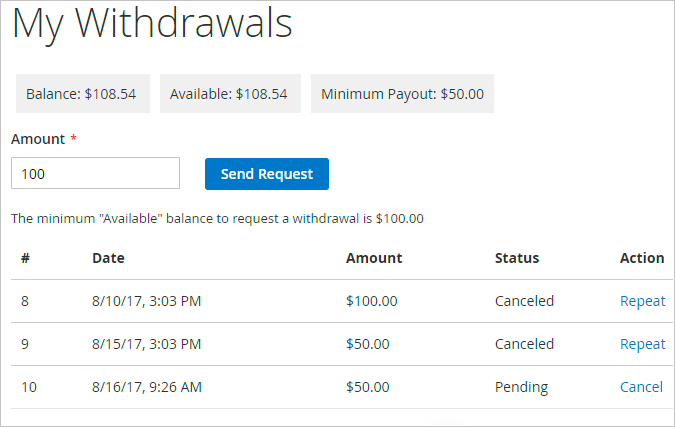
My Withdrawals
In the Withdrawals tab affiliates can see their withdrawals history and send new withdrawal requests.
Find out how to install the Affiliate extension for Magento 2 via Composer.
Integration with Custom Report Builder
We added compatibility with Amasty Custom Reports Builder extension. The 'Amasty Affiliate' entity is now available for report creation within the Custom Reports Builder module.
The compatibility is available as part of an active product subscription or support subscription.

- The compatibility is available with both modules installed;
- Install this package to enable this compatibility amasty/module-affiliate-to-builder-by-amasty ;
- For Amasty Affiliate Account, the Account ID will be pre-selected in the Chosen options, for Banner ID - Amasty Affiliate Banner, for Program ID - Amasty Affiliate Program, for Amasty Affiliate Sales Order - Entity ID;
- See it in action in Advanced Reports demo.
All fields mentioned above are essential and cannot be removed from the report, while the other fields can be customized based on business needs.
Additional packages (provided in composer suggestions)
To make additional functionality available, please install the suggested packages you may need.
Available as a part of an active product subscription or support subscription:
amasty/module-affiliate-to-builder-by-amasty- Install this package for compatibility with Amasty Custom Report Builder.
amasty/module-affiliate-tier-commissions- Install this package to use the multilevel commission functionality of the affiliate referral program.
amasty/module-affiliate-subscription-functionality- Install this package for compatibility with subscription features:- To enable mass action for Affiliates Withdrawals;
- To approve Affiliated manually ( Affiliate Approval Mode);
- To determine which customer groups can join the Affiliate Program by signing up through the Affiliate Program block.
amasty/module-affiliate-hyva- Install this package to ensure the Affiliate extension works with the Hyva Theme.
magento_2/affiliate.txt · Last modified: 2025/05/08 10:12 by avronskaya