
Sidebar
magento_1:smtp
Table of Contents
For more details see the SMTP Email Settings extension page.
Guide for SMTP Email Settings
Keep in touch with your customers! Increase the safety of your emails and the percentage of their delivery to the inbox.
- Avoid getting your emails into spam
- Manage the content of emails
- Timely reveal settings' mistakes with debug mode
- Preview email messages before their sending
- Delete logs automatically or manually when needed
- Lower denial of emails by using secure SMTP servers
Extension configuration
To configure the module settings, please, go to System → Configuration → Amasty Extensions → SMTP Email Settings.
General Settings
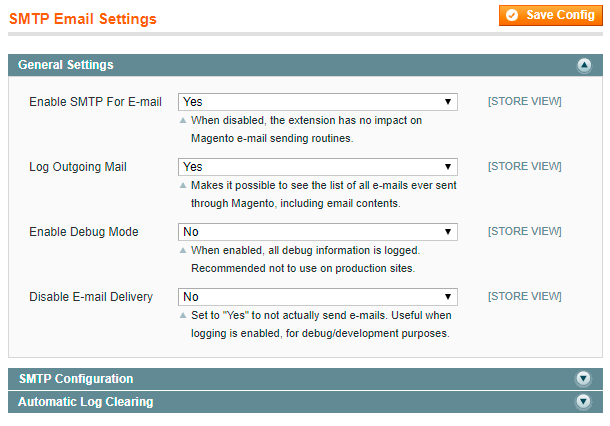
Enable SMTP For E-mail - set to No to disable the module and send emails with the standard Magento email functionality (via PHP). Set to Yes to enable all features of the module.
Log Outgoing Mail - enable the option to log all emails sent from Magento. Due to this, you will be able to view the list of the emails, including their contents.
Enable Debug Mode - switch the option to log all debug information. Such information will help you to avoid mistakes when configuring email sending settings. We recommend disabling debug mode when sending of emails works well.
Disable E-mail Delivery - set this option to Yes when you want to test the system. The gist is that the emails created won't be sent. At the same time, the system will add these emails to log so that you will see all debug information.
SMTP Configuration
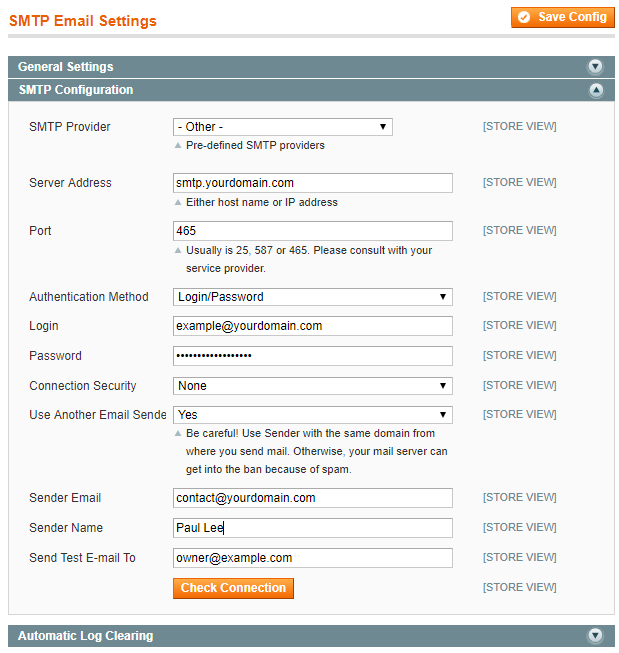
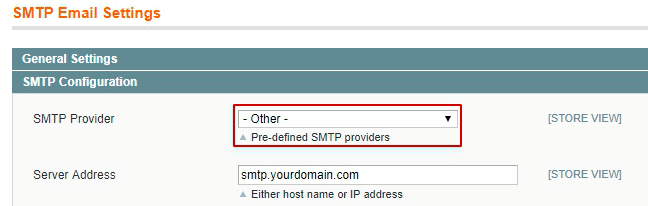
SMTP Provider - select a certain SMTP provider, click the Autofill button, and some other fields will be filled in automatically. If you own a server, select the value Other.
Server Address - define the hostname or IP address of the server.
Port - specify the port number in this field.
Authentication Method - disable if the authentication is not needed.
Login - specify the login for the authentication.
Password - define a password for your login.
Connection Security - specify the protocol for secure communication (click the Autofill button to fill in the field automatically).
When the SMTP Provider field is defined as Other, you have the ability to change the sender email.
Use Another Email Sender - set to Yes to replace the sender email. When set to No, the fields Sender Email and Sender Name are not available.
Sender Email - specify a new sender email. It will replace the original sender email.
Sender Name - give a name to a new sender.
Send Test E-mail To - enter the data to commit the test sending of email. Please click the Check Connection button to make sure that the setup works well. If the setup is correct, you will get the ‘Connection Successful’ message and receive a test email.
A little life hack: know how to replace an email sender.
The main reason to change the email sender is to avoid email overflowing. The feature is helpful when you want to keep your customers informed, but don't want to receive replies from them.
Fulfil some steps to make it work:
1. Set the value Other in the field SMTP Provider. This means that you are using your own SMTP server.
2. Enable the Use another Email Sender option. When the Sender Email and the Sender Name fields appear, provide them with necessary data. You can use either an existing email or a fake one, according to your needs.
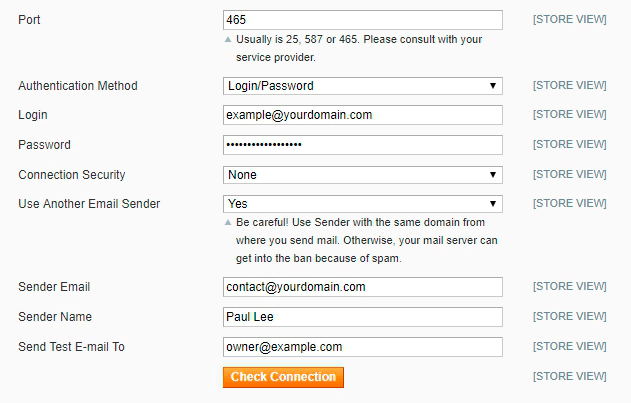
Use the same domain, from which you send the emails. If the domains differ, your mail will be labelled as spam and your mail server will get into the ban.
Automatic Log Clearing
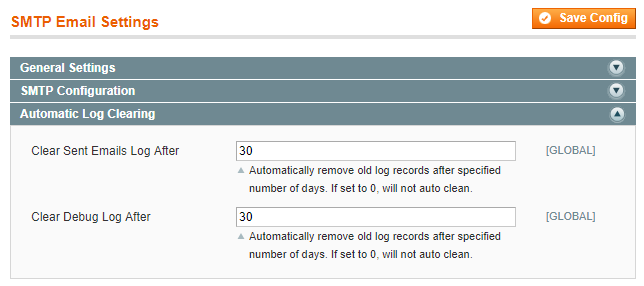
Clear Sent Emails Log After - specify the number of days after which the sent emails log should be removed automatically.
Clear Debug Log After - determine the period (in days), after which the debug log should be deleted.
Specify the value “0” in these fields to disable the options.
Sent Emails Log
You can see the list of sent emails in Admin Panel → System → Tools → SMTP Sent Emails Log. Please remember, that you can see the list of emails sent only when the extension is enabled and setup correctly.
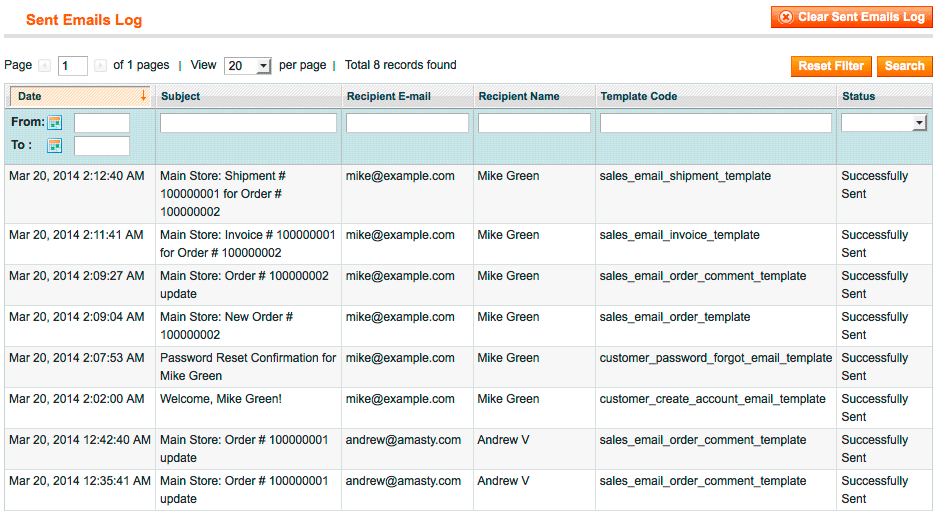
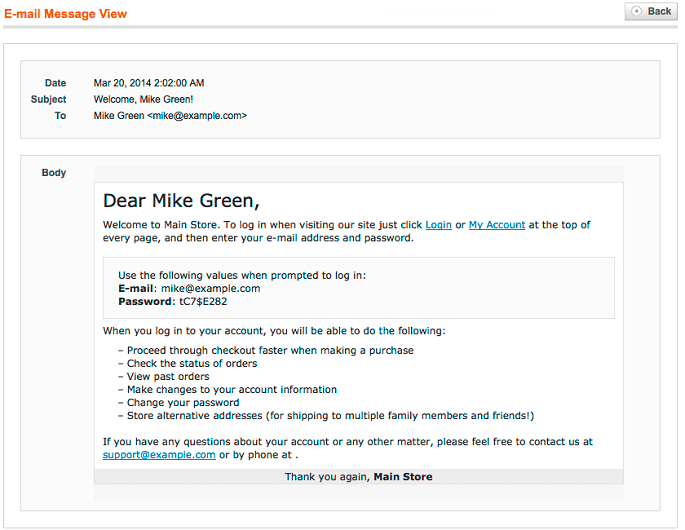
The log contains the next information: the email subject, the full list of email recipients, the email template used and the result of email sending (if the email was sent successfully). Just click the email to see its content.
See the example of the email's view below.
Debug Log
To see the extension debug log, please, go to System → Tools → SMTP Debug Log. The log is recorded only when the Debug Mode is enabled in the configuration section.
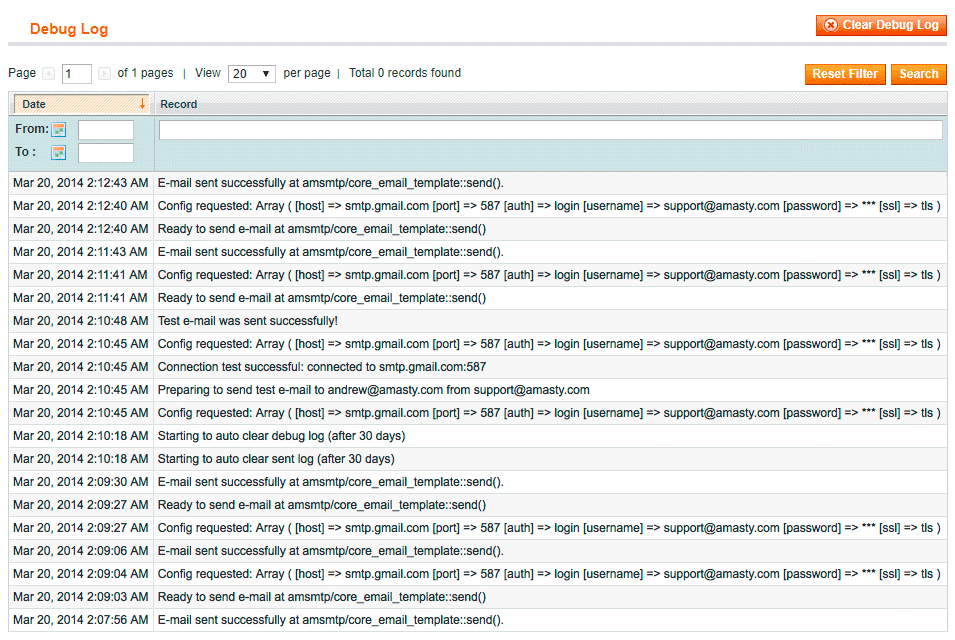
Detect the mistakes committed while configuring the settings. The data displayed will help you to setup the module correctly.
What is SPF record and how to configure it
Please be aware that it is not mandatory to setup SPF record, however doing so you will increase the chance of email delivery.
Sender Policy Framework (SPF) is an email validation system created to prevent email spam in the Internet by detecting email spoofing (creation of emails with forged sender addresses).
SPF technology consists of two parts
- SPF-record in DNS (Domain Name System) zone of your domain;
- email server component of the message recipient or the component of its spam combating system;
SPF record is configured by email sender. It contains information about the servers that are allowed to send emails from your domain name.
Although SPF record is optional, today due to the spam issue most email servers may refuse to accept your email without this record or mark it as suspicious or unwanted.
How to set SPF record for your own SMTP server
If you use your own email server to send emails for your domain (below we use the example.com domain for demonstration) that has IPv4 address xxxx, the SPF record will look like this:
example.com. IN TXT “v=spf1 a mx ip4:x.x.x.x ~all”
example.com. IN SPF “v=spf1 a mx ip4:x.x.x.x ~all”
If your server has more than one IPv4 address, you can list them like that: “v=spf1 a mx ip4:x.x.x.x ip4:y.y.y.y ip4:z.z.z.z -all”.
If you use IPv6 addresses, the record will be: “ip6:xx:yy::zz”, where “xx:yy::zz” is the IPv6 of your email server. In this example, the SPF record allows sending emails for the example.com domain from the IP address specified in the «A» record of the example.com domain (a), mail-exchangers of the example.com domain (mx) and from IP address x.x.x.x (ip4:x.x.x.x). The recipient’s server will make the decision whether to mark as spam emails from other senders (~ all).
To restrict sending emails from senders not listed in the SPF record, you can use the -all option instead of ~all. However, in case there are any inaccuracies in your settings you risk to restrict receiving of your mail. Therefore, use this option only if you are sure that all your settings are correct.
How to set SPF record for Google Apps
If you use Google Apps service to send emails for your domain, the SPF record settings will be slightly different.
The addresses of the email servers that are used by Google Apps can vary and consequently you’ll have to enable Google Apps SPF configuration.
In case you use Google Apps to receive emails, but send emails using your own SMTP server you need to specify it in the SPF record:
example.com. IN TXT “v=spf1 a mx ip4:x.x.x.x include:_spf.google.com ~all”
example.com. IN SPF “v=spf1 a mx ip4:x.x.x.x include:_spf.google.com ~all”
If you use Google Apps Service both for sending and receiving emails, the SPF record will be the following:
example.com. IN TXT “v=spf1 include:_spf.google.com ~all”
example.com. IN SPF “v=spf1 include:_spf.google.com ~all”
Learn more about SPF settings here.
magento_1/smtp.txt · Last modified: 2019/07/22 13:56 by skudrov