
Sidebar
magento_1:sales_reps_and_dealers
Table of Contents
For more details see the Sales Reps and Dealers extension page.
Guide for Sales Reps and Dealers
Benefit from a wide network of sales reps and dealers. Assign customer groups to a particular sales reps and dealers to let them manage only their part of your store audience. On top of that, the extension provides you with a convenient set of tools to control sales reps and dealers.
- Distribute customers between sales reps and dealers
- Allow reps to manage orders only for their customers
- Assign individual dealers to important customers
- Control your sales reps and dealers using built-in tools
Extension Configuration
First of all you need to create a user role for sales representatives and dealers. Navigate to Admin panel → System → Permissions → Roles and press the Add New Role button.
Raise customer service and shopping experience to the new level with the return merchandise authorization system to establish the efficient RMA request process.
Then, specify the role resources.
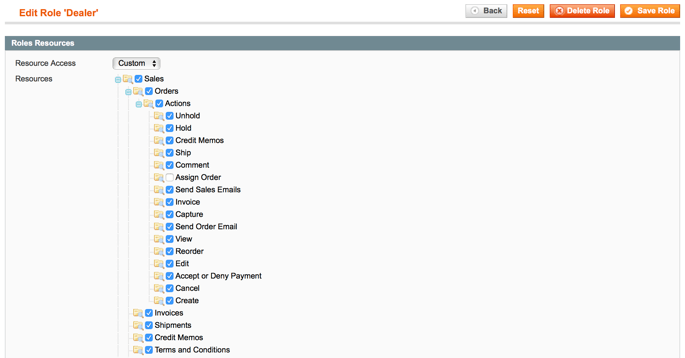
When specifying the role resources, please be aware that our extension works only for orders and customers and its restrictions apply to ‘Orders’, ‘Invoices’, ‘Shipments’, ‘Credit Memos’ and ‘Customers’ sections. You can assign other resources to the role, however they will not be restricted.
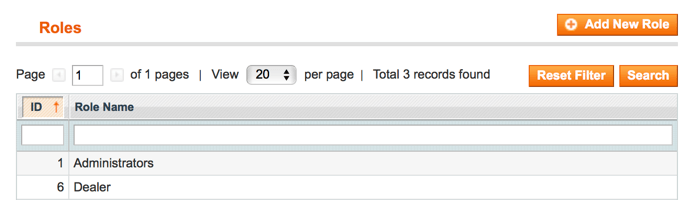
After you’ve created the new role, please see what ID it has and proceed to the next step.
General settings
Go to System → Configuration → Sales Reps and Dealers. Fill in the ID of the role in the Role ID field and save configuration. You can specify more than one role for sale reps and dealers.
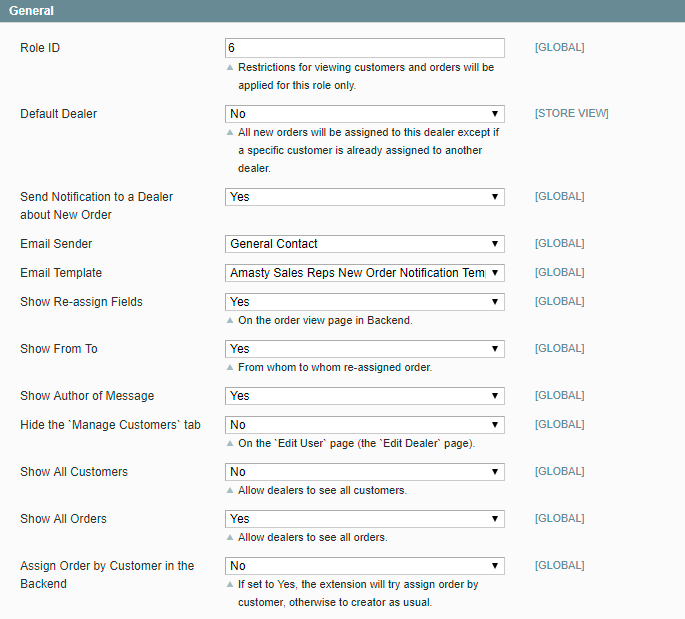
Also, from here you can configure the following settings:
Default Dealer — set the default dealer to assign all new orders to. Excepting the cases when a customer is already assigned to another dealer;
Send New Order Email to the Dealer — enable this option to send a copy of the order email to the associated dealer;
Show Re-assign Fields — enable this option to show this field on the order view page in backend;
Show From To — enable this option to display from whom to whom the order was re-assigned.
Show Author of Message — activate to show the author of message;
Hide the `Manage Customers` tab — enable to hide the edit user page;
Show All Customers — enable this option to show all customers;
Show All Orders - select Yes to let dealers see all orders;
Assign Order by Customer in the Backend — set to Yes to try assigning order by customer, otherwise the order will be assigned to creator as usual.
Create users for the role
Next, navigate to System → Permissions → Users to create users for the role.
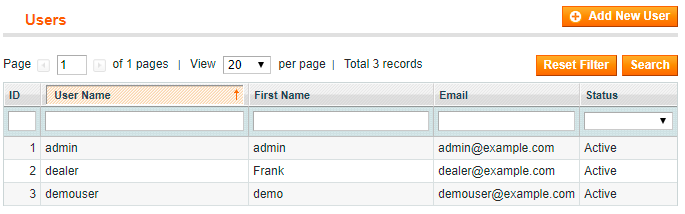
Hit the Add New User button and fill in the required User Info. Then, on the User Role tab assign the user to the role and save the user.
Assign customers to the users
Edit the created user once again to see new tabs added by the extension.

At the Manage Customers tab you can assign customers to the user.
The user will be able to see only these customers on the ‘Manage Customers’ grid, only orders placed by these customers on the order grid and documents (invoices, shipments and credit memos) related to orders of these customers.
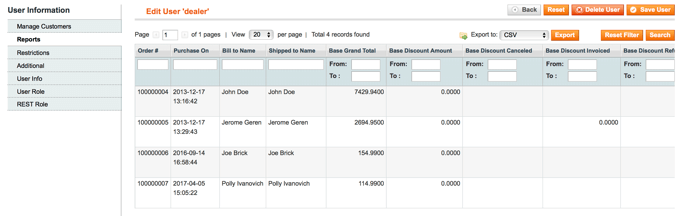
At the Reports tab you can see the list of orders placed by customers assigned to this user.
It is possible to filter and sort orders on this grid. So, for example, if you pay commissions to sales reps/dealers based on complete orders, you can filter the list to show only complete orders.
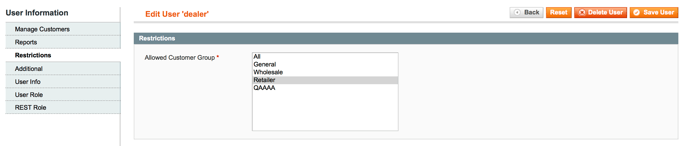
At the Restrictions tab you can assign the user to a particular customer group.
By default users are assigned to all customer groups. If you assign a user to a certain group, he or she will be able to add customers only to this group.
Hence, when being logged in as a dealer and tried to create the order for any customer assigned to you, you‘ll be able to specify only the customer group set by the store administrator.

At the Additional tab you can specify additional info about the dealer/sales rep. The info will be displayed to assigned customers on the checkout page as well as on the customer account page.
This info can be added and edited only by a store admin user.
Log in as a dealer
When logged in as a dealer, all customers created by the user from the admin panel are automatically assigned to this user. Also, it is possible to filter ‘Not Assigned’ dealers on customer and order grids.
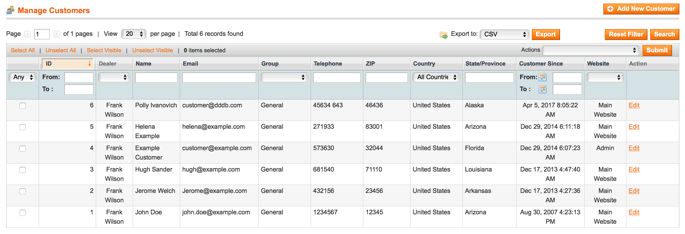
On the Manage Customers page you can see only customers assigned to this user.
When creating an order from the admin panel, sales reps and dealers can only create orders for customers that are assigned to them.
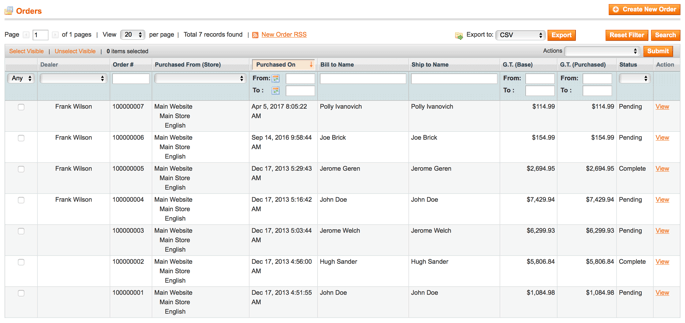
The Dealer column is added to the order grid, so the main admin can see which orders are assigned to what dealers, filter and sort orders by dealers.
Reassign dealers to orders
To assign the order to dealer or to admin, please open Admin Panel → Sales → Orders → Information.
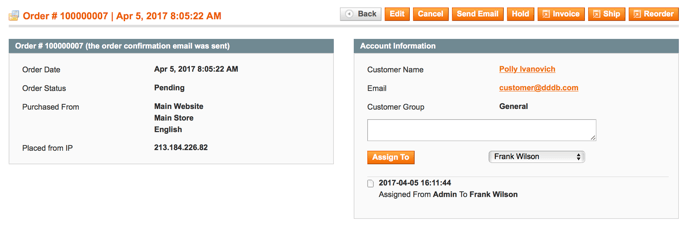
One can write a comment when assigning the order.
Reassignment notifications
Go to System → Configuration → Sales Reps and Dealers → Re-assigned Order Notifications to setup email notifications for reassignment of dealers.
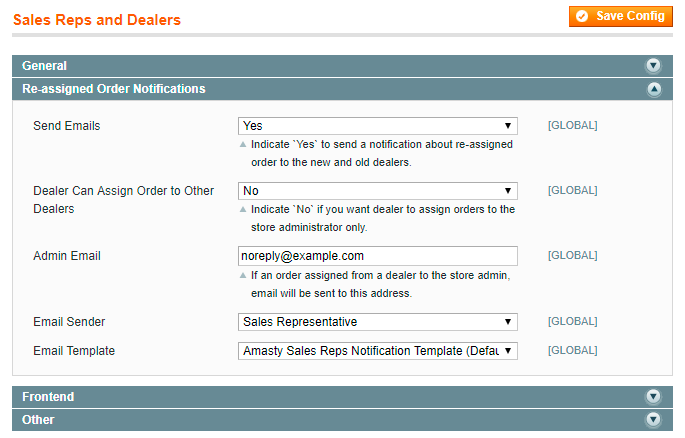
Send Emails — set to Yes to send notifications to both new and old dealer once an orders is reassigned;
Dealer Can Assign Order to Other Dealers — set to Yes to let dealers assign orders to the other dealers or No to assign orders to the store administrator only;
Admin Email — fill in the admin email;
Email Sender — specify the email sender;
Email Template — define the email template.
To make sure that customers know the name of their dealers you can add these variables to the email template:
{{var dealer.firstname}} {{var dealer.lastname}}
Assign customers to dealers
Admin user can assign customers to different dealers via mass action.
Go to Customers → Manage Customers, select multiple customers and choose the Assign to Dealer action from the dropdown menu.
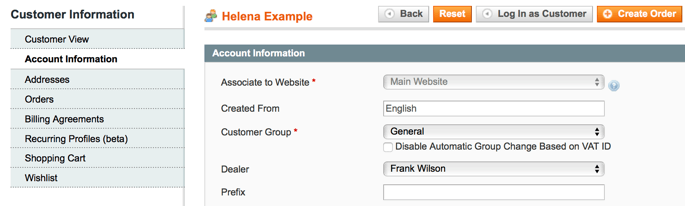
You can also select a dealer for the customer at the Account information tab of the Customer information page.
Additional extension settings

At the System → Configuration → Sales Reps and Dealers → Frontend section you can modify the frontend behavior of the extension. Enable or disable the following options to add or remove the appropriate functionality:
- Allow Customers to select a Dealer on Registration;
- Allow Customers to select a Dealer in Customer Account;
- Allow Customers to select a Dealer on Checkout;
- Show Dealer description at checkout;
- Show Dealer description in customer dashboard.
Find out how to install the Sales Reps and Dealers extension via Composer.
magento_1/sales_reps_and_dealers.txt · Last modified: 2019/07/25 14:58 by skudrov