
Sidebar
magento_2:google_map
Table of Contents
For more details see how Google Map extension works.
Guide for Google Map for Magento 2
Provide customers with the complete information about your store location by adding the free Magento 2 Google Map to the 'Contact us' and other CMS pages. Customize the map, make it informative, and enhance the user experience in your Magento 2 store.
- No coding skills needed
- Add the Google Map to the 'Contact us' page
- Equip any CMS-page with the Google Map
- Set the map position
- Configure the map look and size
Extension Configuration
To configure the extension, please go to Stores → Configuration → Amasty Extensions → Google Map and navigate to the General Settings section.
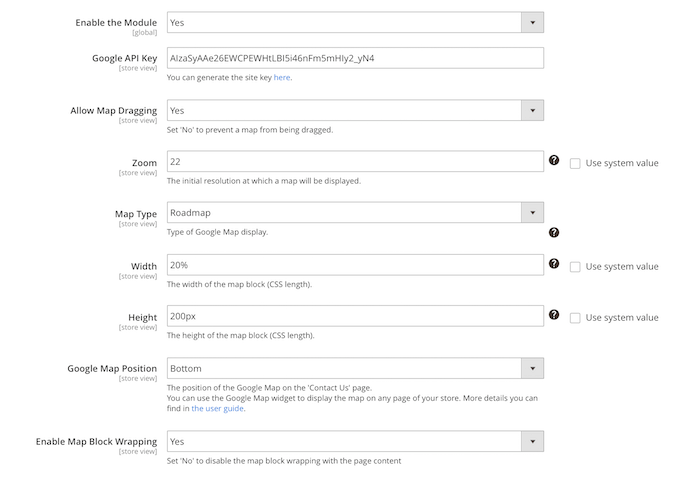
Enable the Module — set Yes to enable the module or No to disable it;
Google API Key — fill in the Google API key. This field is mandatory, so please follow this guide to get a key;
Allow Map Dragging — enable this option to let customers drag the map and navigate through it;
Zoom — define the default map scale. The more the value the closer the more detailed the map will be;
Map Type — select the map type between roadmap, satellite, hybrid, or terrain;
Width — specify the map width using the CSS-length (px, pt, em, ex, % are allowed);
Height — specify the map height using the CSS-length (px, pt, em, ex, % are allowed);
Please make sure to specify the correct value (px, pt, em, ex, %) after the numbers.
Google Map Position — choose the Google Map position (top or bottom of the 'Contact us' page) or enable the map only as a widget;
Enable Map Block Wrapping — enable this option to allow the map block wrapping with the page content.
Next, please expand the Location Marker Coordinates section.

Marker Address — fill in the full store address and hit the Request Latitude and Longitude from Google to automatically fill in the latitude and longitude values.
Please make sure that you completed the Marker Address and Google API Key fields.
Latitude — manually set the latitude value;
Longitude — manually set the longitude value.
Google Map as a Widget
Adding Widget to CMS-pages
With the module, you can add Google Map to any CMS-page as a widget
Please go to Content → Pages and select the page where you want to add a map. Then, expand the Content section. Hit the Show/Hide Editor button to display the editor and select the Insert Widget option from the toolbar.

From the Widget Type dropdown menu select the Amasty Google Map widget.
Next, you can click the Insert Widget button to use the default Google Map configuration from the General Settings or set up a separate map configuration.
In case you want to add an individual Google Map for one of the store pages please fill in all the fields below:
Title for Marker — information you want to display on the marker;
Map Width — specify the individual map width;
Map Height — specify the individual map height;
Map Type — define the individual map type;
Zoom — specify the individual zoom level;
Latitude — set the latitude value;
Longitude — set the longitude value;
Allow Map Dragging — enable or disable the ability to drag the map.
Click the Insert Widget button when you're finished the configuration.
Adding Title to the Map Block
If you need to add a title to your Google Map blog please do the following:
Navigate to Content → Pages and select the page where you want to add a title to the map. Then, expand the Content section. Hit the Show/Hide Editor button to display the WYSIWYG editor.
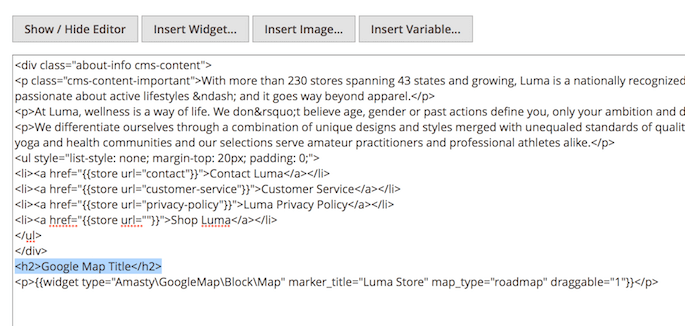
Fill in the desired title above the Google Map widget. Then, select the text and choose the format, for example Heading 2.

If you do not use the WYSIWYG editor, please fill in the title above the Google Map widget tags. Take a look at the example below:
Adding Widget to Layout
Google Map for Magento 2 enables you to add the widget to any layout without a reference to any specific page.
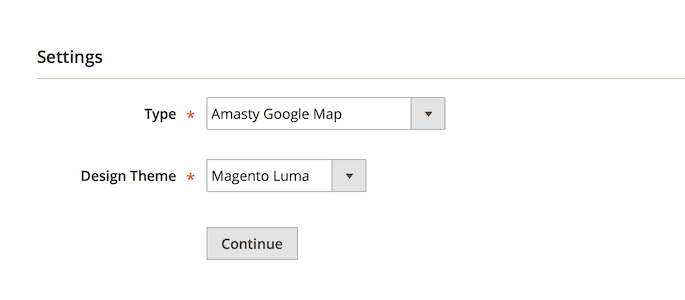
Please go to Content → Widgets and hit the Add Widget button.
Type — select the Amasty Google Map widget;
Design Theme — choose the required layout where you want to apply the widget to.
Click Continue when everything is set.

Then, fill in the Widget Title, define the Store View, and specify the Sort Order.
Finally, you need to hit the Add Layout Update button and select the appropriate place for the Google Map widget.
Find out how to install the Google Map extension via Composer.
magento_2/google_map.txt · Last modified: 2020/07/16 06:18 by tihomirova