
Sidebar
magento_2:security-suite
Table of Contents
For more details see how the Security Suite for Magento 2 extension works.
Guide for Security Suite for Magento 2
Apply full protection to your webstore with Magento 2 Security Suite. Easily control all backend activities and prevent possible security threats with one extension.
- Avoid hacker attacks, spam and bots
- Check your admins’ activities in a few clicks
- Append reCaptcha and two-step authentication
- Be aware of each suspicious login activity via notifications
- Set flexible user permissions
Configuration
To configure all security settings, go to Stores → Configuration → Amasty Extensions.
Google Invisible reCaptcha
Use reCaptcha to protect your store from spam, bots and frauds without any developer’s skills.
To get the access to the 'Invisible Captcha' settings please expand the General Settings section.
General Settings
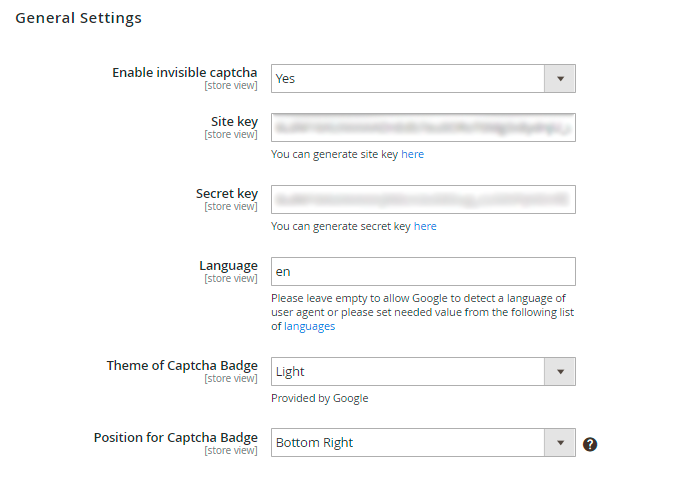
Enable invisible captcha - choose Yes to enable invisible reCaptcha on your website.
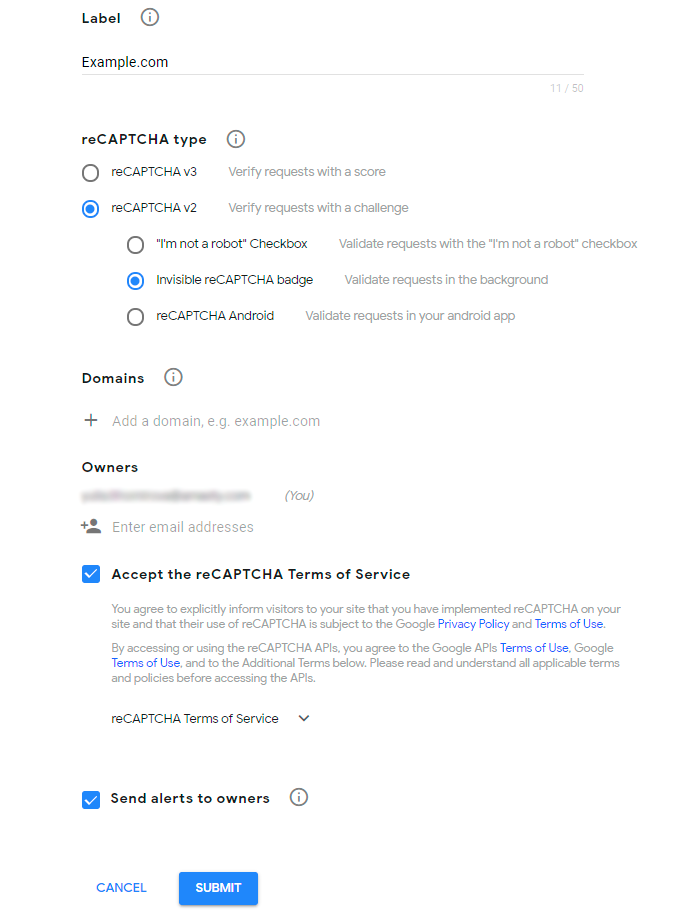
To get the Site key and Secret key click the link.
Then, set the name, select the Invisible reCAPTCHA option, define the domain of your website, tick the Terms of service checkbox and press the Submit button.
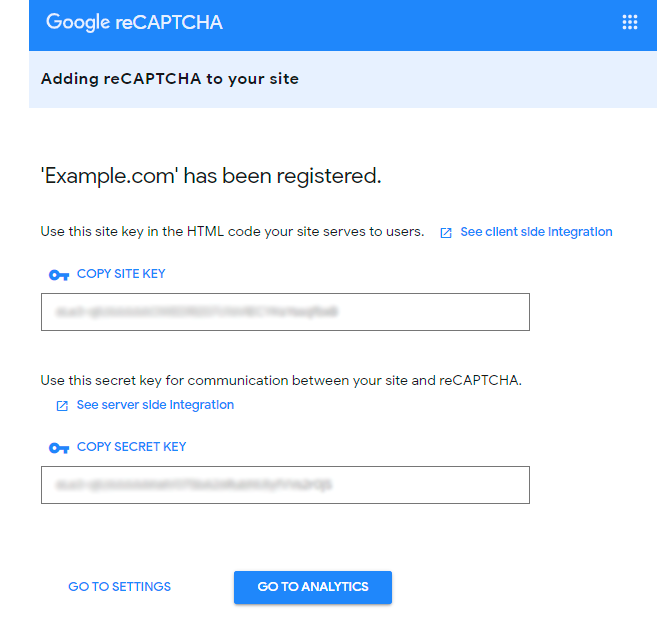
Copy the keys from this page:
Next, you can specify the Language of the Google Invisible reCaptcha that will be used for all users instead of their browsers' preferences. You can see the list of the available languages here.
Theme of Captcha Badge - select the theme that will be displayed on the frontend. Learn more about the available themes here.
Position for Captcha Badge - choose the suitable place for captcha.
The extension does not support the inline position for the Captcha Badge, because explicitly renders the reCAPTCHA widget.
Invisible Captcha for Amasty Extensions
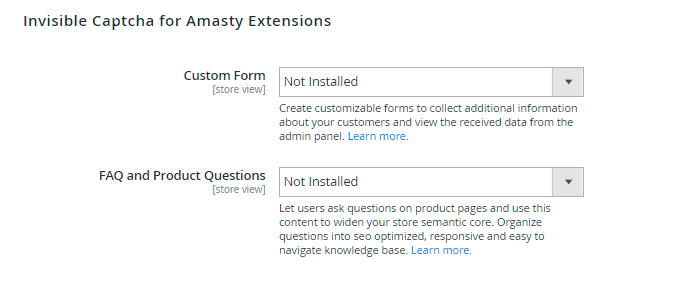
In this section you can enable or disable the Google Invisible reCaptcha for supported Amasty modules. Choose Yes to enable the Captcha for the extensions or No to disable it. Please note that you will get the Not Installed status when you do not have the appropriate extension.
Create customizable forms to collect additional information about your customers and view the received data from the admin panel with Magento 2 Custom Forms extension.
Let users ask questions on product pages and use this content to widen your store semantic core. Apply FAQ and Product Questions for Magento 2 to organize questions into seo optimized, responsive and easy to navigate knowledge base.
Advanced Settings
To add Google Invisible reCaptcha to any custom form on your website, please go to the Advanced Settings section.
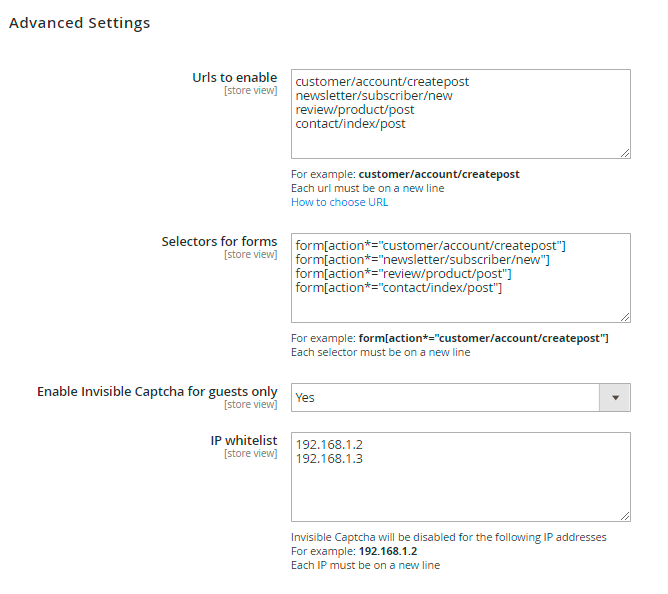
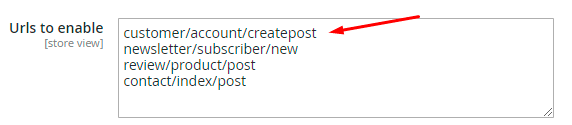
In the Urls to enable field, you need to put the URL where a form is sent.
Note! It’s not the URL where your form is located.
For example, you would like to add a Google reCAPTCHA to a registration form. This is how to get the URL:
1. Go to the registration form page.
2. Fill in the form.
3. Open the 'Inspect' window, and then the 'Network' tab.
4. After submitting the form you need to find a request with POST in the 'Method' column and 302 Status.

5. Click on this request and in the 'Headers' tab find a 'Request URL'. Сopy the path from the URL (in our example it is customer/account/createpost/).

6. Paste the URL in the URLs to enable field.
In the Selector for forms field, you need to put a CSS selector of the form.
For example, this is how to get a CSS selector for 'Create an account' form:
1. Go to the Create an account page and open the Inspect window.
2. Find the HTML code of the form, click on the right mouse button and choose Copy → Copy selector
Note! You should be on 100% sure that the selector is unique. Otherwise, Google CAPTCHA would be added to all elements that have this selector name. Ask your developer to check it.
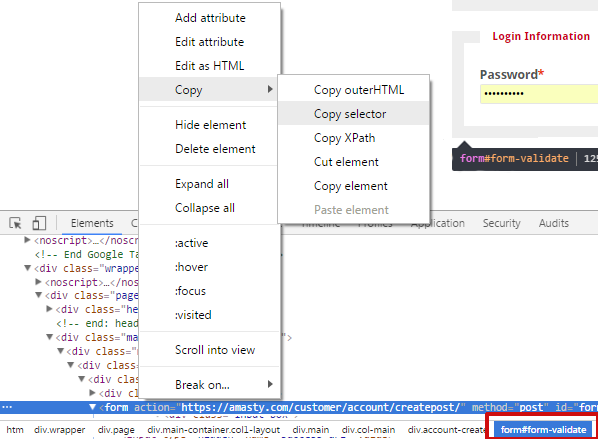
3. In our case the selector is .customer-account-create .account-create form and we add it to the Selector for forms field.
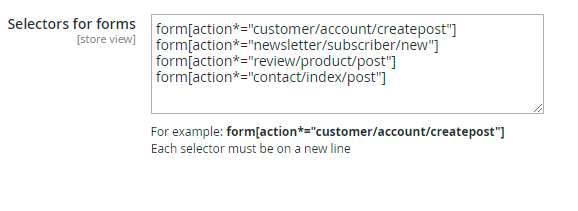
Don't forget to click the 'Save' button after you add a CAPTCHA to all forms that you need.
The extension supports four forms by default. In case you don't need any of them, you can disable these forms manually.
Enable Invisible Captcha for guests only - enable the option to show invisible Captcha only for guests. Thus, the extension won't display Captcha to registered clients.
IP whitelist - specify certain IP addresses for which you want to disable Invisible Captcha. Place put each IP address on a new line.
How to Check Invisible reCaptcha
When everything is set, it is important to check how reCaptcha works. Please, follow these steps:
- Open the page which has a form protected by Google Invisible reCaptcha;
- Open your browser console;
- Choose to perform as any other browser or device;
- Try submitting the form several times until Google shows you the reCaptcha test.
Admin Actions Log
With the Admin Actions Log extension, you have the possibility to track all backend actions performed by store administrators.
General Settings
To configure general extension settings, please go to Stores → Configuration → Amasty Extensions → Admin Actions Log. Expand the General section.
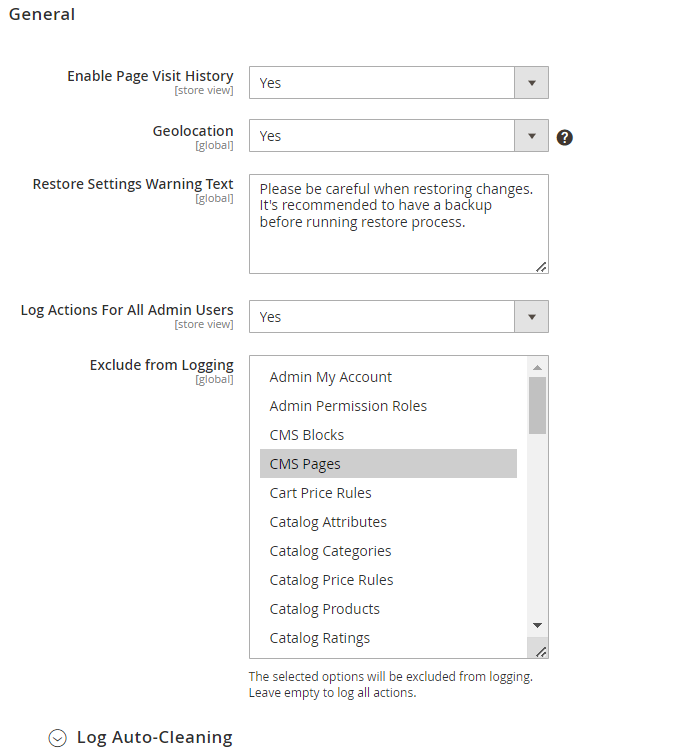
Enable Page Visit History — set this option to Yes if you want to collect the history of all pages, visited by the administrators;
Use GeoIP — enable or disable GeoIP support to determine the country and city from which admin users get logged in;
Restore Settings Warning Text — fill in the warning message for the Restore feature;
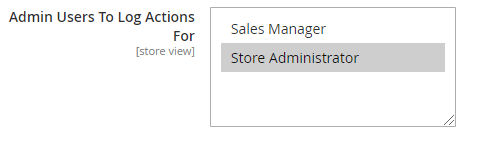
Log Actions For All Admin Users — set this option to Yes to keep track of all admin actions. If you are only interested in the actions of certain administrators, choose No.
If No is set, select admin users whose actions need to be logged.
Database Installation
This product includes GeoLite2 Data created by MaxMind, available from 24.10.2023 (last update date).
To install the Admin Actions Log database, go to Stores → Configuration → Amasty Extensions → GeoIP Data.
Databases are required if you want to use the Geo IP option. Also, you need to install php bcmath or gmp extension on your server.
You can get the databases automatically or import your own data.
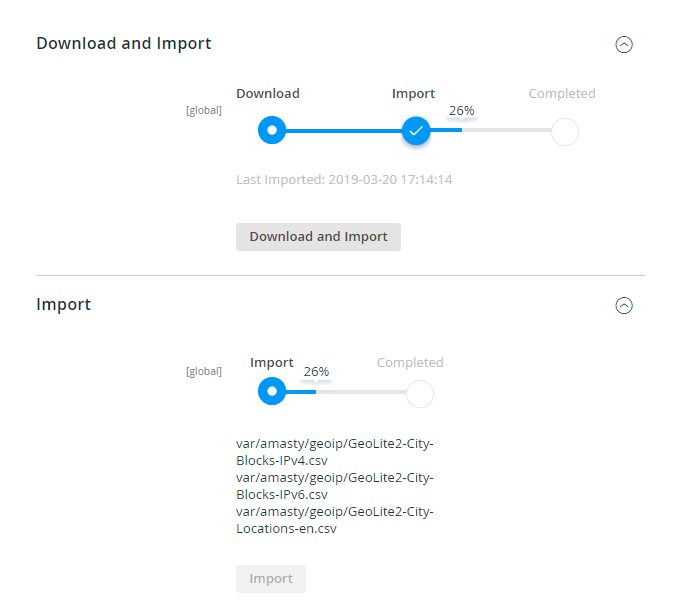
Hit the Download and Import button to make the extension download the updated CSV dump file and import it into your database automatically.
To import the files from your own source, use the Import option. Path to the files should look like this (the part 'var/amasty' should be replaced with your folders’ names):
var/amasty/geoip/GeoLite2-City-Blocks-IPv4.csv
var/amasty/geoip/GeoLite2-City-Blocks-IPv6.csv
var/amasty/geoip/GeoLite2-City-Locations-en.csv
In the Import section, the Import button is grayed out by default. It will be available right after you upload the CSV files. The red error notification will switch to green success notification when the import is completed.
IP Database Update Settings
The database included in the extension was last updated on October 24, 2023. To keep the IP database current, you can update it using one of two methods.
Please note that regardless of the updating method chosen, you need to import the IP database first.

Refresh IP Database - select the appropriate method for refreshing the IP database:
- Manually - to manually upload the updated database files;
- Update via Amasty Service - to update the database automatically and regularly via Amasty Service, which is complimentary for you until August 2024.
Debug Mode
You can enable IP forcing, which makes it possible to set a specific IP address that will be used instead of the visitor's real IP address when determining geolocation. The feature is useful while configuring or testing the extension.
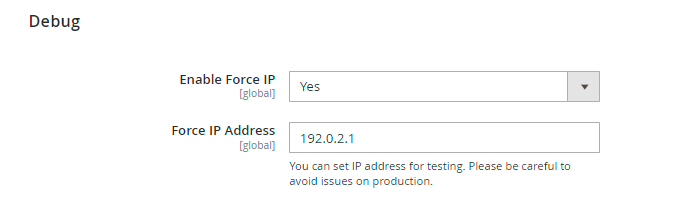
Enable Force IP - set to Yes to replace the real IP address.
Force IP Address - specify the address to use instead of a real one.
Log Auto-Cleaning
Return to the Admin Actions Log → General tab and expand the Log Auto-Cleaning. Here you can configure automatic log cleaning to avoid database overload.
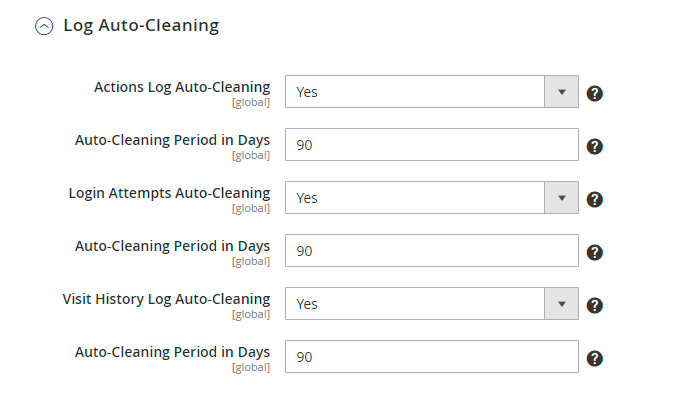
Actions Log Auto-Cleaning, Days — enable the cleaning of the Actions log and specify the number of days after which all action logs would be automatically deleted;
Login Attempts Auto-Cleaning, Days — specify the number of days after which all login attempts would be automatically deleted;
Visit History Log Auto-Cleaning, Days — specify the number of days after which all page history would be automatically deleted. Set 0 for an unlimited number of days.
Email Notifications
With the extension, you can get notifications about Successful, Unsuccessful, and Suspicious admin panel login attempts. To enable any type of notifications, configure the following options:
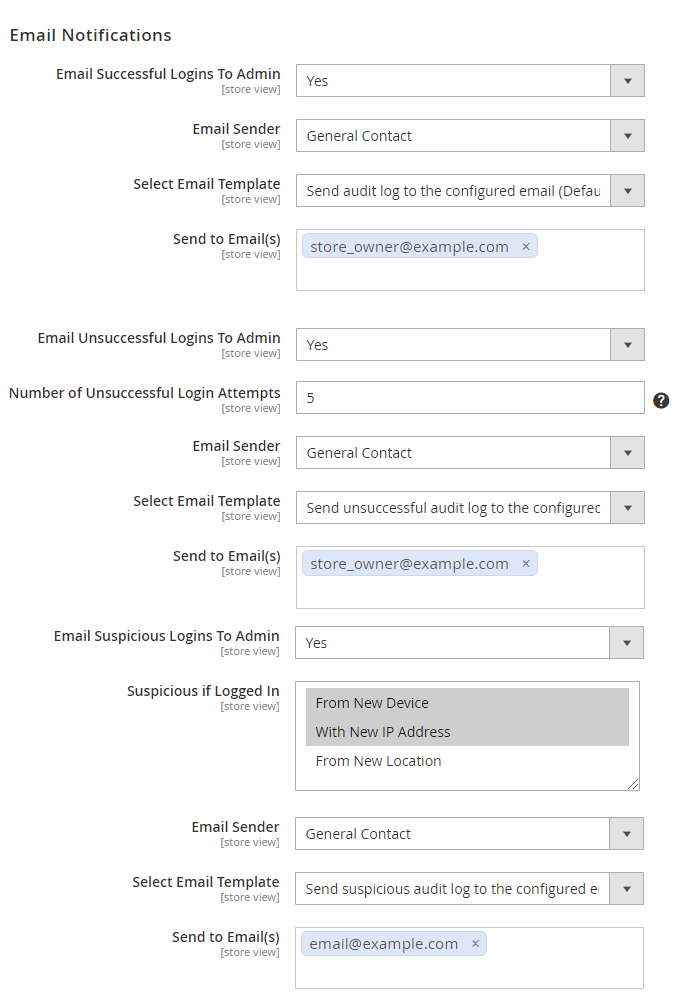
Email Successful / Unsuccessful / Suspicious Logins To Admin — enable or disable a certain notification type;
Email Sender - select an email address from which the notifications will be sent;
Select Email Template — choose the email template to use for notifications;
Send to Email — specify the email address to send notifications to;
Suspicious if Logged In - define which login actions should be considered as suspicious:
- From New Device
- With New IP Address
- From New Location
Actions Log
To see the Action Log of all administrators, please go to System → Actions Log. The actions are logged only for the users you specified on the General Settings page.
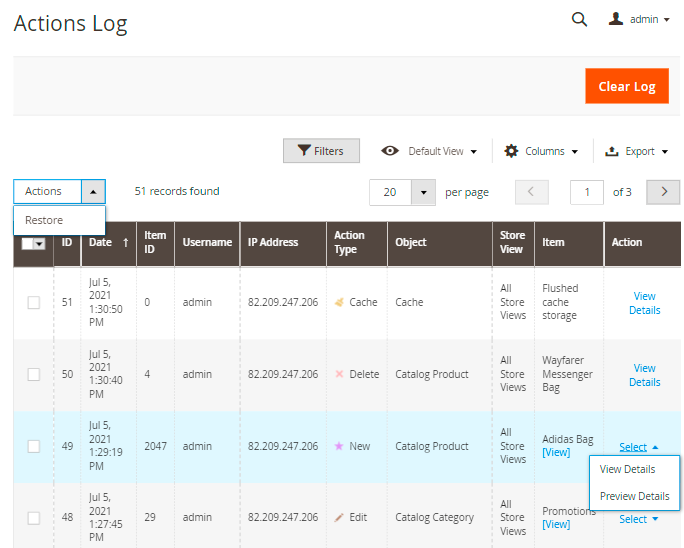
In the Action Log table you can find the following details:
- Date;
- Username;
- Full Name;
- Action Type;
- Object;
- Store View;
- Item;
- Item ID;
- Action.
Use the Actions dropdown to restore changes in bulk.
Click Preview Changes in the Actions column to see the brief info about the action which has been performed by the user.
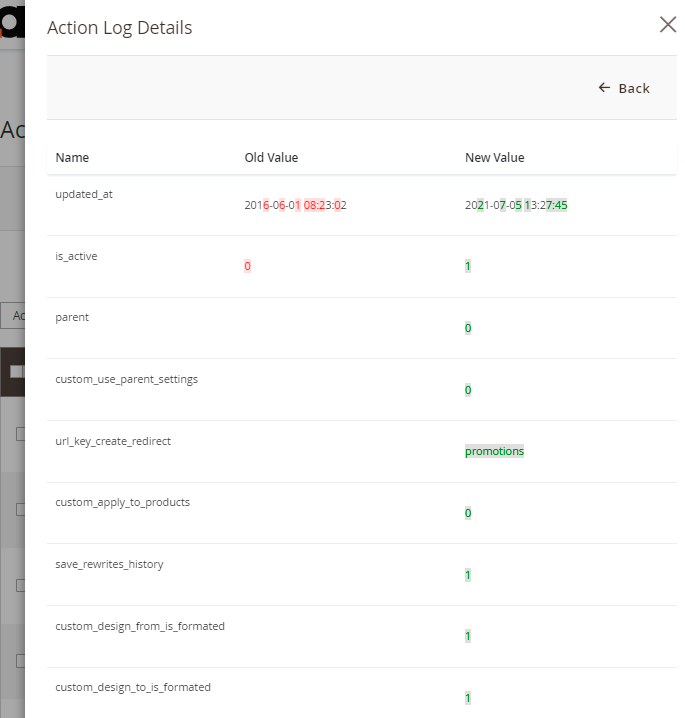
Click View Details in the Actions column to see the details of an action. You can use the Restore Changes button to cancel all changes of this action.
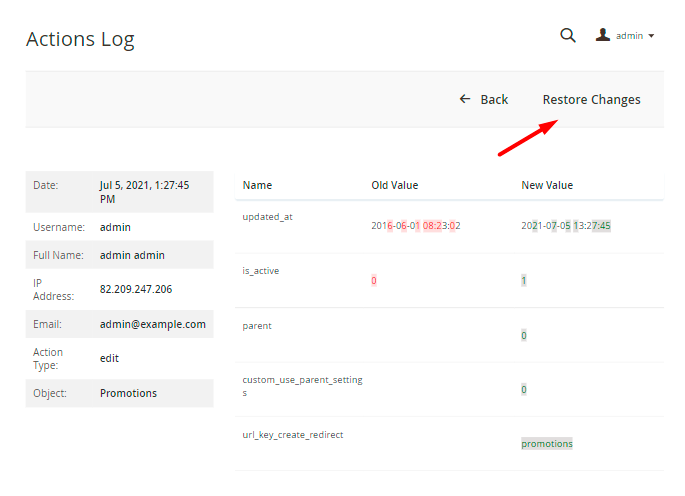
Then, a pop-up window should appear to confirm aborting the changes.
You can modify the pop-up message in the General Settings.
Active Sessions
To view administrator sessions that are active right now, please go to System → Admin Actions Log → Active Sessions.
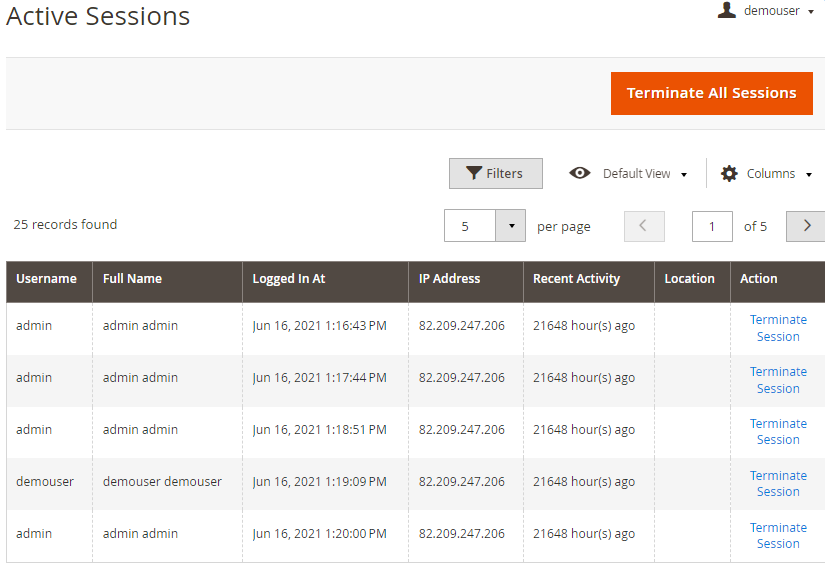
In the table you can find the following information:
- Username;
- Full Name;
- Logged In At;
- IP Address;
- Location (see the General Settings section to enable this column);
- Recent Activity;
- Actions.
Hit the Terminate Session link in the Actions column to terminate any session if necessary.
Login Attempts Log
To access the Login Attempts grid, please go to System → Admin Actions Log → Login Attempts.
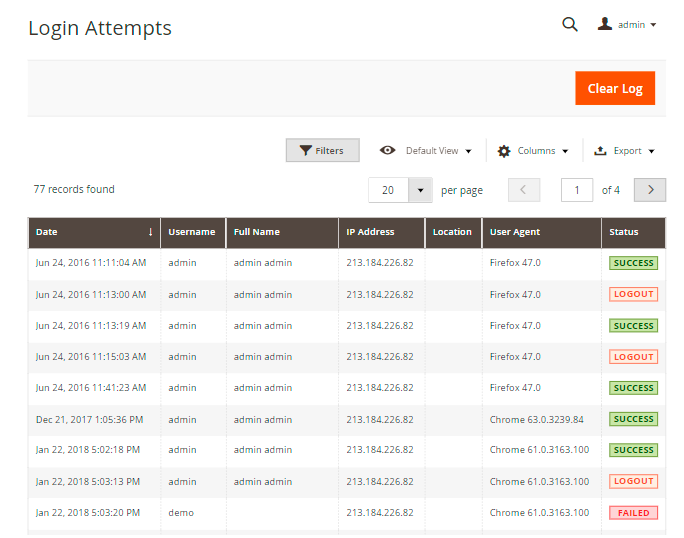
On the grid you can find the following details:
- Date;
- Username;
- Full Name;
- IP Address;
- Location;
- User Agent;
- Status.
Generally, each store administrator can have one of three available statuses:
Success — this status appears when a user is successfully logged in to the admin panel;
Logout — this status appears when a user is successfully logged out from the admin panel;
Failed — this status is shown when the person tries to log in with the wrong username or password.
You can filter the information on the Login Attempts grid by all available columns.
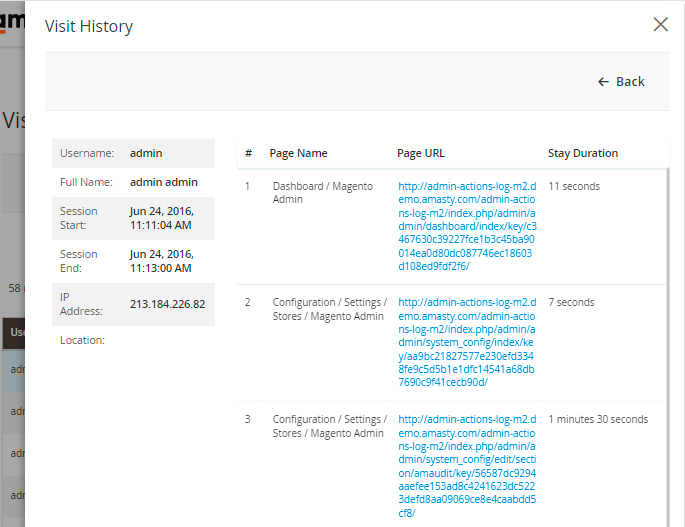
Page Visit History
To see the history of pages visited by all administrators please go to System → Admin Actions Log → Page Visit History.
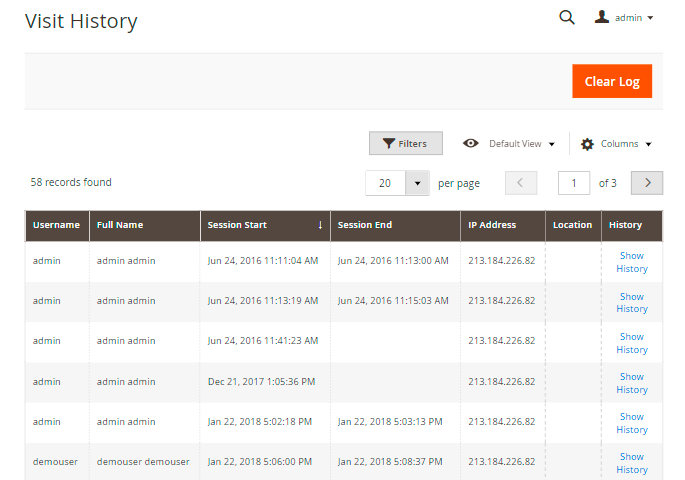
Actions are logged only for the users you specified on the General Settings page.
On the grid you can find the following details:
- Username;
- Full Name;
- Session Start;
- Session End;
- IP Address;
- Location (see the General Settings section to enable this column).
Click the Show History button to see the details of a particular visit.
Changes History
The new History of Changes tab is available for a product, customer and order info pages.
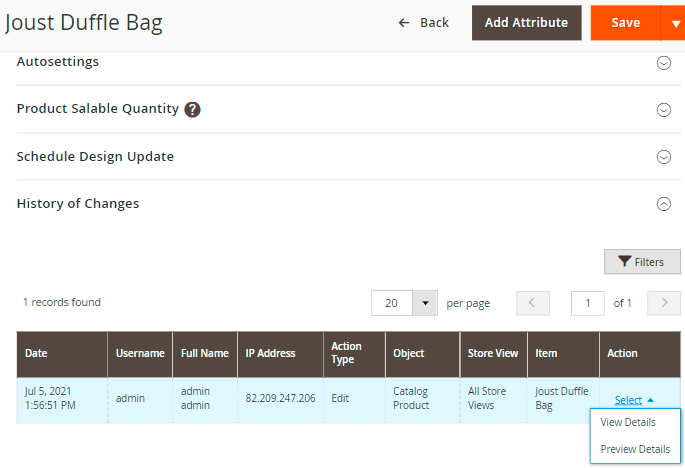
You can preview each particular page modification or view its details via the Select button. On top of that, you can restore recent changes using the Restore Changes button in the detailed view.
Two-Factor Authentication
Protect your webstore with simple yet efficient 2-step verification extension. Make your account available to verified users only.
General Settings
To configure the extension, open the Two-Factor Authentication tab.
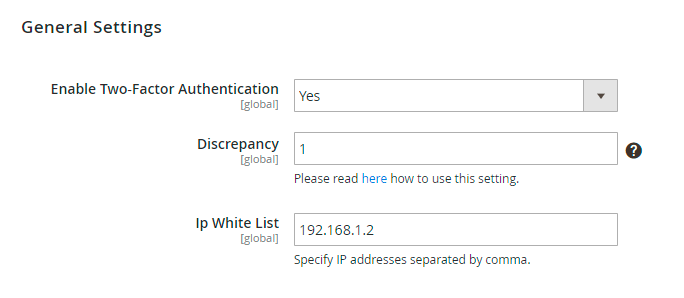
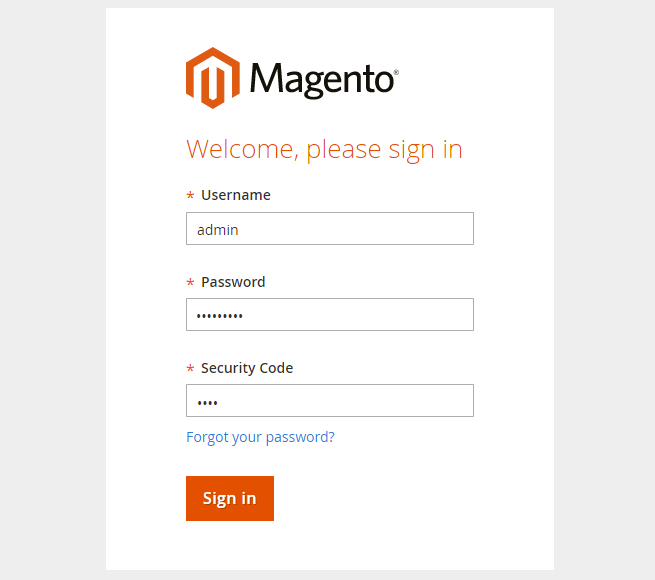
Enable Two-Factor Authentication - Set to Yes to enable two-factor authentication extension on your Magento account.
Note, that this will activate the request for additional security code next time you log in.
Discrepancy — modify the allowed time drift in 30 second units (e.g. 8 means 4 minutes before or after) for verification codes generation.
You can modify the interval for verification codes generation when a user faces an error.
IP White List - In this field, you can include reliable IP addresses. Users, who log in from these IP addresses will not be required for verification code (e.g. your staff members). You can add multiple IPs, separating them with coma.
User Roles
Go to System → Permissions → Users to set admins' permissions.
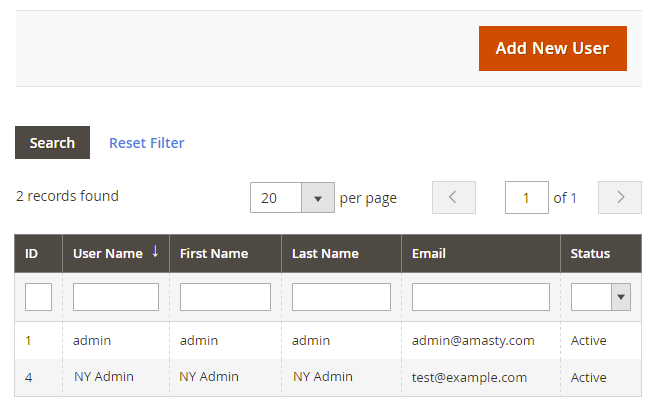
Edit any existing role by clicking it or create a new one using Add New User button.
Open the Two-Factor Settings tab to configure and synchronize the extension with the Google authentication app. The application generates additional security codes.

Enable TFA - Open your Google Authenticator application and register the login by scanning the QR Code or entering the Secret Key.
Status - the default status is Not Configured. It will be switched to Configured, once you enter a Secret Key or scan the QR code.
Secret Key - Insert the Secret Key into Google Authenticator app to generate additional Security Code.
QR code - Scan QR code to receive the Secret Key and insert it into Google Authenticator app to generate additional Security Code.
Security code - Insert your received Security Code and click Check code to verify it. Verify - If Security Code is correct, then Check code link will be changed to Verified.
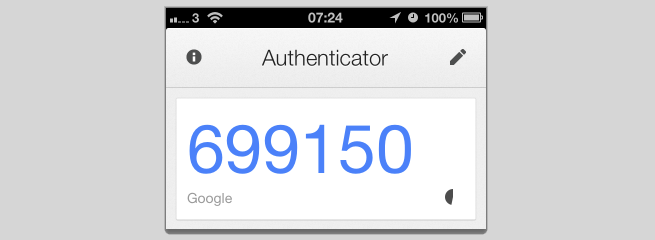
Once your Google Authenticator application is properly configured and synchronized, it will show a onetime passcode that changes every 30 seconds.
Press Save User button. The user will now be required to enter one-time security code when logging in admin panel.
Troubleshooting
When the verification returns the Invalid value, you can fix this by modifying the Discrepancy value in the extension general settings.
Try increasing the value by 1, save changes, and try the verification procedure once again. If you'll face the Invalid value again, please, try to increase a discrepancy one more time.
Testing two-factor authentication
To test, whether the extension was successfully synchronized with Google Authenticator App and well configured, log out from your current session and try to log in to the account you have configured.
This is how Google Authenticator App generates the security code.
Advanced Permissions
Set flexible limitations to your admin users. Configure the Advanced Permissions extension to control the access to products, categories, store views and CMS pages.
Creating Roles with Advanced Permissions
Please make sure you have created the required user before assigning a new role with advanced permissions. You can learn how to add new users here.
To create a new sub-admin role with advanced permissions, please navigate to Admin panel → System → Permissions → User Roles. Then, hit the Add New Role button.
Role Information and Resources
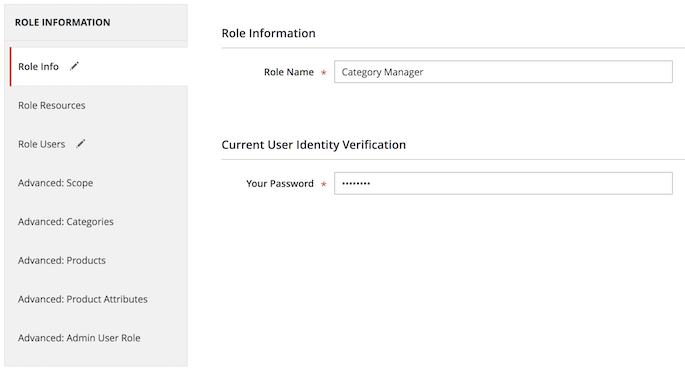
- Specify the Role Name;
- Switch to the Role Resources tab;
- Change the Resource Access option to Custom;
- Specify the resources this role will have access to.

You can provide user role with extra privileges under the System → Amasty Role Permissions branch of the tree.
Please hit the Save Role button and open this role again to have the ability to assign the new role to users.

Then, you can assign this role to certain users. Click the Role Users tab and flag the required users.
Setting Advanced Permissions
With the extension, you can set up advanced permissions to provide or limit access for your store managers to the certain parts of the admin panel.
Advanced: Scope
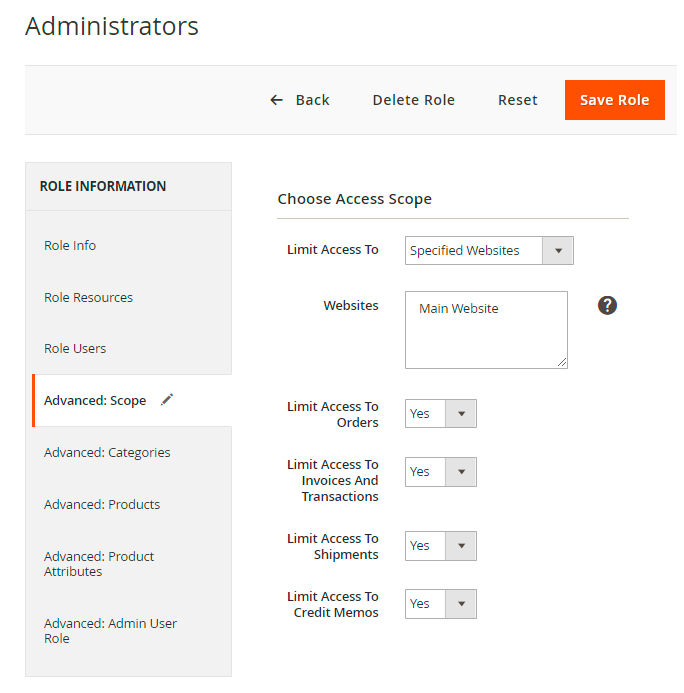
In this tab you can limit access to certain store views or websites. Modify the Limit Access To option to:
- Allow all stores;
- Limit certain websites;
- Limit certain store views.
For the websites and store views option you should specify the required ones.
For the website and store views options you can limit user role access to the following parts of your store:
- Orders;
- Invoices and Transactions;
- Shipments;
- Credit Memos.
Select between the Yes or No options.
Advanced: Categories
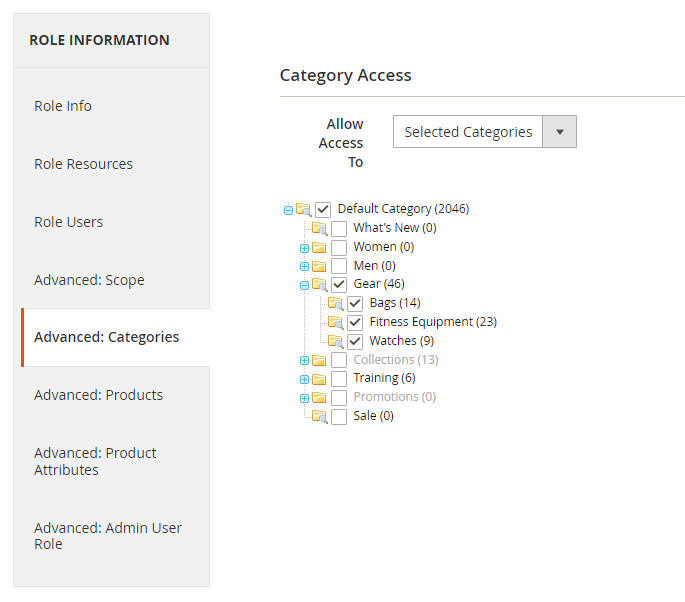
In the Categories tab you can provide this role with access to all product categories or limit to selected categories. Please tick the necessary categories or subcategories to allow access to them.
Advanced: Products
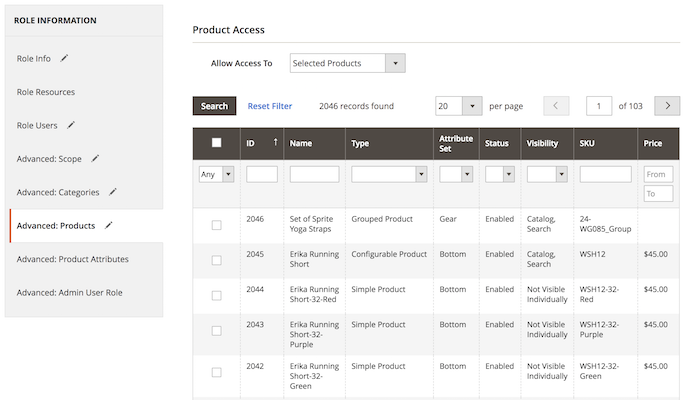
Next, the Products tab enables you to provide access to all, only selected, or own created products. In second case you will need to flag the required product. In third, you can make products accessible only for their owners that is convenient for the multi-vendor stores.
Please see this part of the guide to know how to set product owners.
Advanced: Product Attributes
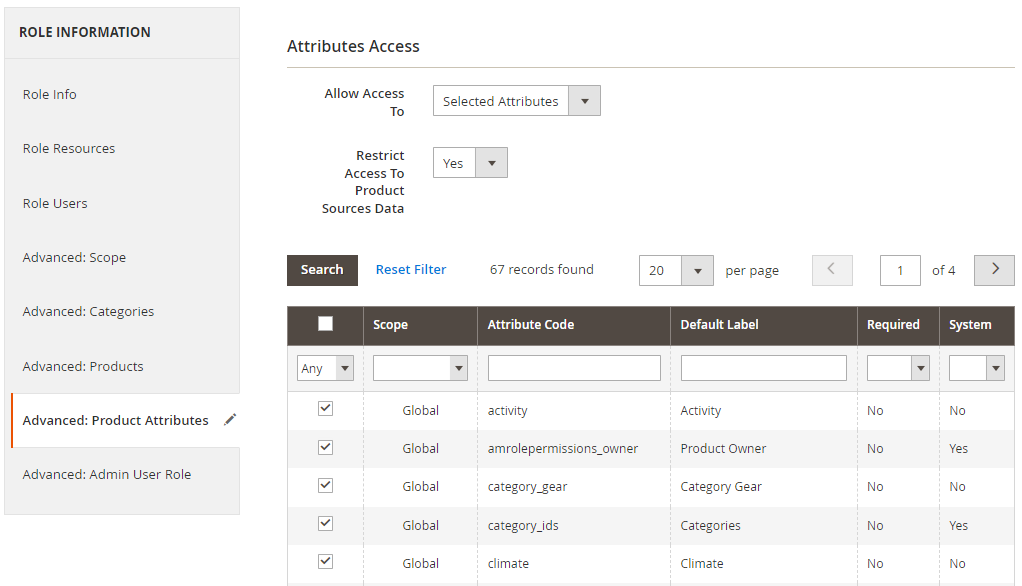
In the Product Attributes tab you can restrict access to certain product attributes. Set the Allow Access To option to Selected Attributes and specify the desired attributes for this user role.
Advanced: Admin User Role
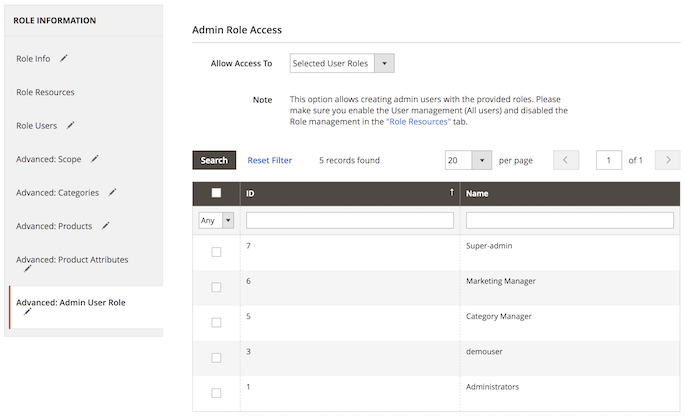
Finally, in the Admin User Role tab you can allow this user to create the new users with the selected roles. Choose the appropriate option from the dropdown menu and select the required roles.
Please make sure that you enabled the User management option and disabled the Role management option for this role in the Role Resources tab.
When the configuring of a certain user role is done, hit the Save Role button.
Creating Sub-Admin Users
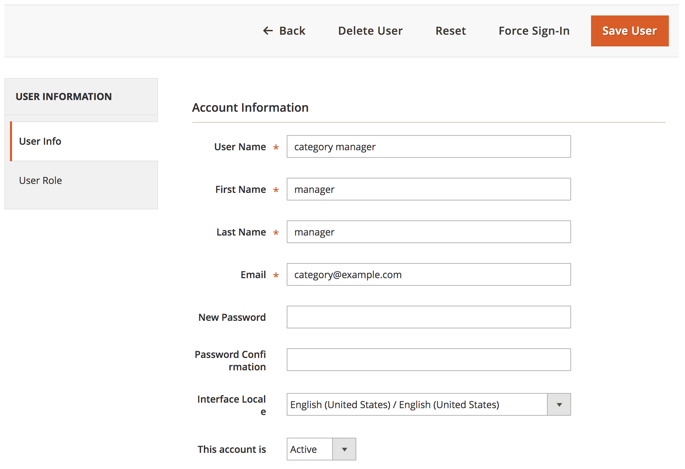
If you need to add extra users to your admin panel, please go to System → Permissions → All Users and hit the Add New User button.
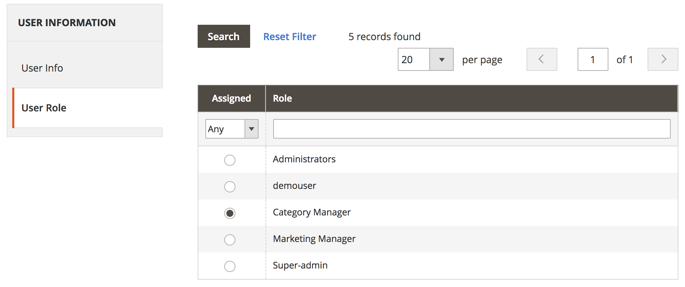
Specify account information and switch to the User Role tab. From here you can tick the desired radio-button to provide this user with certain administrative privileges. When done, hit the Save User button.
Return to the previous steps to know how to set up a user role with advanced permissions.
Changing Product Owner
To provide selective access to a certain product you can set up its owner.
- Go to Products → Catalog;
- Select the desired product;
- Specify product owner in the drop-down menu.

Make sure that you switched the Advanced: Products option to Own Product Only option.
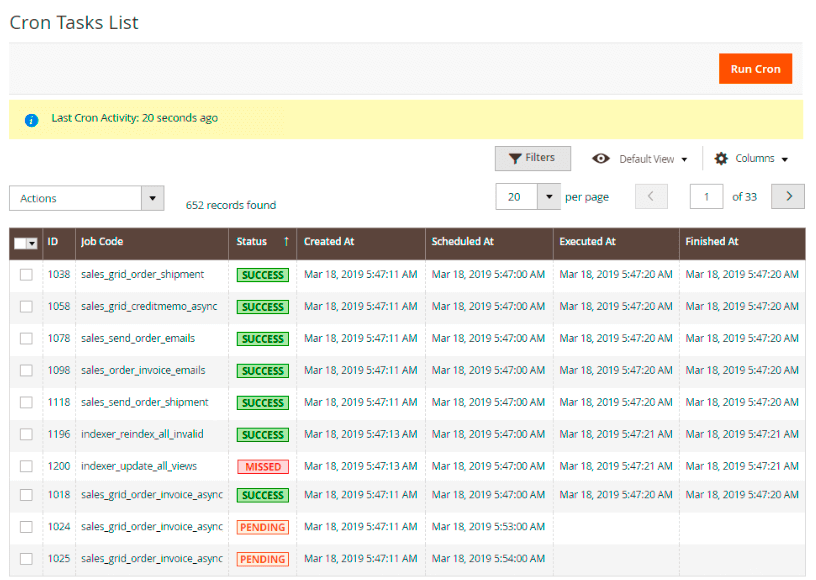
Cron Tasks List
Magento 2 Security Suite extension is preintegrated with Cron Tasks List to provide store owners with an opportunity to track and manage all cron tasks running in the website background.
To view all scheduled and executed cron tasks, go to System → Cron Tasks List
Run all cron tasks and generate their schedule by clicking the ‘Run Cron’ button. Also you can delete separate tasks in bulk, apply filtering and sorting options when it is needed.
Find out how to install the Security Suite extension via Composer.
magento_2/security-suite.txt · Last modified: 2024/06/28 13:01 by kkondrateva