Sidebar
magento_2:ajax_shopping_cart
Table of Contents
For more details see how the Ajax Shopping Cart for Magento 2 extension works.
Guide for Ajax Shopping Cart for Magento 2
Magento 2 AJAX add to cart extension provides a comfortable shopping experience. Customers can easily select configurable options and edit the items in the pop up without wasting time on page reloads.
- User-friendly shopping process;
- Stylish Magento 2 AJAX cart pop up;
- Equip Magento 2 stores with AJAX confirmation windows of 2 different types;
- Support of custom options and configurable products;
- Additional way to gently promote related items.
- Hyva-ready storefront and Hyva Checkout compatible by default
- Compliance with Hyvä Theme Content Security Policies
Magento 2 Ajax Shopping Cart extension is compatible with Hyvä themes. You can find the amasty/module-ajax-cart-hyva package for installing in composer suggest (Note: the compatibility is available as part of an active product subscription or Support Subscription).
The extension is fully compliant with Hyvä Theme Content Security Policies. The compliance is available as part of an active product or support subscription, within the 'amasty/module-ajax-cart-hyva' package.
General Settings
To configure the module, go to Admin Panel → Stores → Configuration → Amasty Extensions → Ajax Shopping Cart
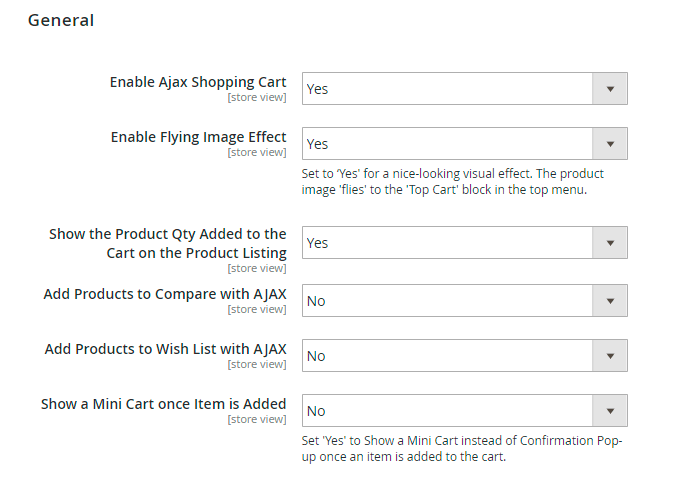
Enable or disable the extension in Enable Ajax Shopping Cart.
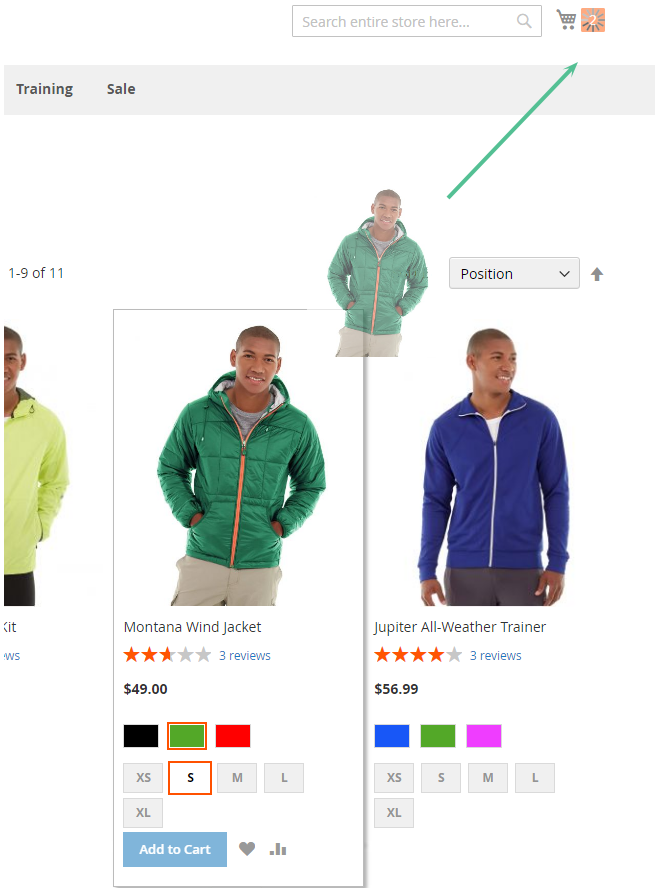
Enable flying image effect: With this setting, you can activate and deactivate nice looking visual effect.
You can get an idea of how the effect works here.
Show the Product Qty Added to the Cart on the Product Listing: Enable the option to highlight the products that have already been added to the shopping cart. With mouse hover over the product, the number of items added to the cart appears.
Add Products to Compare with AJAX: Enable the option to let customers add products to Compare without page reloading. This will fasten the process and make it more convenient.
Add Products to Wish List with AJAX: Set the option to Yes to eliminate page reloading when customers add products to Wish List.
Show a Mini Cart once Item is Added: Enable the option to Show a Mini Cart instead of a Confirmation Pop-up after an item is added to the cart.
Add To Cart Requests Limitation
With the AJAX Shopping Cart extension, you can block IP addresses that send lots of spam requests. This helps prevent your databases from cluttering with unnecessary entries. The functionality is available as part of an active product subscription or support subscription.
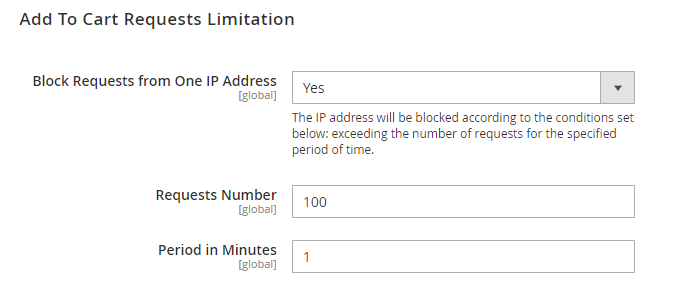
Block Requests from One IP Address - set to 'Yes' to enable the option. In such a case The IP addresses will be blocked according to the conditions set below: exceeding the number of requests for the specified period of time.
Requests Number - set the number of requests.
Period in Minutes - set the period in minutes.
If more than the specified number of requests were sent from one IP address during the specified period, then the IP address will be blocked until the set period of time has elapsed since the last request.
Please note, that for the correct work of this functionality you will need to install the additional library: GitHub - symfony/rate-limiter, that will provide a Token Bucket implementation to rate limit input and output in your application.
Dialog Pop-up
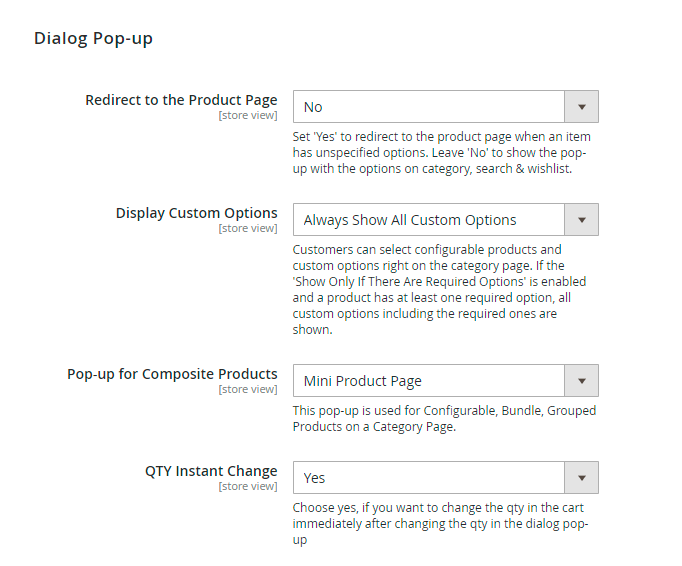
Redirect to the Product Page: Enable the option to redirect customers to the product page when they haven't specified the necessary products options. Set to 'No' to show the pop-up with the options on category, search & wishlist.
Display Custom Options: Customers can select configurable products and custom options right on the category page. If the 'Show Only If There Are Required Options' is enabled and a product has at least one required option, all custom options including the required ones are shown.
Pop-up for Composite Products: It is possible to select what product information you would like to display in the cart dialog window. Set this option to Mini Product Page to display product image, rating and short description together with product options and quantity in the pop-up. Choose Custom Options & Product Qty to show only custom options and product quantity in a pop-up. Here you can see the difference.
QTY Instant Change: Choose yes, if you want to change the qty in the cart immediately after changing the qty in the dialog pop-up.
Confirmation Pop-up
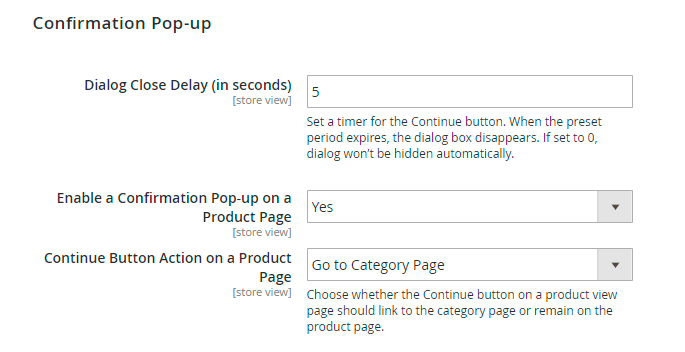
Dialog Close Delay (in seconds): In this field, you can set a timer for Continue button. After a set time expires, a dialog box disappears.
Enable a Confirmation Pop-up on a Product Page: Set the option to Yes to enable showing a confirmation pop-up on a product page.
Continue Button Action on a Product Page: Choose whether the Continue button on a product view page should link to the category page or remain on the product page.
Confirmation Pop-up Display
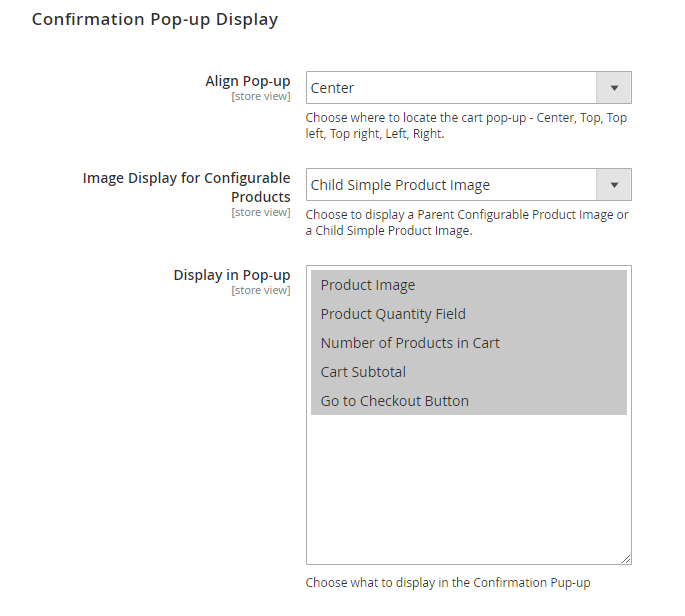
Align Pop-up: Choose, where to locate the confirmation pop-up - Center, Top, Top left, Top right, Left, Right.
Image Display for Configurable Products: Select whether to display Parent Configurable Product Image or Child Simple Product Image.
Display in Pop-up: Choose the information to display in the confirmation pop-up.
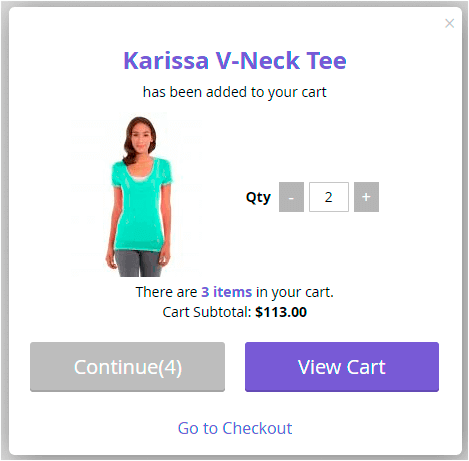
See how a confirmation pop-up looks like:
Selling Options
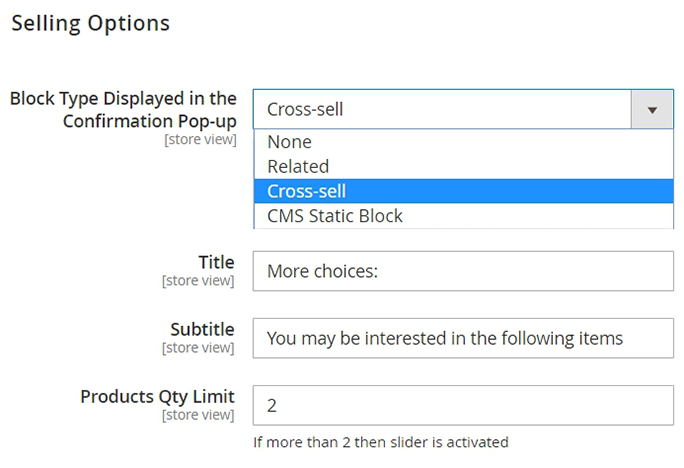
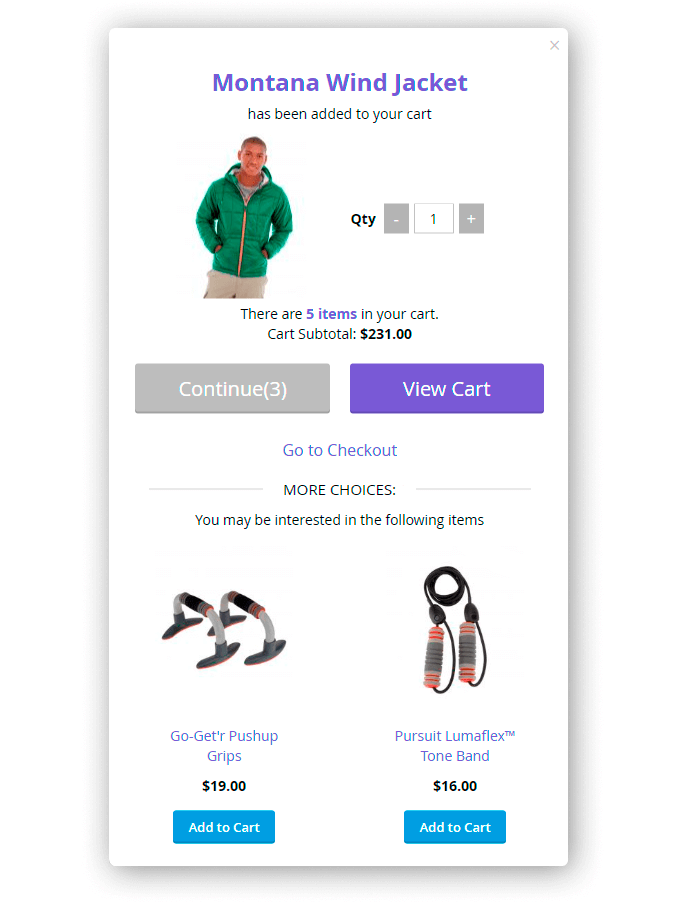
Product Block Type Displayed in the Confirmation Pop-up: To display related products or cross-sells in the confirmation pop-up, select the necessary option.
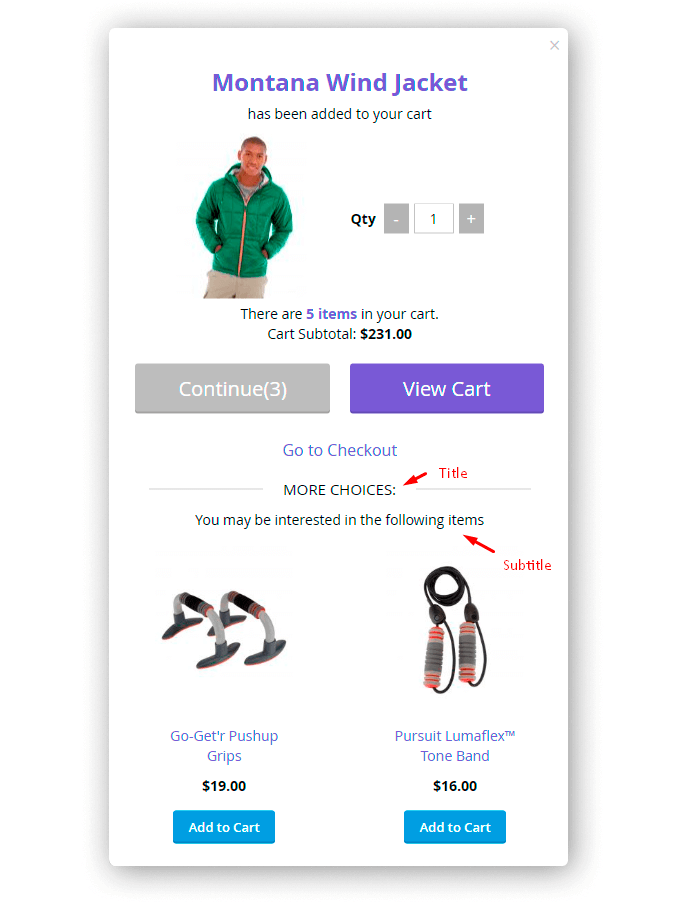
Title: Specify your own title for a selling block.
Subtitle: Add the text for a subtitle of a block with related products or cross-sells.
Products Qty Limit: Specify the maximum number of related products or cross-sells to show in a confirmation pop-up. When the limit exceeds 2, the slider is activated.
See how it looks on the frontend:
To display custom blocks in the confirmation pop-up, set the configuration to CMS Static Block. Set the option to None if you don't want to display any blocks.
Also, you can choose what custom CMS blocks to use on the AJAX confirmation pop-up.
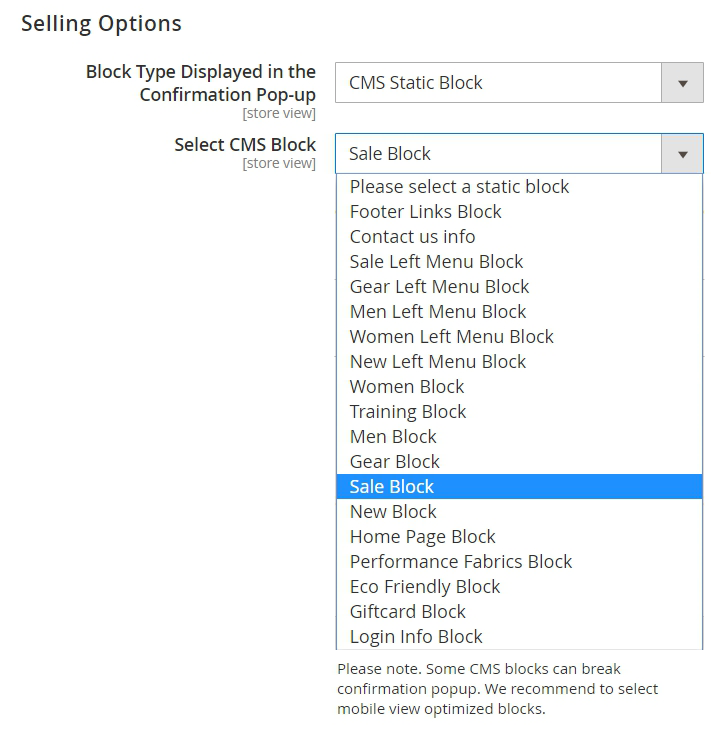
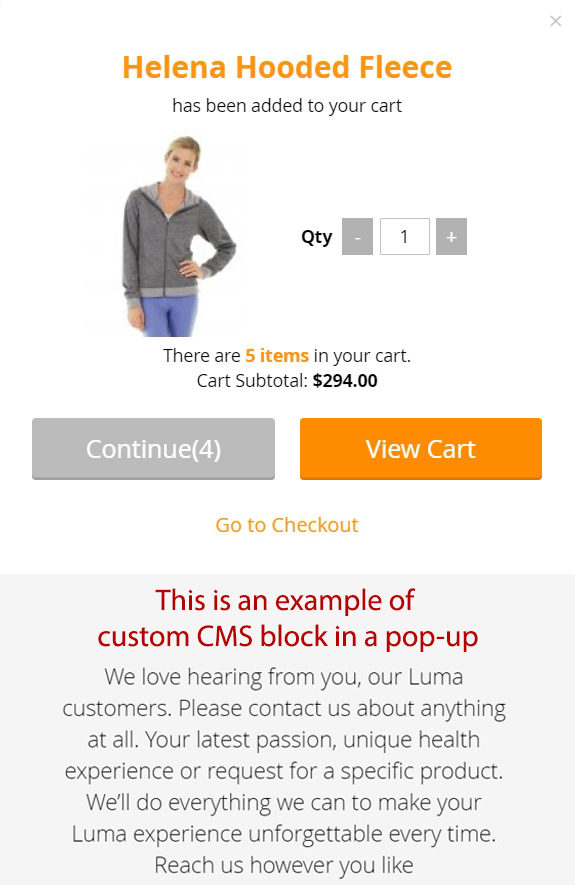
To make sure the CMS blocks work as expected, please select simple CMS blocks. For example, you can add text notification to display useful information. In case of more complex blocks, be prepared to thoroughly check the way block works on the front-end. We also recommend selecting mobile view optimized blocks.
See how it looks on the frontend:
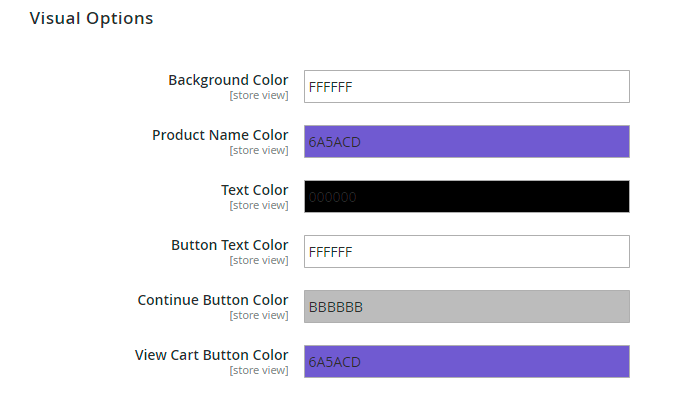
Visual Options
Customize the visual style of a confirmation pop-up.
Frontend
This is how AJAX shopping cart window looks on the frontend.
Catalog Page
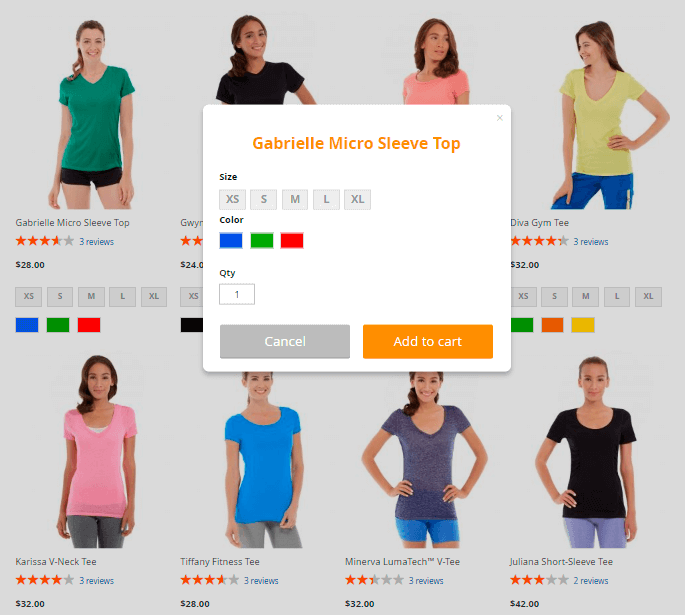
When there are no options available to select on the catalog page itself (e.g. Home Page), customers can specify the product options (color, size, quantity) directly in the dialog pop-up, without going to the product details page.
Here are the types of a dialog pop-up you can choose to display:
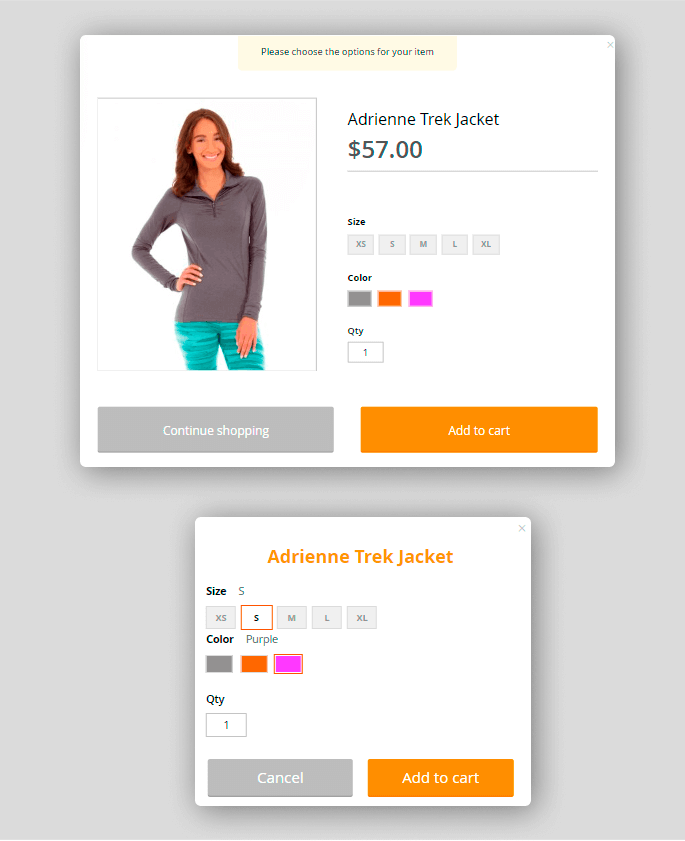
When a customer adds a product to the cart without specifying mandatory options (e.g. size, colour, etc.), the AJAX pop-up will be displayed. The customer will be able to choose the required options right in this pop-up.
Product Page
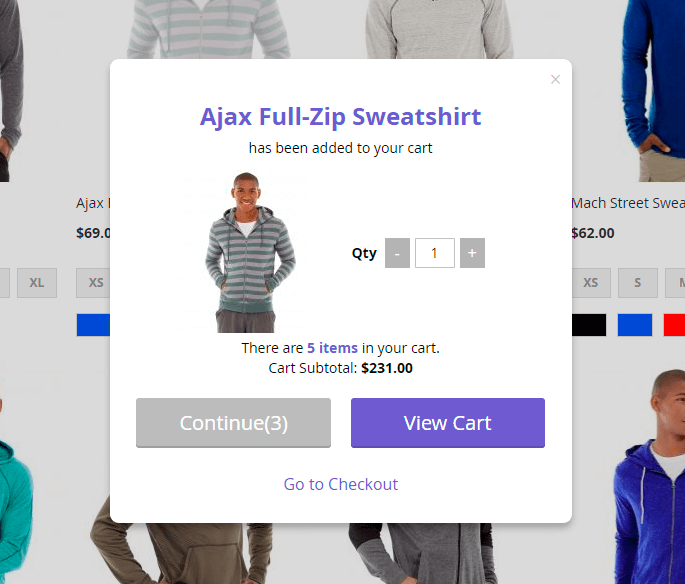
When adding products to cart, customers will see the item they are adding to cart and also brief cart overview – the number of items in the cart and current subtotal.
Flying Effect
This is how the flying image visual effect looks like. It appears when a customer adds a product to the shopping cart.
Related Products
You can add related products block in the cart dialog. Customers will see it when they add a product to the cart.
Find out how to install the AJAX Shopping Cart extension for Magento 2 via Composer.
magento_2/ajax_shopping_cart.txt · Last modified: 2025/06/04 07:45 by asemenova
