
Sidebar
magento_1:admin_actions_log
Table of Contents
For more details see the Admin Actions Log extension page.
Guide for Admin Actions Log
Keep track of all actions performed by admin users in your backend, view log history on a special grid and keep log records as long as you need. View login activity and block malicious login attempts.
- Keep all log details on the grid
- Log actions of particular store admins
- Ban users after several unsuccessful login attempts
- Unblock users manually or automatically
- Store data about admin visits and evaluate your staff efficiency
General Settings
To get the access to the 'Admin Actions Log' settings go to: System → Configuration →Admin Actions Log
Login Lockout Settings
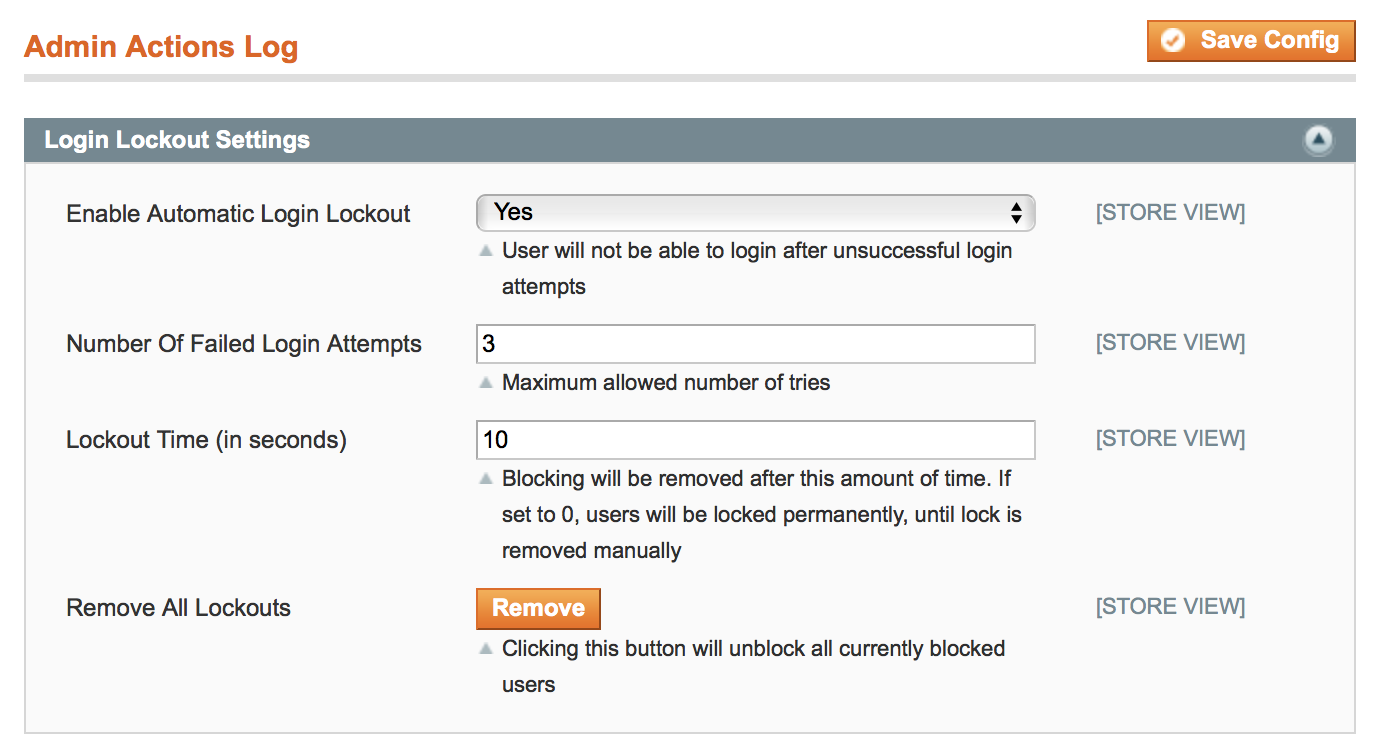
Enable Automatic Login Lockout - if the option is set to 'Yes', users will not be able to log in after unsuccessful login attempts.
Number Of Failed Login Attempts - specify the number of available login attempts before a user is blocked.
Lockout Time (in seconds) - specify the time in seconds after which blocking will be removed. During lockout time all login attempts (even with the right password) will be considered as unsuccessful.
When you specify ‘0’ (zero) for this option, a user will be blocked until you click on the ‘Remove’ button for the ‘Remove All Lockouts’ setting.
Remove All Lockouts - click to unblock all the users who had been blocked.
Log Settings
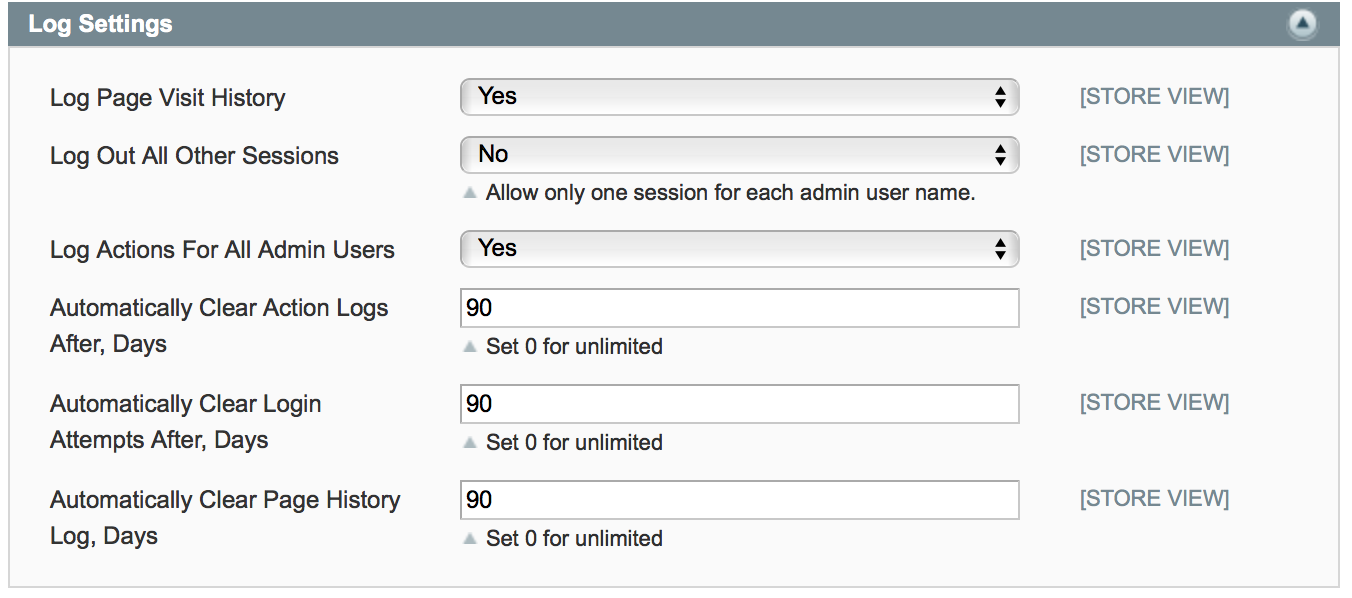
Log Page Visit History - set this option to ‘Yes’ if you want to collect the history of all pages, visited by the administrators.
Log Out All Other Sessions - the option is available only if 'Log Page Visit History' is set to 'Yes'. The option allows only one session for each admin username. Set to 'Yes' if you want to terminate suspicious sessions with the same admin username.
Log Actions For All Admin Users - set this option to ‘Yes’ to keep track of all admin actions. If you are only interested in actions of certain administrators, choose ‘No’ and select the corresponding admin names from the list below.
Automatically Clear Action Logs After, Days - specify the number of days after which all action logs would be automatically deleted (if the input is “0” – the logs won’t be cleared).
Automatically Clear Login Attempts After, Days - specify the number of days after which all login attempts would be automatically deleted (if the input is “0” – the logs won’t be cleared).
Automatically Clear Page History Log, Days - specify the number of days after which all page history would be automatically deleted (if the input is “0” – the logs won’t be cleared).
Email Successful Logins To Admin
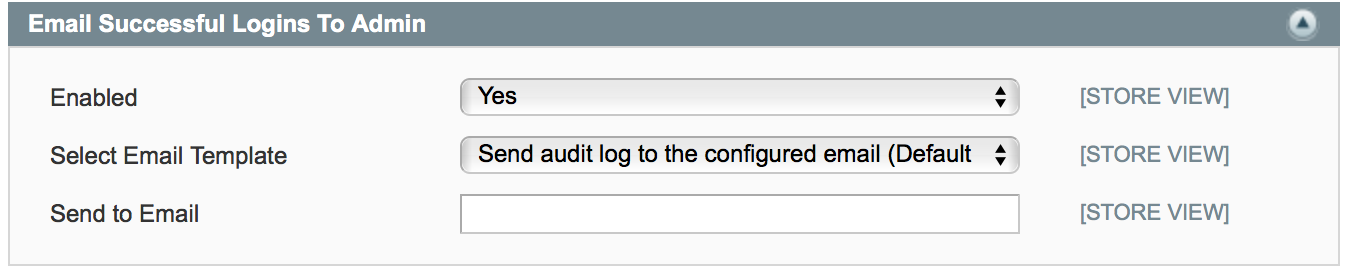
Enabled - set this option to 'Yes' for receiving emails about users who logged into the admin panel.
Select Email Template - choose email template which will be used for receiving emails.
Send to Email - write an email address to which successful logins to admin will be sent. It is possible to set as many emails as you need, just separate them with a comma.
Geolocation

Use Geo IP - set to 'Yes' to determine country and city from which an admin has logged in.
How to enable GeoIP for Admin Actions Log?
To install the Geo IP database, go to System → Configuration → Amasty Extensions → GeoIP Data.
Databases are required for the correct work of the option. Also you need to install php bcmath or gmp extension on your server.
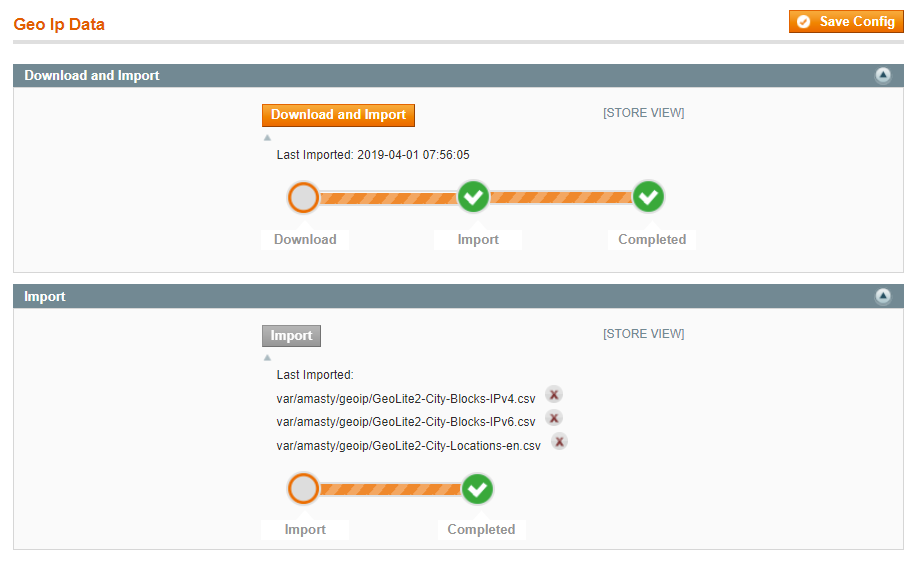
You can get the databases automatically or import your own data.
Hit the Download and Import button to make the extension download the updated CSV dump file and import it into your database automatically.
To import the files from your own source, use the Import option. Path to the files should look like this (the part 'var/amasty' should be replaced with your folders’ names):
var/amasty/geoip/GeoLite2-City-Blocks-IPv4.csv
var/amasty/geoip/GeoLite2-City-Blocks-IPv6.csv
var/amasty/geoip/GeoLite2-City-Locations-en.csv
In the Import section, the Import button is grayed out by default. It will be available right after you upload the CSV files. The red error notification will switch to green success notification when the import is completed.
Email Suspicious Logins To Admin
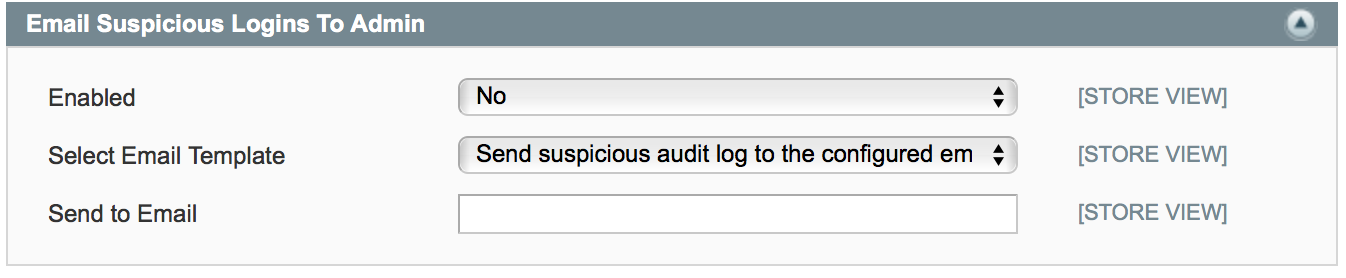
Enabled - set this option to 'Yes' to get an email notification if a user tried to log in from another country.
Select Email Template - choose email template which will be used for receiving emails.
Send to Email - write an email address to which suspicious logins to admin will be sent. It is possible to set as many emails as you need, just separate them with a comma.
Email Unsuccessful Logins To Admin

Enabled - set this option to 'Yes' to get notifications of multiple login faults made during a short time.
Select Email Template - choose an email template which will be used for receiving emails.
Send to Email - write an email address to which unsuccessful logins to admin will be sent. It is possible to set as many emails as you need, just separate them with a comma.
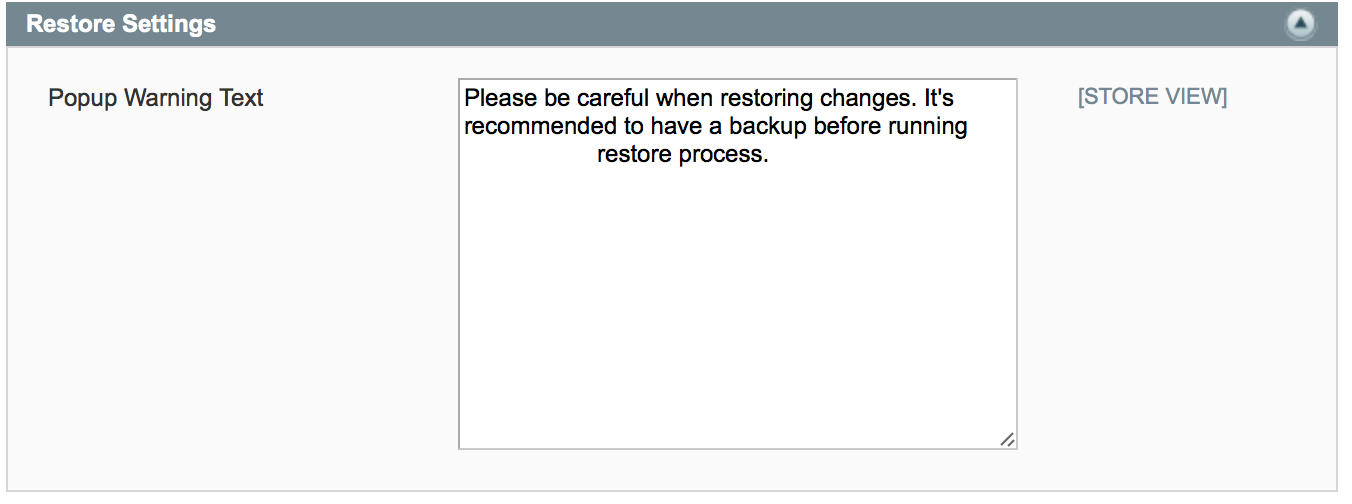
Restore Settings
You can edit the popup warning text that appears once you click the 'Restore Changes' button on the 'Action Log Details' Page:

How to Restore Changes you can see at the Action Log page.
Login Attempts page
To see all login attempts please go to System → Admin Actions Log → Login attempts.
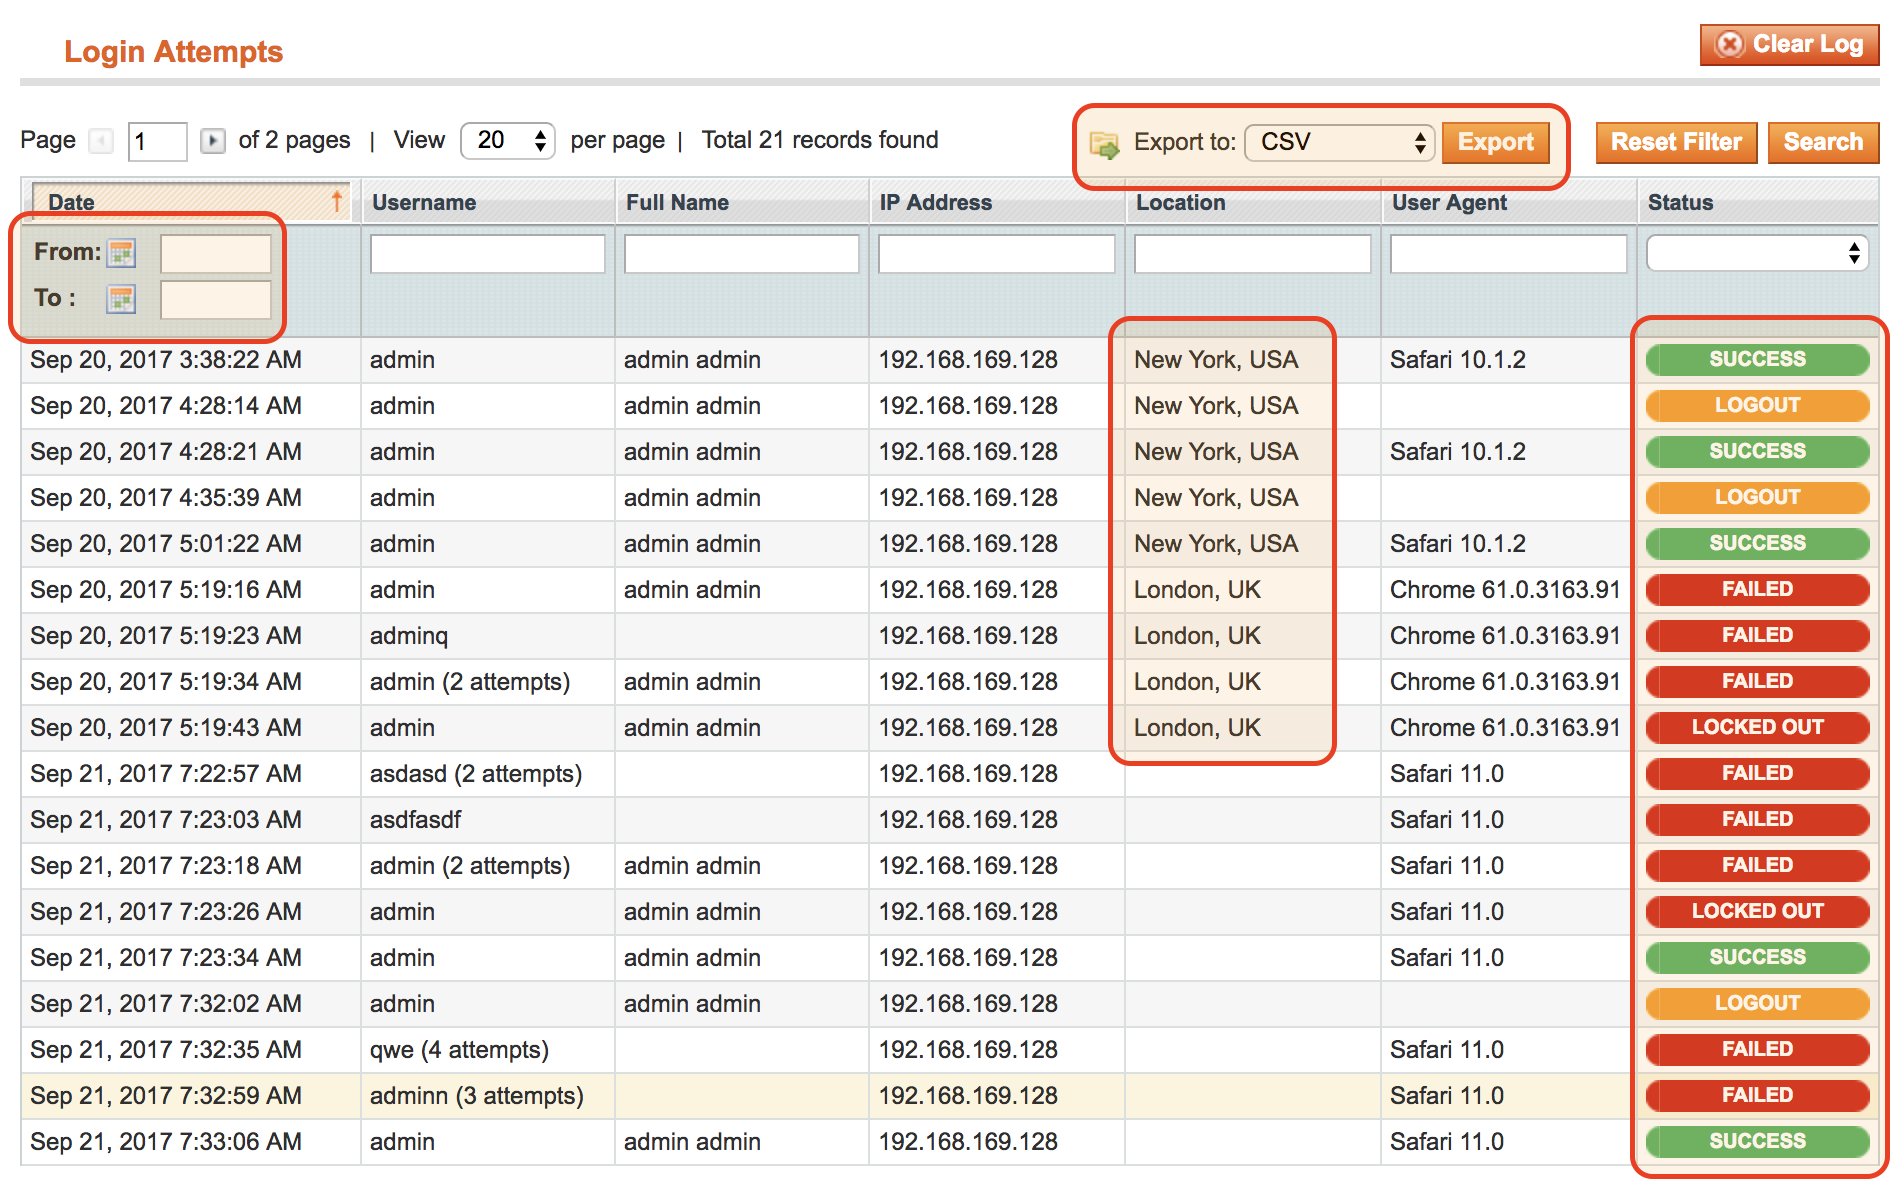
Date column - you can filter all login attempts by date.
Location column - allows seeing user geolocation. Available only if the GeoIP option for Admin Actions Log enabled.
'Export to' - this option allows export and download login attempts data in CSV and XML format.
Statuses of the attempts:
- Success - the admin user logged in successfully.
- Logout - the admin user successfully logged out from the store admin panel.
- Failed - the person tries to log in with a wrong username or password. “Failed” status are grouped by admin username or IP for better visual perception.
- Locked out - displayed when the person is already banned. Until the lockout time is finished all the login attempts will be unsuccessful (even if the password is right). This feature protects your store admin panel from robots.
Action Log page
To see the action log of all administrators please go to System → Admin Actions Log → Action log.
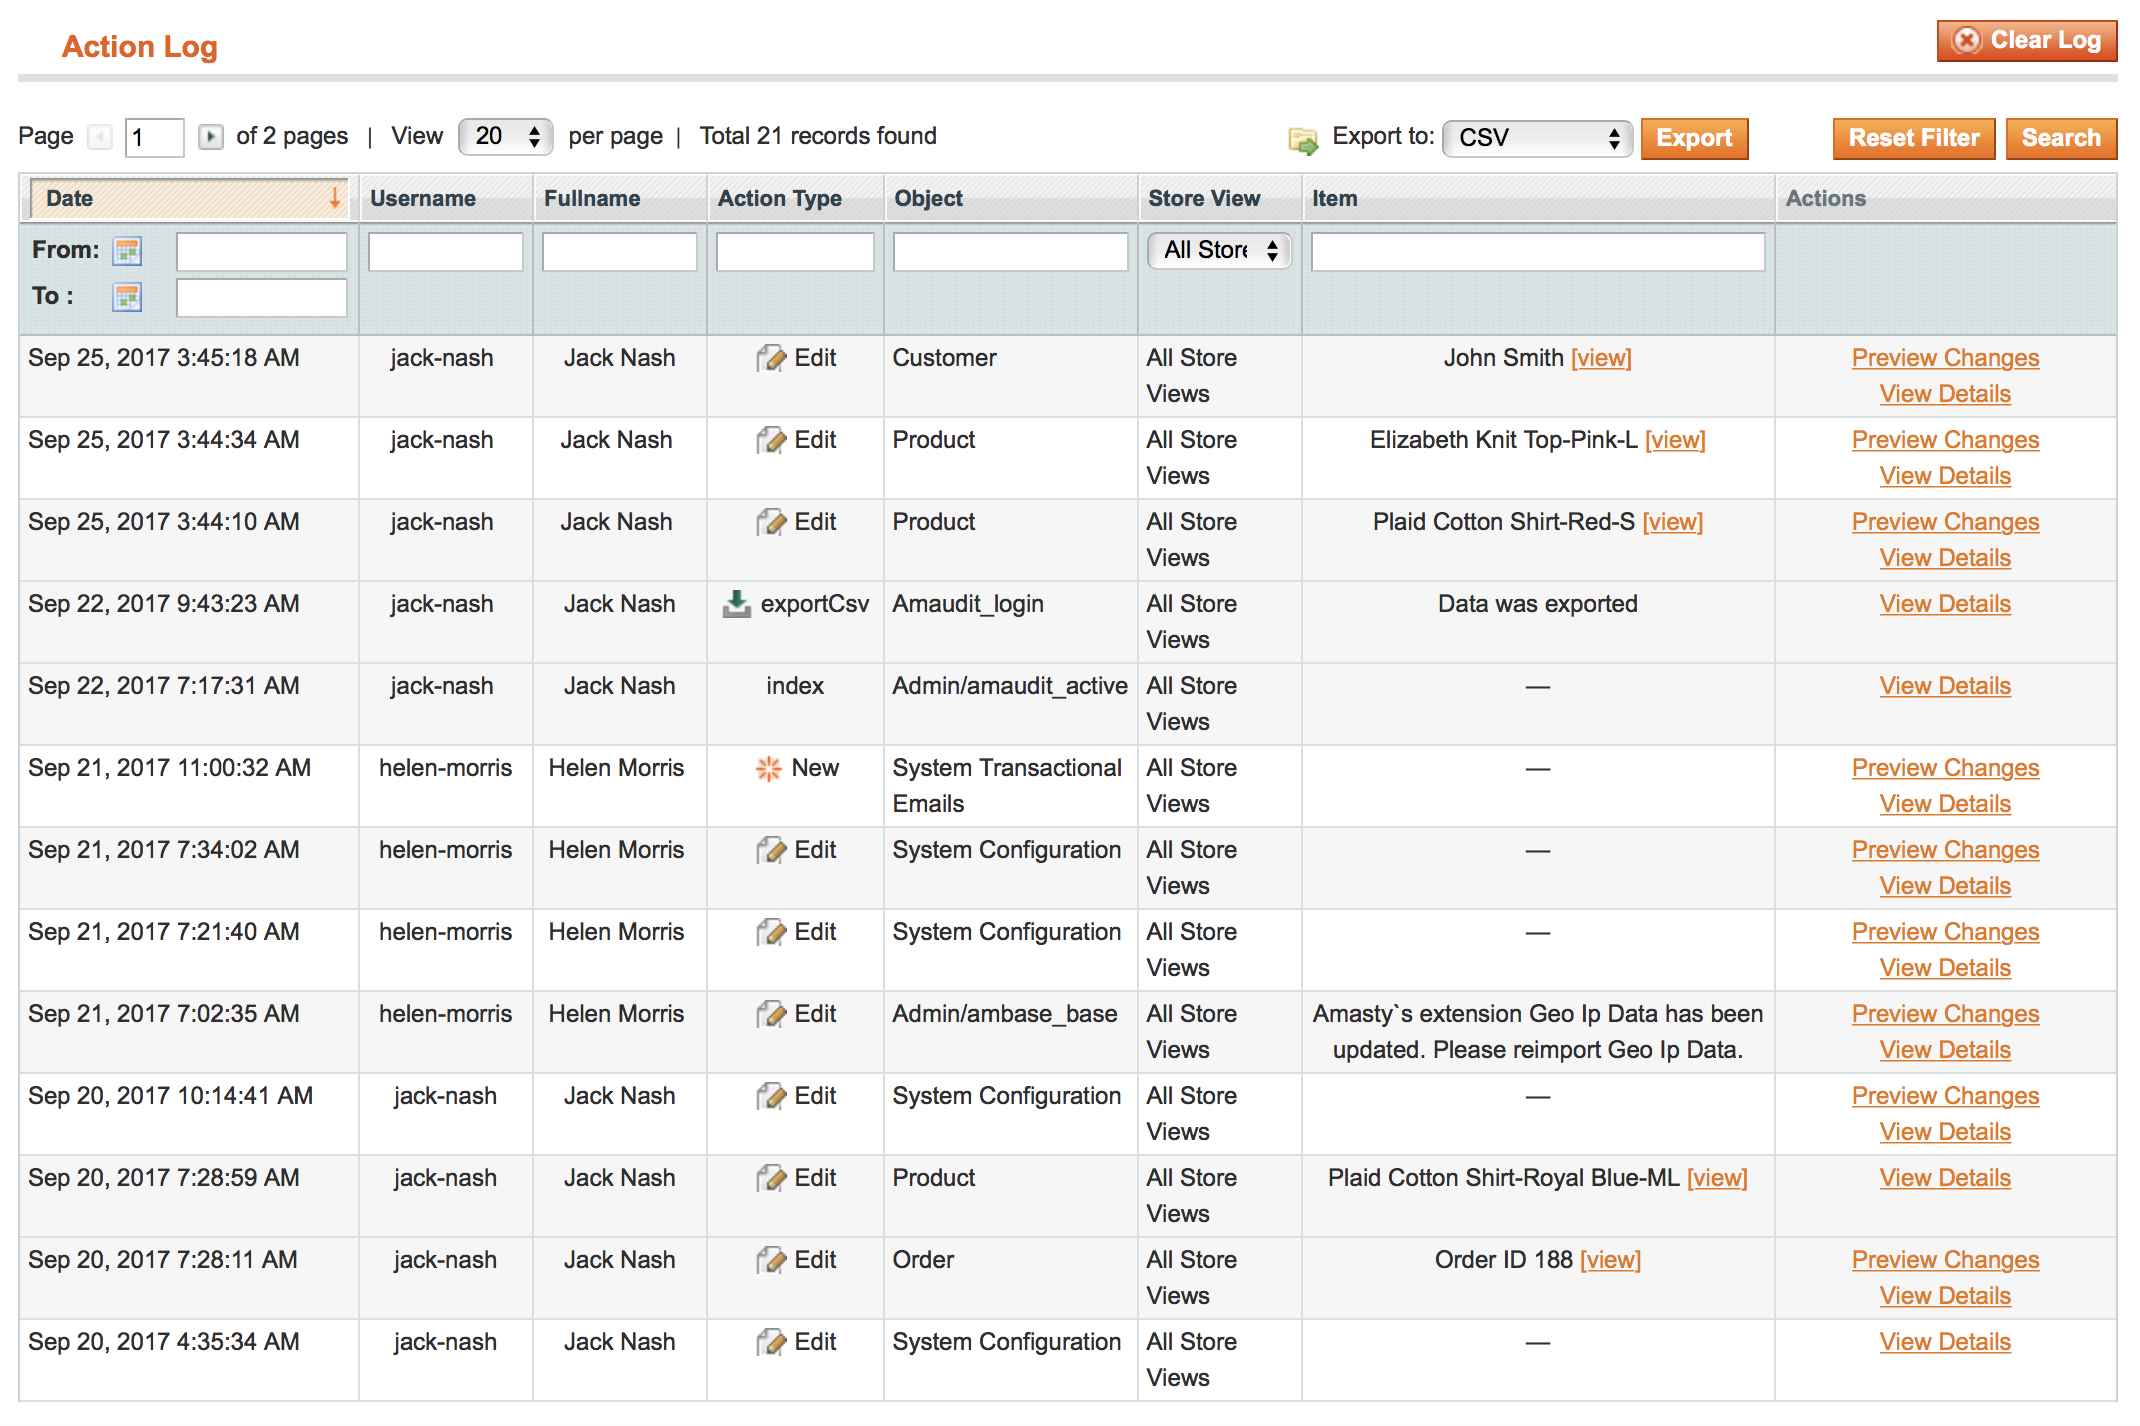
In the table you can see the person, the action type, the magento object and the item or customer account, which has been modified, created or deleted.
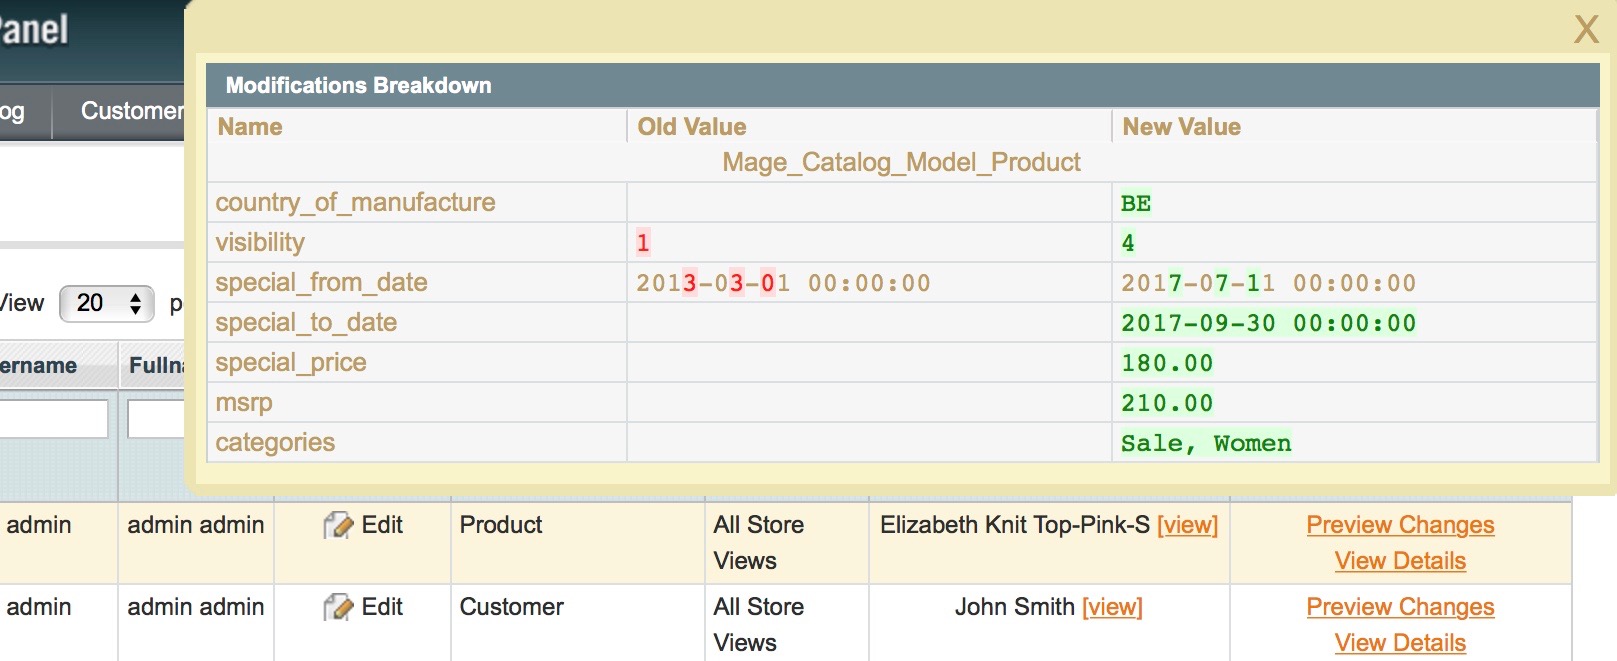
‘Preview Changes’ link in the ‘Actions’ column allows to see the brief info about the action which has been done:
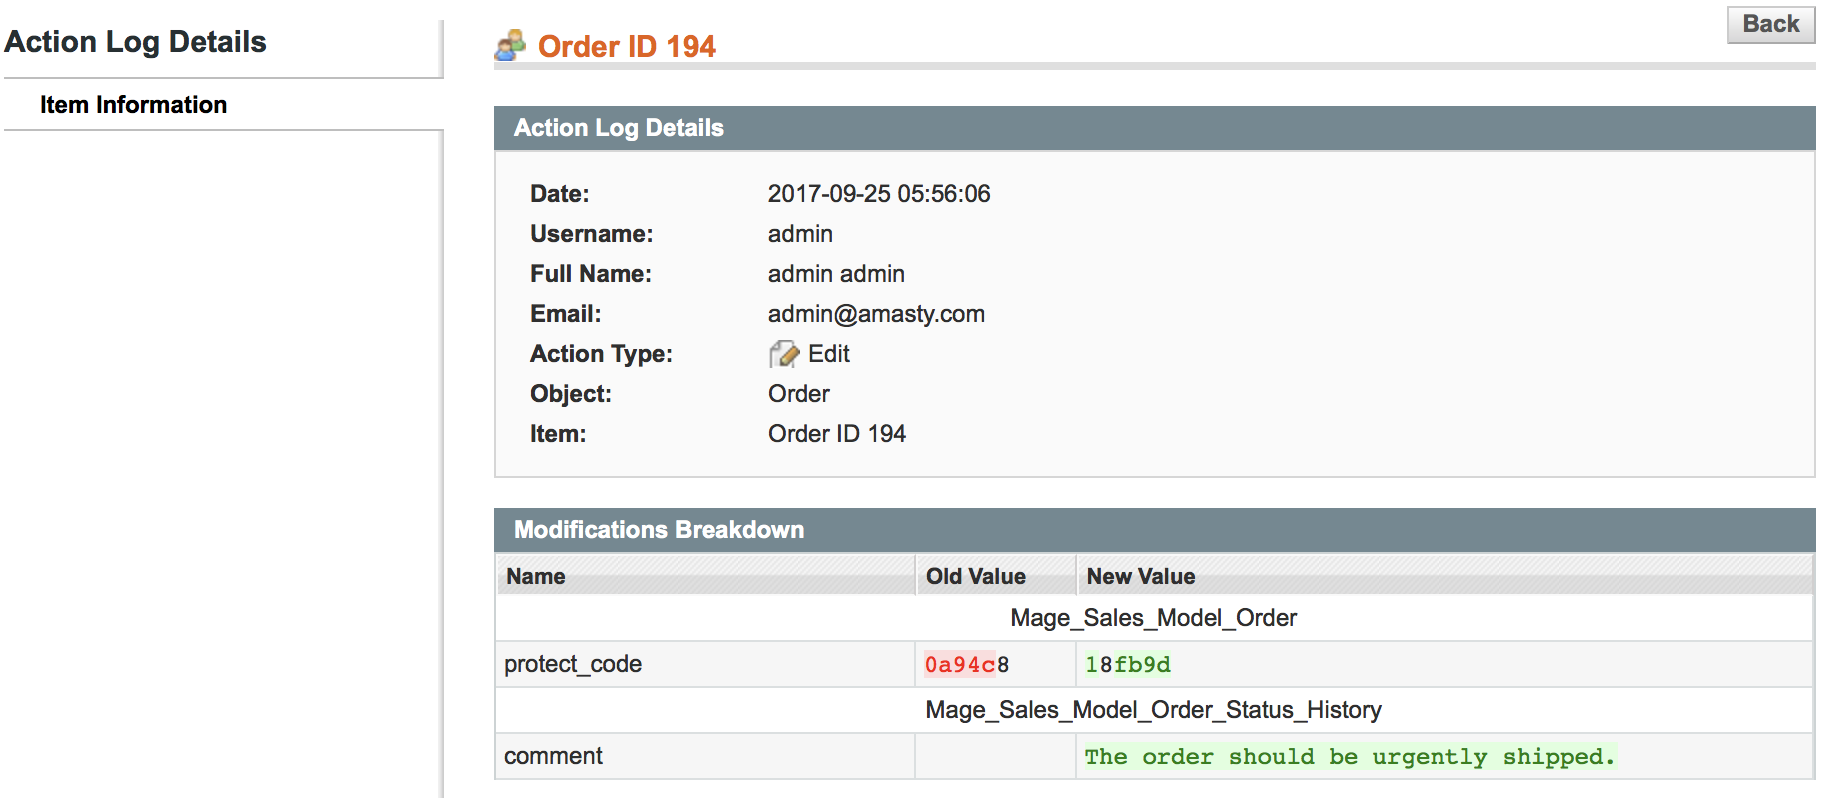
'View Details' link in the ‘Actions’ column of the log allows seeing the detailed view of changes made by the admin. Just click the link or click on the row you are interested in to view detailed Item Information:
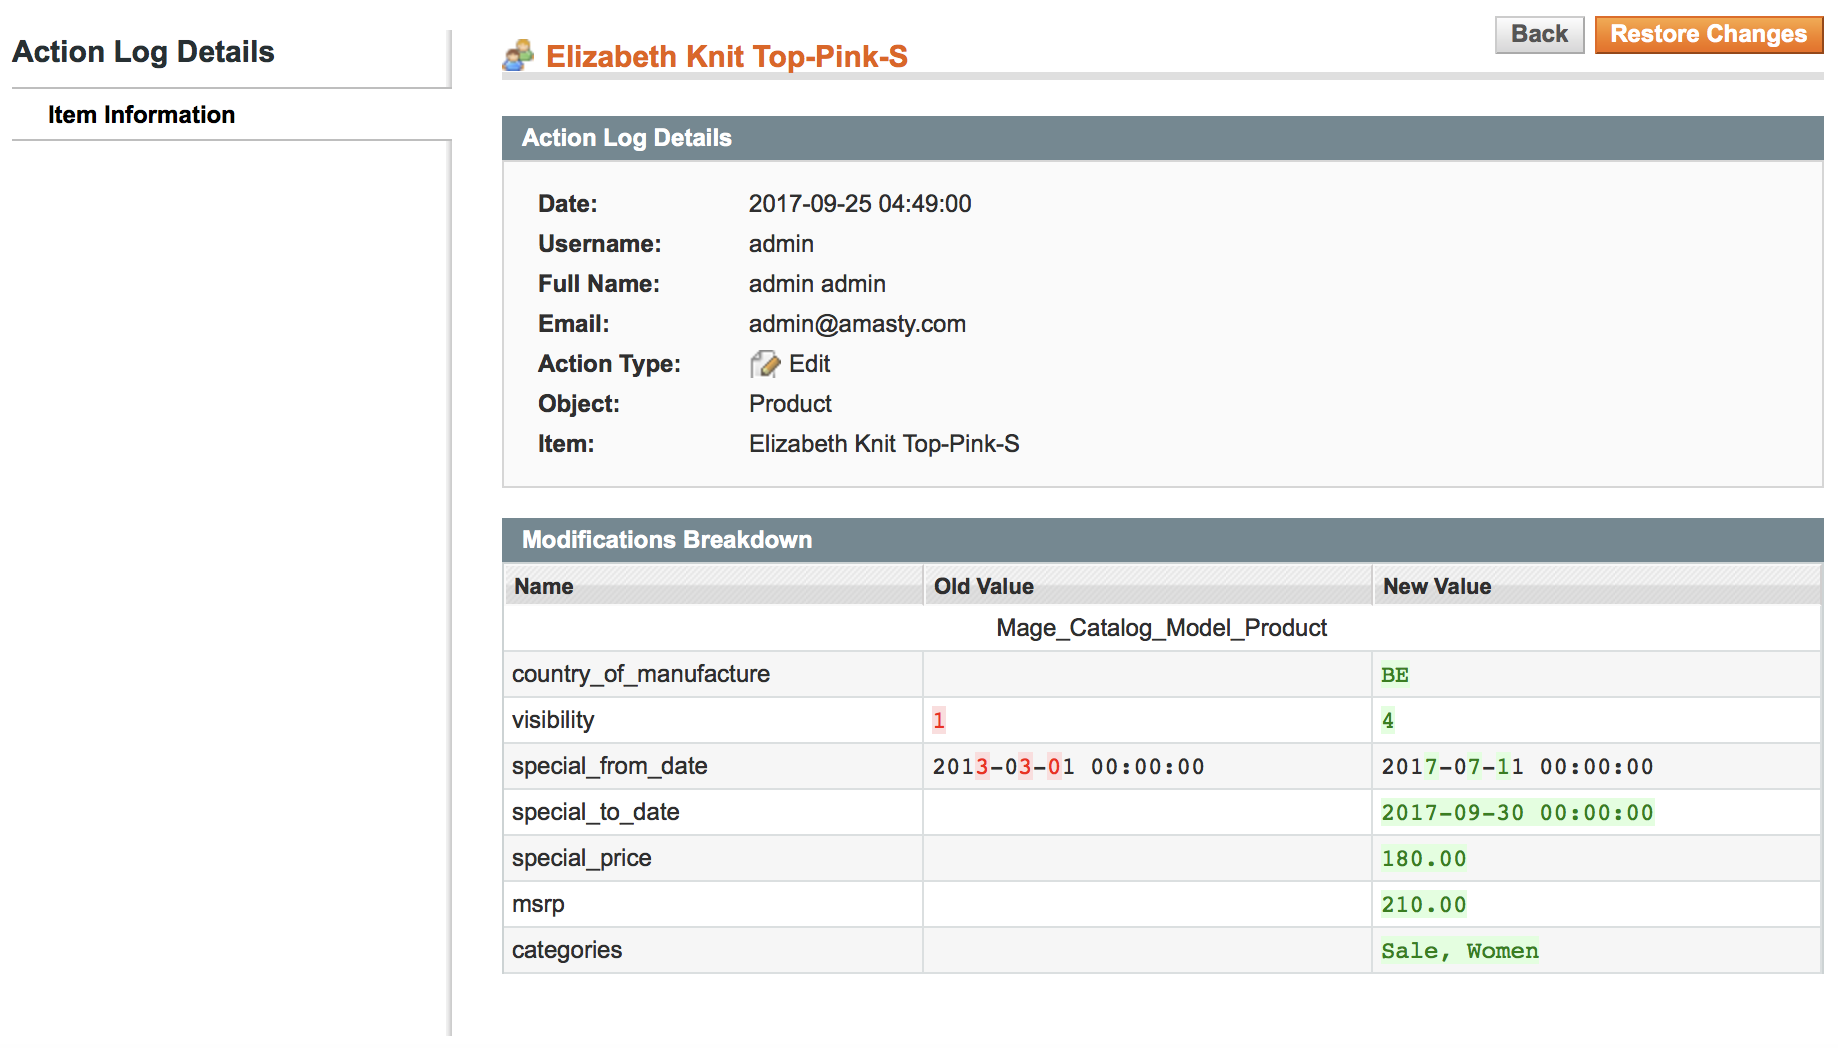
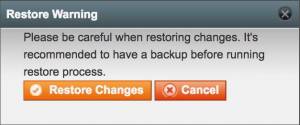
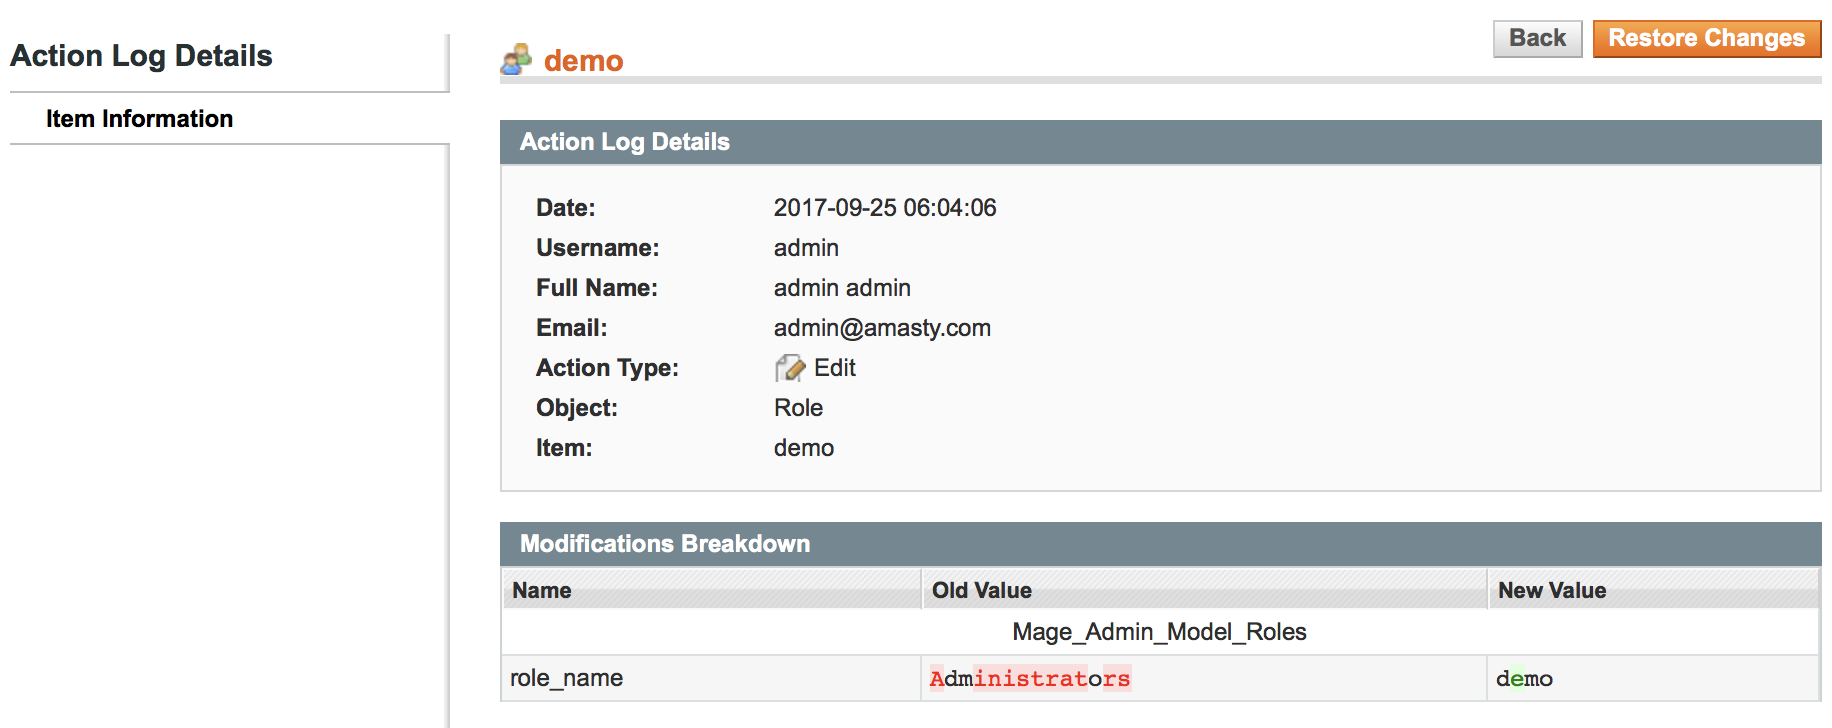
'Restore Changes' option on the 'Item Information' page allows to restore the recent changes. Click it and you will see the pop-up window where you need to confirm your action:
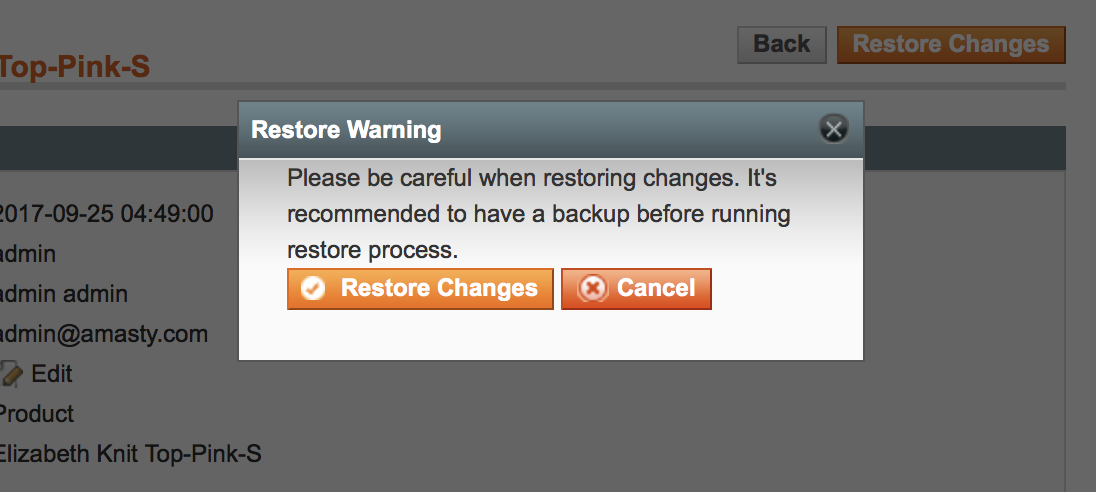
To edit the pop-up window text please go to System → Configuration → Admin Actions Log → Restore Settings.
Also, you can view the comments left by admin users for particular orders:
If the admin user role is changed the role info will be displayed in Actions Log details as well as in the preview window:
Active Sessions page
To view administrator sessions that are active right now please go to System → Admin Actions Log → Active Sessions.
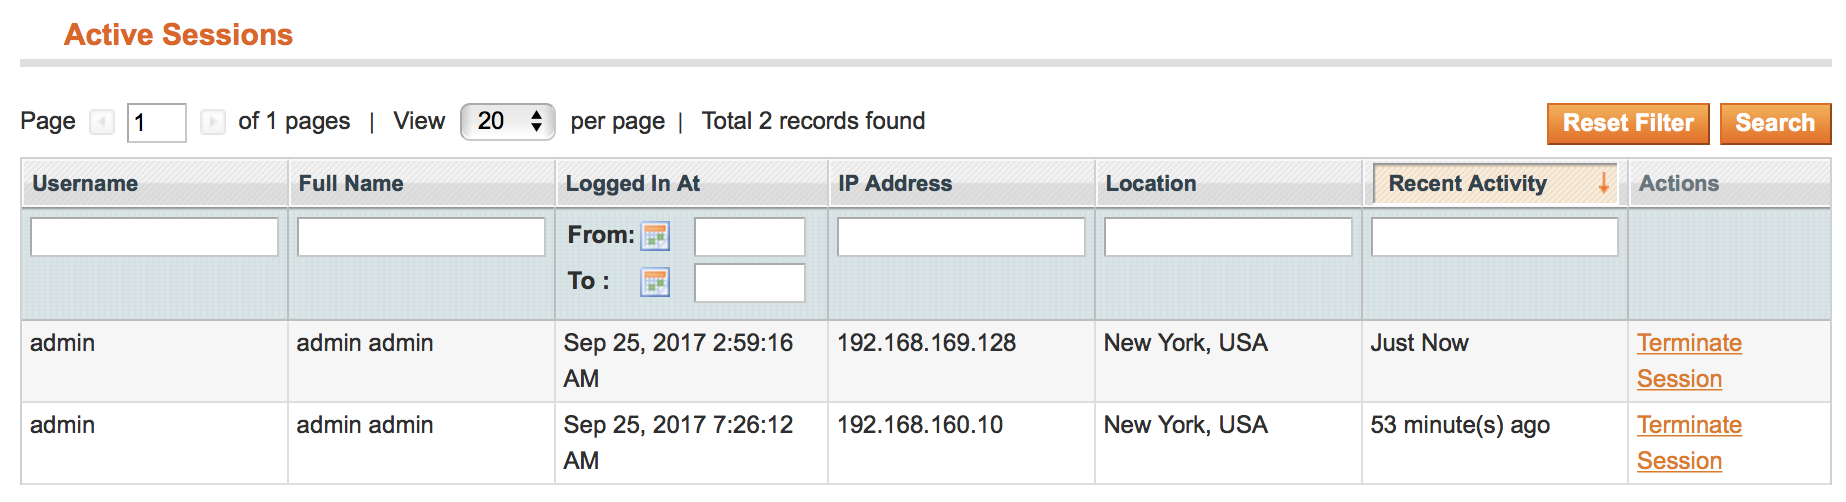
In the table you can see the person, date and time when the session started, IP-address and geolocation of the person, and how recent the session is.
'Terminate Session' - this option allows you to easily terminate any session in just one click.
Page Visit History
To see the history of Magento pages visited by all administrators please go to System → Admin Actions Log → Page Visit History.
Notice that actions are logged only for the users you specified at Configuration page.
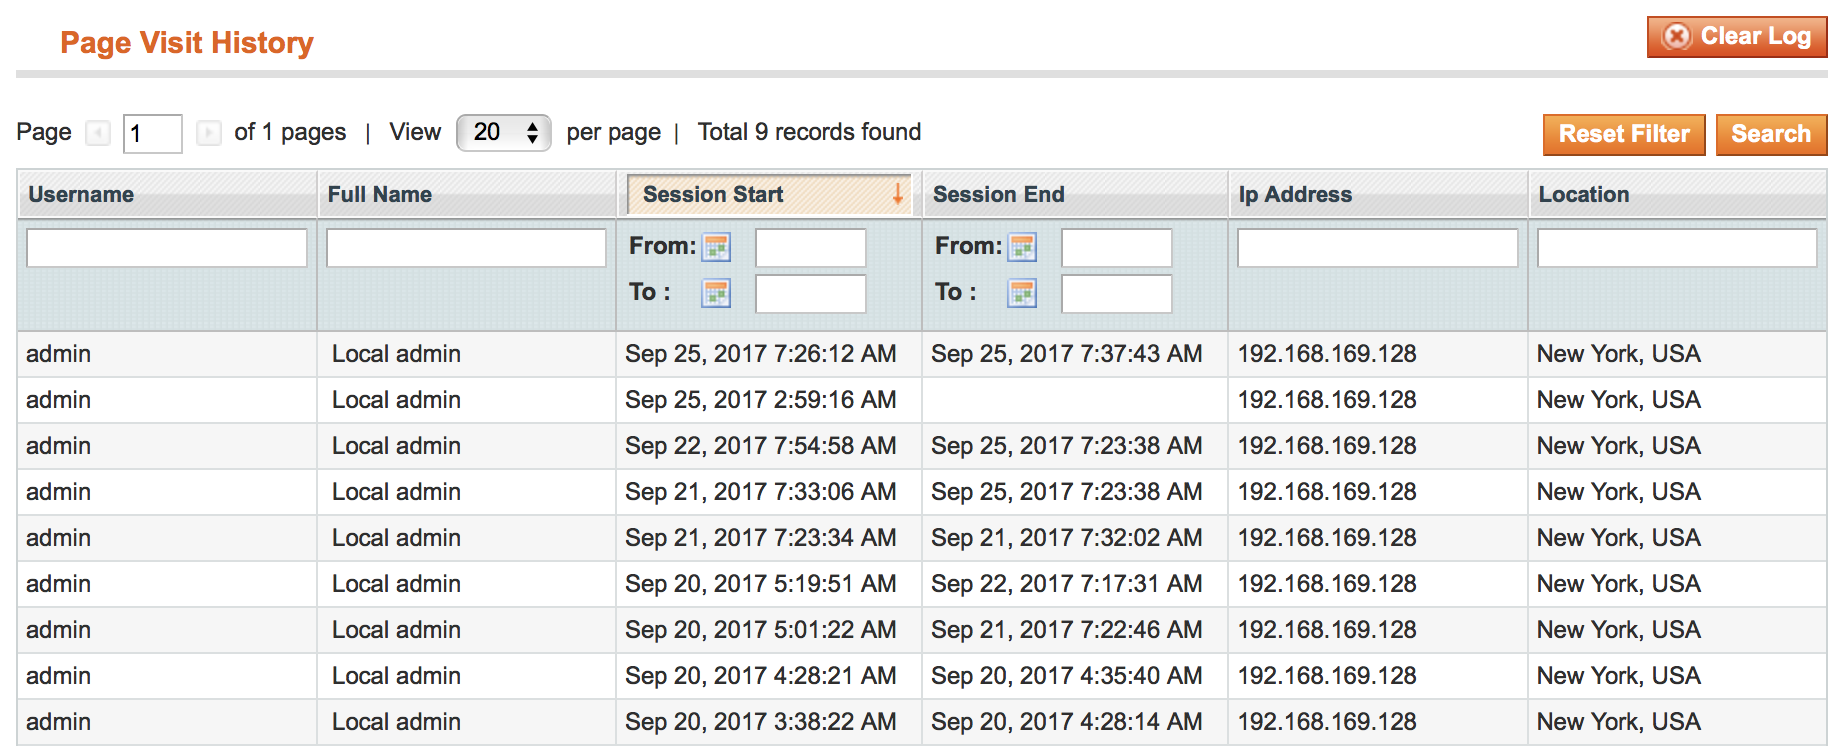
In the table you can see the person, date and time when the session started and ended, IP-address and geolocation of the person.
Click the person’s name to view a detailed Page Visit History of the particular administrator. You will be redirected to the Admin Data tab:
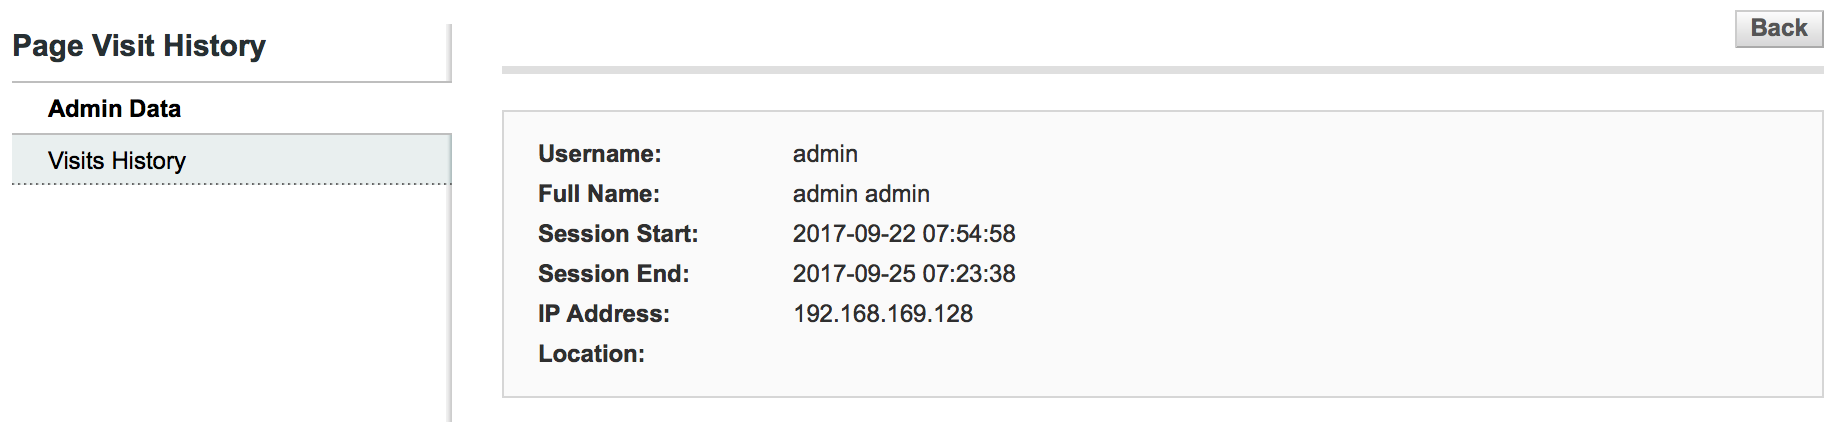
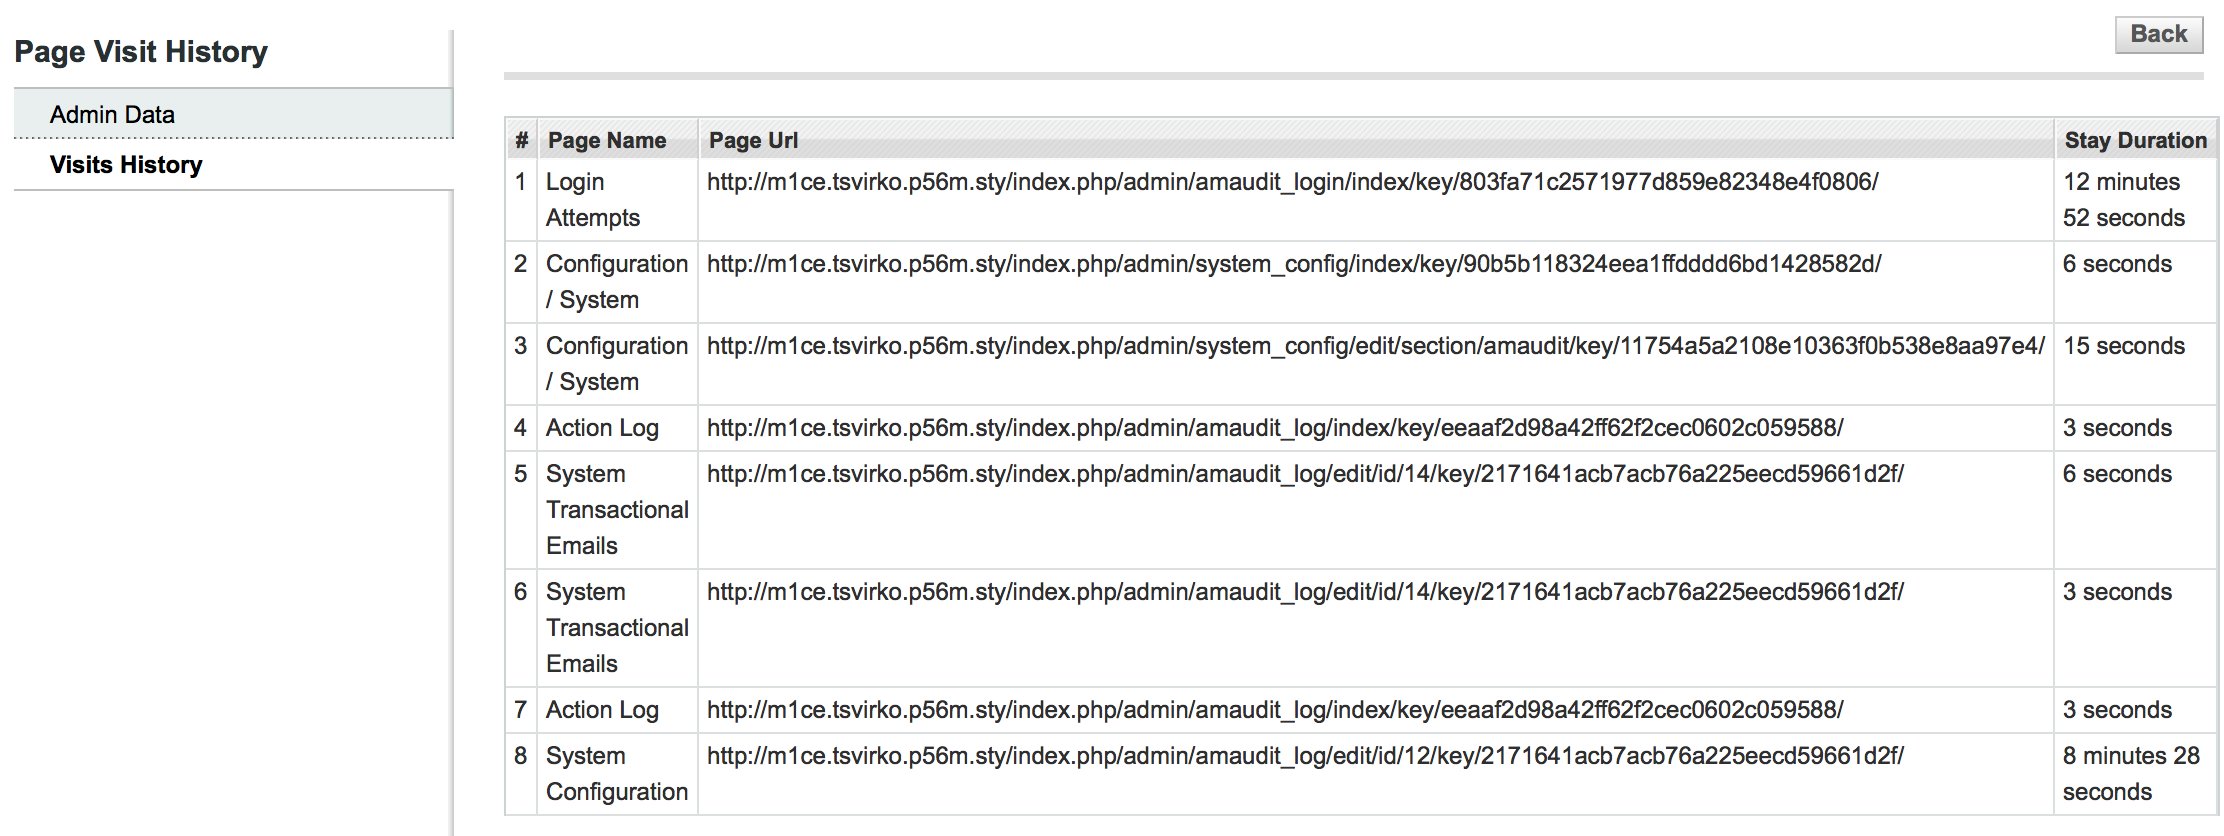
Click the Visits History tab to view the details of the session. You can see Page Name, URL address and the exact duration of staying on this page:
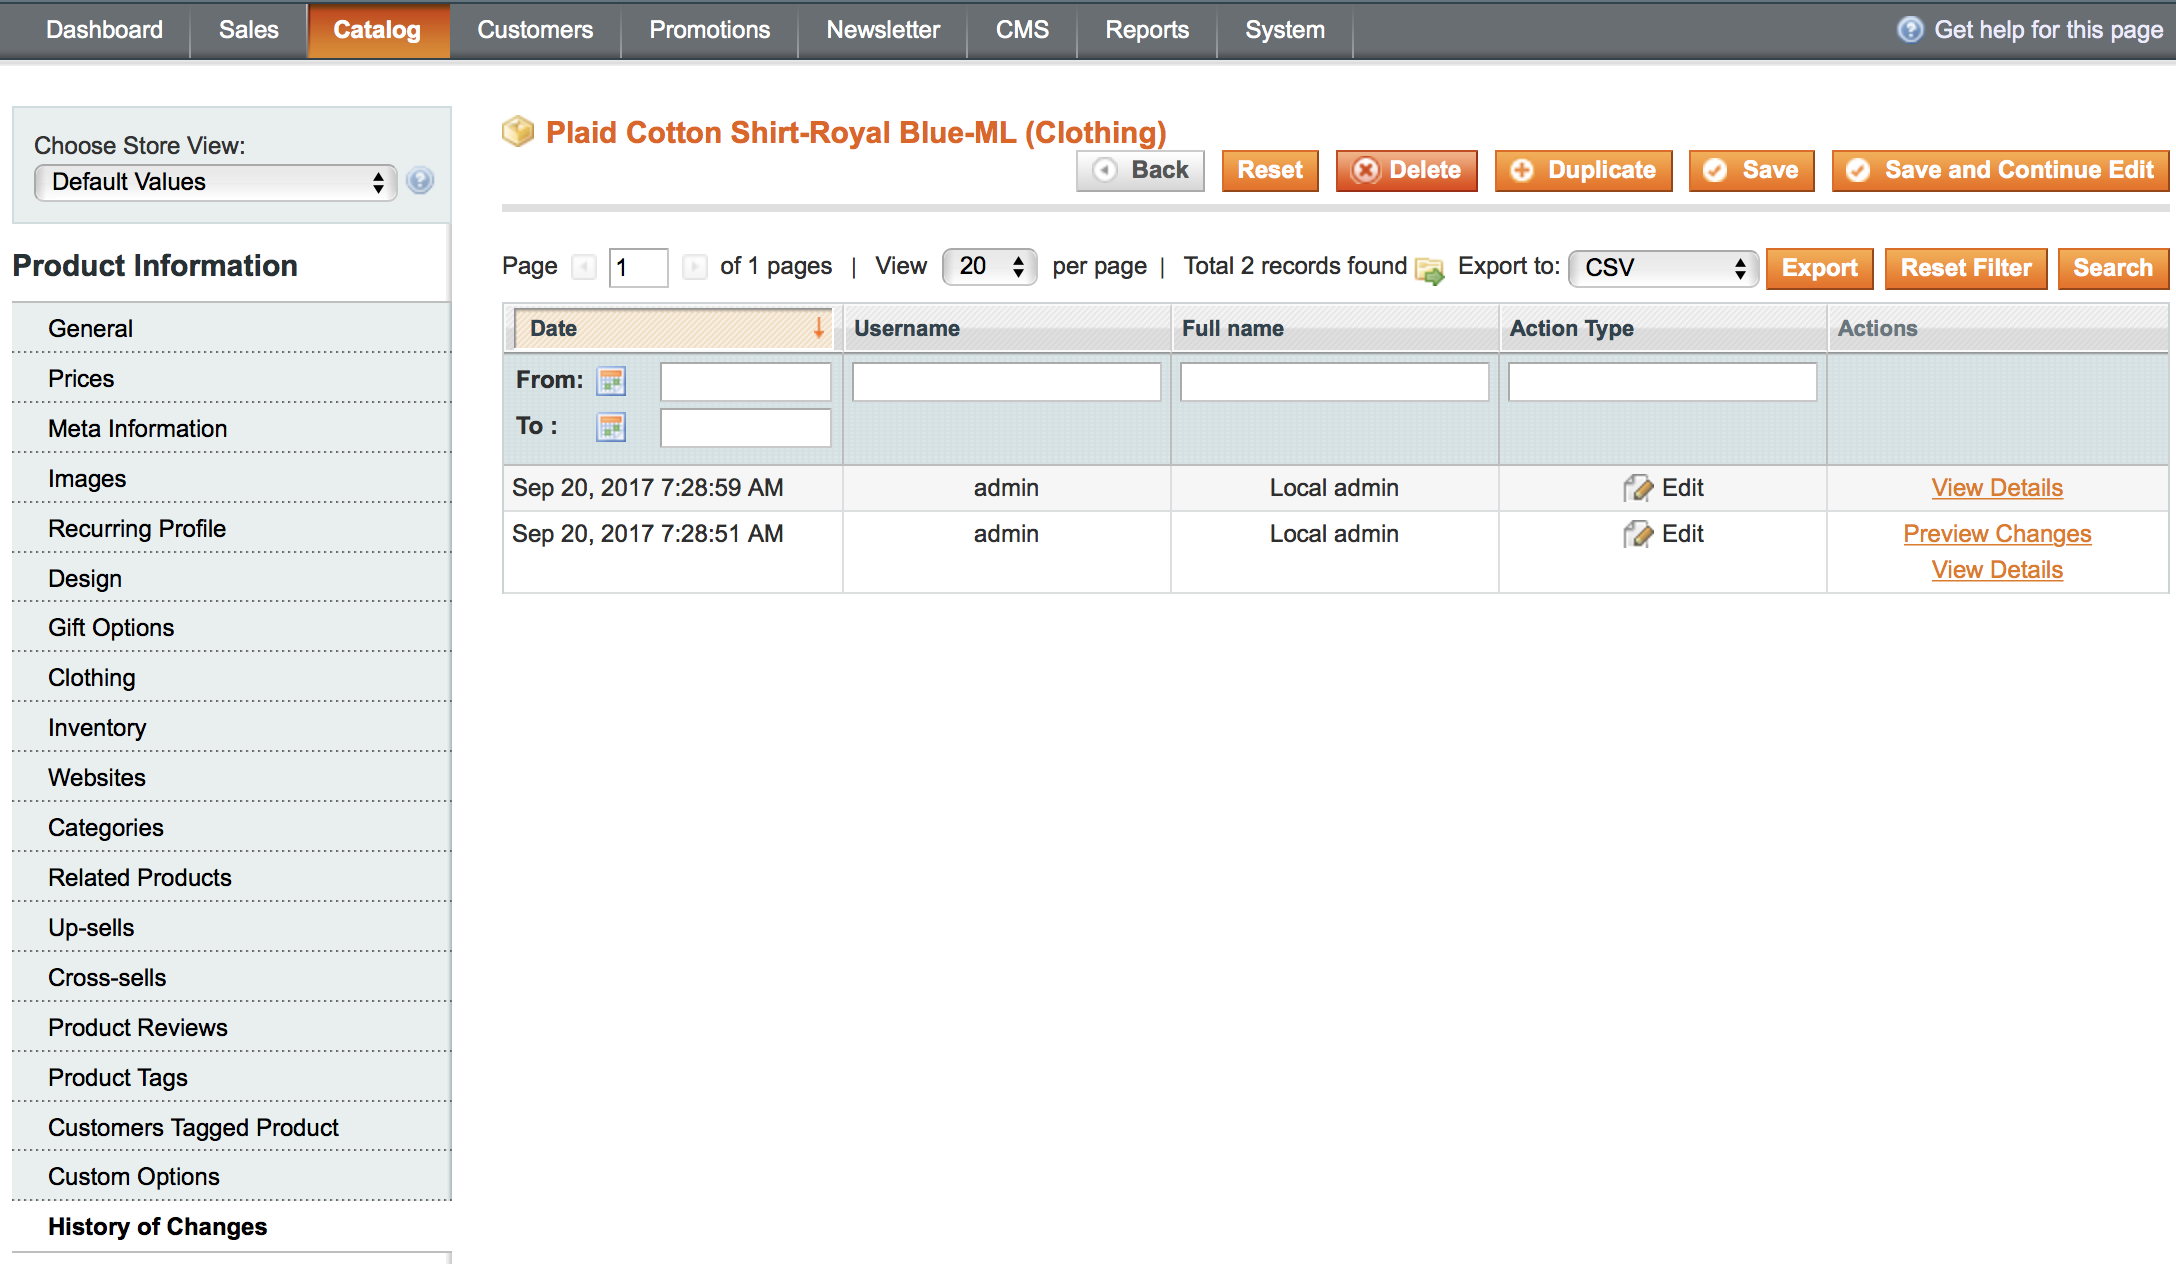
History Of Changes On Other Pages
The history of changes is available for product pages. To view the changes details for each particular product please go to Catalog → Manage Products → open the product you need and then open the History of changes tab.
You can also see the changes for:
- Item Orders: Sales→Orders → Open the order → History of Changes
- Customers: Customers→Manage Customers- >Open particular customer data→History of changes
For more details see the magento admin activity extension page.
magento_1/admin_actions_log.txt · Last modified: 2019/07/22 13:28 by skudrov