
Sidebar
magento_2:google_page_speed_optimizer_powered_by_speedsize
Table of Contents
For more details see the Google Page Speed Optimizer Powered by SpeedSize™ solution page.
Guide for Google Page Speed Optimizer Powered by SpeedSize™ for Magento 2
Never again compromise visual quality for better traffic. Upgrade your Magento store with significantly better performance capabilities using the synergy of Google Page Speed Optimizer and SpeedSize™ — a new standard in media optimization. Get an innovative solution powered by neuroscience media optimization.
- Improve site speed by AI-optimizing your media and code structure
- Get ~99% smaller and visually lossless media size by integrating with the SpeedSize™ platform
- Load like a PRO — fix all media-related Google PageSpeed Core Web Vitals errors and improve Magento 2 speed metrics. Get your site into the green zone
- Boost SEO ranking and reach the top of the search results page
- Drive more sales by empowering UX with 4K images and videos
SpeedSize™ Media Optimization
SpeedSize™ neuroscience-powered AI analyzes your original media, recreates it in its identical high quality but smaller in size (only a few KBs), and delivers it from SpeedSize’s CDN (or yours).
Improve your site’s speed and media quality now. To enable the integration, navigate to Stores → Configuration → Amasty Extensions → Image Optimizer and expand the SpeedSize Settings tab.

Public Key - insert the key generated on the SpeedSize side.
CDN - specify the CDN.
Video support: if SpeedSize is enabled (CDN and Public Key are correctly filled out), the original video links on the pages will be replaced with the SpeedSize links without additional configuration.
Code Optimization Tips
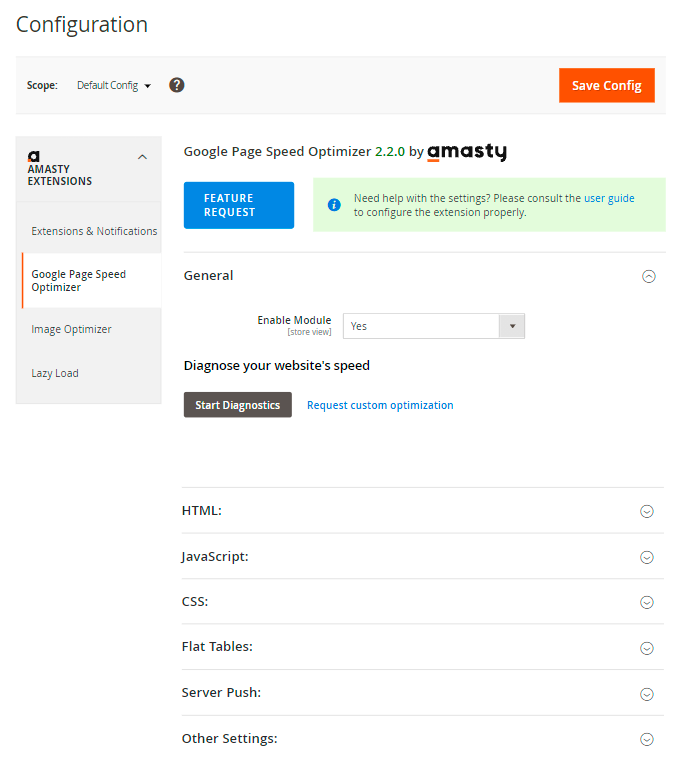
Before starting the optimization, check your website’s current Google score right from the admin panel using the Diagnostic option. This built-in testing tool helps you to measure the result after enabling each option. Diagnostics include the tips for Magento optimization based on the current score and the metrics that should be improved. Follow the recommendations to get the most out of the extension. Moreover, for your convenience, Magento performance optimization tips display a precise way for the feature that should be enabled to improve a specific metric.
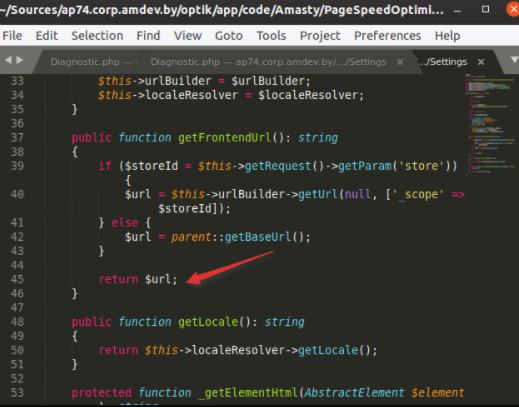
Please, mind that the extension automatically gets the URL of a real webstore to check. But if you install the module on a test instance, specify the required URL here:
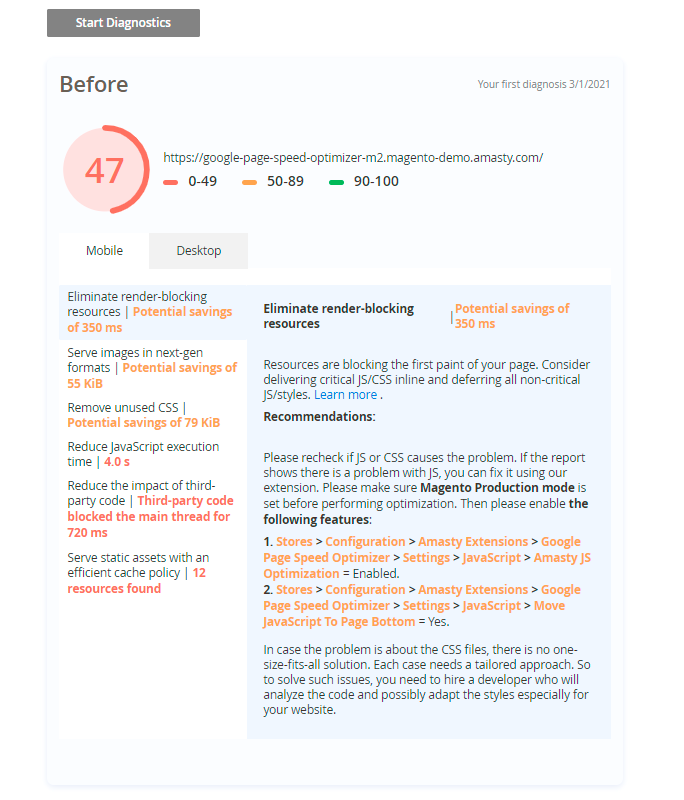
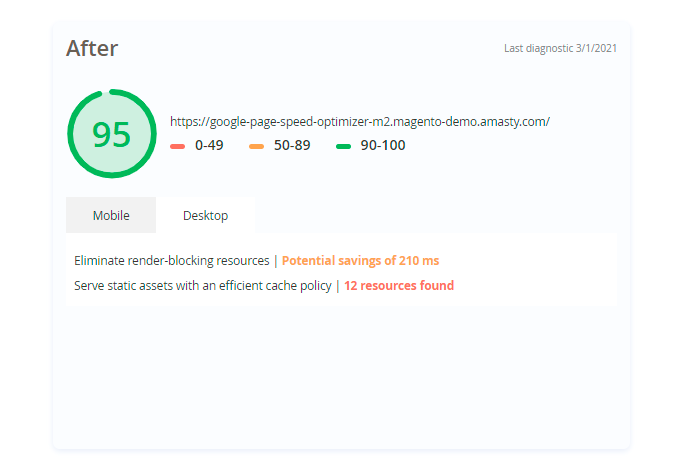
You may see the desktop and mobile page speed scores separately. The informative block also contains Google recommendations.
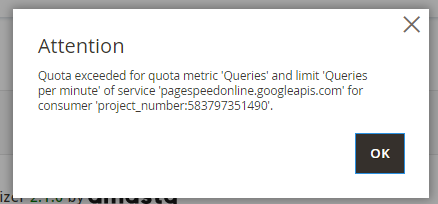
Note that Google has a limit for checking. If you face the issue below, please wait for some time and restart diagnostics.
Follow the recommendations and check the result once more. You will see the result in the After tab.
Before starting configuration, please, set Magento Production mode instead of Developer or Default. The Production mode is required to get the best performance of this extension.
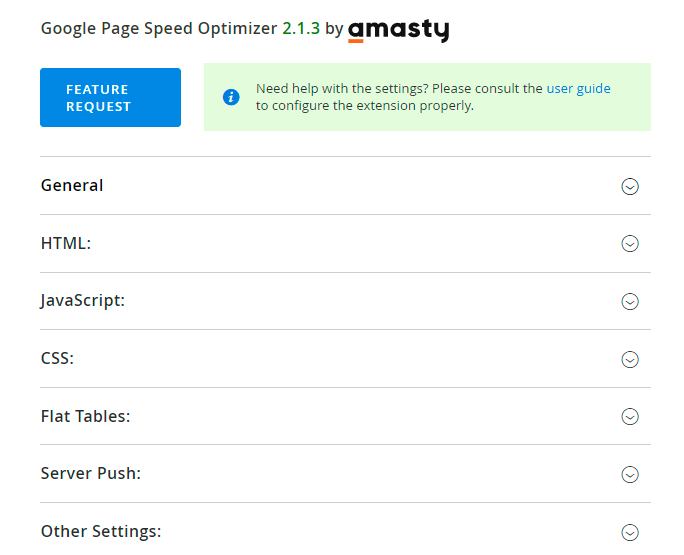
Google Page Speed Optimizer
This part of the extension contains code optimization and some other settings to make your webstore load faster.
The extension also works on Magento cloud.
Using the settings, you can reduce HTML, CSS and JS code size. The extension removes all unnecessary line breaks, tabs, comments and spaces. Also, it includes some advanced settings, such as server push.
HTML Minification
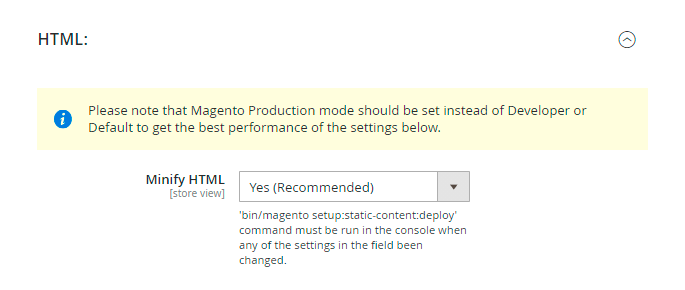
Minify HTML - set the option to Yes to enable HTML minification.
Prioritize Resource Loading - when enabled (Yes), the extension sorts the resources in the <head> tag, prioritizing the most important ones to ensure faster loading. The order of priority is as follows:
- Meta tags and page title
- Critical resources (inline CSS in <style> and inline scripts)
- External CSS files
- Fonts
- JavaScript
The Prioritize Resource Loading feature is available in the Pro and Premium extension versions, as a part of an active support or product subscription. You can find the amasty/module-optimizer-subscription-functionality package for installation in composer suggest.
When any of the settings in the field have been changed, execute the following command:
bin/magento setup:static-content:deploy
JavaScript
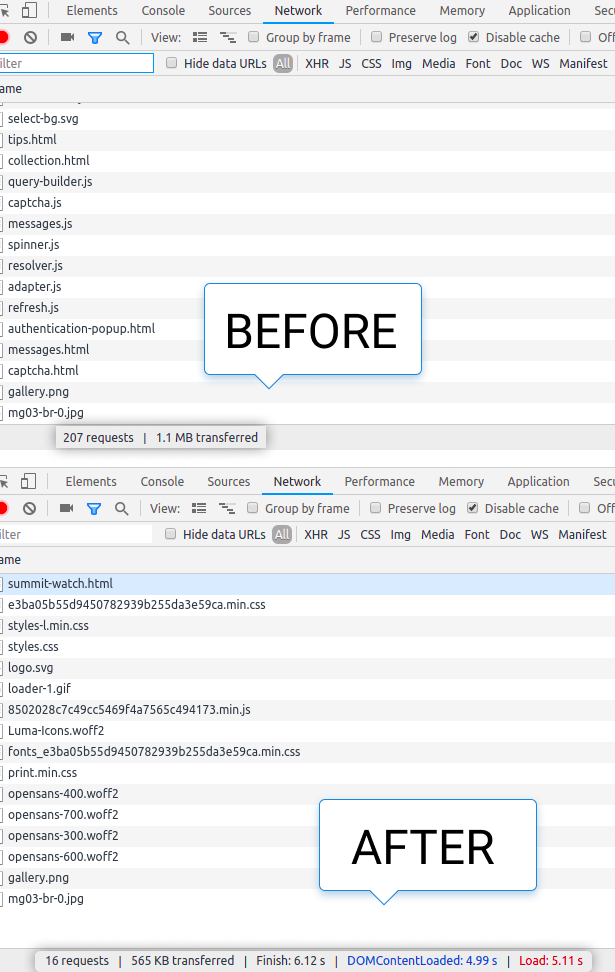
In this tab, you can create an advanced bundle of JS using the Advanced JS Bundling feature and JS Minification that will significantly reduce the page size in kilobytes and increase the page load speed. Google rank for both mobile and desktop will be improved.
You will need to use CLI commands to run through the optimization. Please make sure that you have access to the console and know how to do it.
Please create a full backup of your Magento instance and follow the instructions that are displayed in the Run Optimization section.
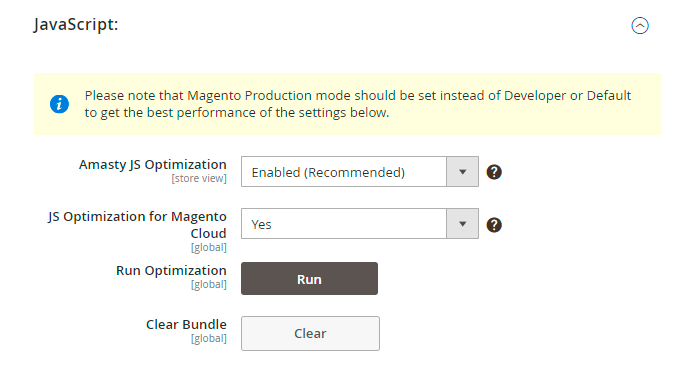
To run the optimization, set the Amasty JS Optimization option to Enabled.
Is Magento Cloud - set to Yes if you use Magento Cloud hosting platform.
Click Start.
Easily Clear Bundle if needed.
Automatic Optimization
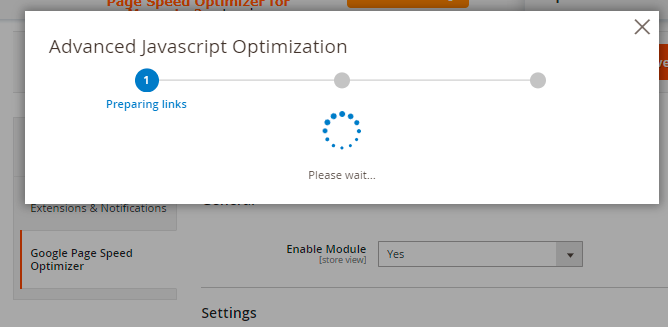
Step 1. After clicking the Start button, the extension starts preparing all the links for optimization.
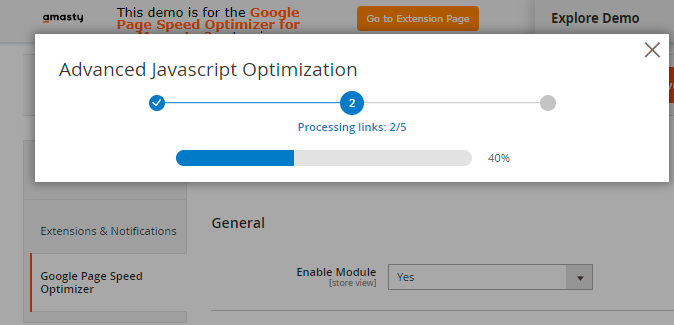
Step 2. Links processing progress is displayed on the bar.
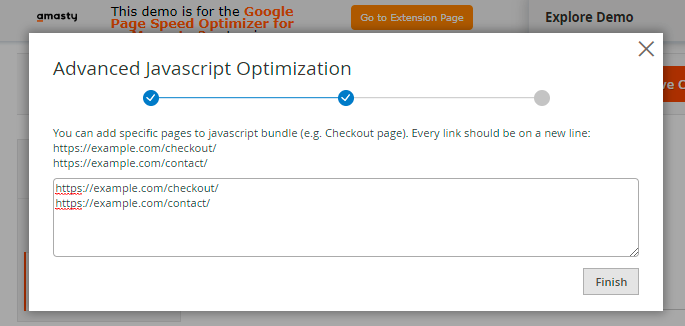
When all the links from the bundle are successfully processed, you can add specific pages to JavaScript bundle. Keep in mind that each link should be placed on a new line.
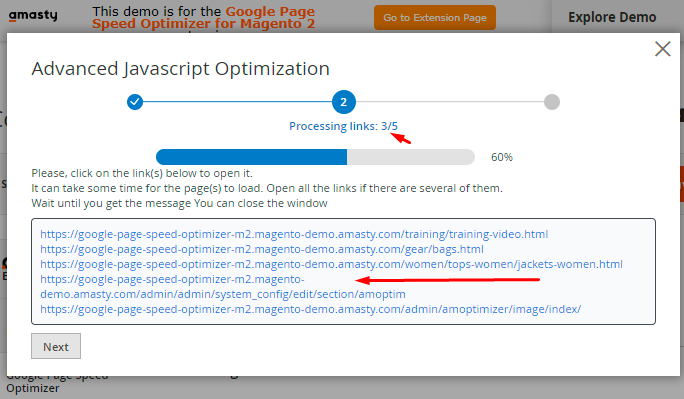
If any errors are found, the processing will be stopped and the error message will appear. You may check the particular link that caused a failure. For example, 3/5 links have been successfully processed and then the message appears. It means that the 4th link contains some problems. Easily click on it to check if it is valid or not and correct the link or page itself if needed.
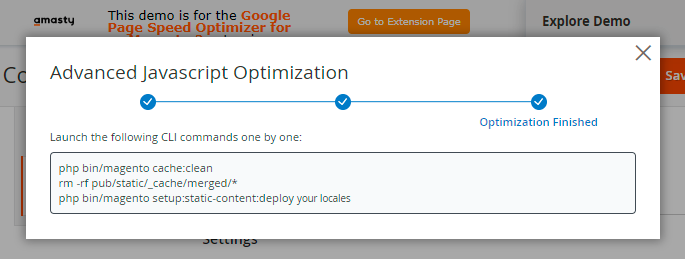
Step 3. When optimization is finished, you will see the appropriate message and a list of commands that should be executed.
'Is Magento Cloud' Usage
Previously, the setting 'Is Magento Cloud' was created for Magento Cloud usage. But, to avoid manual deployment, you can also use this setting even if you don't use the Cloud. Follow the steps below to set up an automatic deploy:
1. Set 'Is Magento Cloud' option to 'Yes'
2. Find the app/etc/config.php file. There you will see the list of installed modules. To create an optimization file, you will need the following massive:
'system' => [
         'default' => [
		     'dev' => [
			     'template' => [
				     'minify_html' => 1
				  ],
				  'js' => [
				       'merge_files' => 1,
					   'enable_js_bundling' => 1,
					   'minify_files' =>1
				  ]
			  ]
		  ]
	]
3. Go back to your admin panel and click Run Optimization → Start.
4. The extension will generate the code that should be put into cloud repository:
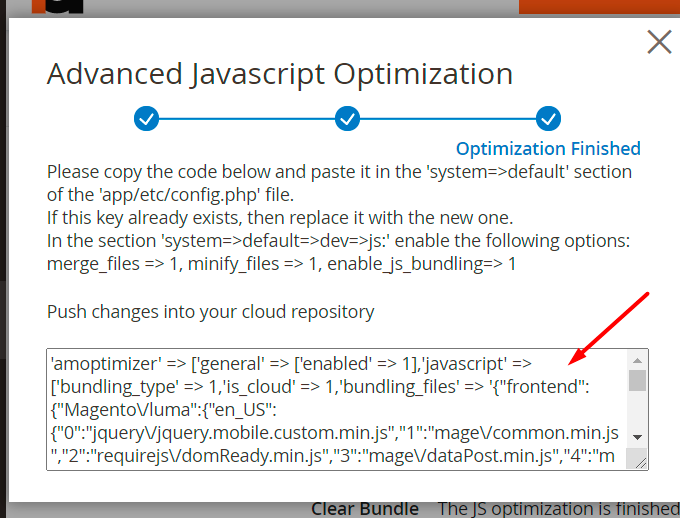
You can see the detailed instructions for generating in the Advanced Javascript Optimization.
5. Copy the generated code and paste it after ‘default’ arrow in app/etc/config.php:

6. Save the config.php file.
Additional JS Options
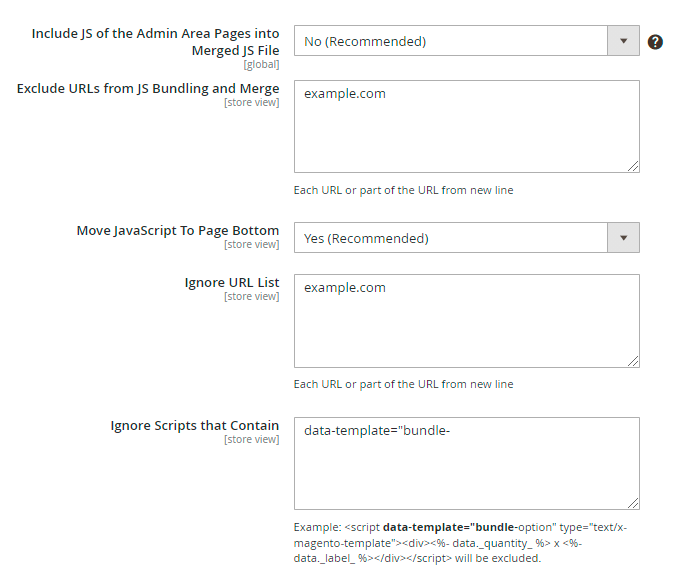
Include JS of the Admin Area Pages into Merged JS File - enable this option if you want to optimize the admin area as well.
Optimizing the admin area pages sometimes leads to malfunctions and doesn't affect the Google rating.
Exclude URLs from JS Bundling and Merge - specify particular URLs that shouldn't be merged or minified. Start each URL or part of the URL from a new line.
Don’t forget to run the command
bin/magento setup:static-content:deploy
in the console after any changes in this block of settings have been made.
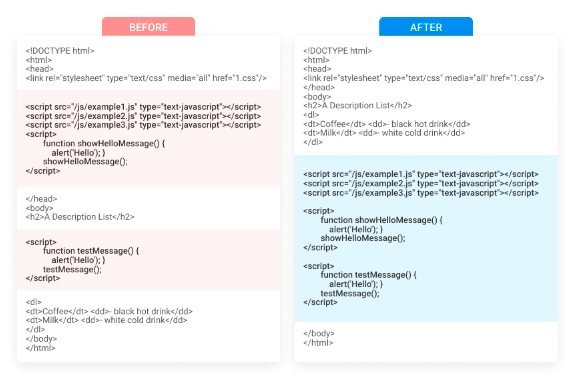
Move JavaScript To Page Bottom option helps to load all the important content before loading JS. The functionality improves page loading time.
Ignore URL List - provide URLs of the pages on which JS shouldn't be moved to the bottom.
Ignore Scripts that Contain - you may also specify particular scripts and their parts if you want them to exclude from moving.
The sample of the Moving to Footer feature:
JavaScript Optimization Strategy
Please note that the the ability to choose a strategy for JavaScript optimization is available only as a part of an active support or product subscription. You can find the amasty/module-optimizer-subscription-functionality package for installation in composer suggest.
Scripts that Contain - add the scripts you want to optimize according to the chosen strategy.
Example: <script data-template=“bundle-option” type=“text/x-magento-template”><div><%- data._quantity_ %> x <%- data._label_ %></div></script>
Strategy - choose the strategy for JavaScript optimization.
- Defer - for delayed JS files loading.
- Async - to load JS files asynchronously.
If Amasty JS Optimization is Disabled, you can customize the way of code optimization. Besides Moving JS To Page Bottom, there are 4 additional options to reduce your JS code. You can also exclude particular URLs and scripts.
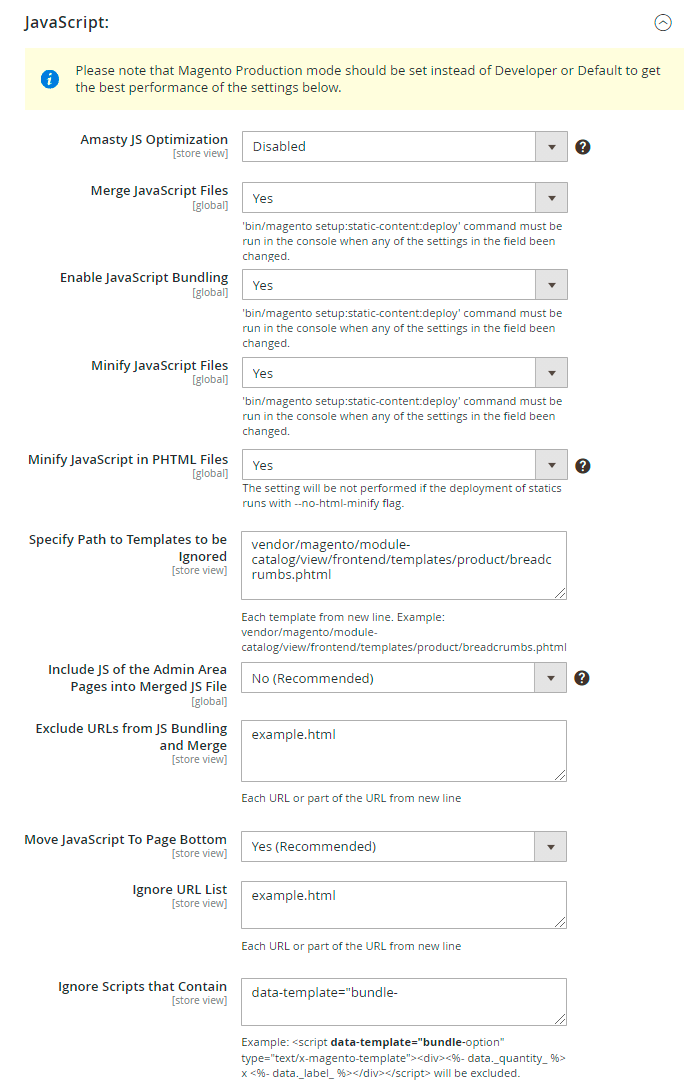

Merge JavaScript Files - select Yes to put all JS files into one. As a result, the number of queries will be reduced.
Enable JavaScript Bundling - enable this option to combine all JS files into a few bundles and download them for each page. This helps to save time by reducing the number of server requests.
Notice that as browsers download the bundles synchronously, page rendering is blocked until all bundles finish downloading.
Minify JavaScript Files - set to Yes to enable JS minification.
Minify JavaScript in PHTML Files - enable this option to reduce the load time of non-cacheable pages by minifying JS in PHTML files when deploying statics.
The setting will be not performed if the deployment of statics runs with –no-html-minify flag. Also, this setting is recommended to be run on the testing environment first.
Specify Path to Templates to be Ignored - exclude particular templates from minifying if needed.
Include JS of the Admin Area Pages into Merged JS File - enable this option if you want to optimize the admin area as well.
Optimizing the admin area pages sometimes leads to malfunctions and doesn't affect the Google rating.
Exclude URLs from JS Bundling and Merge - specify particular URLs that shouldn't be merged or minified. Start each URL or part of the URL from a new line.
Don’t forget to run the command
bin/magento setup:static-content:deploy
in the console after any changes in this block of settings have been made.
This is how the bundling feature works:
CSS
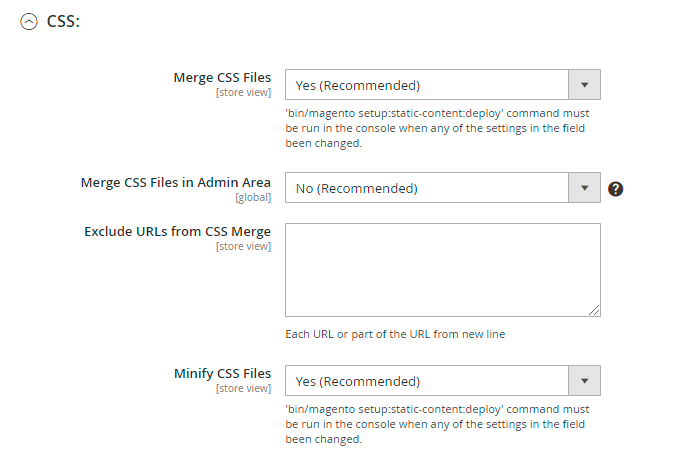
Merging CSS Files works the same way as merging JS files.
Merge CSS Files in Admin Area - set No to forbid CSS files merging in the admin area. It won't affect your Goggle rating.
Exclude URLs from CSS Merge if needed.
Minifying CSS Files works the same way as minifying JS and HTML.
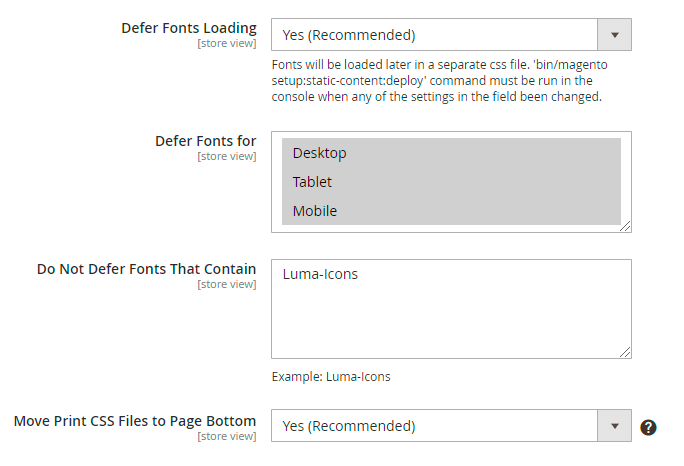
If you set Defer Fonts Loading to Yes, the browser will load the page with system fonts and replace them with your fonts when they are loaded. It makes store pages load faster.
The following command must be run in the console when any of the settings in the field been changed:
bin/magento setup:static-content:deploy
Defer Fonts for - choose the particular devices for which the fonts should be deferred.
You may exclude some fonts from deferring in the Do Not Defer Fonts That Contain option.
As in the JS tab, you can also Move Print CSS Files to Page Bottom to make your page render faster.
Flat Tables
Flat Tables allow storing all the information about a category or a product. Such tables help to shorten the query in the database.
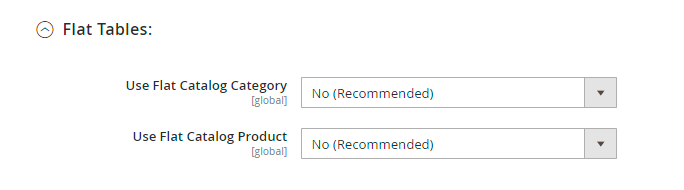
Keep in mind that flat catalog usage is not recommended by Magento documentation. See more details here.
Server Push/ Preload
A powerful feature of HTTP/2 represents the ability of the server to send multiple responses for a single client request. That is, in addition to the response to the original request, the server can push additional resources to the client, without the client having to request each one explicitly.
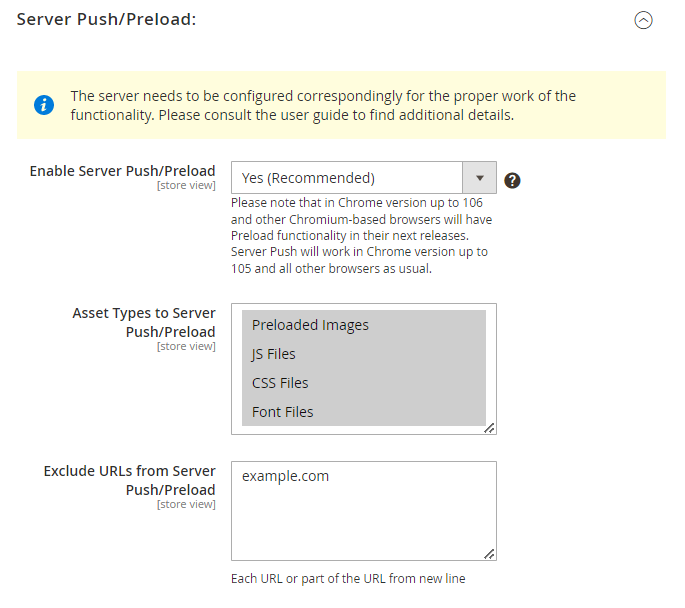
Before enabling the option, the server needs to be configured correspondingly for the proper work of the functionality. Please, follow the steps below to configure the server you’re using.
Nginx Server
Please, add the following changes to the configuration file which is responsible for Magento:
1. Specify http2 flag for listen parameters
2. Add http2_push_preload on; to enable pushes (it should be under server scope)
3. Specify max pushes per request in http2_max_concurrent_pushes 50
server {
    listen 80;
    listen [::]:80;
    listen 443 ssl http2; <-- Add http2 flag
    listen [::]:443;

    http2_push_preload on; <-- Enable preload
    http2_max_concurrent_pushes 25; <-- Setup max pushes per request

    ...
Apache Server
1. First, you need to enable the HTTP/2 module.
sudo a2enmod http2
2. Then edit your Apache virtual host file. If you enabled HTTPS with Let’s Encrypt, then the SSL virtual host is created as a separate file ending with le-ssl.conf.
sudo nano /etc/apache2/sites-enabled/your-site-le-ssl.conf
3. Put the following directive after the opening <VirtualHost *:443> tag.
Protocols h2 http/1.1
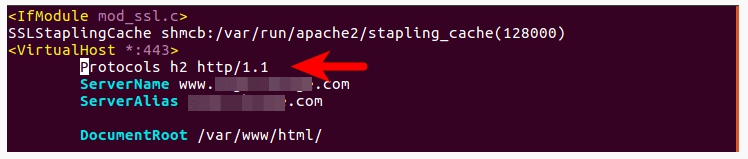
4. Save and close the file. Then restart Apache for the changes to take effect.
sudo systemctl restart apache2
To make the feature work with Varnish, proceed to the Varnish configuration file and remove the following line from it:
unset resp.http.Link
Module Configuration
Now we can proceed to extension settings.
Enable Server Push/Preload - enable the Basic option to activate server push or Advanced to preload critical resources & assets.
Asset Types to Server Push - specify the files that will be used for the push.
Exclude URLs from Server Push - provide particular URLs to exclude from the push.
Server Push/Preload: Advanced
Please note that the advanced preload functionality is available only as a part of an active support or product subscription. You can find the amasty/module-optimizer-subscription-functionality package for installation in composer suggest.

1. Type
2. Resource URL - specify the URL of the asset to preload (Image, JS File, CSS File, Font File).
3. Priority
- Browser Priority (Recommended) - refer to this documentation for more information.
- High
- Low
4. Preload as
- Image
- JS File
- CSS File
- Font File
5. Enable CORS support (for Fonts Only) - set to Yes to activate CORS support for fonts.
Other Settings
In this tab, you can enable some additional settings to make your webstore perform better.
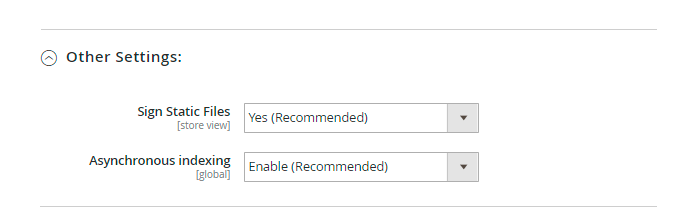
Sign Static Files - activate the option to make the browser automatically update cached values once they are changed.
Asynchronous indexing - enable to distinguish traffic patterns on the database level to avoid conflicts between read and write operations. Order data is placed in temporary storage and moved to the Order Management grid with no accidents.
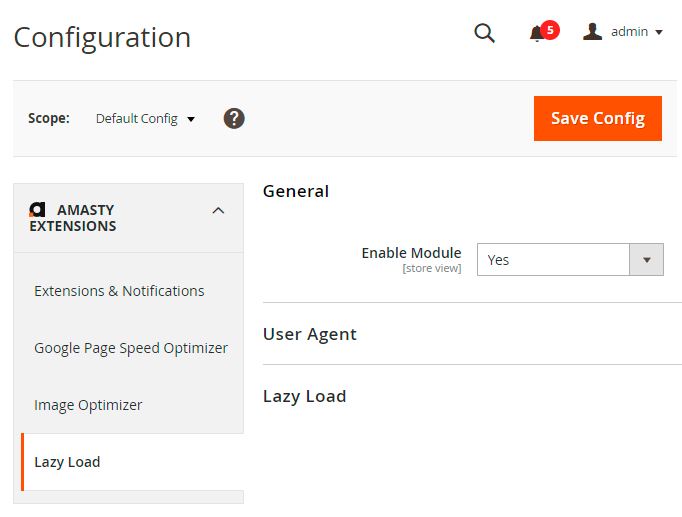
Image Optimizer
Switch to this tab to configure media optimization using various flexible settings.
Replace Images
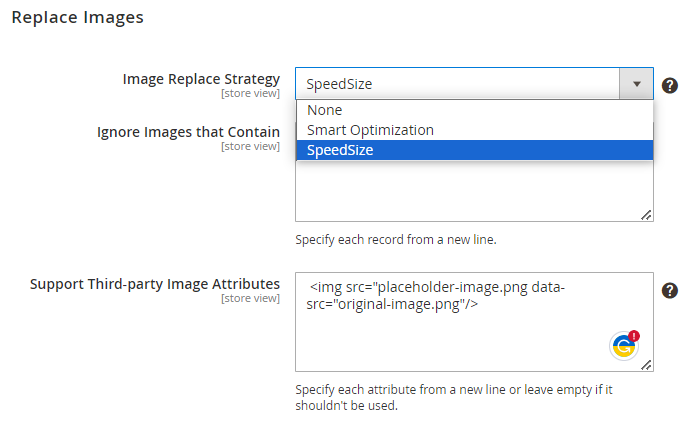
Image Replace Strategy - select the suitable strategy for image optimization:
* Choose None if you don’t need to optimize images;
* Choose the Smart Optimization strategy to automatically replace all existing images with lighter alternatives in either AVIF or WebP format. When this strategy is enabled, images will be replaced with AVIF format versions. However, if the user's browser doesn't support the AVIF format, images will be replaced with WebP format alternatives (WebP and Image Resolutions strategy). You can access a list of browsers that support the AVIF format here;
AVIF is a modern image format based on the AV1 video format, known for its superior compression compared to WebP, JPEG, PNG, and GIF. It is designed to replace them as the preferred image format.
Please be informed that the Smart Optimization strategy (AVIF format) is available only as part of an active product subscription or support subscription for Pro and Premium extension versions.
* Choose SpeedSize to optimize all existing images with the SpeedSize™ functionality. Please note that this strategy will work only if the correct CDN and Public Key in the SpeedSize™ Media Optimization section are specified.
SpeedSize - a solution based on neurobiological optimization of multimedia that allows you to maintain high quality and speed of loading images.
Video support: if SpeedSize is enabled (CDN and Public Key are filled out), the original video links on the pages will be replaced with the SpeedSize links without additional configuration regardless of whether the SpeedSize strategy is selected or not.
Ignore Images that Contain - specify particular images that should be skipped.
Use EOL separator for your images ignore list. Several records should be written on a new line.
Support Third-party Image Attributes - you can replace images generated by third-party lazy load extensions by specifying the required attribute. Example: <img src=“placeholder-image.png data-src=“original-image.png”/> In this case 'data-src' - it's a third-party attribute, so you need to prescribe it in the field if you want images with this attribute to be replaced with WebP format.
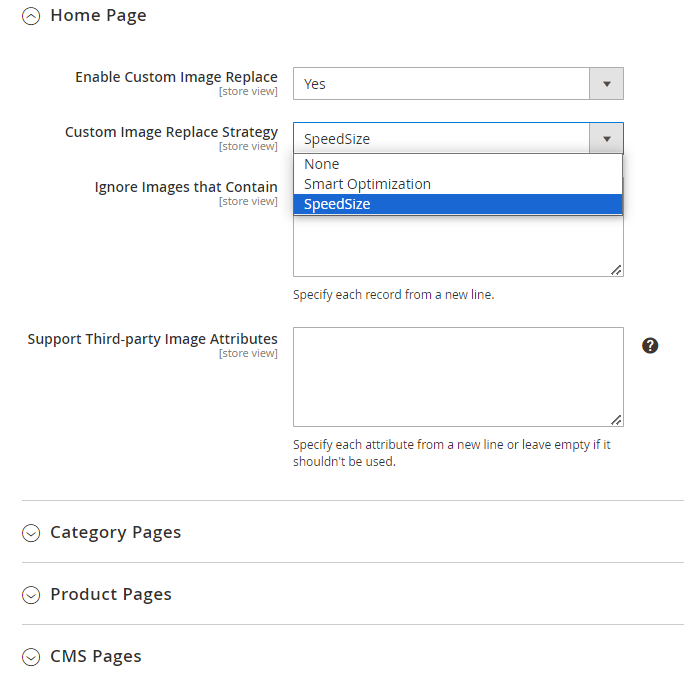
Additionally, you can adjust the optimization for particular store pages separately. The settings are the same as above.
Lazy Load
This extension is used to load images only when they become visible, which makes pages load faster. Proceed to the Lazy load tab to enable the functionality.
To deliver the media correctly, the srcset attribute will be deleted from Lazy Load images.
General
Enable Module - set to Yes to activate lazy load functionality.
Lazy Load
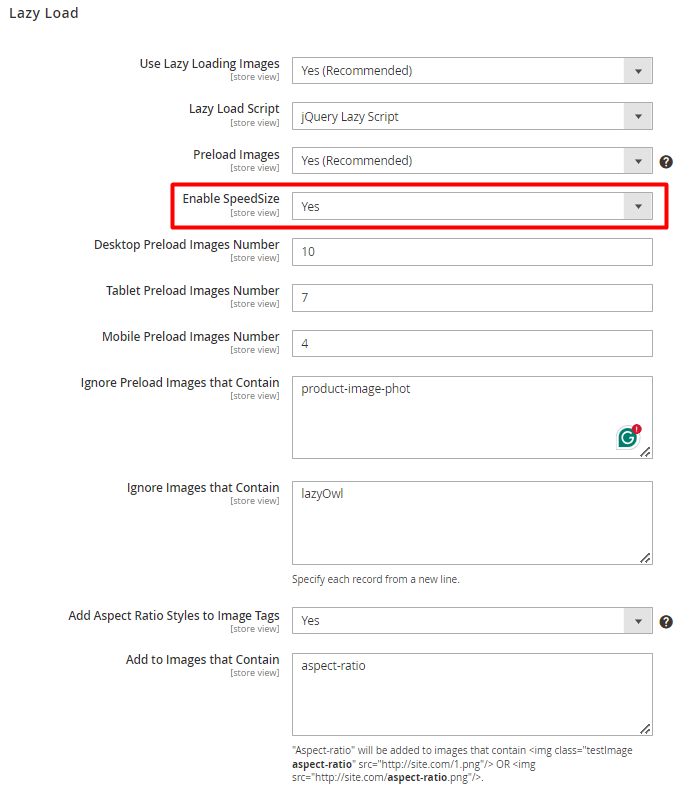
Use Lazy Loading Images - set to Yes to make off-screen images load only when a customer scrolls to them. It prevents pages full of images from lagging.
Lazy Load Script - you can choose between 2 lazy load scripts: jQuery Lazy Script or Native JS Lazy Script. We recommend trying both of them to choose one that fits your system best.
If you have the Pro or Premium version of the extension along with an active product subscription or support subscription, you can utilize the lazy load functionality for images with the <source> tag within <picture> and images with the <srcset> tag within <img>. However, it's important to note that optimization and lazy loading for images with the <source> tag in <picture> will only work if one of the following scripts is selected: Vanilla, jQuery, or Lozad Lazy script.
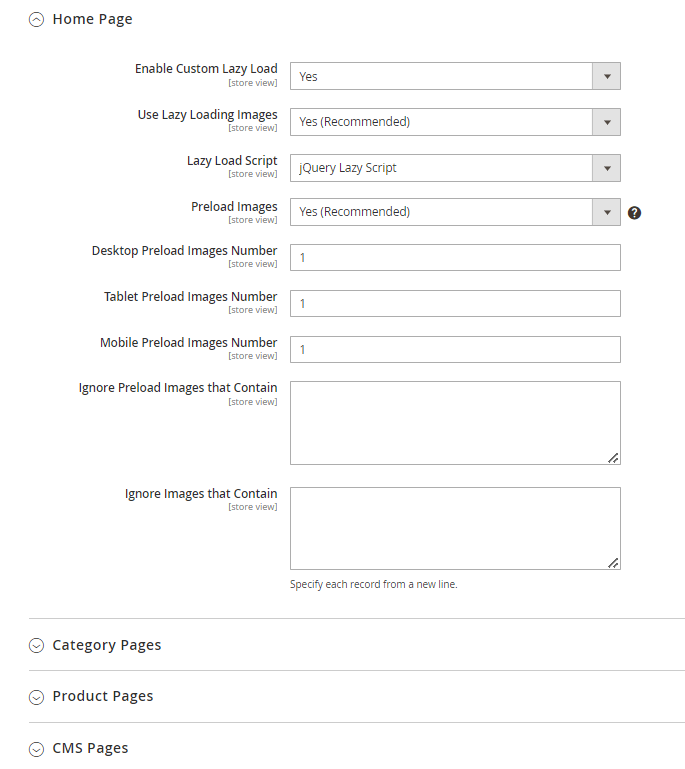
You can decide whether to request the preload of Magento 2 key images or load them from scratch when they happen on screen. Decide how many images to load by setting Preload Images Number.
Enable SpeedSize - set Yes if you want to enable SpeedSize for lazy load (for all pages at once).
Desktop Preload Images Number - set the number of images to be pre-loaded on the page from the start. You can also assign a specific number of images for tablet devices with the Tablet Preload Images Number and for phones with the Mobile Preload Images Number fields.
Ignore Preload Images that Contain - specify the images (their classes) that should be excluded from preloading.
Ignore Images That Contain - specify the images that should not be optimized.
For better compatibility with other extensions, the img tag which includes empty src will be ignored.
All other tabs of this block have the same structure, but you can specify the settings for particular site pages. Thus, you can select the most suitable type of optimization for each store page.
Save the configuration.
AJAX Compatibility
You are able to add the compatibility with 3-rd party extensions which use AJAX. It can be done with the usage of the following sample:
<?php

class Test
{
    /**
     * @var \Magento\Framework\DataObjectFactory
     */
    private $dataObjectFactory;

    /**
     * @var \Magento\Framework\Event\ManagerInterface
     */
    private $eventManager;

    public function __construct(
        \Magento\Framework\DataObjectFactory $dataObjectFactory,
        \Magento\Framework\Event\ManagerInterface $eventManager
    ) {
        $this->dataObjectFactory = $dataObjectFactory;
        $this->eventManager = $eventManager;
    }

    public function execute()
    {
        $someHtml = '<div><img src="test.jpg">...</div>';
        $data = $this->dataObjectFactory->create(
            [
                'page' => $someHtml,
                // \Amasty\PageSpeedOptimizer\Model\Output\LazyLoadProcessor::PAGE_CONFIG keys
                'pageType' => 'catalog_category_view',
                // optional. Example of configs
                // \Amasty\PageSpeedOptimizer\Model\Output\LazyLoadProcessor::prepareLazyConfig
                'lazyConfig' => [

                ]
            ]
        );
        //if Amasty PageSpeedOptimizer is not installed output page will be the same
        $this->eventManager->dispatch('amoptimizer_process_ajax_page', ['data' => $data]);
        $someHtml = $data->getData('page');

        return $someHtml;
    }
}
Find out how to install the Google Page Speed Optimizer Powered by SpeedSize™ via Composer
magento_2/google_page_speed_optimizer_powered_by_speedsize.txt · Last modified: 2025/06/19 12:30 by kkondrateva