Sidebar
magento_2:order_notes_m2
Table of Contents
For more details see how the Order Notes for Magento 2 extension works.
Guide for Order Notes for Magento 2
Create order notes and mark them with colored flags. Simplify your order management process in times by making important comments noticeable.
Keep in mind, that when you assign a flag to particular order status, flags will be added to the newly created orders only. Previously created orders will remain without the flag.
Creation of order flags
Existing order flags can be seen in the Sales → Order Flags
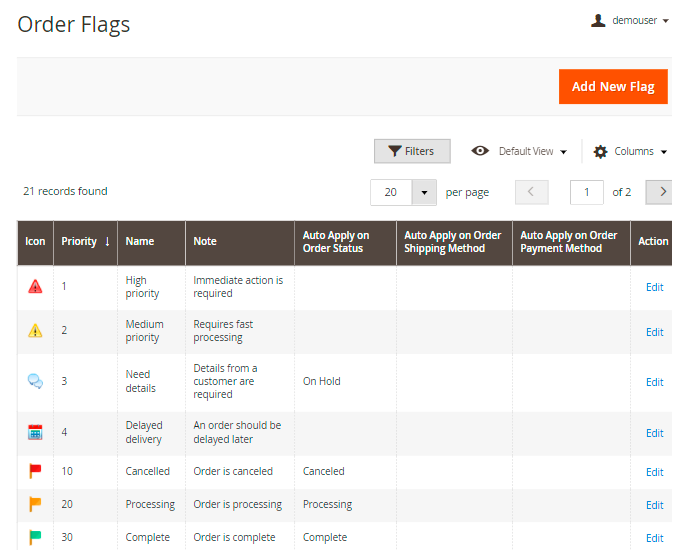
28 icons are supplied with the extension. Feel free to replace them and/or add new.
Click ‘Add New Flag’ to create a new flag.
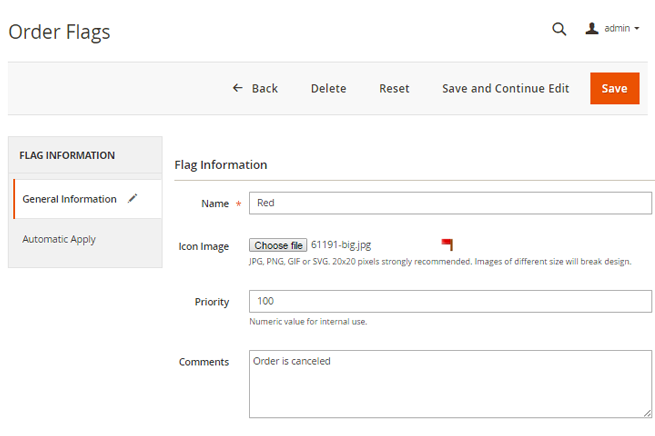
Icon Image - you can upload a new icon instead of a default flag.
Priority - set low value to define high priority. Priorities are used in flags auto assigning. In this case, the module chooses the most prioritizing flag in the column.
Comments - leave a comment to display it on the order grid. Hover over a flag to see it.
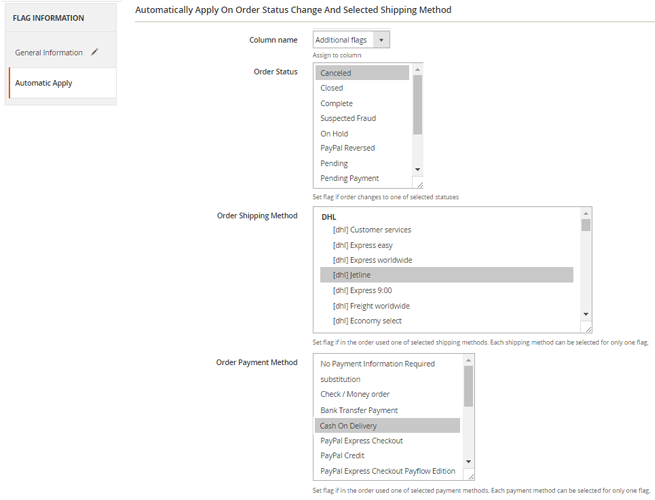
‘Column name’ - select the appropriate flag column. Learn how to create flag columns below.
‘Automatic Apply’ - you can select order parameters, to which the flag should apply automatically.
Order status - the flag will be applied automatically to the orders, which get a status(es) you choose. In this case, it's a ‘Canceled’ status.
Order Shipping Method and Order Payment method - specify additional parameters for automatic flag apply, such as shipping and payment methods.
Creation of flag columns
You can add columns with additional labels to the order grid. To do this, please go to: Sales → Order Flags → Columns
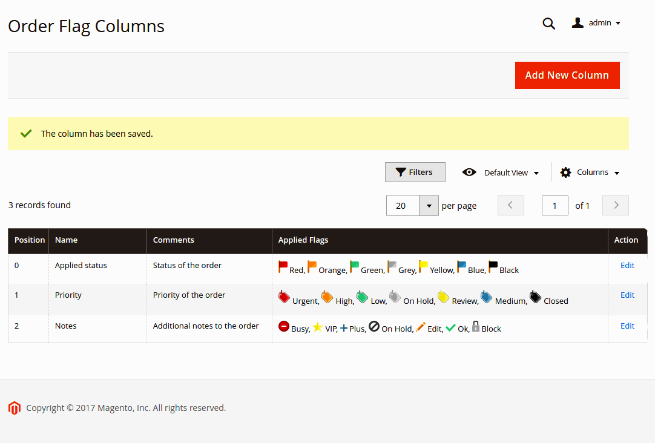
‘Add New Column’- click to create a new flag column.
You can set for each column its own labels. For example, you can specify one column and labels there to display priority of the order, the second for status recognition and the third for other order notes.
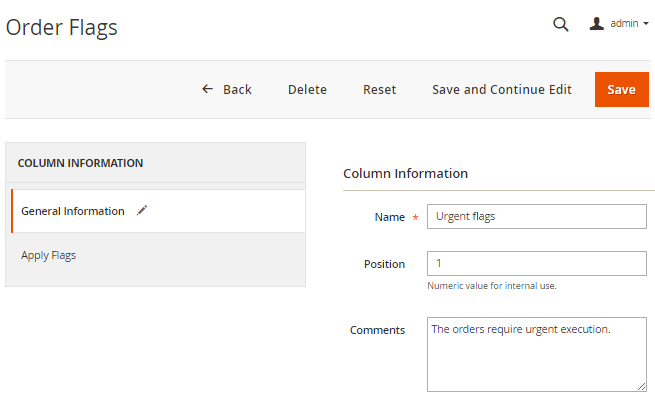
Position - columns can be arranged on the order grid basing on the required priority.
Comments - here you can add a note to the whole column.
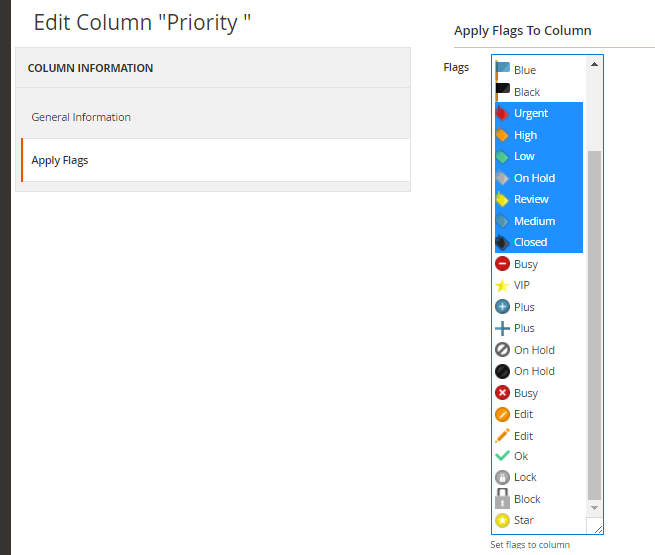
Flags - assign the appropriate flags to the column.
This comment is displayed on the order grid in case an order doesn't have a flag note. Hover over a flag to see it.
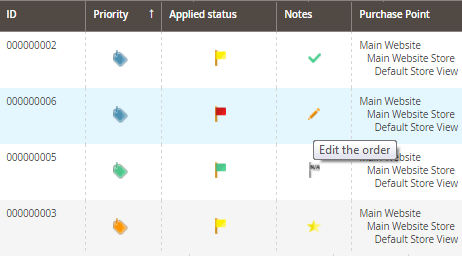
Order flags on order grid
Go to Sales → Orders
Hover over a label to see the comments. Click on the label field to set it for the order.
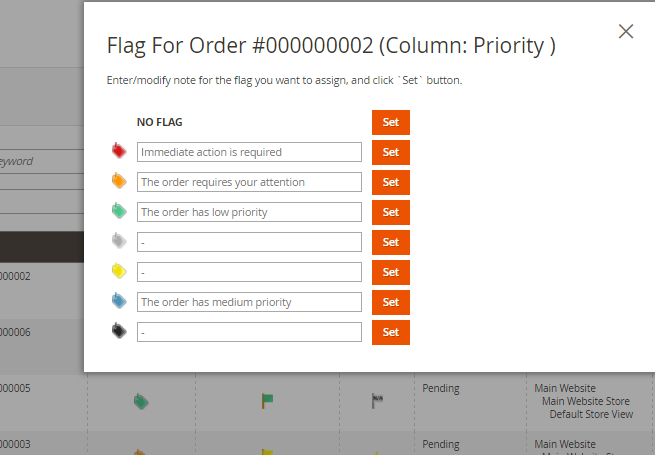
Press ‘Set’ button next to the appropriate flag to assign it to the order. If it's necessary, you can edit the flag comment that will be saved only for this order.
To remove a flag from the order, choose ‘NO FLAG’ option.
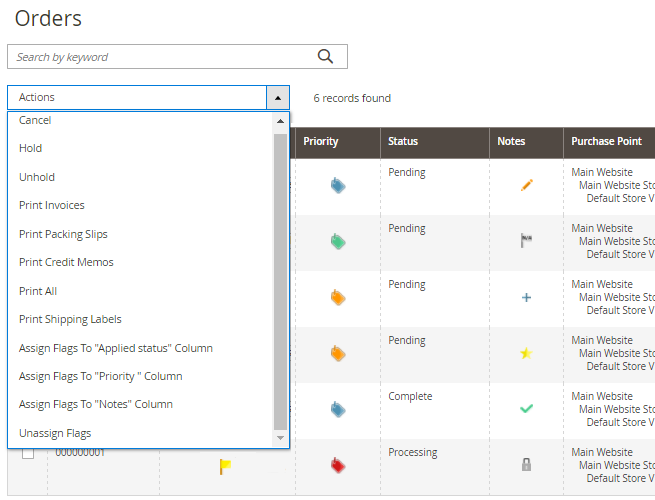
You can also apply flags to multiple orders by using the ‘Assign flags’ actions on the order grid.
Find out how to install the Order Notes extension for Magento 2 via Composer.
magento_2/order_notes_m2.txt · Last modified: 2021/04/16 12:54 by tihomirova
