Sidebar
magento_1:product_labels
Table of Contents
For more details see the Product Labels extension page.
Guide for Product Labels
Add unlimited number of fresh & elegant labels to any product.
- Design elegant labels of different shapes and color
- Use sticker collections coming out of the box
- Preview label from backend
- Automatic and manual rules for label display
- Create unlimited number of labels
You can upload any label image you like. With this module you will get a ready-made labels which you can use immediately. Best Seller, Most Popular, Free Shipping, etc.
General Settings
To configure the extension go to System → Configuration → Amasty Extensions → Product Labels.
In the General Options, activate the Automatically add labels option.
Notice, that if templates do not go with your custom theme, disable the option and update the templates manually. Find the CSS selector in the code and insert it in the field CSS selector for the image block See the instructions

With the page optimization Magento extension, you can improve the code structure for better Google ranking.
In the On Sale condition section, you can specify the minimal discount amount for display of labels.
Please be aware this is a flat amount, not percent.
- To specify the minimal percent discount please use Minimal discount percentage setting.
- In some cases discounts can be decimal, so the extension offers you a Rounding of discount percentage option. You can use three algorithms:
| The next lowest integer value. | With this algorithm 20.3 will be rounded to 20. |
| By rules of mathematical rounding. | 20.4 will be rounded to 20 and 20.6 will be rounded to 21. |
| The next highest integer value. | 20.3 will be rounded to 21. |
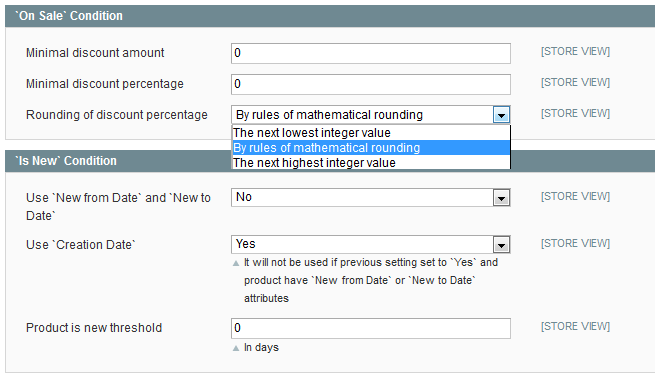
You can also highlight some labels according to their date in the Is New condition section:
- If you set the option Use New From Date to Yes, the extension will consider products as new between New from Date and New to Date.
- Alternatively, you can choose the products to be new a certain amount of days after creation date. For this, set Use Creation Date to yes and appoint the number of days the product will be considered as new.
Product Labels Grid
To create labels please go to Admin Panel → Catalog → Product Labels.
The Product Label Grid allows you to navigate your labels easily and efficiently. There are Name, Status, Product Page Text, Category Page Label, and other columns, by which you can easily search all the necessary information. You can add new labels, submit Delete and Change Status actions for better promo management.

Edit Product Label
To edit product labels, click on the existing label in the grid or add a new one.
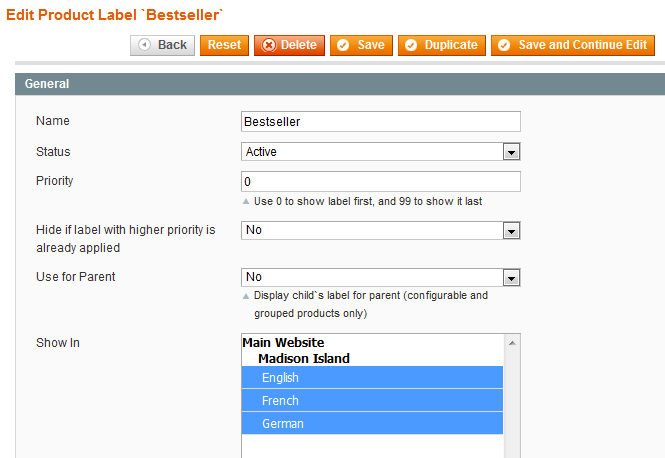
- Name the label and set a Status.
- Use the Priority field to manage order in which the labels are applied to products. The highest priority is zero.
- You can hide the label, when a label of higher priority is already applied to the products, by activating the Hide if label with higher priority is already applied option.
- Choose whether to appoint the label of the child product to its Parent products. If Yes, the label will be displayed on the adjacent configurable or grouped products.
- Select the stores, the labels will be displayed on
Edit Label for Product Page
In the Product Page tab of the Label settings, there is a broad choice of configuration opportunities.
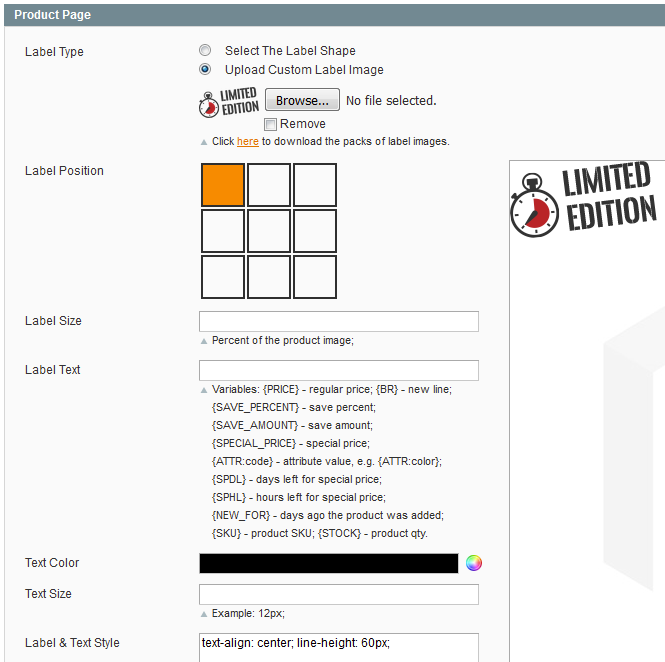
- In the Label Type, click Select the label shape. You are offered a number of various label shapes to fulfill your inquiries. There is also a handy color picker to pick up the necessary color for this label.

Alternatively, you can choose Upload Custom Label Image and grab your own custom images or download the packs of catchy label images from Amasty for free.


- Label Position field has a nine position grid, where you can select the needed location for the label. There is also a real-size preview window right in the settings, so you don't have to check it on the front-end time and again.
- Configure Label and Text Size along with Text Color, tooled with a color picker. In case you use auto labels adding, you need to add label width and label height percentage of the original image. This action is required for the correct label view on the Product and Category pages. Employing CSS, you can also manage Label & Text Style (e.g. text-align:center, width:300px;).
In the Label Text field, you can indicate the text that should be displayed on the label. You can utilize the following variables in the label texts:
{ATTR:code} with this variable you can display a value of any attribute in the label text. Please replace 'code' with the code of the actual attribute. For example, {ATTR:manufacturer} would display the product manufacturer.
{SAVE_PERCENT} Saving percentage, it's the percentage margin between regular price and special price. If you specify in admin panel 'Sale! {SAVE_PERCENT} OFF!', on the front end it will be 'Sale! X% OFF!', X stands for the percent number.
{SAVE_AMOUNT} Flat savings amount, represents a flat difference between the regular price and special price. So 'Save {SAVE_AMOUNT}!' results into 'Save $X!'. X is the amount, '$' sign will be automatically replaced with the symbol of your currency.
{PRICE} displays regular price.
{SPECIAL_PRICE} displays a special price.
{NEW_FOR} shows how many days ago a product was added. 'NEW! Arrived just {NEW_FOR} days ago!' will be shown as 'NEW! Arrived just X days ago!', where X is a number of days.
{SKU} displays product SKU.
{BR} new line. The extension automatically breaks messages into several lines if they are too long. If you need to display some words or phrases in a separate line, please use a {BR} variable.
Edit Label for Category Page
The settings for managing labels on the Category page are identical as for Product Page. It is possible to choose label position both for product and for category pages. You can also use different images for category and product pages (e.g smaller image for category page and a bigger one for product page).
Conditions
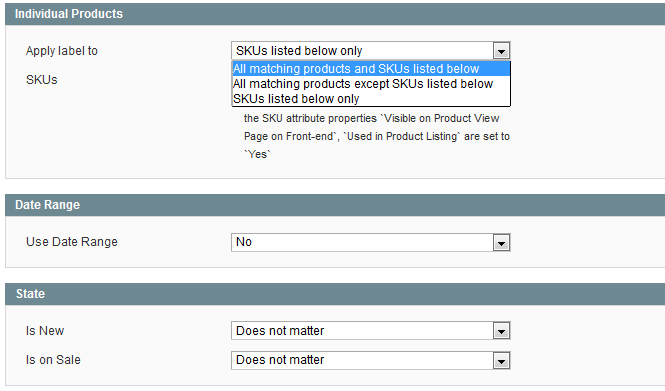
At the Conditions tab you can specify, which products to apply the label to:
- All matching products and SKUs listed below - the label will be applied to all products which meet the conditions specified at this tab and also to the products, SKUs of which are indicated in ‘SKUs’ field.
- All matching products except SKUs listed below - the label will be applied to all products which meet the conditions specified at this tab, however, will not be applied to the products, SKUs of which are indicated in ‘SKUs’ field.
- SKUs listed below only - the label will be applied only to the the products, SKUs of which are indicated in ‘SKUs’ field.
You can specify Dates and Time for label display.
For Is New option you can select:
- 1. ‘Does not matter’. In this case, the option will be ignored.
- 2. ‘Yes’. The label will be applied only to products that are set as new.
- 3. ‘No’. The label will be applied only to products that are NOT set as new.
For Is on Sale option you can select:
- 1. ‘Does not matter’. In this case the option will be ignored.
- 2. ‘Yes’. The label will be applied only to products that have special price and the discount amount is higher than specified at the configuration page.
- 3. ‘No’. The label will be applied only to products that do not have a special price.
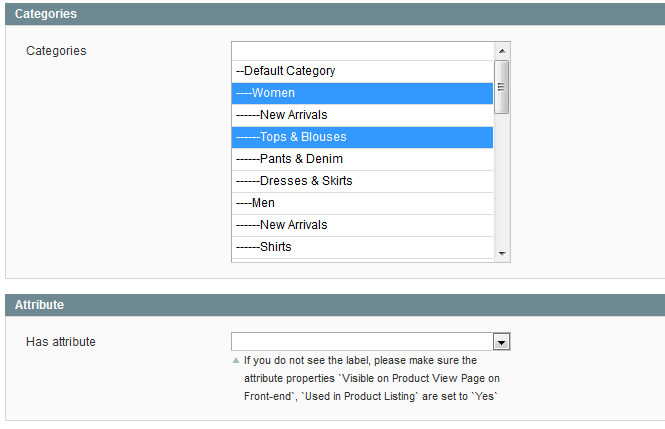
You can choose to products of which Category the label should be applied.
You can also choose to products with what Attribute to add the label (drop-down and multiple select attributes are available here).After you choose the Attribute, you can also select the products, with which attribute value to apply the label.
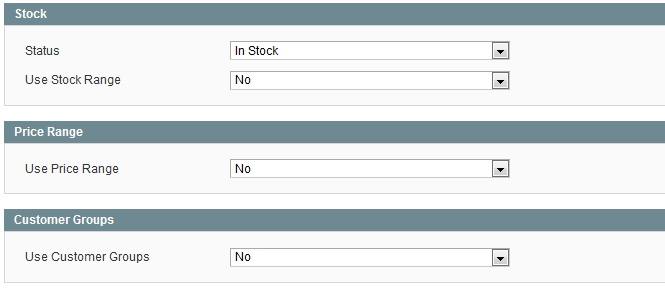
You can choose the Price Range of the products for which the label should be displayed, e.g. for products with price between 50 and 150.
Choose which price should be used for the price range feature, e.g. special price, based price (the one specified in the ‘price’ field), final price (price with all options), etc.

It is possible to indicate the Customer groups to which the label should be displayed. It is also possible to assign labels to individual products when editing products in admin panel.
Frontend
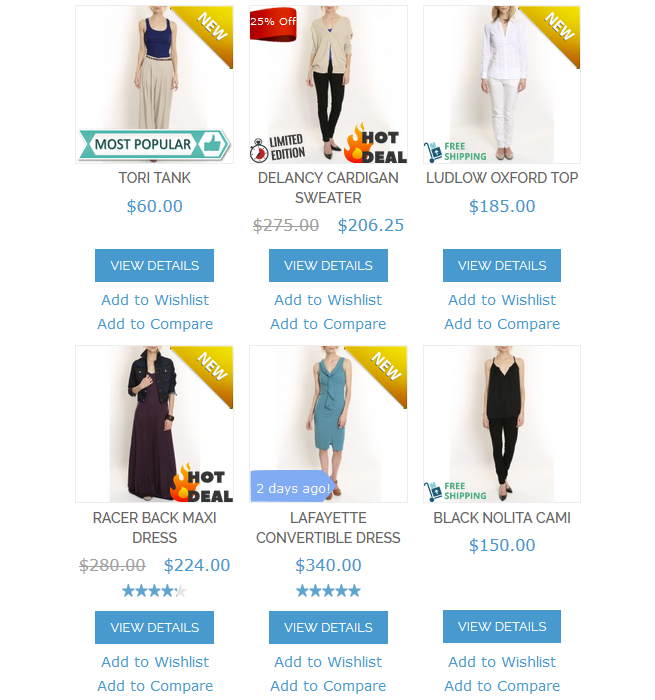
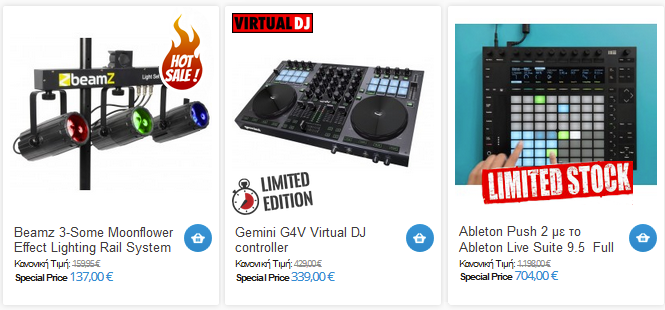
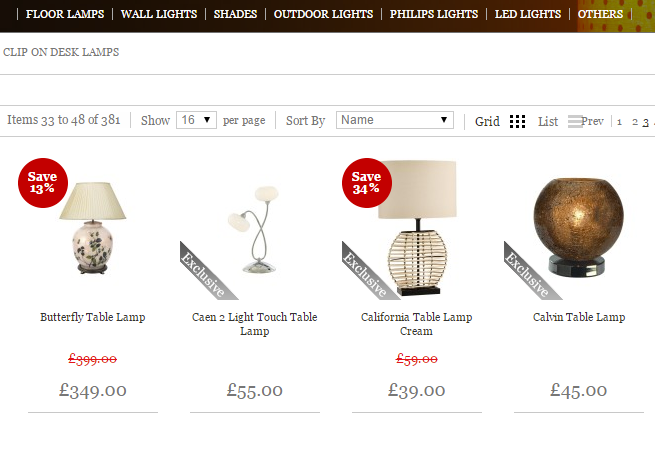
See various labels on the Product and Category pages.

magento_1/product_labels.txt · Last modified: 2020/02/14 16:15 by hfedulova
