Sidebar
magento_1:one_step_checkout
Table of Contents
For more details see the One Step Checkout extension page.
Guide for One Step Checkout
The extension can significantly reduce cart abandonment, combining the entire purchase process on a single page. The whole checkout flow with various steps is simplified to a handy page with customizable sections and fields. Among its prominent features there are Google address suggest and freindly guest checkout.
Having troubles?
- Try disabling the extension and check if you're getting the same result with Magento default checkout. One Step Checkout is designed to be as transparent for other checkout-related extensions as possible, it will display the data “as-is”. So if you're getting suspicious results please compare them to what you get with One Step Checkout disabled.
- Some custom themes may have custom design for blocks displayed on checkout. If you see blocks displaying incorrectly on One Step Checkout please try switching to Magento default theme. Would that help that will mean that theme should be adjusted to disable custom design for checkout blocks.
General Settings
To configure the extension settings please go to Admin panel → System → Configuration → One Step Checkout.
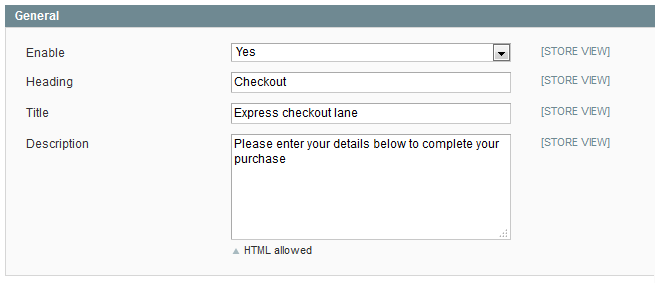
For better SEO rankings include main keywords in the Title and Heading of your checkout page.
In the Description, set an appropriate guidelines for your customers on various issues concerning taxes (e.g. VAT) or any other payment aspects, specific for your state. You can use <html> to highlight the important points.
Fields, Which Trigger Checkout Refresh
In the Address Fields, choose the fields after filling in which, the data in Shipping Methods, Payment Methods (if enabled) will be accordingly refreshed (without full checkout page reloading).
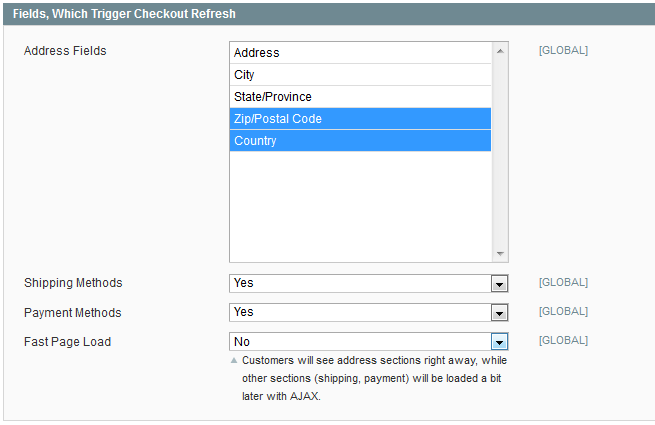
To boost checkout page loading, you can enable Fast Page Load. This way, the customers will see the Billing section loaded instantly, and other sections will load short after (without full page reloading). This AJAX plugin offers smoother page performance.
Shopping Cart Settings
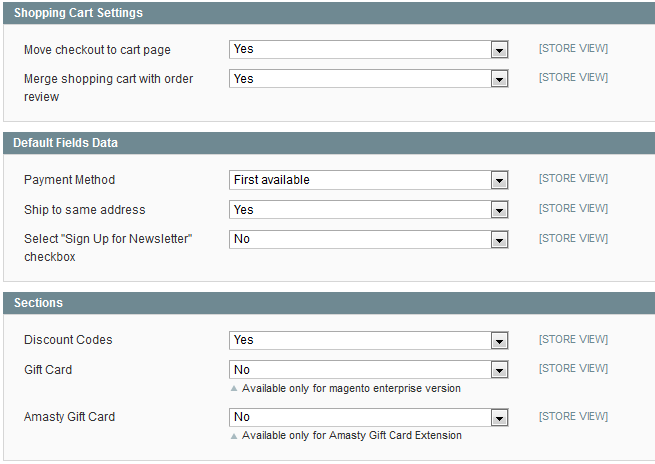
Set the Move checkout to cart page option to Yes, if you want to couple shopping cart and checkout pages.
With Merge Shopping cart with Order Review option, you can simply make the review block editable and thus save space by combining the shopping cart block with review. This also means the customers will skip to checkout right after adding products to cart and will be able to complete it within minimum time period.
Default Fields Data
Set the default option for Payment Method and activate Ship to same address to hasten the checkout procedure.
- Auto-Select: First Available
- Credit Card (saved)
- Check/Money Order
- No Payment Information Required
- Purchase Order
- Cash On Delivery
- PayPal Mobile Express Checkout Library
You can also make newsletter subscription checkbox signed by default, set Select “Sign Up for Newsletter” checkbox to Yes. See how to enable Newsletter Subscription in Visual options
Sections
Add the Sections you want to be displayed on the checkout page.
Google Autocomplete
To significantly simplify the address fill, enable Google Autocomplete.

The feature will not be available without API key. The settings may appear somewhat complex, but once you all set, you have a convenient feature, that makes address fill procedure simplified to couple of clicks.
Visual Options
These settings allow you to customize the checkout page as you want.
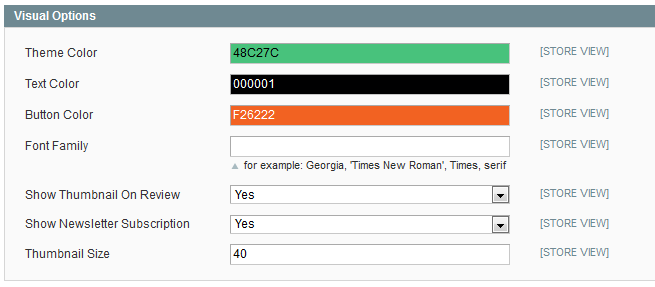
- Enable Show Thumbnail On Review and set a size to display product thumbnails on the review step.
- Enable Show Newsletter Subscription to let customers subscribe to newsletter during checkout.
Geo IP Data
To install the Geo IP database, go to System → Configuration → Amasty Extensions → GeoIP Data.
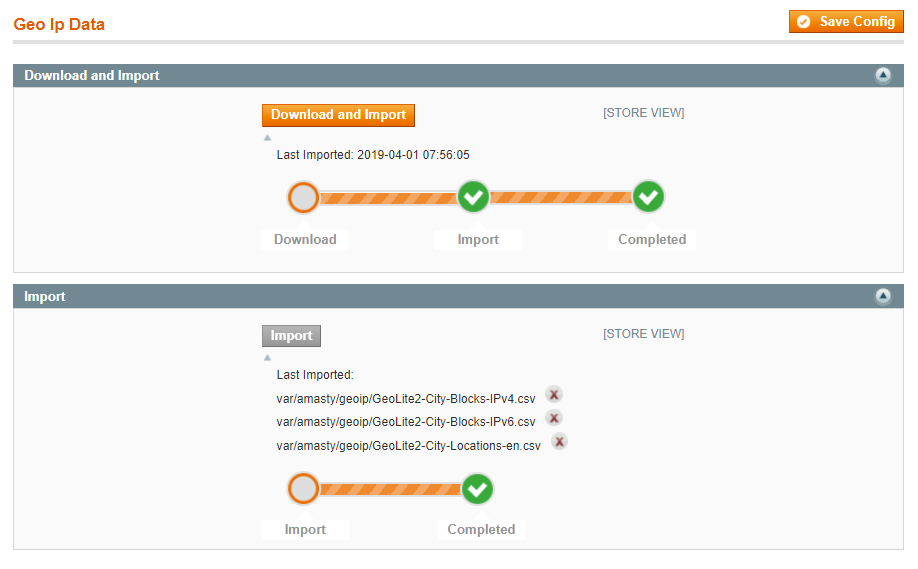
Databases are required for the correct work of the module. Also you need to install php bcmath or gmp extension on your server.
You can get the databases automatically or import your own data.
Hit the Download and Import button to make the extension download the updated CSV dump file and import it into your database automatically.
To import the files from your own source, use the Import option. Path to the files should look like this (the part 'var/amasty' should be replaced with your folders’ names):
var/amasty/geoip/GeoLite2-City-Blocks-IPv4.csv
var/amasty/geoip/GeoLite2-City-Blocks-IPv6.csv
var/amasty/geoip/GeoLite2-City-Locations-en.csv
In the Import section, the Import button is grayed out by default. It will be available right after you upload the CSV files. The red error notification will switch to green success notification when the import is completed.
Sometimes it happens that the import is stuck in the middle of the process. It’s a common issue, and there is a solution for it. Read our article and learn how to import Geo IP database properly.
Credit Card Detector
Open the Credit Card Detector tab to configure card icons display. (Admin panel → System → Configuration → Credit Card Detector.)
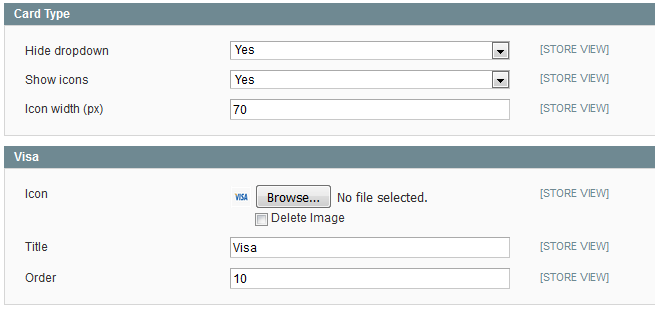
- Set the option to Yes if you don’t want to display a Dropdown with card types on the checkout page.
- Specify icons’ Size in pixels.
- It’s possible to show a card types dropdown and icons either together or separately.
NOTE: When card icons are enabled a customer just needs to start typing a credit card number and the module will automatically select the necessary card type.
- You can upload a custom Icon for each card type.
- Specify a card’s Title and display Order.
Auto Shipping
Open the Auto Shipping tab to manage settings for auto shipping. (Admin panel → System → Configuration → Auto Shipping.)
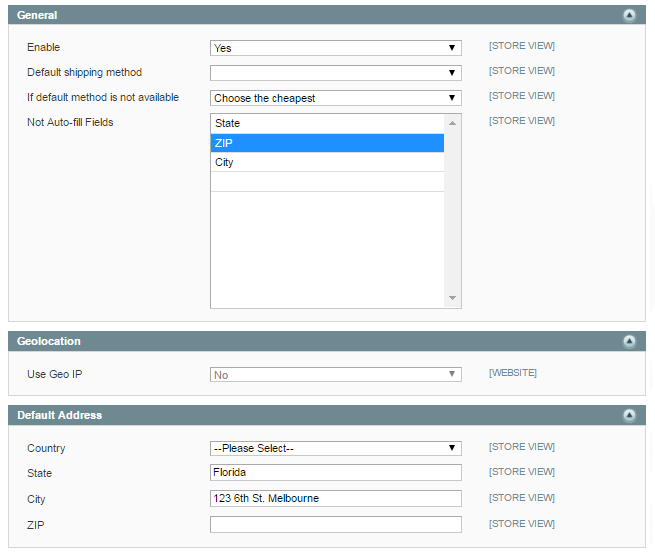
General Tab:
- Enable field - Set the option to Yes if you want to display a default shipping method on the checkout page.
- Default shipping method - choose a shipping method you would like to set by default
- If default method is not available - choose the way shipping method will be selected if it hasn't been chosen by default
- Not Auto-fill Fields - choose the fields that you want to leave empty
Default Address Tab - fill in the fields with the text you would like to be displayed as an example.
Manage One Step Checkout
Labels and Layout
Please go to Admin panel → System → Amasty One Step Checkout to configure display of fields in checkout blocks and other options.
At the Labels and Layout tab you can specify labels for checkout blocks and choose layout for the checkout page. It is possible to specify labels and all other extension settings for each store view.
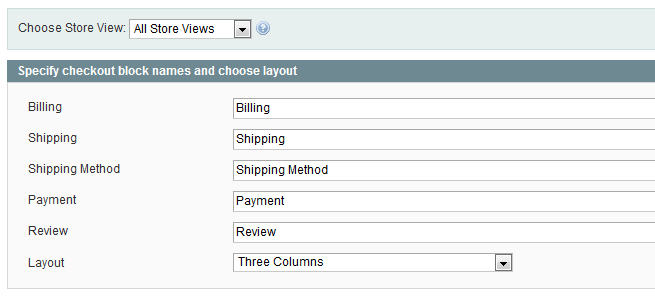
Fields
At the Fields tab you can configure the order and other parameters of fields in checkout blocks. Please choose for which block to edit the fields, Billing or Shipping.
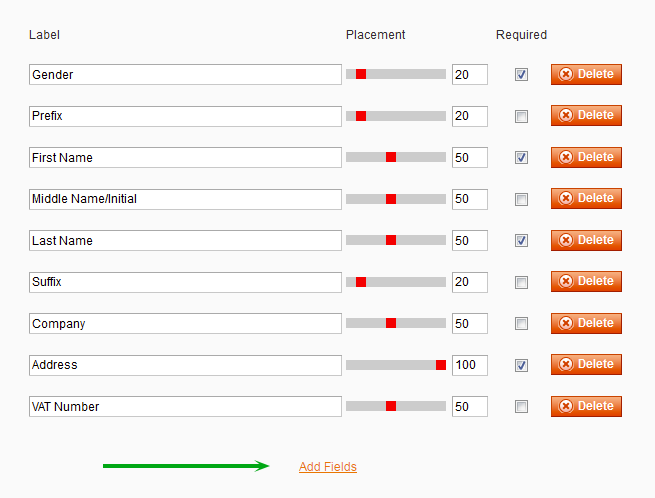
- To change display order for a field just drag the field to the right position.
- It is possible to edit label for each field.
- In Placement column you can specify in percent how much space each field will take in a line. E.g. Last Name field will take 50% of a line. If you specify 100, the field will occupy the whole line.

- Add fields. With Add fields button, either in Shipping and Billing sections, you can add up to three new fields. Set a label name, a placement, and length. E.g. Include additional fields, that in your view, can be appropriate like e-mail or note to seller.
Frontend
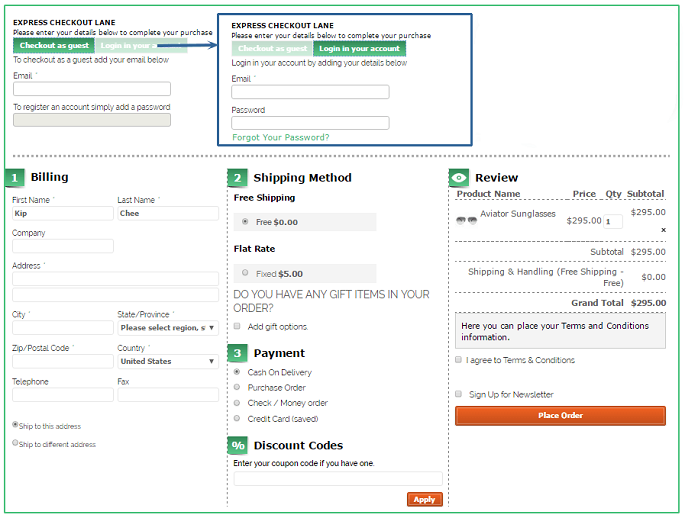
As you see, checkout is combined with shopping cart page and is very compact. Customers need to fill in just one page and the order is complete. To save additional space, you can remove the shopping cart and enable editing of products in the cart on the order review step.
Customers can log in right on the checkout page.
- To login as a guest, customers need only an e-mail.
- To sign up, they should simply add a password.
- If a customer is already registered, there is a second tab Login in your account, with e-mail and password fields.
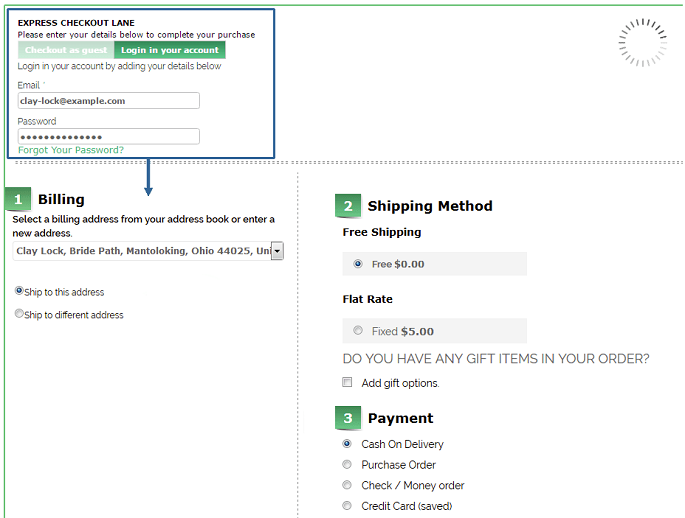
Registered customers will have their checkout information filled automatically.
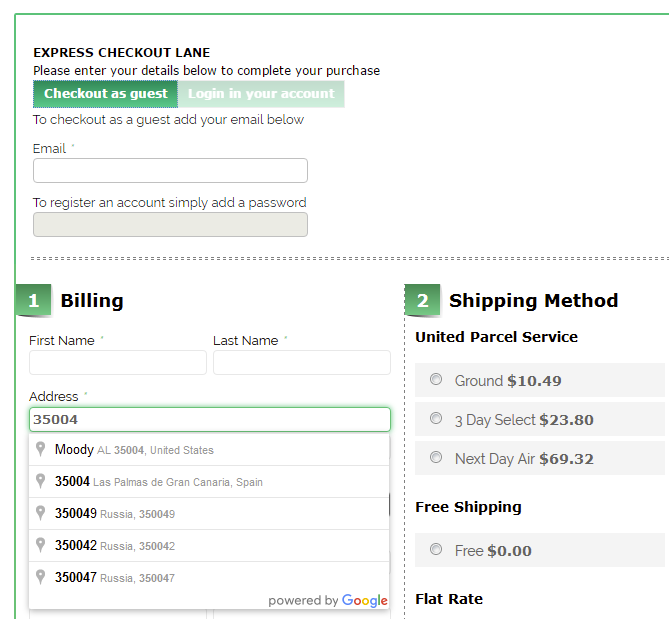
Google Address Autocomplete significantly ease the checkout procedure for customers.
magento_1/one_step_checkout.txt · Last modified: 2022/04/19 09:06 by hshevtsova
