Sidebar
magento_2:delivery_date_manager
Table of Contents
See the way the Delivery Date Manager for Magento 2 extension works.
Guide for Delivery Date Manager for Magento 2
Increase the level of customer service in your store. Enable clients to choose delivery dates and time periods to receive orders. Define your delivery schedule and exclude specific days or hours when delivery is unavailable. Add delivery info to emails and printed order-related docs.
- Create delivery channels to fulfill the most complex delivery schedule scenarios
- Enable buyers to select desirable days and time of delivery
- Configure time slots, set quotas per slots and days
- Set operational intervals, add exclusions rules
- Include delivery info into docs and emails
![]() Any concerns about module configuration and implementation?
Any concerns about module configuration and implementation?
Book an individual training session to explore how the extension works and what practices to implement to achieve the desired result. Save time spent searching for the right settings - discuss configuration cases suitable for your business with the experts and work out the flow that your team needs.
First Time Setup
1. Default Channel adjustment
Following actions should be taken to start using the extension after its files' successful install.
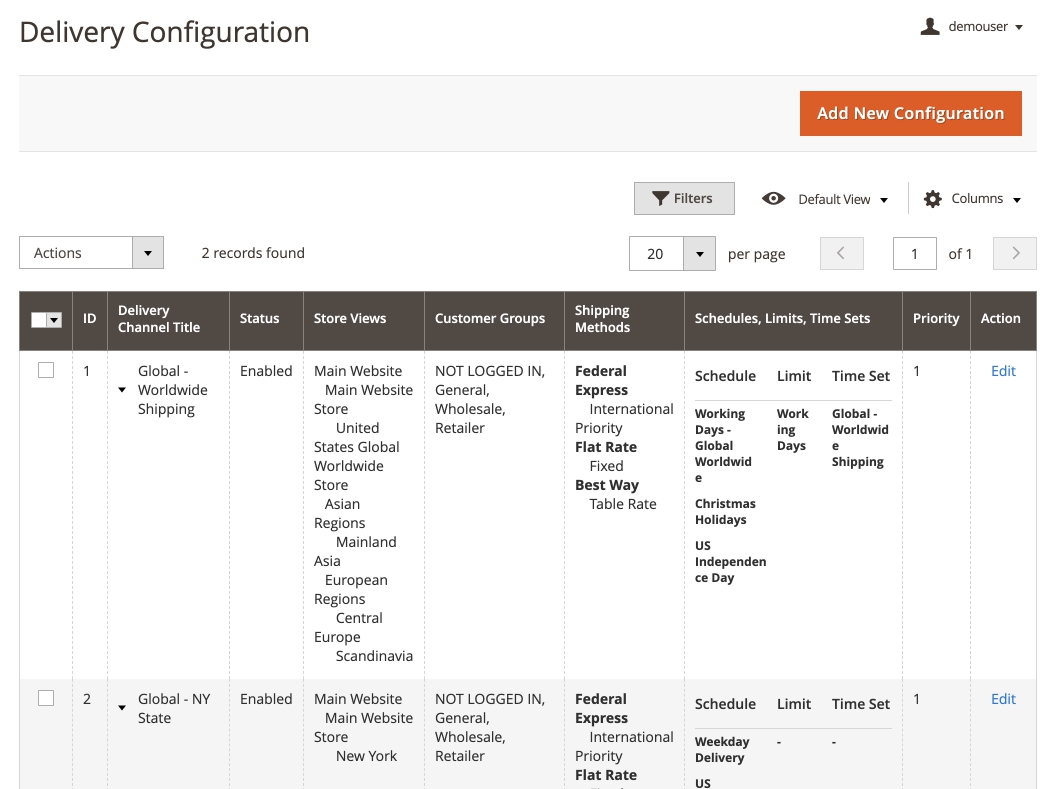
At Sales → Delivery Configurations Grid, please click the 'Create' button to create your first delivery channel.
Open 'Configuration Applicability Scope' expand and select a combination of store views, shipping methods, and customer groups. The delivery schedule you'll configure here will be available for this combination only.
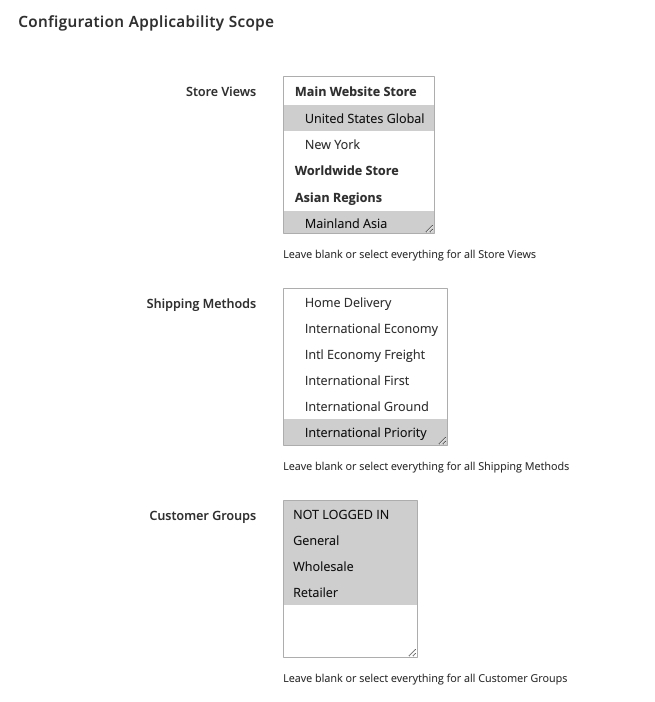
Hold [Control] and click any value to select more than one value in the Customers Groups menu.
2. Basic limitations configuration
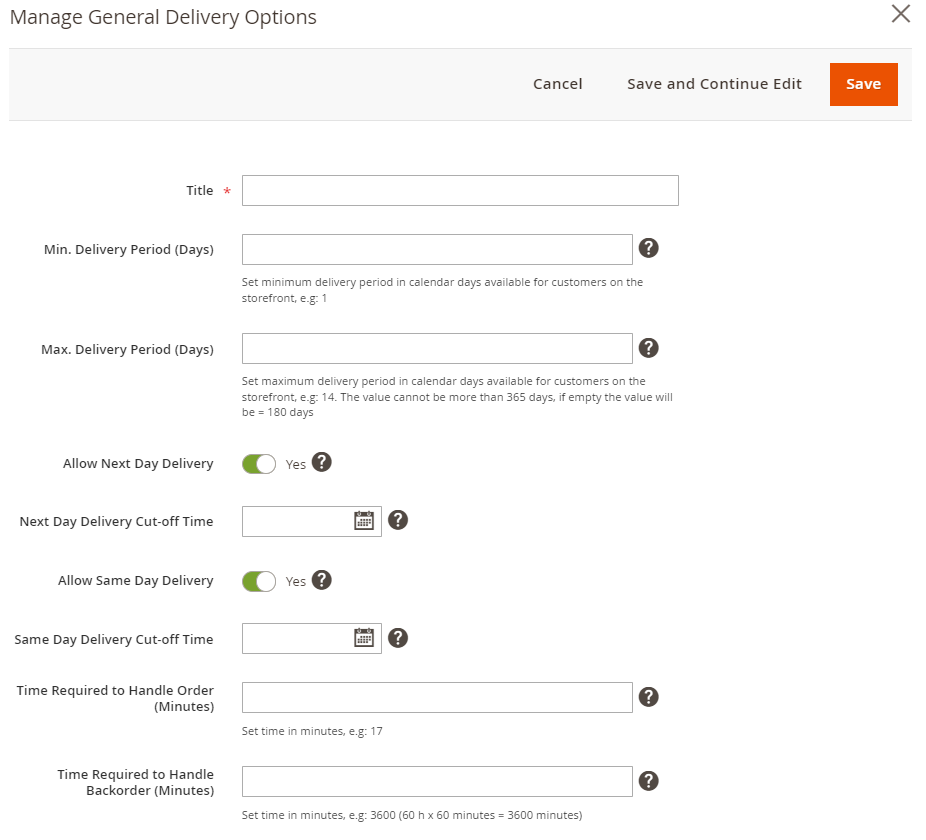
At 'General Delivery Options' settings, please click 'Add' to create your first general delivery preset.

Select Allow Next Day Delivery if you'd like to use this option - and add Next Day Delivery Cut-off Time in your store's default timezone.
Configuration of the next day delivery is available only as part of an active support or product subscription. You can find the amasty/module-delivery-date-manager-subscription-functionality for installation in composer suggest.
Please select Allow Same Day Delivery if you'd like to use this option - and add Same Day Delivery Cut-off Time in your store's default timezone.
Then, 'Save' to save your first general delivery preset and close the preset configuration pop-up.
Please note that to ensure the 'Min. Delivery Period (Days)' setting works properly, you need to set either 0 or 1 in this field.
3. Working Days List
At 'Schedule, Time Intervals & Limits' expand, please 'Add' a new working days 'Schedule'.
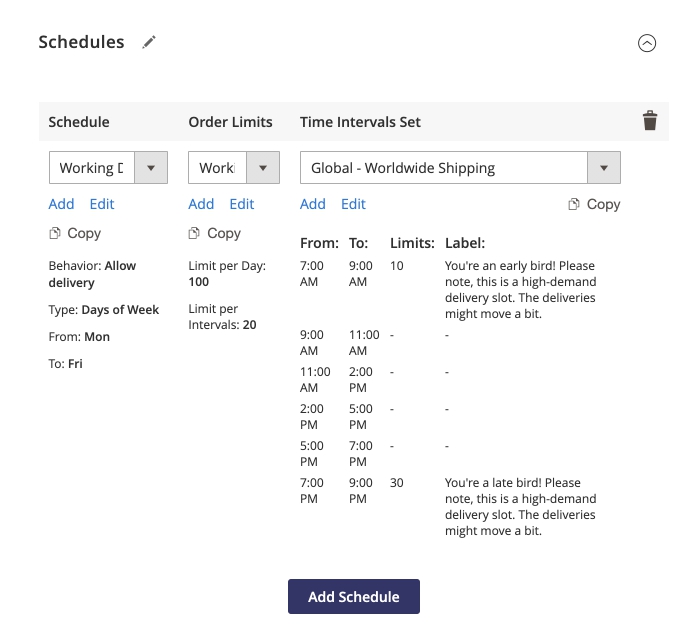
Selecting Type of Days - 'Day of Week', From - 'Monday' and To - 'Friday' will establish a generic working days schedule. 'Save' the schedule once you finished configuring days availability.
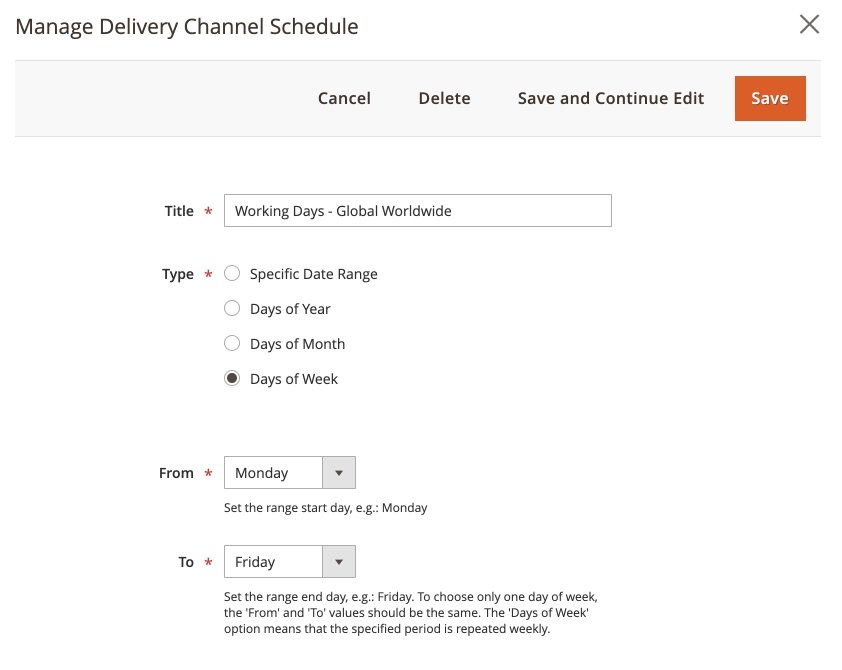
'Save' your Default Global Channel afterward.
Optional: Available Delivery Time Intervals List
If you'd like to allow customers to select a delivery time, please on the 'Add' button to create a new preset for 'Time Intervals'.
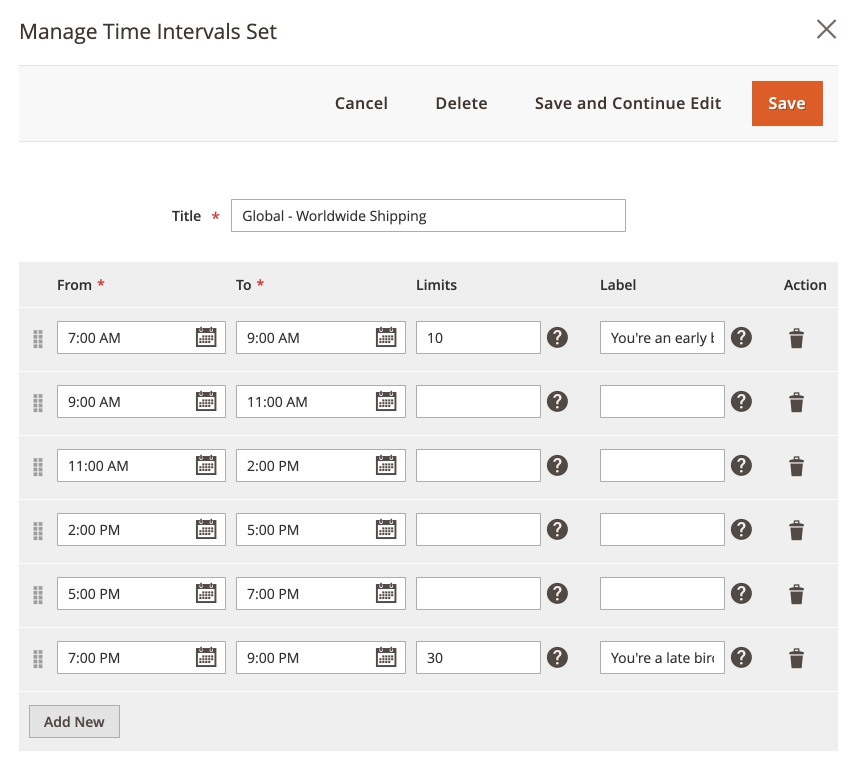
There, please insert earliest possible delivery time (09:00, as an example), latest possible delivery time within the same day (17:00), and maximal possible courier delay (1:30 for 90 minutes) into From, To and Interval fields correspondingly and click 'Generate'.
'Save' your Default Global Channel afterward.
The last generated time interval will be shortened to fit into To limitation or end of the day (whichever comes first).
00:00 (12:00AM) counts as day start and 23:59 (11:59PM) counts as day end.
Advanced Configuration
Each delivery Configuration at Sales → Delivery Configurations Grid is a separate composite entity which consists of its own delivery Schedules, Time Interval lists, and limitations.

It is absolutely possible to use completely different Configurations for different store views, shipping methods, and customer groups, creating as complicated schemes as necessary - and allowing seamless integration with other extensions which interact with these scopes, shipping carriers and customer segments.
Channel Setup Global
Enable Delivery Config - allows using this configuration and its associated presets at Frontend for displaying Delivery Dates and Times.
Delivery Config Title - configuration name. For management purposes only, does not affect Frontend.
Priority - determines which configuration should be applied first at Frontend, if there is more than one eligible. As with Cart Price Rules, the lower the number - the higher the Priority (0 first, 1 second, 2 third).
Exception from this rule: allowed days from multiple eligible configurations are combined into a single calendar at Frontend. If the day customer selected is allowed in more than one configuration - then Priority values from these configurations will define which list of Time Intervals (and other limitations) will be used.
Configuration Applicability Scope
Available after saving new configuration (i. e. editing existing configuration). All conditions you define here are additive and must be fulfilled at Frontend at once to make Delivery Dates and Times appear for a customer.
Store View - this configuration will be used for any store view selected.
Shipping Methods - this configuration will be used for any shipping method selected.
Customer Groups - this configuration will be used for any customer group selected.
Channel Setup: Limitations
You can define the general date & time availability options in this General Delivery Options slide-in. One preset per delivery configuration.
Config Option Name - configuration name. For management purposes only, does not affect Frontend.
Min Delivery Period - measured in days, defines the interval between Order placement and the closest available delivery day.
Max Delivery Period - measured in days, defines the interval between Order placement and the farthest available delivery day.
Min Time required to handle an Order - measured in hours, defines the interval between Order placement and the closest available delivery time. Min Time required to handle a Backorder - measured in hours, defines the interval between Order placement and the closest available delivery time.
Allow Same Day Pickup and its related Same Day Pickup Cut-off Time setting enable Order Placement day usage as Delivery Day until Cut-off Time. The latter option accepts HH:MM (24h) time format only.
Channel Setup: Difference between Schedule and Exception
Add Schedule allows defining basic days availability by combining multiple schedules into one calendar. Each schedule keeps its own order limits and time intervals (and respects Min/Max settings from the Limitations section). All three following sections are relevant for configuring Schedules.
Add Exception allows removing particular days from the calendar which has been formed with Add Schedule. Only 'Channel Setup: Working Days' is relevant for Exceptions configuration.
For multiple configurations, their respective calendars (combined Schedules minus combined Exceptions from each) will be merged into one client-side calendar. Once the customer picks a date - if that date was allowed by multiple configurations, configuration with the highest priority will be used for the rest.
Channel Setup: Working Days
The General day-by-day schedule can be defined here. Multiple presets per delivery configuration are allowed, 'Edit'ing it in one configuration alters it for all configurations.
Schedule Name - configuration name. For management purposes only, does not affect Frontend.
Type of Days - defines the basics by which the schedule will be formed:
- Day of Week for generic “Monday to Friday” and its variants. “From day of the week” - “to day of the week”.
- Specific Date Range for cases where you're planning the possible schedule ahead, then add Exceptions (see next section) as needed. “From particular date” - “to particular date”.
- Days of Month is preferable for cases where the same days of each month keep “Working”/“Weekend” status. “From Nth of any month” - “to Mth of same month”.
- Days of Year - similar with Specific Date Range, but without year definition. “From Nth of this month” - “to Mth of that month”.
Channel Setup: Schedule-wide Order Limits
Here and below, empty value (and 0) means “Unlimited”. Multiple presets per delivery configuration are allowed, 'Edit'ing it in one configuration alters it for all configurations. Will be applied to the Working Days schedule from the same configuration section.
Order Limits Name - configuration name. For management purposes only, does not affect Frontend.
Limit per Day - defines how many Orders can be scheduled for delivery for any given day. Has priority over Limit by Time Interval.
Limit per Time Interval - defines how many Orders can be scheduled for delivery for any given time interval (regardless of that interval's duration). If both this option and Limits option from the available Time Intervals list are available for a particular time interval - a lesser value will be used.
Channel Setup: Working Time
Here, exact orders-per-time-interval delivery and each time interval's duration can be configured. Multiple presets per delivery configuration are allowed, 'Edit'ing it in one configuration alters it for all configurations. Will be used for Working Days schedule from same configuration section.
Time Intervals Name - configuration name. For management purposes only, does not affect Frontend.
In the 'Generate Time Intervals' section:
- From defines earliest delivery time possible,
- To defines the latest delivery time possible and
- Interval will set each interval's duration.
Click 'Generate' to create a list of non-overlapping time intervals fitting into From-To constraints. Last generated time interval's duration will be reduced, to fit.
The section below contains a grid of existing time intervals, complete with in-line edit, an option to delete each and with:
- Label field content of which will replace “HH:MM-HH:MM” interval text at frontend, if present,
- Limits field which defines how many Orders can be scheduled for delivery for this particular time interval.
Other configuration options
The options which don't interact with delivery schedules directly are located at Stores → Configuration → Amasty Extensions → Delivery Date.
General Settings
First, you need to configure the General Settings section. The options you specify here will apply to all store views.

Enabled - The option turns on/off the module.
Enable Server Timezone - set to Yes if you would like to use Magento store timezone to calculate the delivery dates and time. When the Server Timezone is disabled, the extension will rely on the timezone of a customer’s device to list available the delivery dates.
Delivery Date CMS Block - This setting will help you to add the custom CMS block on the Checkout Page. We advise you to don't use any interactive elements in the CMS blocks (e.g., redirection from the Checkout Page) since it may result in decreasing 'Checkout-to-order' conversion rate.
Delivery Date Field Settings
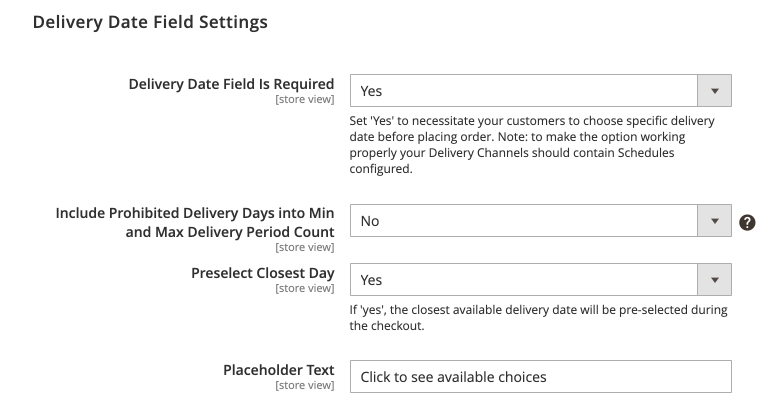
Delivery Date Field Is Required - set to Yes if you want to make choosing delivery date a required field.
Include Prohibited Delivery Days into Min and Max Delivery Period Count - set to Yes to allow prohibited days that were configured at Delivery Exceptions, when calculating the delivery period.
Preselect Closest Day - set to Yes to choose the nearest available day automatically.
Placeholder Text - enter custom placeholder text that will be visible on the checkout.
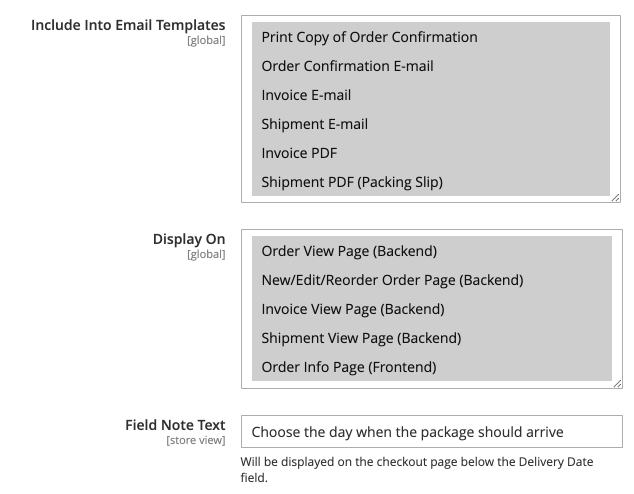
Include Into Email Templates and Display On - choose the preferred places where you'd like to display the delivery information.
Field Note Text - enter the tooltip text that will be displayed on the checkout page below the Delivery Date field.
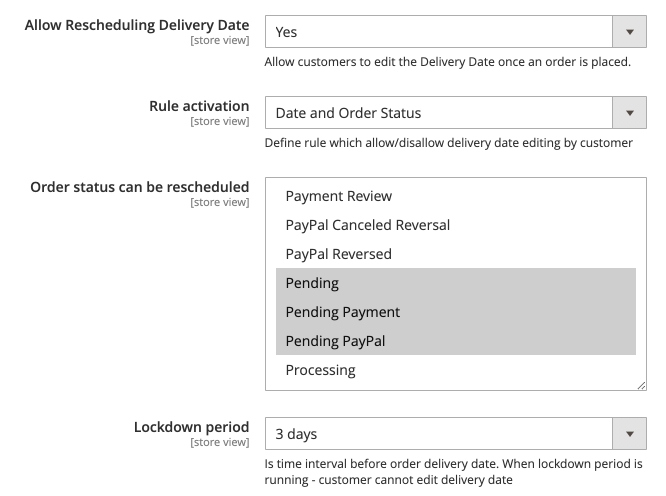
Allow Rescheduling Delivery Date - allow customers to edit the Delivery Date after an order is placed.
Rule activation - set the trigger that will allow/disallow changing the delivery date.
Order status can be rescheduled - choose the order status when the order delivery dates can be modified.
Lockdown period - set time interval before order delivery date. When the lockdown period is running - the customer cannot edit the delivery date.
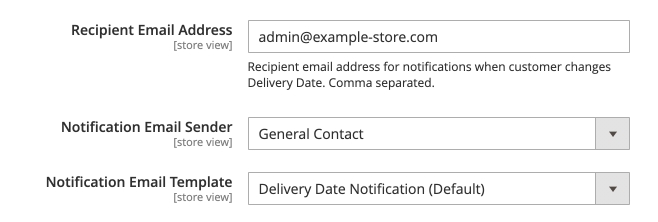
Here, you can adjust email notifications that are sent for the Delivery Date Manager extension. Set the Recipient Email Address, choose Notification Email Sender and Notification Email Template.
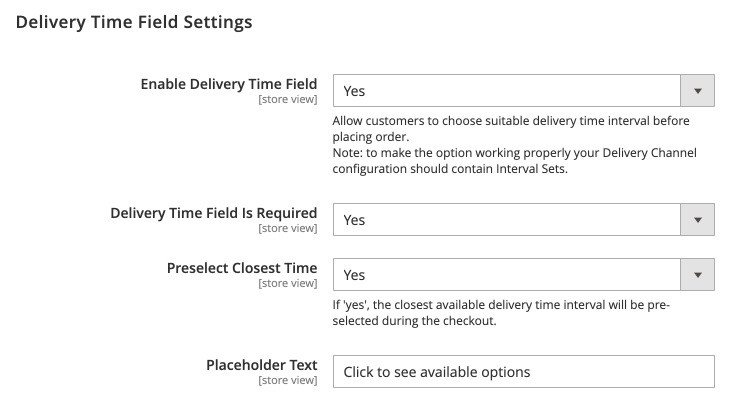
Enable Delivery Time Field - set to Yes to allow customers choose delivery time.
Delivery Time Field Is Required - set to Yes to make this field mandatory.
Preselect Closest Time - if set to Yes, the closest available delivery time interval will be pre-selected during the checkout.
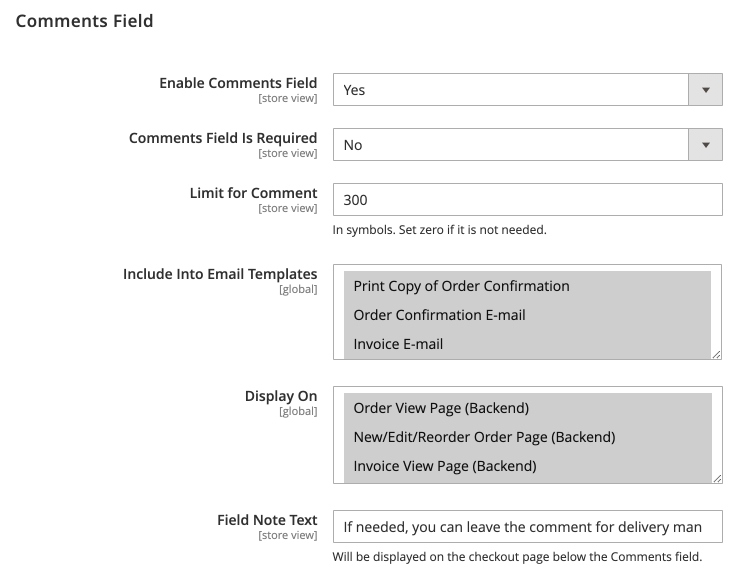
These settings are similar to the Delivery Date section above.
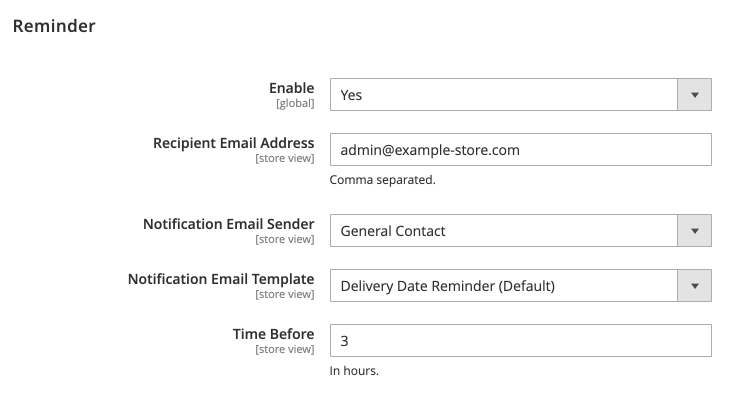
Reminder
Enable - Turn on/off the reminder option.
Recipient Email Address - specify email addresses to which you'd like to send reminders.
Notification Email Sender - Choose the default e-mail sender for the short notice. It can be the Owner, Sales Representative, Customer Support Manager, etc.
Notification Email Template - Select the e-mail template for the notice before delivery. If you need to create an appropriate template first, please go to Marketing в†’ Communications в†’ Email Templates.
Showcase
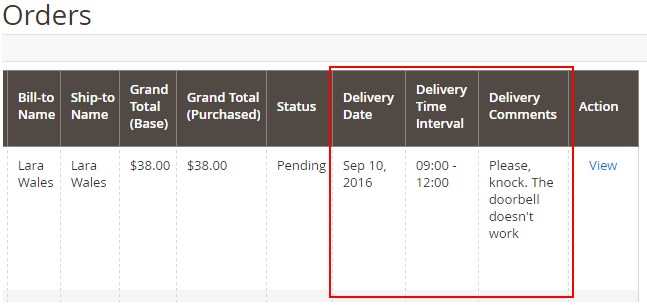
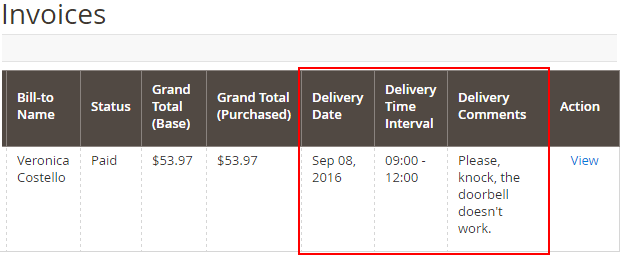
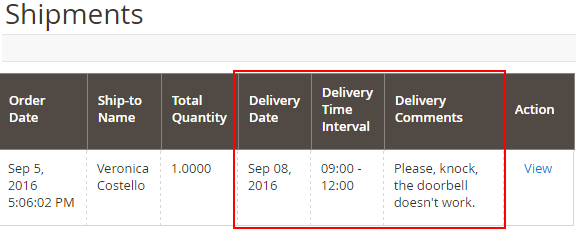
Overview of Admin side configuration
1. Delivery Date on the Orders grid.
2. Delivery Date on the Invoices grid.
3. Delivery Date on the Shipments grid.
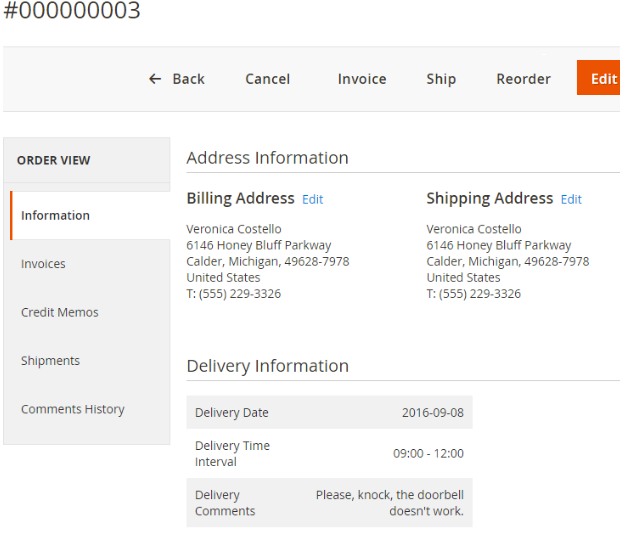
4. Delivery details are added to the order information page for your convenience.
Cron Tasks List
Easily operate and test cron performance by managing all existing cron tasks in one place. To see the cron tasks list, please, go to System в†’ Cron Tasks List.
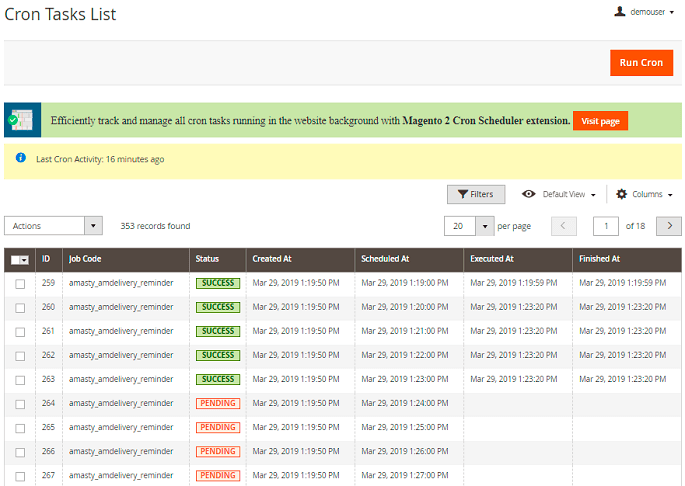
Here, you can see all the existing cron tasks and their statuses. Run cron tasks and generate their schedule by clicking the *Run Cron* button. Also, delete tasks in bulk, apply the filtering and sorting options when it is needed.
Delivery Date on the Frontend
A customer can specify the necessary details for delivery during checkout.
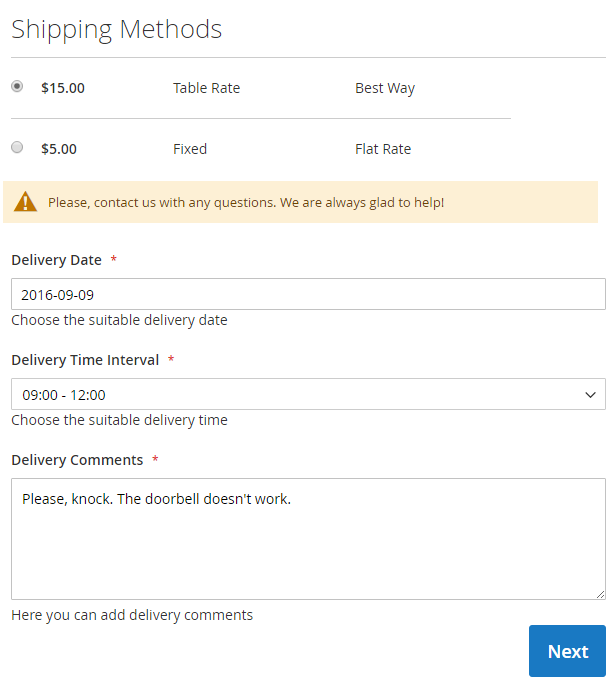
Allow clients to review delivery notes before they place an order.
Find out how to install the Delivery Date extension for Magento 2 via Composer.
magento_2/delivery_date_manager.txt · Last modified: 2025/06/16 14:16 by avronskaya

